


Bobtail rack
Road Captain
Joined: Sep 2007
Posts: 578
Likes: 1
From: Many, Louisiana
I have a rack for my Night Train. It won't work with my badlander seat. It has the seat bolt kit that stays with the seat when I take it off. Don't know what it's called. It was on there when I got the bike. But when I bought the rack they said I'd need some install kit from HD. Reason it won't work is that the seat bolt isn't long enough to go through both the seat tab and the rack mount tab.
BUT it works perfect with the Sundowner seat that I use for 2 up. That seat has a regular bolt that comes out. So I can get a long enough bolt to work.
And yes, you have to drill the holes over your plate.
Chop On,
Robert
BUT it works perfect with the Sundowner seat that I use for 2 up. That seat has a regular bolt that comes out. So I can get a long enough bolt to work.
And yes, you have to drill the holes over your plate.
Chop On,
Robert

Advanced
Joined: Nov 2007
Posts: 62
Likes: 1
I put one on my softail custom and had to drill holes in the license plate bracket, had to locate the holes on the top then loosen the bracket and drill pilot holes and then drill to final size from underneath. Its easier to drill with the license bracket removed from the bike.
Road Captain
Joined: Jan 2006
Posts: 603
Likes: 0
From:
That is correct unless you have added the tri-bar led tail-light in which you have to get an adapter that HD sells which goes under the fender to attach and the rack bolts directly to the rear of the bracket.
Outstanding HDF Member
Joined: Mar 2007
Posts: 2,573
Likes: 0
From: Minneapolis, MN
Thanks to all for the comments on this... I just picked up the Bobtail rack today, and hope to install it next weekend.
Anyone have pic's of where you need to drill? The rear fender doesn't need to be removed, does it? Gawd, I hope not!
Anyone have pic's of where you need to drill? The rear fender doesn't need to be removed, does it? Gawd, I hope not!
Cruiser

Joined: Jan 2009
Posts: 123
Likes: 1
From: Livingston,TN.
[quote=twisted125;5467237]I put one of these on my standard - same thing. The front eyelet obviously goes where your seat bolt it. And for the rear, you just drill through where your plate is. Its easy as pie

Trending Topics
Tourer
Joined: Dec 2008
Posts: 459
Likes: 1
From: New Port Richey, FL
It does have to be removed if you use a drill. I used a right angle dremel tool with a drill bit looking end and cut in a circle. I was able to get at it from underneth without removing anything. There was just no good way to use a drill on my xbones.
HD Forum Stories
The Best of Harley-Davidson for Lifelong Riders

Jason Momoa Is Turning Classic Harleys Into PHEVs
Verdad Gallardo
Harley-Davidson Fat Boy Becomes a Dark, Decepticon-Inspired Custom
Verdad Gallardo
6 Weirdest Harley-Davidsons Ever Sold to the Public
Verdad Gallardo
7 Times Harley-Davidson Chucked Tradition Out the Window
Verdad Gallardo
7 Surprising Harley-Davidson Products that Are Not Motorcycles
Verdad Gallardo
8 Best Harley-Davidson Motorcycles Ever
Pouria Savadkouei
10 Worst Harley-Davidson Motorcycles Ever
Pouria Savadkouei
Killer Custom's Jail Break Is The Breakout That Refused to Blend In
Verdad Gallardo
Crazy Bunderbike Build Looks Amazing, But Is It Impossible to Ride?
Verdad GallardoRoad Master
Joined: Apr 2009
Posts: 953
Likes: 0
From: SOUTH-ALABAMA
naahh. I just removed the seat bolt, set the rack tabs on the tail light where they should go - its pretty much self explanatory, then leaned the front down to where it contacted the bolt hole. Stuck the bolt back in it, and drilled out the sides. I only put the two side bolts in, didn't intercourse with the upper ones. Its solid as hell, and your mounting with bolt and lock nuts, I didn't find adding the other two necessary. Plus, its just a bull **** little rack to hold small items, no REAL weight goin down back there. Good luck with it. I got a tri bar and did away with the rack, it lost its appeal after I headed in a new direction with the bike, just another thing to throw on ebay.
May our Moderator Rest in Peace
Joined: Sep 2006
Posts: 11,386
Likes: 35
From: Rochester, NY
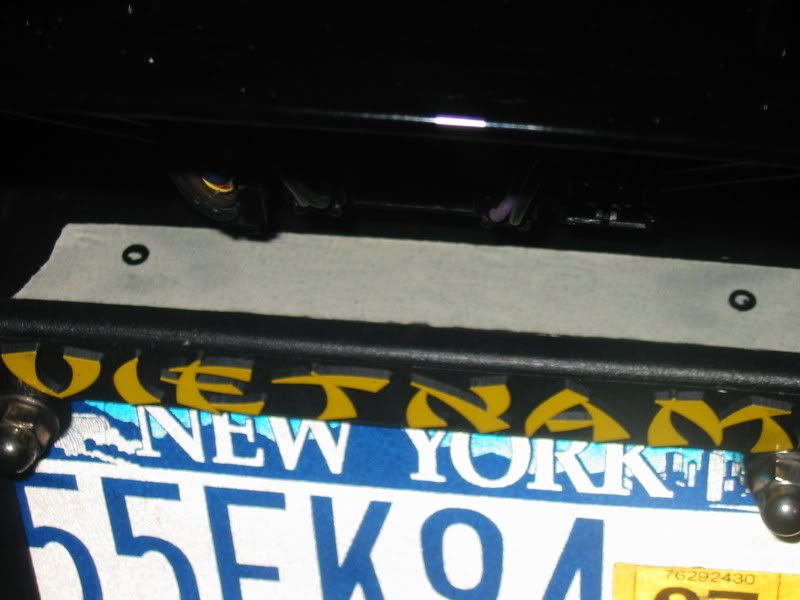
Otherwise the holes are extremely difficult to drill from the top with normal hand tools. But if you have a slim drill or a very long bit, or bit extension you can get at it from underneath. The trick is to get a small hole in the right spot from above to use as a pilot for the full sized drill to follow when you come up from below.
I use some masking tape and a Sharpie marker to mark out where the holes needed to be. Then used a small drill on top and the bigger longer one from below to get it done.
It was almost a wasted effort in the end, because I replaced the tail light with the tri-bar and had to use a an adaptor bracket to get it to fit.
But on the plus side the stock tail light bracket is not rated for loads exceeding 10lbs. of load on the rack (according to Harley). Given the plastic nature of the light assembly I can understand why.
But when you install the tri-bar you need to use a steel bracket that's substantially heavier duty and even if the load limit is still listed at about 10lbs. I'll bet good money it can easily handle far more weight than I would feel comfortable with hanging out back that far.

Thread
Thread Starter
Forum
Replies
Last Post