


* HOW TO * under fifty bux *
Thread Starter
|
Club Member
Joined: May 2006
Posts: 14,564
Likes: 9,225
From: the 50s & the 60s

How bout pix Kaycee??
Which technique did you use??
mud
Road Captain


Joined: May 2008
Posts: 564
Likes: 6
From: Wyoming USA
Sorry no pics I made the 1 u made with the 3/4" strap and the 5/16" tube on top about 2hrs total time in fab and paint.Allso did the regulator mod of sanding down the fins with my dremel tool about a 10 min. job.God I love this board.I got a jack stand I need to fab up so I'll take some pics of it . C-YA
Thread Starter
|
Club Member
Joined: May 2006
Posts: 14,564
Likes: 9,225
From: the 50s & the 60s
JB, you should post this in the things to *buy* thread.
It's here -
https://www.hdforums.com/forum/dyna-...nder-50-a.html
This thread is for *making* things.
mud
.
Ultimate HDF Member
Joined: Dec 2008
Posts: 5,120
Likes: 17
From: Indiana
JB, you should post this in the things to *buy* thread.
It's here -
https://www.hdforums.com/forum/dyna-...nder-50-a.html
This thread is for *making* things.
mud
.
It's here -
https://www.hdforums.com/forum/dyna-...nder-50-a.html
This thread is for *making* things.
mud
.
well i am at the re assembly stage on my cafe, did my wires last night and figured some of you would like this little trick... here is how you get cables that look completely trick for super cheap!!!
order some wrap though these guys:
http://cableorganizer.com/chrome-sle...-sleeving.html
You can get the side entry stuff as well (I used the black on my Harley)
all you need to do is wipe down your old cables real well... when ever i cut it, i use a lighter to heat the end and then while it is gooey i touch my finger to it... this just seals it all up so that it does not unravel... dad taught me this years ago to fix our ski ropes when we had to make them longer... then zip tie, pull it tight, zip tie again.... looks awesome!


and the black on my bob:
brake line:


order some wrap though these guys:
http://cableorganizer.com/chrome-sle...-sleeving.html
You can get the side entry stuff as well (I used the black on my Harley)
all you need to do is wipe down your old cables real well... when ever i cut it, i use a lighter to heat the end and then while it is gooey i touch my finger to it... this just seals it all up so that it does not unravel... dad taught me this years ago to fix our ski ropes when we had to make them longer... then zip tie, pull it tight, zip tie again.... looks awesome!
and the black on my bob:
brake line:
Elite HDF Member
Joined: Jul 2008
Posts: 4,056
Likes: 4
From: San Antonio Texas
Thanks for that one, I was just looking at puting some chrome braided lines and cables on my RK. This rocks!!
HD Forum Stories
The Best of Harley-Davidson for Lifelong Riders

7 Surprising Harley-Davidson Products that Are Not Motorcycles
Verdad Gallardo
8 Best Harley-Davidson Motorcycles Ever
Pouria Savadkouei
10 Worst Harley-Davidson Motorcycles Ever
Pouria Savadkouei
Killer Custom's Jail Break Is The Breakout That Refused to Blend In
Verdad Gallardo
Crazy Bunderbike Build Looks Amazing, But Is It Impossible to Ride?
Verdad Gallardo
Harley-Davidson Reveals Super Cool Cafe Racer Concept
Verdad Gallardo
Engraved Rebellion: Inside Bundnerbike's Glam Rock II
Verdad Gallardo
10 Motorcycles You Should Never Buy
Joe Kucinski
10 Things Harley-Davidson Needs to Fix in 2026
Verdad GallardoMay our Moderator Rest in Peace
Joined: Sep 2006
Posts: 11,386
Likes: 35
From: Rochester, NY
JRK5892,
Instead of using zip ties on the ends of the mesh covering. You might want to try using some shrink tube instead.
It works just as well as the zip ties, but leaves a cleaner looking install.
I used that when I replaced the black plastic sleeving on the wire harness and it came out looking very nice without a lot of work.
Before;
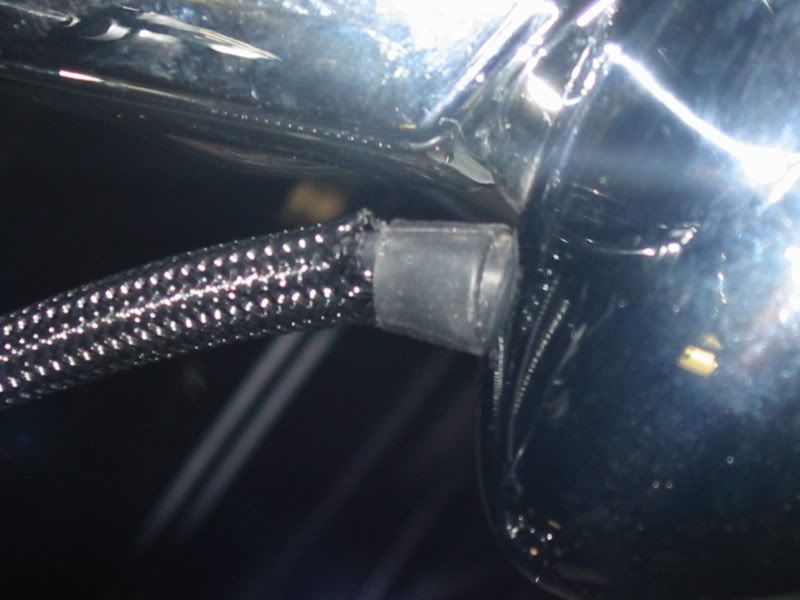
After;

Not the greatest, but it was my first try. Its since been replaced with a better job.
Instead of using zip ties on the ends of the mesh covering. You might want to try using some shrink tube instead.
It works just as well as the zip ties, but leaves a cleaner looking install.
I used that when I replaced the black plastic sleeving on the wire harness and it came out looking very nice without a lot of work.
Before;
After;
Not the greatest, but it was my first try. Its since been replaced with a better job.
Advanced
Joined: Dec 2008
Posts: 73
Likes: 0
From: Normandy, France
Hi -
I've been lurking for a while now and getting many great ideas for cheap mods from this thread : thanks all you guys for contributing so much !
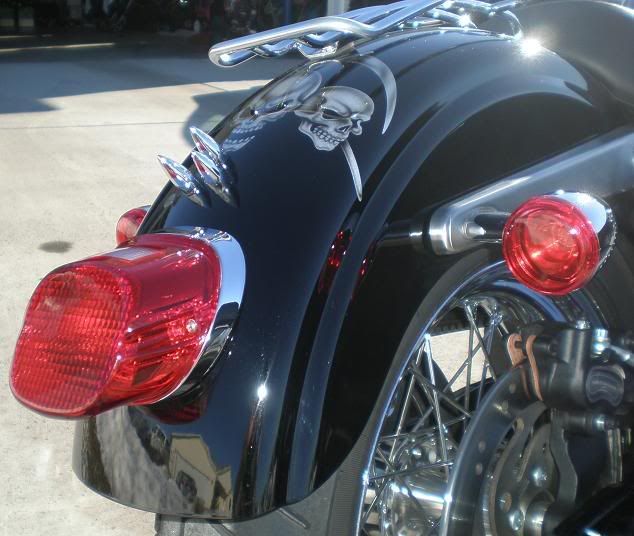
The time has come for me to add my little idea here : I was removing the hard panniers that came with my sportster (bike was a used buy, came with the original HD 'sports' panniers which are a bit useless : load limited to 7lb each side and too small to fit most things into) and I wanted to relocate my rear indicators to the standard locations (they were on extension arms to fit behind the panniers).
Of course I didn't actually have the original supports so I decided I'd make a pair. They cost me exactly - nothing : all done with bits I had lying around in my toolboxes and odds&sods box.
I used :
- 2 bolts, thread to match indicator mount and 2 in. long approx.
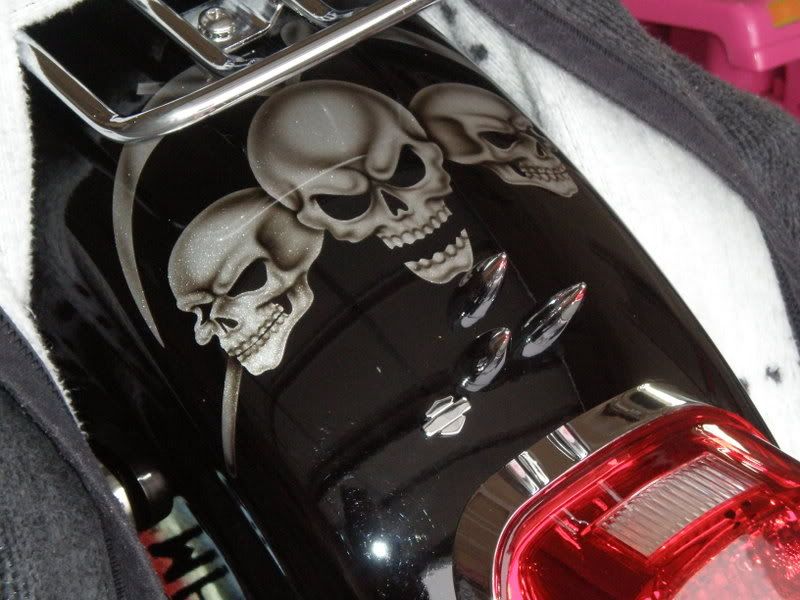
- 2 washers to go between bolt head and inside of rear fender
- 2 20mm (just over 3/4 in)(I know, but I function in metric) pieces of copper plumbing pipe ext. diameter 14mm (9/16 approx.), same as you would use for plumbing a house.
Tools necessary :
- 1 spanner to fit bolt heads
- 1 drop of loctite per side
- 1 plumber's pipe cutter (good) or 1 sharp hacksaw (not so good) - I prefer the pipe cutter because it's easy to get the 2 pieces of copper exactly identical in length.
- 1 belt sander or sanding bench to remove any chamfer left by cutting tool .
You don't really need the sanding bench, but it just makes things neater. You *could* get the same result with a flat file and emery cloth.
Now my rear indicators sit really close to the fender, don't move at all (I rode 25mi to work this morning and still perfectly tight. The copper can be left bare or painted silver/black and because it is NOT plastic you can really pull the bolt tight.
Total time necessary, once the indicators were re-wired properly : 10 minutes to cut pipe, sand down, source bolts and washers from the Box of Oddments (tm) and tighten to spec.
Total cost : zero (OK, 1/2 bottle of wine for my own enjoyment, but I don't count that as project cost)
Here are the pictures :


I've been lurking for a while now and getting many great ideas for cheap mods from this thread : thanks all you guys for contributing so much !
The time has come for me to add my little idea here : I was removing the hard panniers that came with my sportster (bike was a used buy, came with the original HD 'sports' panniers which are a bit useless : load limited to 7lb each side and too small to fit most things into) and I wanted to relocate my rear indicators to the standard locations (they were on extension arms to fit behind the panniers).
Of course I didn't actually have the original supports so I decided I'd make a pair. They cost me exactly - nothing : all done with bits I had lying around in my toolboxes and odds&sods box.
I used :
- 2 bolts, thread to match indicator mount and 2 in. long approx.
- 2 washers to go between bolt head and inside of rear fender
- 2 20mm (just over 3/4 in)(I know, but I function in metric) pieces of copper plumbing pipe ext. diameter 14mm (9/16 approx.), same as you would use for plumbing a house.
Tools necessary :
- 1 spanner to fit bolt heads
- 1 drop of loctite per side
- 1 plumber's pipe cutter (good) or 1 sharp hacksaw (not so good) - I prefer the pipe cutter because it's easy to get the 2 pieces of copper exactly identical in length.
- 1 belt sander or sanding bench to remove any chamfer left by cutting tool .
You don't really need the sanding bench, but it just makes things neater. You *could* get the same result with a flat file and emery cloth.
Now my rear indicators sit really close to the fender, don't move at all (I rode 25mi to work this morning and still perfectly tight. The copper can be left bare or painted silver/black and because it is NOT plastic you can really pull the bolt tight.
Total time necessary, once the indicators were re-wired properly : 10 minutes to cut pipe, sand down, source bolts and washers from the Box of Oddments (tm) and tighten to spec.
Total cost : zero (OK, 1/2 bottle of wine for my own enjoyment, but I don't count that as project cost)
Here are the pictures :


Last edited by OrdinaryJoe; Jan 27, 2009 at 08:56 AM.