





How do you disassemble this connector?
Thread Starter
|
Grand HDF Member

Joined: May 2007
Posts: 3,553
Likes: 17
 How do you disassemble this connector?
I'm replacing my rear turn signals and instead of just cutting the wires and soldering/wrapping things back up I thought I'd take a whack at doing it the right way.
I should have cut the damn things as this little connector is driving me up the wall. The connectors below are the connectors at the end of your turn signal wires, which connect to a little electrical board behind the tail light housing.
I'm pretty sure there are a couple tabs in there that have to be pressed down in order to release the wire ends, but I can't see them, nor do I know where they really are inside the connector. I watched a vid that SC-Longhair did this past June where he took apart a Molex or Deusch (sp) connector of some sort but that really isn't the same thing I'm dealing with here.
Here are a few pics. If you know how to get the wires out of the connectors I'd appreciate some help. Thanks
Here's a view of the wires going in to the connector end:

Here's a view of the bottom of the connector; or the end that goes head first in to the electrical board:

Here's a side view to help you identify what I'm talkin' about:

I should have cut the damn things as this little connector is driving me up the wall. The connectors below are the connectors at the end of your turn signal wires, which connect to a little electrical board behind the tail light housing.
I'm pretty sure there are a couple tabs in there that have to be pressed down in order to release the wire ends, but I can't see them, nor do I know where they really are inside the connector. I watched a vid that SC-Longhair did this past June where he took apart a Molex or Deusch (sp) connector of some sort but that really isn't the same thing I'm dealing with here.
Here are a few pics. If you know how to get the wires out of the connectors I'd appreciate some help. Thanks
Here's a view of the wires going in to the connector end:
Here's a view of the bottom of the connector; or the end that goes head first in to the electrical board:
Here's a side view to help you identify what I'm talkin' about:

Road Master
Joined: Mar 2009
Posts: 990
Likes: 10
From: Redondo Beach, California

I did a turn signal relocation on a friend of mine's Sportster and I think that I used a special pick tool that I got for my birthday. It was from Snap-on. There was a part number for the tool in the Harley service manual if I remember correctly. Even with the special tool, it was a PITA for sure. Good luck with your project and ride safe out there!

Ultimate HDF Member
Joined: Apr 2008
Posts: 5,384
Likes: 12
From: Out on Deranged
Well IMO,if there is no seam anywhere on the connector where it might come apart there is no reason to spend hours trying to disassemble something that could just break in the process. Now wouldn't that be frustratin'?

Outstanding HDF Member
Joined: Sep 2007
Posts: 3,352
Likes: 4
From: Augusta, GA
You have to go in from the plug side, above the pin itself. You can use a jewelers screwdriver or a stiff piece of wire about half the thickness of a metal coathanger.
You are trying to pry up a plastic tab that is holding the pin inside the connector. The tab is just below the tab that you squeeze to take the connector out of the plug in the taillight. You want to go in the plug against the pin and then swing towards the outside. In your second pic that would be from the top portion of the hole, against the pin and then swing towards the top or upward. It can be frustrating the first few times but it gets easy after doing several of them.
You are trying to pry up a plastic tab that is holding the pin inside the connector. The tab is just below the tab that you squeeze to take the connector out of the plug in the taillight. You want to go in the plug against the pin and then swing towards the outside. In your second pic that would be from the top portion of the hole, against the pin and then swing towards the top or upward. It can be frustrating the first few times but it gets easy after doing several of them.
Last edited by sniper77; Feb 23, 2010 at 05:08 AM.

Cruiser
Joined: Apr 2008
Posts: 178
Likes: 3
From: mansfield nottinghamshire england
 tried to do the same
tried to do the same disconnecting the connector but nearly ended up pulling all my hair out so out came the knife and cut the **** off then wrapped it back up after doing my job. no help i guess but thats what i did. good luck

Club Member
Joined: May 2006
Posts: 14,564
Likes: 9,225
From: the 50s & the 60s

I'm replacing my rear turn signals and instead of just cutting the wires and soldering/wrapping things back up I thought I'd take a whack at doing it the right way.
I should have cut the damn things as this little connector is driving me up the wall. The connectors below are the connectors at the end of your turn signal wires, which connect to a little electrical board behind the tail light housing.
I'm pretty sure there are a couple tabs in there that have to be pressed down in order to release the wire ends, but I can't see them, nor do I know where they really are inside the connector. I watched a vid that SC-Longhair did this past June where he took apart a Molex or Deusch (sp) connector of some sort but that really isn't the same thing I'm dealing with here.
Here are a few pics. If you know how to get the wires out of the connectors I'd appreciate some help. Thanks
Here's a view of the wires going in to the connector end:
Here's a view of the bottom of the connector; or the end that goes head first in to the electrical board:
Here's a side view to help you identify what I'm talkin' about:
I should have cut the damn things as this little connector is driving me up the wall. The connectors below are the connectors at the end of your turn signal wires, which connect to a little electrical board behind the tail light housing.
I'm pretty sure there are a couple tabs in there that have to be pressed down in order to release the wire ends, but I can't see them, nor do I know where they really are inside the connector. I watched a vid that SC-Longhair did this past June where he took apart a Molex or Deusch (sp) connector of some sort but that really isn't the same thing I'm dealing with here.
Here are a few pics. If you know how to get the wires out of the connectors I'd appreciate some help. Thanks
Here's a view of the wires going in to the connector end:
Here's a view of the bottom of the connector; or the end that goes head first in to the electrical board:
Here's a side view to help you identify what I'm talkin' about:
.
here ya go Bry..............
.
.

****AMP fitting release tool****
..
I've received several emails over the last three years asking about
extracting wires from the ever so popular AMP connectors.
HD uses these in several locations on their machines.
.
I am a strong believer in NOT cutting wires.
remove the lens, then unplug the fitting.
Really very simple to disassemble the electrical connectors
so you can pull the wires thru the standoffs.
I've heard quite a few folks on the forums
brag on how fast they can cut the wire and then solder.
Sadly, that bit of misinformation is a joke.
I can extract several before you can even get out
the snips, soldering gun, solder, shrink wrap, heat gun, etc.
Patience is a virtue while mastering this technique on the first wire.
After that, they get easier.
I can release them in a matter of seconds now.
Same is true for the other connectors that HD uses -
Deutsch, Packard, Delphi -
NO need to BUY SPECIAL extraction tools for any of these.
Here ya go:
Remove the two screws that hold the taillight to it's housing.
Use a small screwdriver to push the lock tab down a little,
and pull the fitting out.
.
.


.
This image below shows the 2 hole AMP and the tip of the 16 gauge wire I use.
Blue arrow shows a slight bend, and the tip is hammered flat.
Red is the first lock to undo. This is what holds the wires in the fitting.
Green is the tab that you released in the first step above,
it locks the fitting to it's receiver.
Green on the right is opened way up for some of the pix farther down.
Don't bend it out or you will ruin the fitting.
They are cheap, fifty cents or so.
.
.


.
Blue below, better shot of the 16 ga tip.
.
.


.
Next image you see I put an S bend in my release tool so I can control it better.
Also here you see that I have the turn indicator wire pushed fully IN
while raising the lock tang inside.
.
.


.
Now, below, once you have the lock tang lifted,
extract the wire.
.
.


.
Don't forget to pay attention to which wire comes from which side of the fitting.
There are small numbers on the housing.
In this case. 1 is purple, 2 is black.
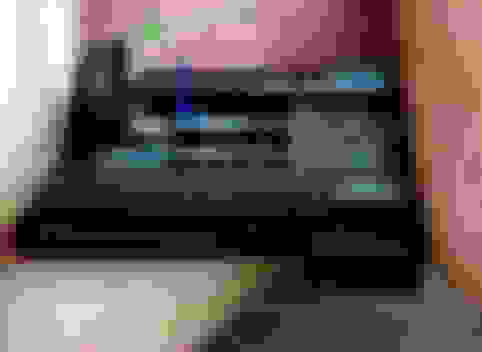
Next two images illustrate where the tang is, and where the tip of my tool needs to be.
Green is pulled way up here simply for the photo.
.
.


.
I suggest buying a couple of new sockets so you can fold this way wide open
for your first try at this. If need be.
Little blue arrow indicates how far the end of the tang lifting wire needs to be.
.
.

.
These are great fittings, but, they are not watertight.
Green below shows a generous dab of dielectric compound on the tip of a little brush.
Red - the fitting is full
.
.
.


I made two video tutorials.............................
.
.
part 1 - http://www.youtube.com/embed/myPysAK2bWA
.
.
part 2 - http://www.youtube.com/embed/RNc0M74G4_Q
.
.
.
part 1 - http://www.youtube.com/embed/myPysAK2bWA
.
.
part 2 - http://www.youtube.com/embed/RNc0M74G4_Q
.
.
.
.
Last edited by mud; Feb 2, 2017 at 11:12 AM.

Tourer
Joined: Apr 2009
Posts: 327
Likes: 1
From: new bedford, ma
Trending Topics

Cruiser

Joined: Aug 2006
Posts: 242
Likes: 8
From: Texas
I just did this on Sunday for my ride. Mud your posts really rock! I was trying to figure out how to describe what I did but you nailed it and with pictures to boot.
HD Forum Stories
The Best of Harley-Davidson for Lifelong Riders

7 Surprising Harley-Davidson Products that Are Not Motorcycles
Verdad Gallardo
8 Best Harley-Davidson Motorcycles Ever
Pouria Savadkouei
10 Worst Harley-Davidson Motorcycles Ever
Pouria Savadkouei
Killer Custom's Jail Break Is The Breakout That Refused to Blend In
Verdad Gallardo
Crazy Bunderbike Build Looks Amazing, But Is It Impossible to Ride?
Verdad Gallardo
Harley-Davidson Reveals Super Cool Cafe Racer Concept
Verdad Gallardo
Engraved Rebellion: Inside Bundnerbike's Glam Rock II
Verdad Gallardo
10 Motorcycles You Should Never Buy
Joe Kucinski
10 Things Harley-Davidson Needs to Fix in 2026
Verdad Gallardo
Cruiser
Joined: Jun 2009
Posts: 143
Likes: 1
From: upstate NY
I bought a glasses repair kit from the dollar store that has some small screw drivers.. i found the flathead in that kit to work the best for these connectors. i find them to be much smaller than your average precision screw driver.
*have to give credit to mud, it was the guidance of the above write up that i used to get it out.
*have to give credit to mud, it was the guidance of the above write up that i used to get it out.
Thread Starter
|
Grand HDF Member
Joined: May 2007
Posts: 3,553
Likes: 17
Thank you all so much, and especially you mud. That helps me tremendously. I'm going to pick up some additional connectors (now that I know the part # thanks to your photo). I'll bend the tab out of the way so i can see what I'm doing as you suggested.
Two lessons learned (possibly more to come):
1) Don't start taking **** apart at midnight when you only went into the garage for a smoke.
2) PATIENCE.
Two lessons learned (possibly more to come):
1) Don't start taking **** apart at midnight when you only went into the garage for a smoke.
2) PATIENCE.