







External to Internal Wiring?
Advanced
Joined: Mar 2010
Posts: 80
Likes: 2
From: England

The existing wires will have connectors on the end of them which fit into your wiring loom. You wont be able to fit them through the bars! You can either try to pop the wires out of the connectors and refit them after threading through the bars or cut the wires and re-solder them.Either way its not a five minute job.
Ultimate HDF Member


Joined: Jan 2007
Posts: 8,750
Likes: 261
From: back home in Michigan
Free is right. It can be done, but it will take a lot of patience. Pulling the wires through 1" bars with sharp 90's in them is not picnic, and like JRK said, the way they are now, they might not be long enough to reach internally. each bend takes up a little extra wire (in length). And free was right about the plugs which are probably located in the front of the frame. If you unplug the wires going to the bars you can take each individual wire out of the plug. First take a real fine tip marker and write on the plug block the color of each corresponding wire so when you put them back in you put them in the right location. Take a small pick and unlock each wire and gently pull each out. Now you have just wires with the metal tips on them. I would only do the solder thing if you really need to add extensions. If the wires are long enough just fish them through the bars. The best wire pulling lube is for electricians and can be picked up at Lowers or Home Depot. Way better than WD 40 too. Take your time pulling them through so you don't damage them and create a potential short.
Check out this post by Citoriplus from the *HOW TO * under fifty bux* thread:
Here's a cheap way to help get good solder connections when you need to lengthen, shorten, or add lines in the bikes electrical system.
The biggest problem with soldering wires on a bike is you need to be an octopus. You need a couple of extra hands to hold the wires whileyou use solder with one hand and the iron in the other. So I came up with a simple and cheap way to make a couple of different wire holders.
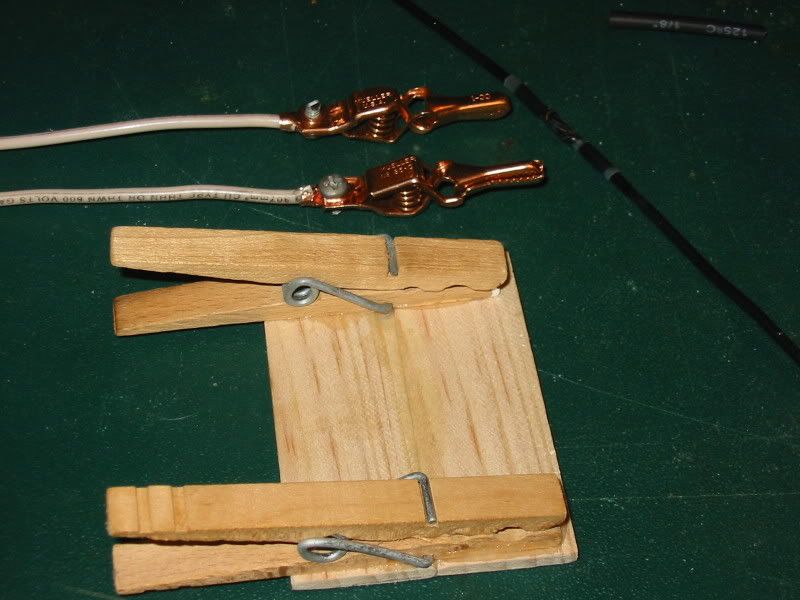
I think I spent a grand total of less than a buck for both of them, and that's because I wanted to get a new pair of alligator clips. The wood one was made from a pair of cloths pins glued to a couple of pieces of a paint mixing stick I got from Home Depot for free. The clips I swiped off the wife. This one is good for any wires that you can lay on a table, or you can glue a magnet to the back and stick it to any steel surface.
The other one with the alligator clips I mademade from the clips and a one foot long piece of scrap 12ga solid copper wire. Its great for using where you can use a clamp or vise grips on the wire between the clips and bend the ends to wherever you need them. Just be careful of using metal clips like these. A hot iron on the wores will have the teeth melting through the wire insulation. So you might considerfiling the teeth down a little and covering them with some tape or shrink tubing.
Soldering wires isn't rocket science, but it does take a little practice to do well all the time. But here's a tip for making solder connections that are nearly bullet proof. Once you get the wires soldered properly, like this.
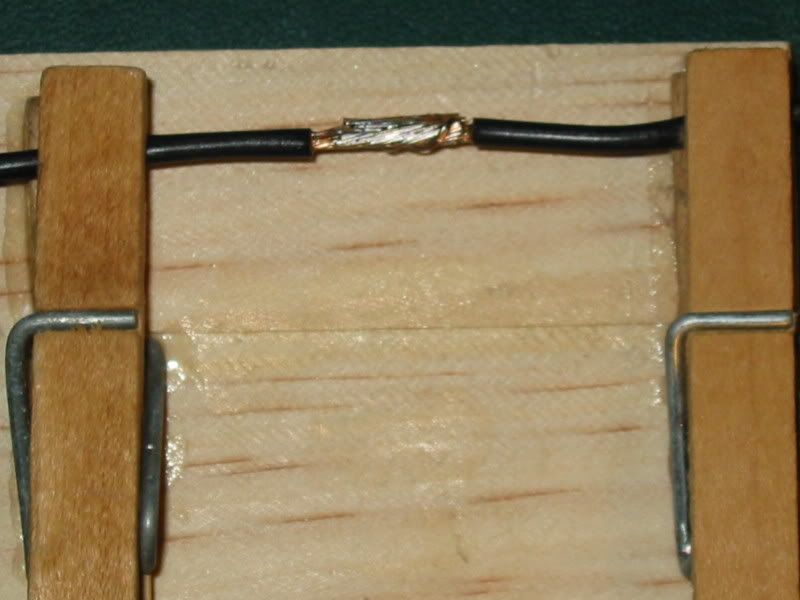
Get some of the wives nail polish or some of this liguid tape and paint the exposed wire and solder connection.
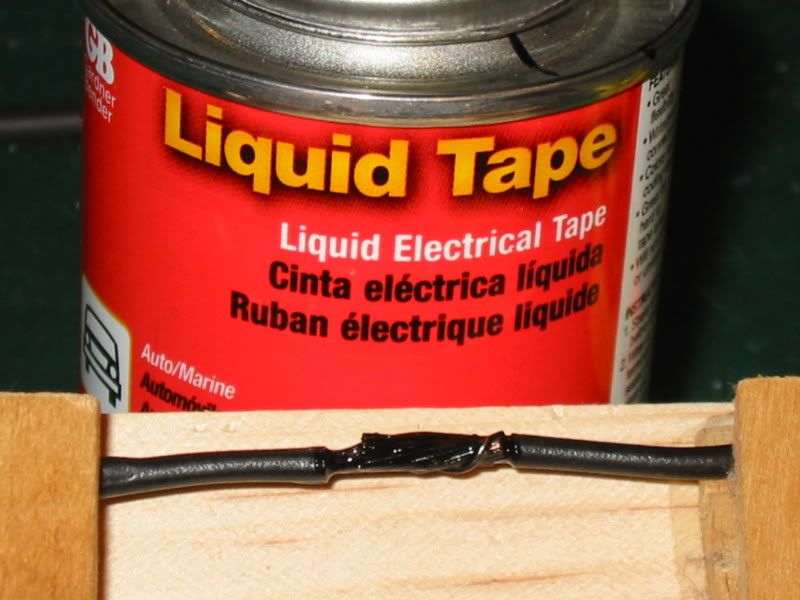
When you ‘paint’ the connection pay particular attention to the ends of the insulation and make sure its well coated. This will prevent any moisture from migrating up the wire strands and corroding them. It won't bother anything today, but a couple of years down the road it will drive you nuts trying to find the electrical gremlins.
Once its dry use a good grade of heat shrink tubing to seal and protect the connection.
Done right the connection will be only slightly larger than the original wire size and last a lifetime.
This is what it looks like before I heated the shrink tubing.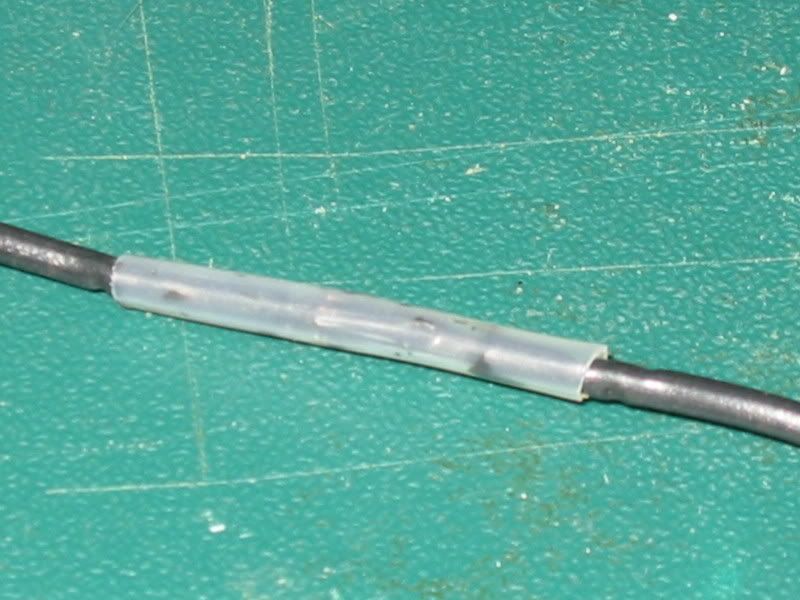
And after.
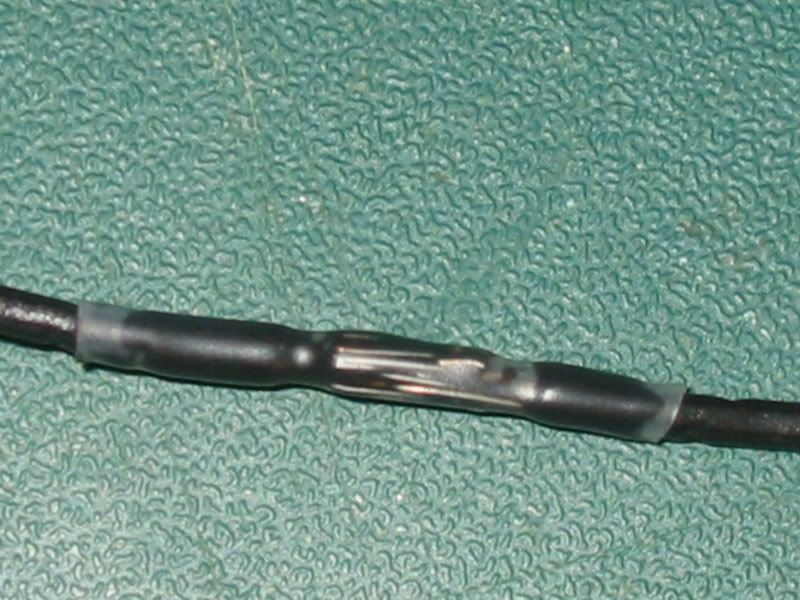
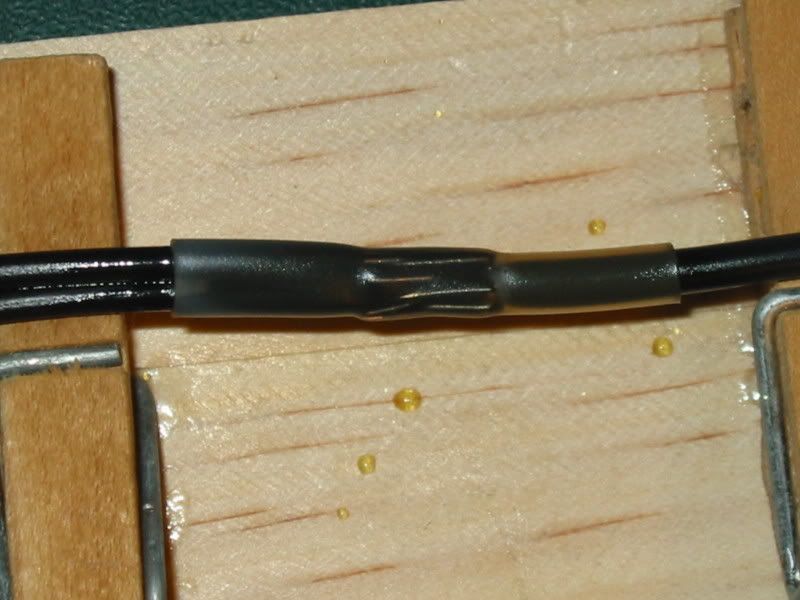
And here's one where I spliced one wire to an existing line.
Ride safe.
The biggest problem with soldering wires on a bike is you need to be an octopus. You need a couple of extra hands to hold the wires whileyou use solder with one hand and the iron in the other. So I came up with a simple and cheap way to make a couple of different wire holders.
I think I spent a grand total of less than a buck for both of them, and that's because I wanted to get a new pair of alligator clips. The wood one was made from a pair of cloths pins glued to a couple of pieces of a paint mixing stick I got from Home Depot for free. The clips I swiped off the wife. This one is good for any wires that you can lay on a table, or you can glue a magnet to the back and stick it to any steel surface.
The other one with the alligator clips I mademade from the clips and a one foot long piece of scrap 12ga solid copper wire. Its great for using where you can use a clamp or vise grips on the wire between the clips and bend the ends to wherever you need them. Just be careful of using metal clips like these. A hot iron on the wores will have the teeth melting through the wire insulation. So you might considerfiling the teeth down a little and covering them with some tape or shrink tubing.
Soldering wires isn't rocket science, but it does take a little practice to do well all the time. But here's a tip for making solder connections that are nearly bullet proof. Once you get the wires soldered properly, like this.
Get some of the wives nail polish or some of this liguid tape and paint the exposed wire and solder connection.
When you ‘paint’ the connection pay particular attention to the ends of the insulation and make sure its well coated. This will prevent any moisture from migrating up the wire strands and corroding them. It won't bother anything today, but a couple of years down the road it will drive you nuts trying to find the electrical gremlins.
Once its dry use a good grade of heat shrink tubing to seal and protect the connection.
Done right the connection will be only slightly larger than the original wire size and last a lifetime.
This is what it looks like before I heated the shrink tubing.
And after.
And here's one where I spliced one wire to an existing line.
Ride safe.
post# 1009 …… internal bar wiring ....................................... dklozik
post# 1091 …… molex connector poking tool .......................... mud
post# 1092 …… AMP fitting release tool ............................... mud
post# 1093 …… Deutsch fitting crimper ............................... mud
post# 34 ..... internal bar wires ......................................... dklozik

Ultimate HDF Member
Joined: Jan 2007
Posts: 8,750
Likes: 261
From: back home in Michigan
Soldering should only be done when absolutely necessary.
Every soldering point is another potential problem and if the soldered joint is not sealed completely from moisture, it will get moisture in it. Imho if it can be avoided its best to do so.
But Citoriplus's pictoral is a great way to do it if needed. Another thing is make sure you stagger the soldered joints. Those joints will not bend well, and having more than one next to one another will only create more problems when trying to pull the wire through the bars.
Every soldering point is another potential problem and if the soldered joint is not sealed completely from moisture, it will get moisture in it. Imho if it can be avoided its best to do so.
But Citoriplus's pictoral is a great way to do it if needed. Another thing is make sure you stagger the soldered joints. Those joints will not bend well, and having more than one next to one another will only create more problems when trying to pull the wire through the bars.
Advanced
Joined: Mar 2010
Posts: 80
Likes: 2
From: England
Glidermike is correct about having soldered joints side by side. It will make it harder to thread the wires through the bars as by the time you solder and heat shrink the joints the wires are more bulky and less flexible . When we did mine the other day we staggered the joints and solders to eliminate such problems. It certainly made it easier to get the wiring around the bends, and a lot less bulky.
depends on the bars, for apes and reg bars i just cut and solder them all in the same spot cause it is faster for us in the shop that way, any Z bar or custom bar staggering is much better to pull it... also it will be easier to use a fan pull string (the small chain) that falls right though the bars, you should be able to pull a cotton ball though the holes after you drill them
Tourer
Joined: Jul 2008
Posts: 336
Likes: 0
Not to steal the thread, but JRK, I was looking at some bars, Wild One Chubbys for my low rider. What are you riding on yours? My curiosity was on the wide or narrow bars, Î have seen the normal ones on softails, but it seems that the dyna might look better with the narrow ones, do you have any pics of yours from the front? Just to keep the thread true, I am going to internally wire them!! Thanks Been a while since I've been out here, your ride is looking awesome.

Banned
Joined: Oct 2007
Posts: 1,494
Likes: 5
I bought the bike used, and it came with 13" Ape Hangers that are externally wired. I don't like looking at the handlebars and seeing zip ties to hold the wires in place (not the clutch, brake, etc wires). Any ideas on what I might be capable of? Can I drill the existing handlebars to run the wires internally?
Thanks for your help!
Thanks for your help!
Internally wiring does really clean up the bars, but if it is just the tie straps that bother you the most, you could drill the bars for the OE wire loom clips and use those to hold the harness.
Do you like the bars? If you are going to spend time wiring them, make sure they are the bars you want. You might want to get yourself a pre-drilled bar so you don't have the dimples that extend past the control housings too. I used a take off set from an 09' SB and it was a pretty straight forward swap.
CB
Last edited by NoLongerAmember; Jun 13, 2010 at 06:13 PM.
HD Forum Stories
The Best of Harley-Davidson for Lifelong Riders

7 Surprising Harley-Davidson Products that Are Not Motorcycles
Verdad Gallardo
8 Best Harley-Davidson Motorcycles Ever
Pouria Savadkouei
10 Worst Harley-Davidson Motorcycles Ever
Pouria Savadkouei
Killer Custom's Jail Break Is The Breakout That Refused to Blend In
Verdad Gallardo
Crazy Bunderbike Build Looks Amazing, But Is It Impossible to Ride?
Verdad Gallardo
Harley-Davidson Reveals Super Cool Cafe Racer Concept
Verdad Gallardo
Engraved Rebellion: Inside Bundnerbike's Glam Rock II
Verdad Gallardo
10 Motorcycles You Should Never Buy
Joe Kucinski
10 Things Harley-Davidson Needs to Fix in 2026
Verdad Gallardo
Cruiser
Joined: Apr 2008
Posts: 166
Likes: 0
From: Waldorf, MD
Dude, just do it!!
It will work,
No extentions needed, I still have a couple of inches of slack if needed.
If you re-locate your turn signals to your fork tree it will even be easier.
Use muds thread on dis-connecting the wiring pack and go for it.
it is a weekend job, wait for the rain and go for it then.
Use JRK's trick on using the dog tag chain to help thread thru the wires. And a hook made from an old hanger will help.
It will work,
No extentions needed, I still have a couple of inches of slack if needed.
If you re-locate your turn signals to your fork tree it will even be easier.
Use muds thread on dis-connecting the wiring pack and go for it.
it is a weekend job, wait for the rain and go for it then.
Use JRK's trick on using the dog tag chain to help thread thru the wires. And a hook made from an old hanger will help.