


Ignition switch moved - Street Bob
Thread Starter
|
Cruiser
Joined: Aug 2006
Posts: 190
Likes: 1
From: Warwickshire
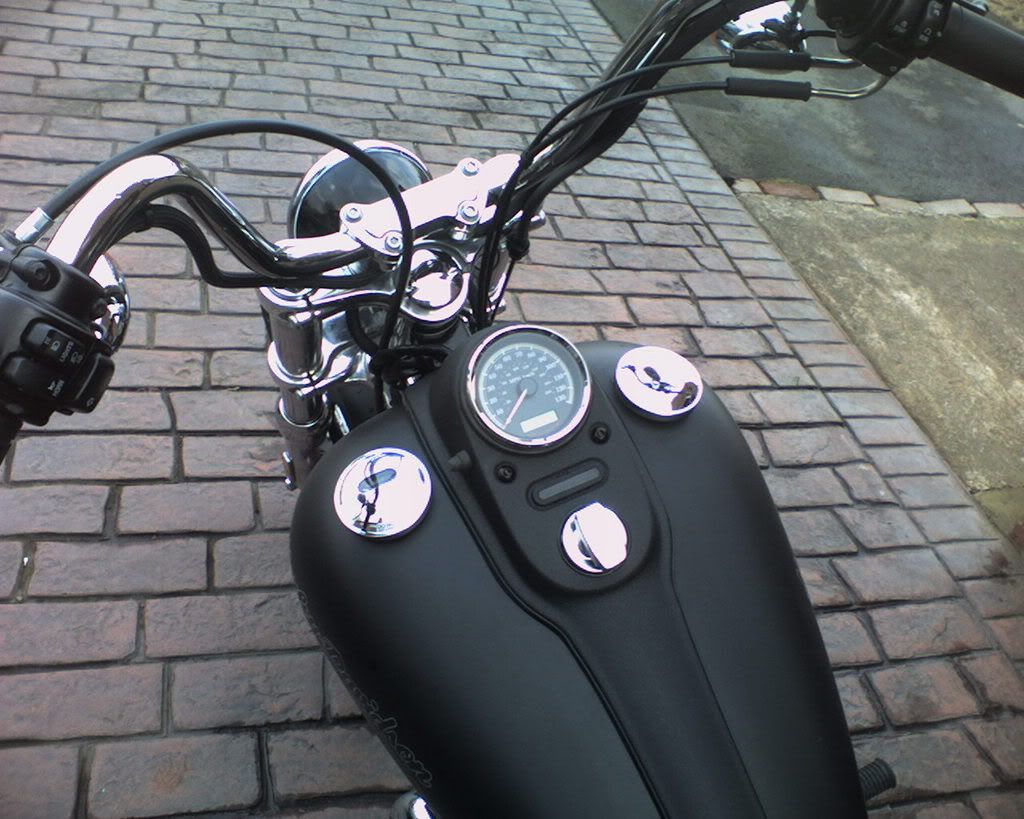
Hi Guys, I just finished re-locating my ignition from that PITA frame neck switch. It’s easy. Needless to say this is on your own head: I’m not quite sure about photobucket so tell me if the links to the pics don’t work!
Take off the seat and the console. Disconnect the harness to the instruments to free the console. Note the rubber boot on the press switch needs unscrewing a little before you pry (carefully) on the boot.
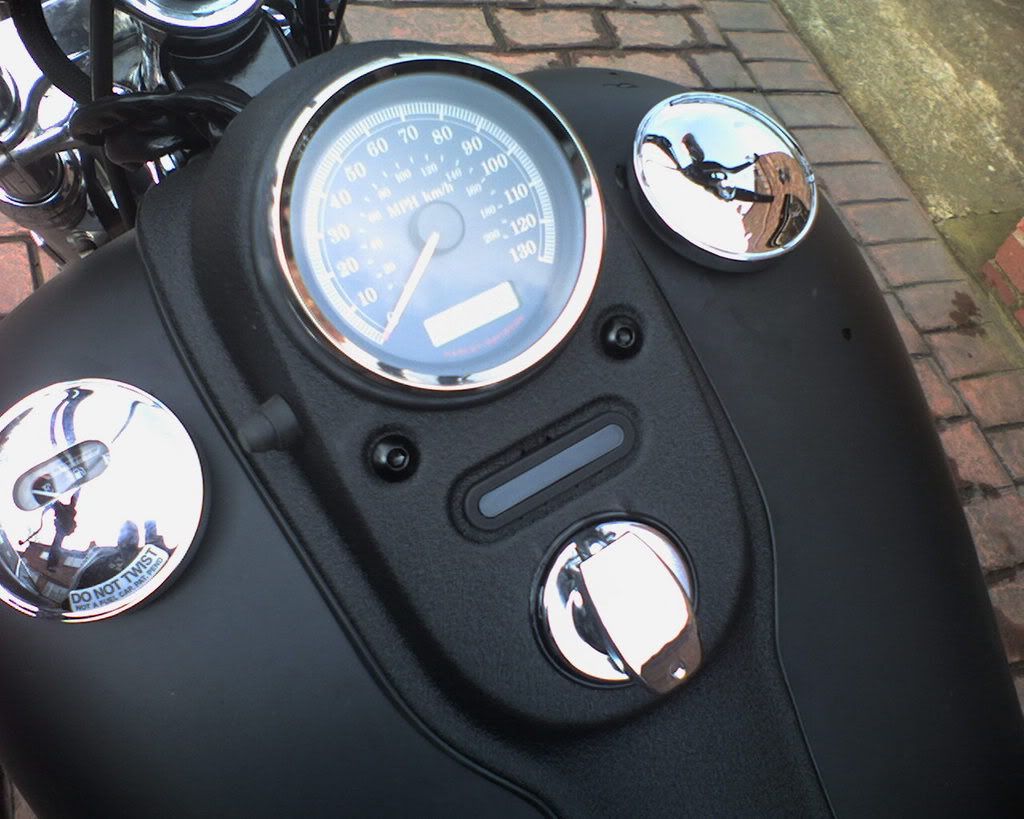
Assuming you are using a pattern switch like mine you will need to hole saw around 2”/51mm diameter. If you mark this carefully you should take out all the little indentations in this area of the console. I used a pillar driller (and a pilot hole).
Make up a small sub-plate (I used 1/16” thick aluminium) and fix it using some of the screws holding the petrol tank top bulkhead plate on.
Use double sided tape on the base of the new switch. Pull the switch back into the new hole in the console and offer them up to the tank. Align the console over its fixing spire nuts and when you’re happy with the switch position drop it down and press it onto the tape to fix it down.
Take off the console carefully and mark the switch fixing hole points on the new sub-plate. Bolt together, I used brass BA screws. I also put an extra nut UNDER the front 2 fixing holes so the slope of the switch reflected the slope of the console.
Re-assemble and check concentricity with the hole and the slope. You can slot the holes for position and use washers to jack up the slope till you get it spot on. Once you have it right, fix the switch & plate down. Trim the edge of the hole in the console with plastic trim. Make sure the switch moves freely, mine is a bit tight[:@]. Loctite or superglue the nuts!
Access the existing ignition feed via the plastic cover plate at the back of the frame neck, inside the fame down tubes at the top. You can feel the 3 way connector on the back of the neck switch. Pop the clips each end and you can pull back the lead.
At the LHS of the frame neck, remove the rubber grommet. Use a wire hook to slip inside this hole, catch the ignition cable and pull it out. Replace the grommet and the plastic frame plate.
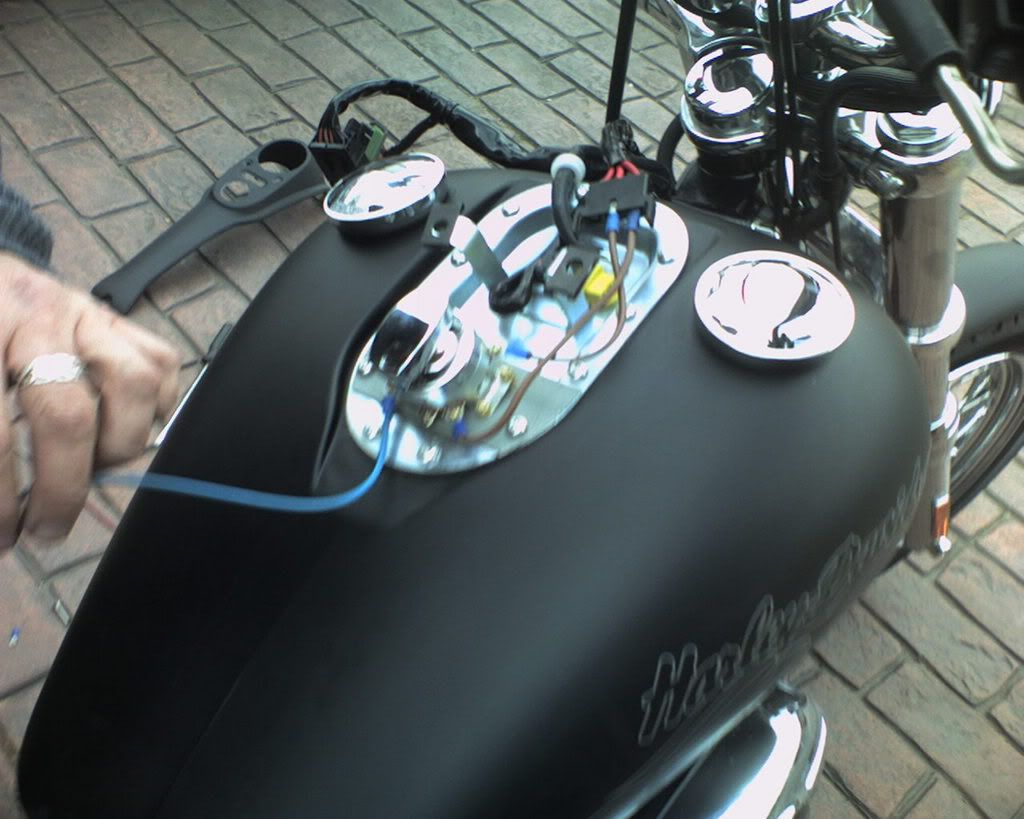
Route this ignition cable over the tank front along with the other cables into the console area. I left the connector on so I can de-convert if I want to. Connect in using spades and extend down to the new switch. Terminate on the switch with ring crimps. Mine is an HDI model. Red is the common feed, Red/black to the ignition and Red/Grey (only gray in U.S.! ) to the accessories.
Fire it up. Put it back together. Ensure you don’t crimp the gas line which is bundled together with the electrics under the console edge.
I took the opportunity to (satin) black out the screws on assembly.
I can now ride with my keys in my pocket and my HDSS auto-arms as soon as I switch off and walk away.
Not the most complicated mod in the world but so satisfying. I don’t know why HD didn’t get it right in the first place!
Sorry about the photo quality – forgot my camera. Thank heavens for mobile phones.
All the best. WW.


[URL=http://i176.photobucket.com/albums/w169/
Take off the seat and the console. Disconnect the harness to the instruments to free the console. Note the rubber boot on the press switch needs unscrewing a little before you pry (carefully) on the boot.
Assuming you are using a pattern switch like mine you will need to hole saw around 2”/51mm diameter. If you mark this carefully you should take out all the little indentations in this area of the console. I used a pillar driller (and a pilot hole).
Make up a small sub-plate (I used 1/16” thick aluminium) and fix it using some of the screws holding the petrol tank top bulkhead plate on.
Use double sided tape on the base of the new switch. Pull the switch back into the new hole in the console and offer them up to the tank. Align the console over its fixing spire nuts and when you’re happy with the switch position drop it down and press it onto the tape to fix it down.
Take off the console carefully and mark the switch fixing hole points on the new sub-plate. Bolt together, I used brass BA screws. I also put an extra nut UNDER the front 2 fixing holes so the slope of the switch reflected the slope of the console.
Re-assemble and check concentricity with the hole and the slope. You can slot the holes for position and use washers to jack up the slope till you get it spot on. Once you have it right, fix the switch & plate down. Trim the edge of the hole in the console with plastic trim. Make sure the switch moves freely, mine is a bit tight[:@]. Loctite or superglue the nuts!
Access the existing ignition feed via the plastic cover plate at the back of the frame neck, inside the fame down tubes at the top. You can feel the 3 way connector on the back of the neck switch. Pop the clips each end and you can pull back the lead.
At the LHS of the frame neck, remove the rubber grommet. Use a wire hook to slip inside this hole, catch the ignition cable and pull it out. Replace the grommet and the plastic frame plate.
Route this ignition cable over the tank front along with the other cables into the console area. I left the connector on so I can de-convert if I want to. Connect in using spades and extend down to the new switch. Terminate on the switch with ring crimps. Mine is an HDI model. Red is the common feed, Red/black to the ignition and Red/Grey (only gray in U.S.!
) to the accessories.Fire it up. Put it back together. Ensure you don’t crimp the gas line which is bundled together with the electrics under the console edge.
I took the opportunity to (satin) black out the screws on assembly.
I can now ride with my keys in my pocket and my HDSS auto-arms as soon as I switch off and walk away.
Not the most complicated mod in the world but so satisfying. I don’t know why HD didn’t get it right in the first place!
Sorry about the photo quality – forgot my camera. Thank heavens for mobile phones.
All the best. WW.

[URL=http://i176.photobucket.com/albums/w169/
Thread Starter
|
Cruiser
Joined: Aug 2006
Posts: 190
Likes: 1
From: Warwickshire
If this doesn't work I give up!
http://i176.photobucket.com/albums/w...Photo-0043.jpg
http://i176.photobucket.com/albums/w...Photo-0042.jpg
http://i176.photobucket.com/albums/w...Photo-0041.jpg
http://i176.photobucket.com/albums/w...Photo-0037.jpg
http://i176.photobucket.com/albums/w...Photo-0031.jpg
http://i176.photobucket.com/albums/w...Photo-0030.jpg
http://i176.photobucket.com/albums/w...Photo-0029.jpg
http://i176.photobucket.com/albums/w...Photo-0028.jpg
http://i176.photobucket.com/albums/w...Photo-0026.jpg
http://i176.photobucket.com/albums/w...Photo-0025.jpg
http://i176.photobucket.com/albums/w...Photo-0024.jpg
Road Master
Joined: Feb 2007
Posts: 773
Likes: 1
From: NZ but live in Dorset, England
Class job Walt ... third time lucky on the links ! It looks real good.
I've got a free day tomorrow ... but its going to be warm ... I'll planning a run across the Brecons and back as I haven't been able to ride this weekend ...
I'll post when i've done it too.
Mat
I've got a free day tomorrow ... but its going to be warm ... I'll planning a run across the Brecons and back as I haven't been able to ride this weekend ...
I'll post when i've done it too.
Mat
Road Master
Joined: Mar 2006
Posts: 1,187
Likes: 0
From: DFW
Thanks Walt, good info and pics. Now all I have to do is get up the nerve. Jackyl is considering using his obvious expertise in putting together a 'kit' for us less adventurous/mechanically inclined folk. I think I'll wait and see what he comes up with before I dive into it on my own...
Tourer
Joined: Dec 2006
Posts: 327
Likes: 0
From: Birmingham _ England
Brilliant work there Walt ,a real class mod and great workmanship. I hate where the damn ignition switch is as standard but to be honest dont have the "*****" to attempt this mod yet.
Bike is only 5 weeks old and i am reluctant to start messinwithout sound knowledge of what i,m doing.
-=BJ=-
Bike is only 5 weeks old and i am reluctant to start messinwithout sound knowledge of what i,m doing.
-=BJ=-
Road Master
Joined: Mar 2006
Posts: 1,187
Likes: 0
From: DFW
Walt - If you had to name one thing, what would you say was the MOST difficult part of the process? The wiring? The sawing? The fear of f~cking it up?
THANKS!
THANKS!
Trending Topics

Tourer

Joined: Dec 2006
Posts: 429
Likes: 20
From: Fort Valley, GA
Hey walter looks good. Do you ever vacation in LasVegas? I have the same bike. I would
pay you to put one on mine.
Greg
07 Streetbob
pay you to put one on mine.
Greg
07 Streetbob
HD Forum Stories
The Best of Harley-Davidson for Lifelong Riders

6 Weirdest Harley-Davidsons Ever Sold to the Public
Verdad Gallardo
7 Times Harley-Davidson Chucked Tradition Out the Window
Verdad Gallardo
7 Surprising Harley-Davidson Products that Are Not Motorcycles
Verdad Gallardo
8 Best Harley-Davidson Motorcycles Ever
Pouria Savadkouei
10 Worst Harley-Davidson Motorcycles Ever
Pouria Savadkouei
Killer Custom's Jail Break Is The Breakout That Refused to Blend In
Verdad Gallardo
Crazy Bunderbike Build Looks Amazing, But Is It Impossible to Ride?
Verdad Gallardo
Harley-Davidson Reveals Super Cool Cafe Racer Concept
Verdad Gallardo

