Speedo Relocation Instructions (My Version)
Thread Starter
|
Outstanding HDF Member
Joined: Jun 2007
Posts: 2,541
Likes: 11
From: Elyria, OH
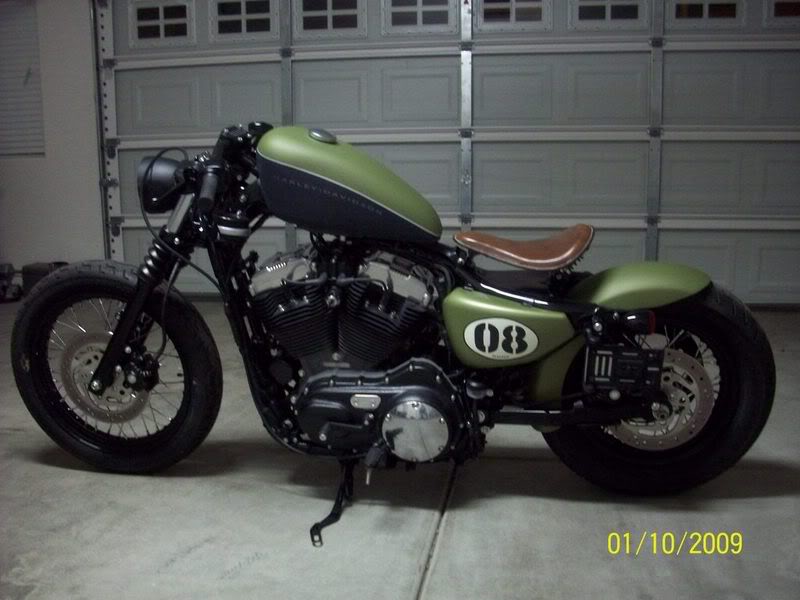
I have had many questions about my speedo relocation and I know many people have done it several different ways. Here's the way I did it. It took me less than an hour to do it.
I was fortunate enough to have an 02 Hugger that I traded top clamps with so I had one without the speedo mount attached to the clamp. You will need to acquire a different top clamp if you have the stock one on the bike now.
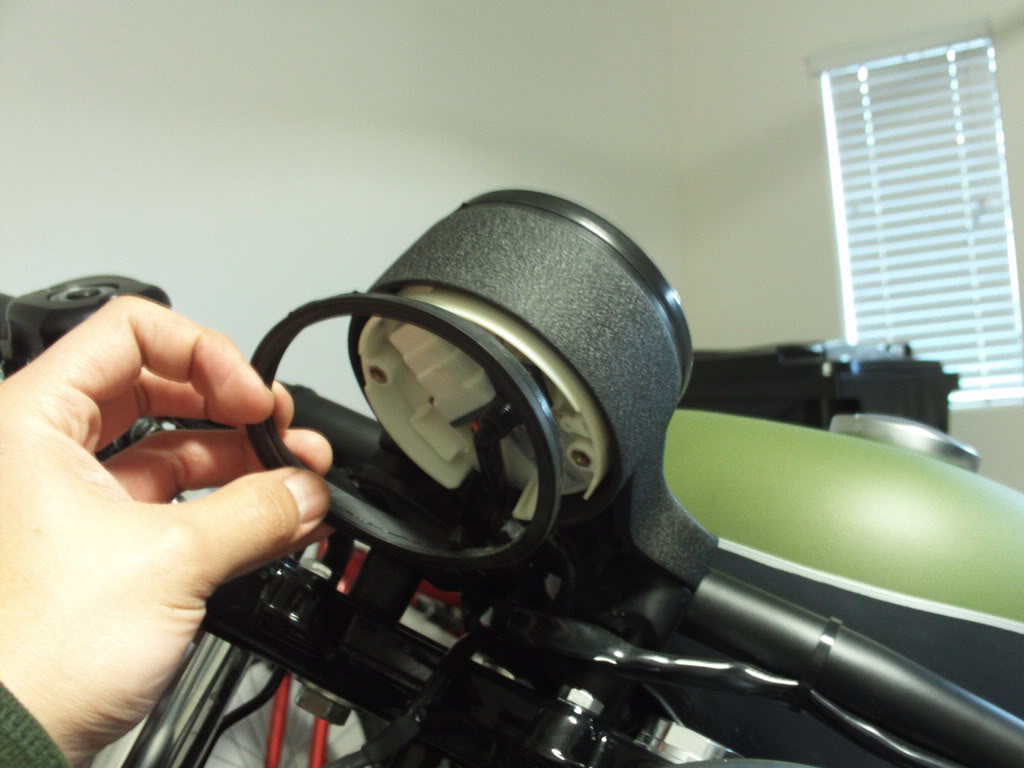
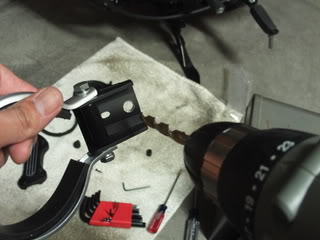
First thing to do is remove the speedo from the top clamp housing.
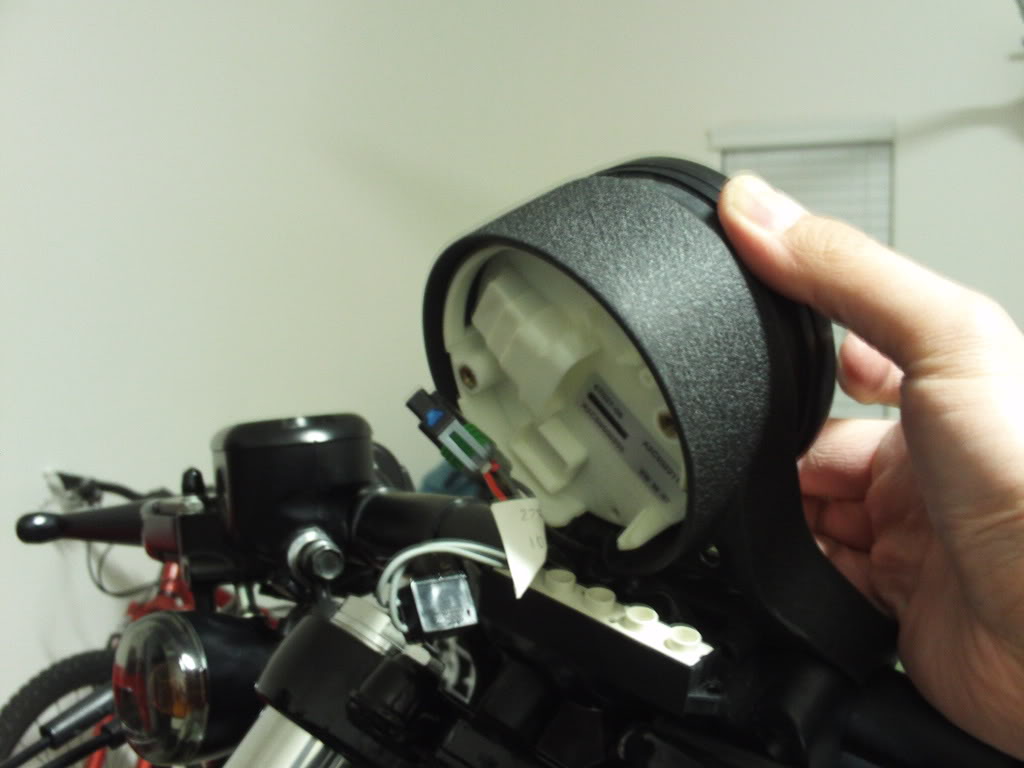
-Remove the plate from the back of the speedo housing and unplug the connector from the back of the speedo. Then remove the speedo from the housing by pulling up from the top.
Next remove the indicator lights from the top clamp by removing the two screws from the back of the light bar. Remove the plastic bezel from the top of the clamp (don't loose the plastic strip with the symbols on it).
Replace top clamp with the one you will replace it with..
I reassembled the indicator light bezel to the lights and used 2 sided emblem adhesive to attach it to the top clamp. Works for me for now.
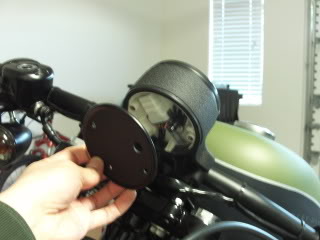
Now there are 2 small holes in the mounting plate for the guage clamp (Auto Meter Part # ATM-3209 From Summitracing.com) I drilled out one of the holes to 5/16" to fit on the front tank mount bolt.
Mount the clamp under the tank mount nut.
Install the speedo into the clamp along with the original rubber seals and rotate it to your liking and tighten the bolts on both sides of the clamp.
Now for the wiring... Reroute the wiring down to the speedo. You may need to remove the headlight eyebrow to fit the connector through.
I had to slice the plastic cover on the harness to get enough length to reach then I just taped it up with electrical tape. Plug the connector into the speedo make sure the original rubber ring is on the back of the speedo then install the back plate.
You Are Done!
Hopefully this will help some people. Feel free to ad your own ideas to this thread. (Maybe this can be a Sticky)
I was fortunate enough to have an 02 Hugger that I traded top clamps with so I had one without the speedo mount attached to the clamp. You will need to acquire a different top clamp if you have the stock one on the bike now.
First thing to do is remove the speedo from the top clamp housing.
-Remove the plate from the back of the speedo housing and unplug the connector from the back of the speedo. Then remove the speedo from the housing by pulling up from the top.
Next remove the indicator lights from the top clamp by removing the two screws from the back of the light bar. Remove the plastic bezel from the top of the clamp (don't loose the plastic strip with the symbols on it).
Replace top clamp with the one you will replace it with..
I reassembled the indicator light bezel to the lights and used 2 sided emblem adhesive to attach it to the top clamp. Works for me for now.
Now there are 2 small holes in the mounting plate for the guage clamp (Auto Meter Part # ATM-3209 From Summitracing.com) I drilled out one of the holes to 5/16" to fit on the front tank mount bolt.
Mount the clamp under the tank mount nut.
Install the speedo into the clamp along with the original rubber seals and rotate it to your liking and tighten the bolts on both sides of the clamp.
Now for the wiring... Reroute the wiring down to the speedo. You may need to remove the headlight eyebrow to fit the connector through.
I had to slice the plastic cover on the harness to get enough length to reach then I just taped it up with electrical tape. Plug the connector into the speedo make sure the original rubber ring is on the back of the speedo then install the back plate.
You Are Done!
Hopefully this will help some people. Feel free to ad your own ideas to this thread. (Maybe this can be a Sticky)
Cruiser
Joined: Nov 2008
Posts: 167
Likes: 3
I saw an incredible story today on relocating the spedo drive (mechanical) to the rear wheel...
http://www.jockeyjournal.com/forum/s...ad.php?t=47754
Gazza
http://www.jockeyjournal.com/forum/s...ad.php?t=47754
Gazza
Cruiser
Joined: Nov 2008
Posts: 167
Likes: 3
Better solution for the idiot lights is use the mounting holes built into your
eyebrow. Go to your dealer and look through the '03 Dyna parts book (lot's of
other years models work too, that's just what I used). Your eyebrow has the
oval cutout to take the bezel, just peel the sticker off.

Gazza
eyebrow. Go to your dealer and look through the '03 Dyna parts book (lot's of
other years models work too, that's just what I used). Your eyebrow has the
oval cutout to take the bezel, just peel the sticker off.
Gazza
Thread Starter
|
Outstanding HDF Member
Joined: Jun 2007
Posts: 2,541
Likes: 11
From: Elyria, OH
Better solution for the idiot lights is use the mounting holes built into your
eyebrow. Go to your dealer and look through the '03 Dyna parts book (lot's of
other years models work too, that's just what I used). Your eyebrow has the
oval cutout to take the bezel, just peel the sticker off.
Gazza
eyebrow. Go to your dealer and look through the '03 Dyna parts book (lot's of
other years models work too, that's just what I used). Your eyebrow has the
oval cutout to take the bezel, just peel the sticker off.
Gazza
Last edited by Gpsjr10; Jan 3, 2009 at 10:20 PM.
Cruiser
Joined: Nov 2008
Posts: 167
Likes: 3
Yep, that's from an '03 Dyna something. Only one model that year had the
idiot lights in the eyebrow, the other dyna model's had them somewhere else.
On some of the later years there was a more modern looking piece (kinda
smoother jelly beanish thing), that should fit the same eyebrow also, the
eyebrow pretty much stays the same across all models for long periods of
time.
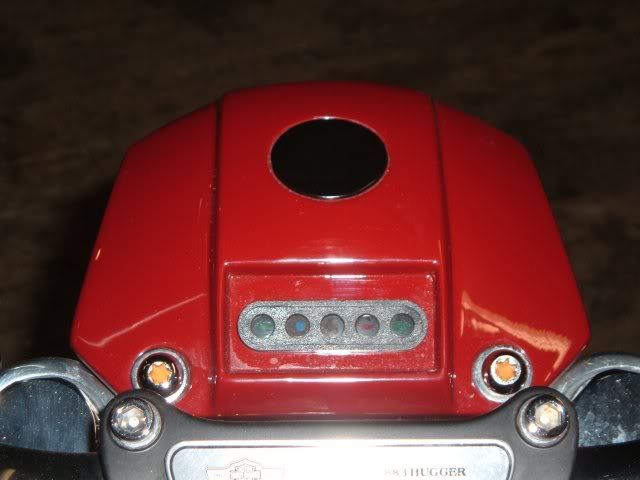
The way that one I showed works is you have seven pieces. The five bulb &
lens pieces come separately, then there's the bezel and the face plate. The
bezel pushes into the eyebrow. Then each of the five bulbs push into that,
they have alignment flats to keep them straight. Then the face plate pushes
into the top of the bezel. You can see the oval line where the faceplate
pushes into the recess on the bezel on my pic. The bulb lens pieces each
come with way longer than you need pigtails that you just splice into your
old connector.
Gazza
idiot lights in the eyebrow, the other dyna model's had them somewhere else.
On some of the later years there was a more modern looking piece (kinda
smoother jelly beanish thing), that should fit the same eyebrow also, the
eyebrow pretty much stays the same across all models for long periods of
time.
The way that one I showed works is you have seven pieces. The five bulb &
lens pieces come separately, then there's the bezel and the face plate. The
bezel pushes into the eyebrow. Then each of the five bulbs push into that,
they have alignment flats to keep them straight. Then the face plate pushes
into the top of the bezel. You can see the oval line where the faceplate
pushes into the recess on the bezel on my pic. The bulb lens pieces each
come with way longer than you need pigtails that you just splice into your
old connector.
Gazza
Last edited by GazzaTheBastard; Jan 4, 2009 at 08:05 AM.

Banned
Joined: Jan 2009
Posts: 1,647
Likes: 2
From: Fairmont, Wv
Guys this is great! Thank you, this is exactely what I have been looking for. I ordered my bracked from summitracing and will have it powdercoated black. I am thinking I can do something with the lights. I will try to get some pics up when I have it done. again thanks alot!!!
Trending Topics
Cruiser
Joined: Sep 2008
Posts: 177
Likes: 1
I finally got around to relocating my speedo. This was GPS's guide was the only basic one I had to work with. I bought the same mount from Summit and it was perfect. Anyways It went a little something like this:
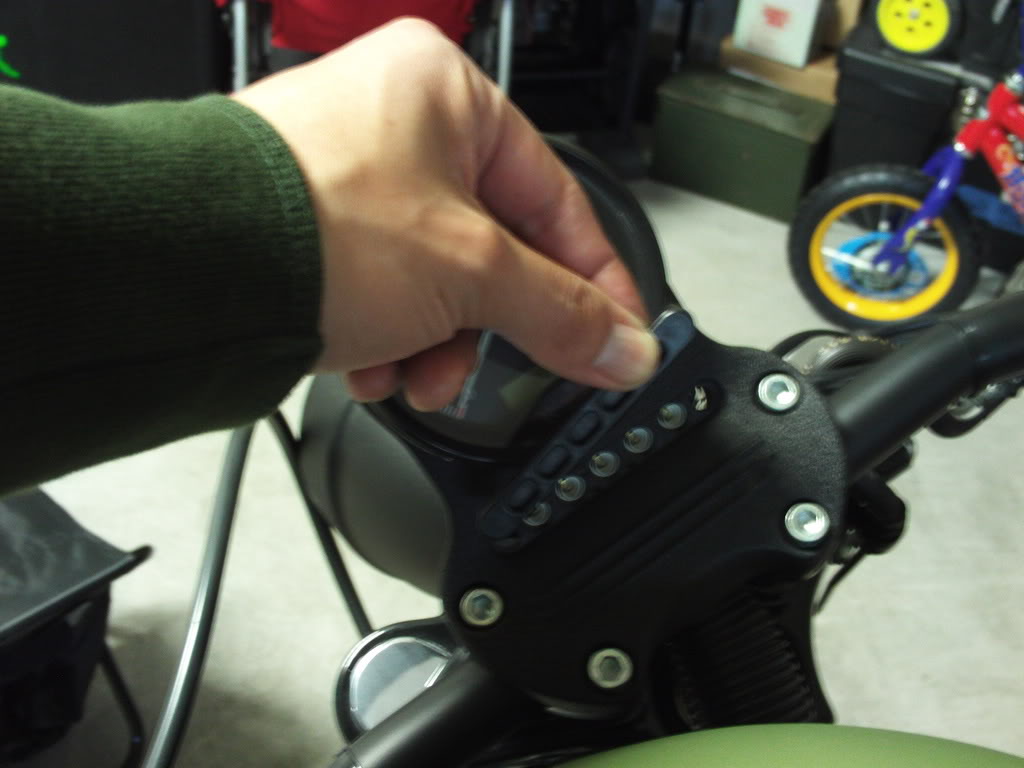
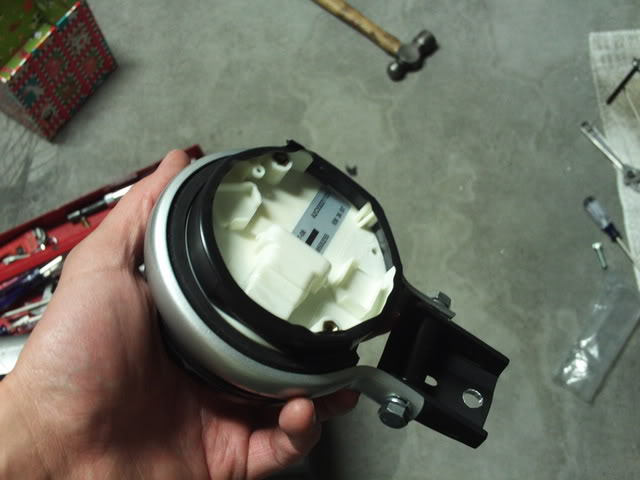
Now pulling this sucker out was pissing me off. I couldn't figure it out at first but than i figured I really had to tug and pull it out like a man.
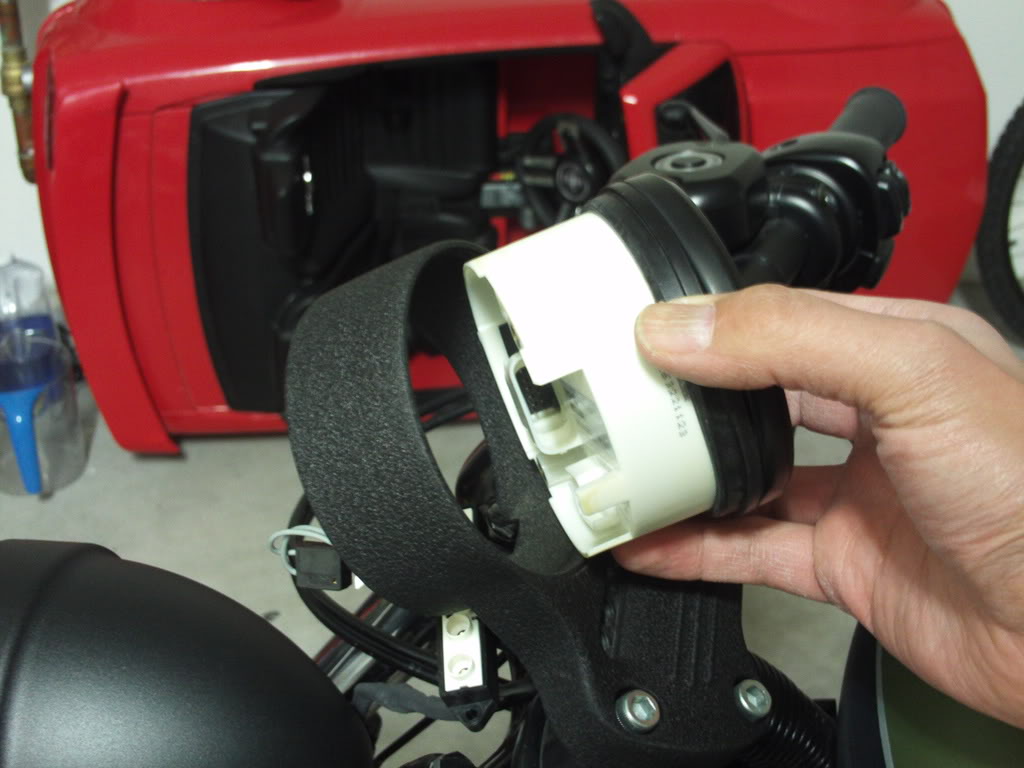
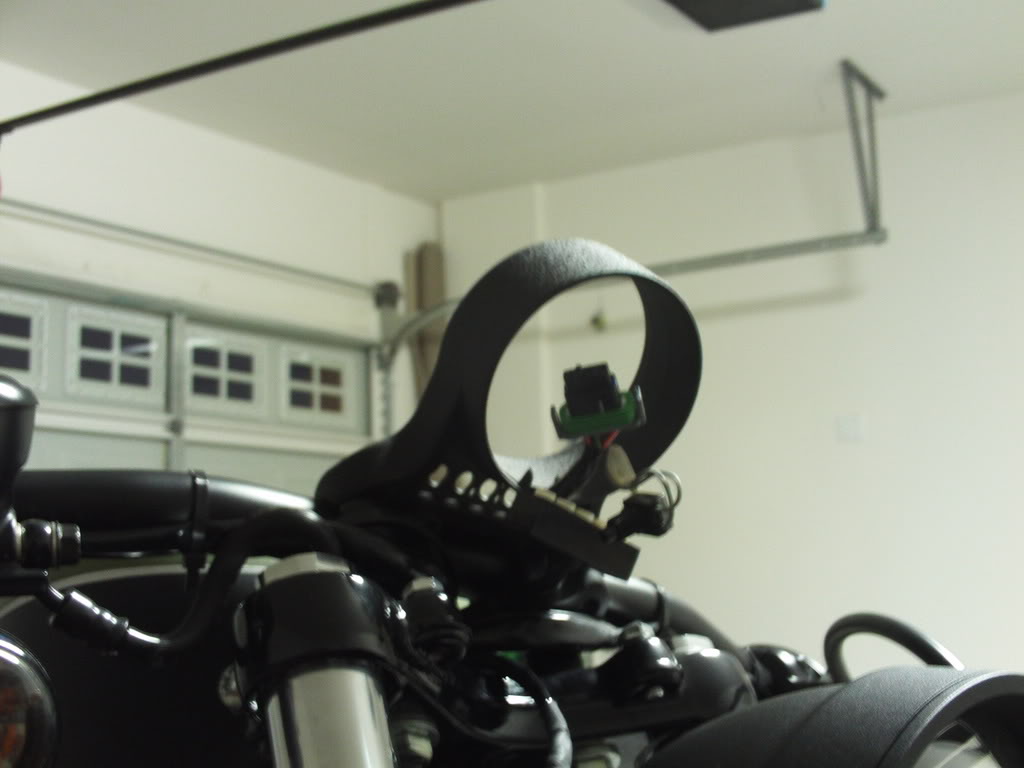
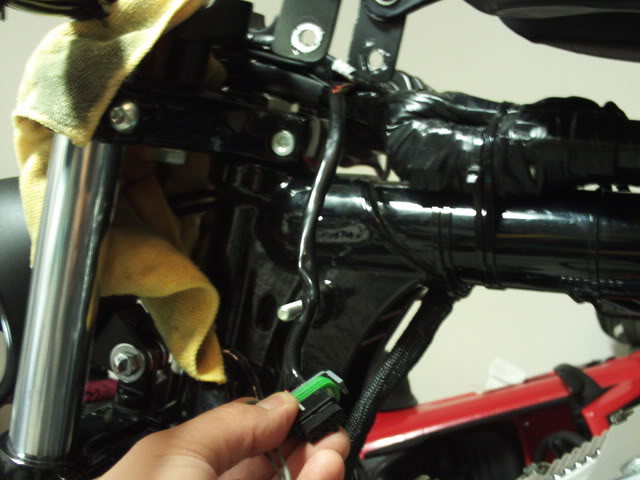
Ok now here I had to lift my tank because I had an insane wire job done on my bike when I did the coil relocation. the 1 1/2" tank lift allowed a bunch of wires to be tightly wrapped and tucked underneath the tank. I had to undo some electrical tape to pull out more wire length on my speedo, so that it may reach it's new mounting point.
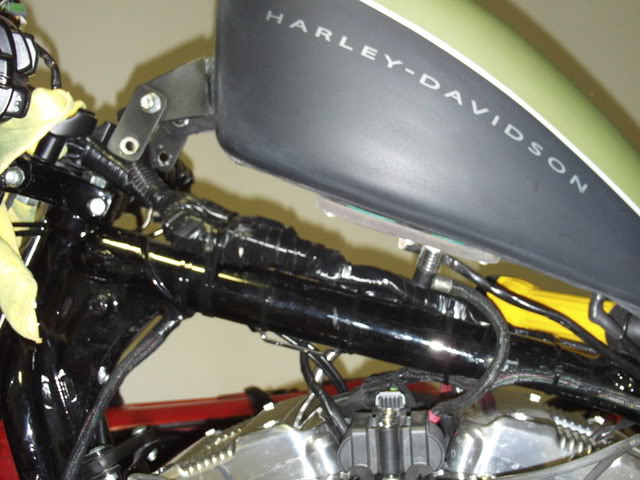
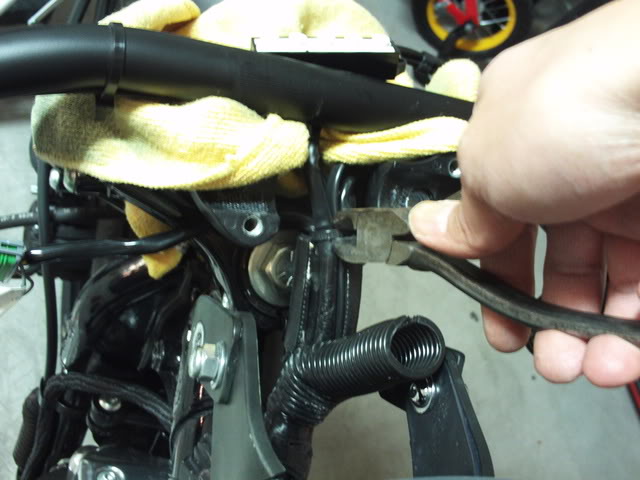 Pulling out the wire
I was still about 2 inches short in this pic
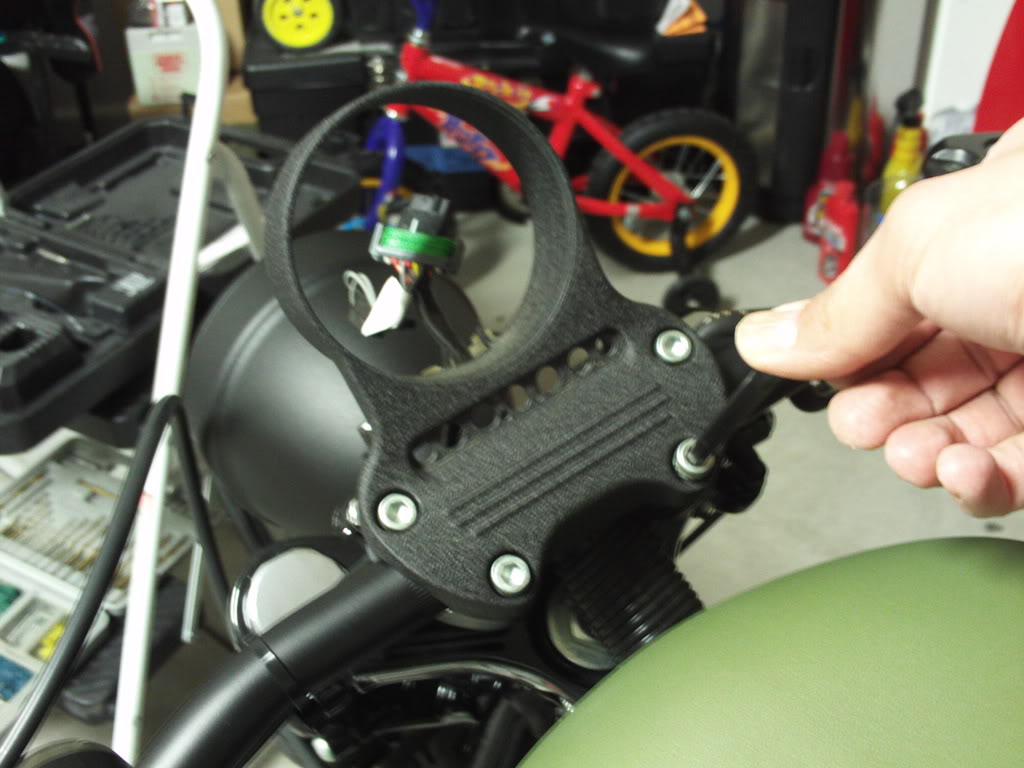
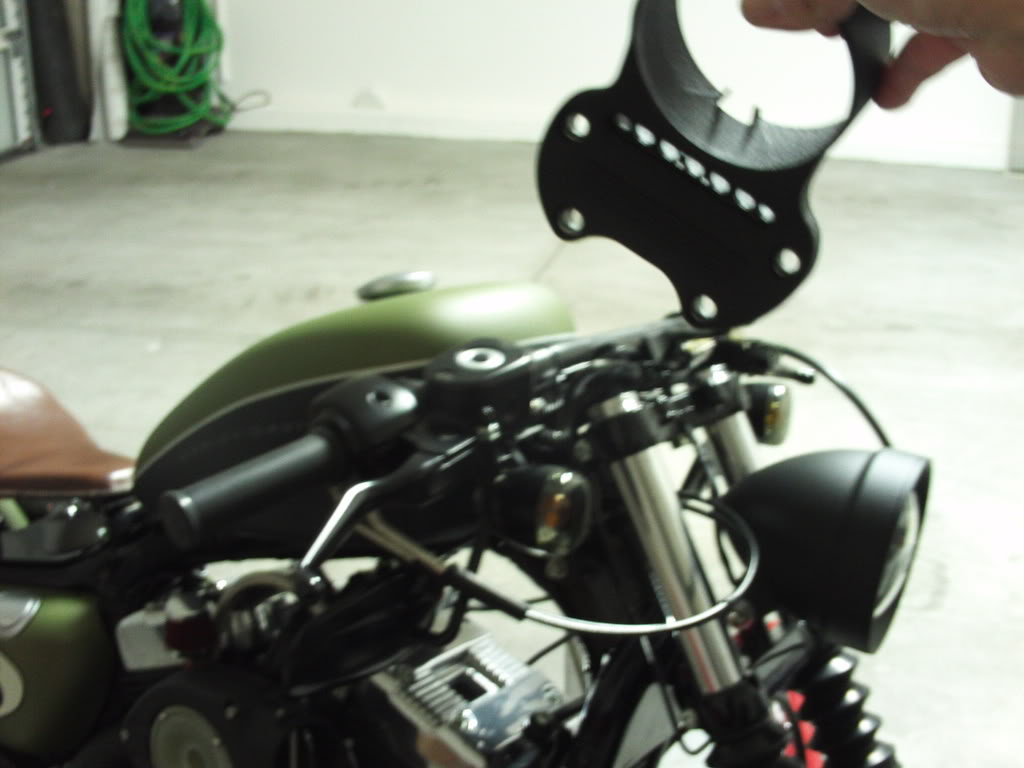
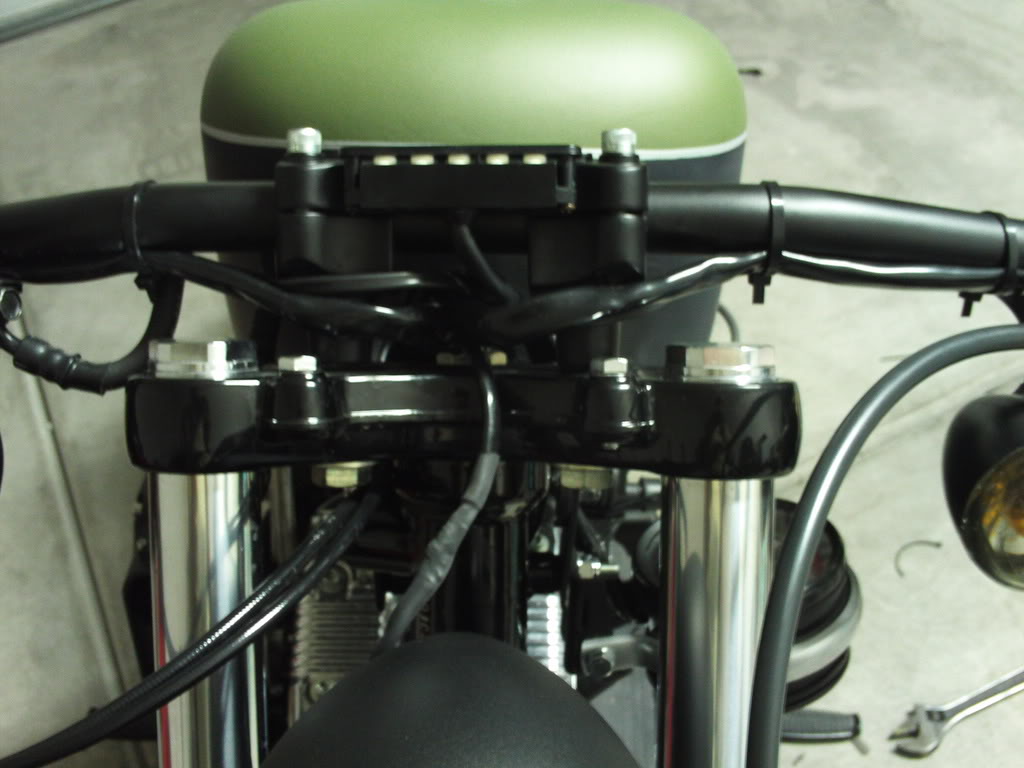
Here i'm trying to get an idea of how to mount this sucker. It didn't have much room to play with since my signal lights are mounted on my drag bars so a couple ideas went out the window. Anyway I figured something out. The mount was be placed on the tank mount bolt. Don't let the little tank lift brackets throw you off.
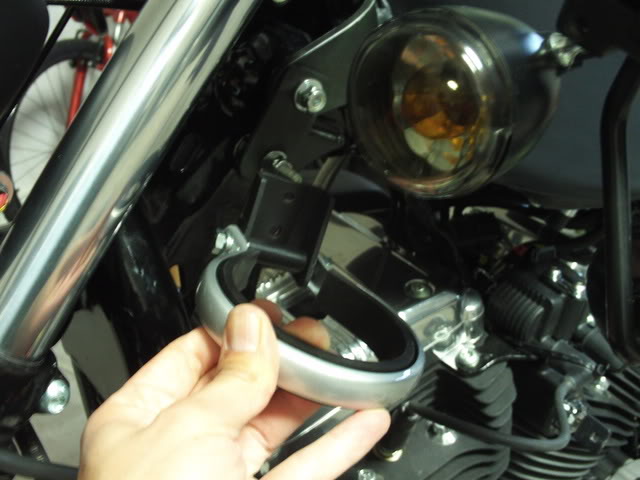
Must drill out the mount to a larger diameter right over the existing hole so you may mount on the tank mount bolt (if that is your plan)
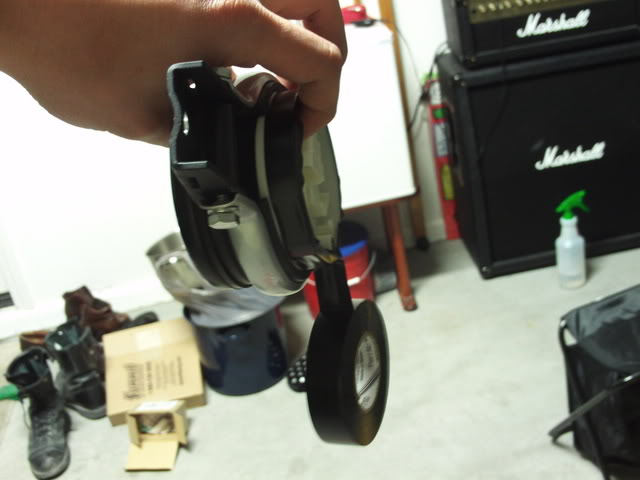
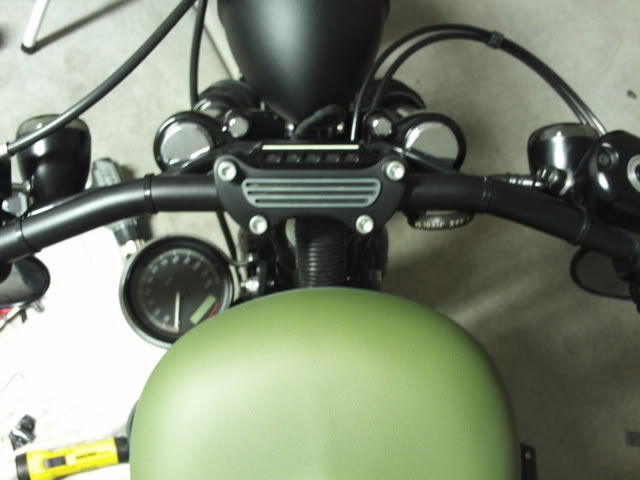
When the speedo is placed into the new clamp, you want to make sure you place all the rubber seals back on. However I noticed there wasn't a complet seal, and there was in fact a little gap that made the white speedo housing visable. So I wrapped it up a little mit with electrical tape to get a seal and hide the housing.
Just want to point out that the my speedo in this pic is backwars, as I flipped it around in later pictures, in order to get everything to fit (trial and error)
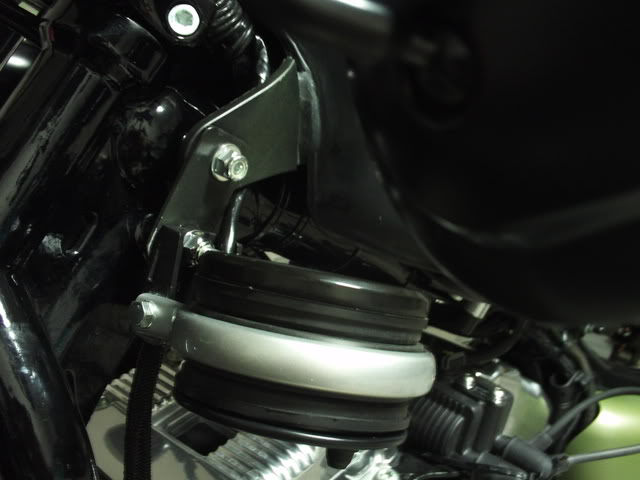
And It looks like a good fit. Now what to do with that stupid LED...hmm
Got some dual sided super sticky MOLDING TAPE (haha cheap but great..thnks GPS)
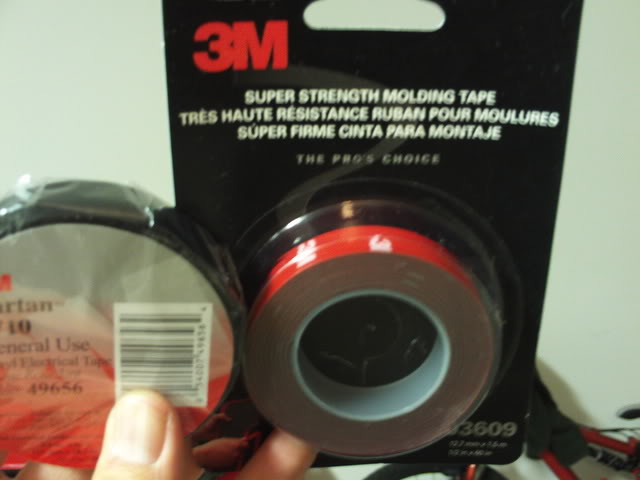
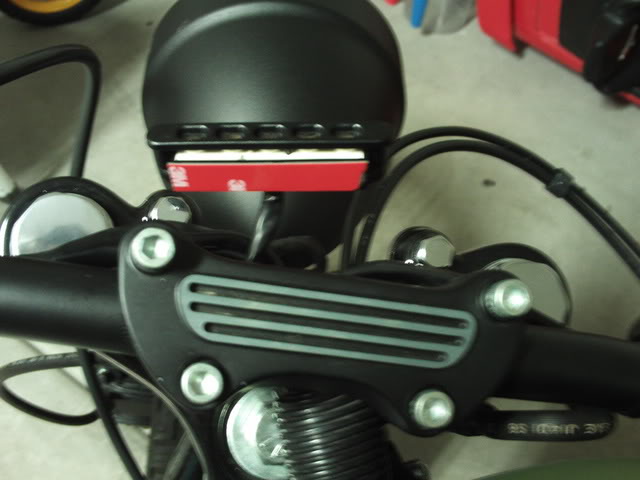
And stick!
Now I have to fab up a nifty little cover this week to hide all thoes wires under the bar clamp as well as covering up the LEDs a little better
Now pulling this sucker out was pissing me off. I couldn't figure it out at first but than i figured I really had to tug and pull it out like a man.
Ok now here I had to lift my tank because I had an insane wire job done on my bike when I did the coil relocation. the 1 1/2" tank lift allowed a bunch of wires to be tightly wrapped and tucked underneath the tank. I had to undo some electrical tape to pull out more wire length on my speedo, so that it may reach it's new mounting point.
Pulling out the wireI was still about 2 inches short in this pic
Here i'm trying to get an idea of how to mount this sucker. It didn't have much room to play with since my signal lights are mounted on my drag bars so a couple ideas went out the window. Anyway I figured something out. The mount was be placed on the tank mount bolt. Don't let the little tank lift brackets throw you off.
Must drill out the mount to a larger diameter right over the existing hole so you may mount on the tank mount bolt (if that is your plan)
When the speedo is placed into the new clamp, you want to make sure you place all the rubber seals back on. However I noticed there wasn't a complet seal, and there was in fact a little gap that made the white speedo housing visable. So I wrapped it up a little mit with electrical tape to get a seal and hide the housing.
Just want to point out that the my speedo in this pic is backwars, as I flipped it around in later pictures, in order to get everything to fit (trial and error)
And It looks like a good fit. Now what to do with that stupid LED...hmm
Got some dual sided super sticky MOLDING TAPE (haha cheap but great..thnks GPS)
And stick!
Now I have to fab up a nifty little cover this week to hide all thoes wires under the bar clamp as well as covering up the LEDs a little better
Last edited by Slackster; Jan 11, 2009 at 03:21 AM.
HD Forum Stories
The Best of Harley-Davidson for Lifelong Riders

6 Weirdest Harley-Davidsons Ever Sold to the Public
Verdad Gallardo
7 Times Harley-Davidson Chucked Tradition Out the Window
Verdad Gallardo
7 Surprising Harley-Davidson Products that Are Not Motorcycles
Verdad Gallardo
8 Best Harley-Davidson Motorcycles Ever
Pouria Savadkouei
10 Worst Harley-Davidson Motorcycles Ever
Pouria Savadkouei
Killer Custom's Jail Break Is The Breakout That Refused to Blend In
Verdad Gallardo
Crazy Bunderbike Build Looks Amazing, But Is It Impossible to Ride?
Verdad Gallardo
Harley-Davidson Reveals Super Cool Cafe Racer Concept
Verdad Gallardo