


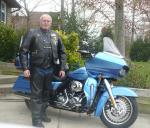



Road Glide Wrapped (Pics)

Grand HDF Member

Joined: Aug 2014
Posts: 3,612
Likes: 1,606
From: Eastern Ohio

Looks really good. Nice job. I tried wrapping my softail tins a couple years ago. You are definitely right about needing patience. I did the front fender and didn't like how it turned out, so I scrapped the project. I still have some vinyl. Maybe next year I'll two tone one of the bikes.

Thread Starter
|
Cruiser

Joined: Mar 2010
Posts: 178
Likes: 3
From: Chicago NW suburbs
Was it to put the wrap on ? How much wrap did you need to purchase ? Were there a lot of bubbles to remove ? How well did it conform to the edges of your side covers ? Wow, your bike looks great, any chance you could do a play by play write up ? I have been looking at changing my colors up and this loos to be the way..
First question yes it was difficult to do the wrap even just two toning it. I purchased 5' by 20', the standard width is 5' and then you just order the length you need. They don't have it by the foot but every couple I think. I have a ton left over since my original plan was to wrap the whole bike. This stuff is pretty good with the bubbles, it is designed to be breathable from what I read so the bubbles came out pretty easy. The problem was when you got a crease, the vinyl is very forgiving so if I got a crease I lifted it back up and smoothed it out and the crease would come right out. The hard part is working with all of the curves (tank especially) when you cleaned up one crease it caused problems in another area. Thats where the patience came in, when I got it to an area where it would not be seen that is where I would stop. There are some bad creases under the tank but you can only see them if you bend down and look under the tank. I'll give a quick tutorial on how I did it;
First I stripped the bike down, everything was done off of the bike and on the bench. You could do it on the bike but it would be even more difficult.
Next I cleaned all of the parts with a 50/50 mix of isopropyl alcohol and water. I used a clean microfiber and sprayed the parts (bought a cheap spray bottle) wiped them down flipped the microfiber over to dry side to get it all off. Did this twice just to be sure. The main thing is to get all of the wax off so the vinyl will stick.
For measuring out the vinyl I used one of those seamstress measuring tapes, stole the wifes. Went about 2" over on my measurements and cut out a piece of vinyl.
For me since I two toned it and a comment was made in a reply about how it all flowed from the fairing to the bags I just ran off of the existing pinstripes on the bike. I took 1/4" painters tape and ran the edge at the bottom of the pinstripe and pressed it down real good. Layed out the vinyl and kept working it until I got it to the areas that would not be seen and over the painters tape I put down. Then I used a sharp razor knife (the one where you can break the end off to get a fresh blade) and gently cut along the vinyl laying on the painters tape. Pulled off the waste and then gently pulled the painters tape up and pushed the vinyl that was under the painter tape back down. In my case the gold pinstripe hid where they met (which was good for me since all of the cuts weren't straight).
It's hard to write up a step by step since I was learning along the way and by no means am I even close to being a master. The main thing I can say is prep is key just like in most projects, making sure the wax is off so the vinyl will stick is crucial.
One thing I did have problems with the vinyl sticking were the heat guards mounted to the frame and the headlight bezel since they were molded plastic with no paint on them. It bubbled pretty bad in the recess of these parts after sitting for awhile. I redid one yesterday and cleaned it real good again so I will have to see if that will last.
One other note if you get a crease even a bad one peel that portion back off the part and throw a little heat on it from a heat gun (not alot just pass by it a couple of times) and the crease will come out and you can continue laying that section. There is no need to remove the entire piece of vinyl to get the crease out. You can also use the heat to stretch the vinyl to go around curves or in recesses as needed just don't use a ton of heat it only takes a little. Also the vinyl is pretty pliable, they say it can stretch about 30% so don't be afraid to stretch it to get around the curves.
Again sorry it wasn't a clear write up but my methods changed as I did different parts. Putting a link in for Metrorestyling and there are also several videos on Youtube showing how to apply the material.
http://www.metrorestyling.com/category-s/37.htm
Road Captain
Joined: Jun 2014
Posts: 673
Likes: 29
From: NE Ohio
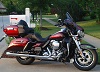
You did a nice job! Completely changed the look of your bike & from the pics looks like a quality piece of work.
I also like your license plate frame!
I also like your license plate frame!
HD Forum Stories
The Best of Harley-Davidson for Lifelong Riders

7 Surprising Harley-Davidson Products that Are Not Motorcycles
Verdad Gallardo
8 Best Harley-Davidson Motorcycles Ever
Pouria Savadkouei
10 Worst Harley-Davidson Motorcycles Ever
Pouria Savadkouei
Killer Custom's Jail Break Is The Breakout That Refused to Blend In
Verdad Gallardo
Crazy Bunderbike Build Looks Amazing, But Is It Impossible to Ride?
Verdad Gallardo
Harley-Davidson Reveals Super Cool Cafe Racer Concept
Verdad Gallardo
Engraved Rebellion: Inside Bundnerbike's Glam Rock II
Verdad Gallardo
10 Motorcycles You Should Never Buy
Joe Kucinski