


Project Black out ... so far so good

Thread Starter
|
Road Master
Joined: Dec 2005
Posts: 844
Likes: 2
From: Tampa, FL
It's been a busy day so far and almost got all the chrome pieces off my ride. Only have a couple more parts to take off, then Monday morning it's off to get them powdercoated gloss black. This has been one hell of a learning session...thank God for a service manual. Anyway, here is some things I have discovered so far:
1. Have a service manual ... this is a must
2. Put plastic under the bike prior to starting ... just look at my floor now
3. Have a rubber mallet ... some of the covers are tough as hell of get off ... just play whack-a-mole
4. taking off the rear turn signal bar is a bitch if you dont take off the fender or rear tire.
5. Wash your bike prior to starting
6. Take notes, label things or put the bolts/screws back in where they go
7. You have to take off the front footboard bracket to get the primary cover off.
Anyway...here are some pics so far:


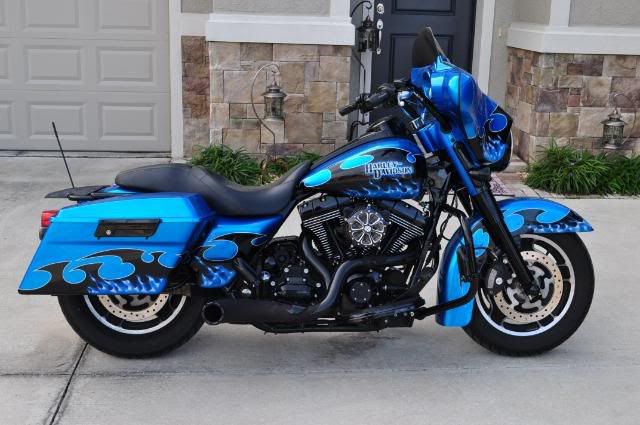
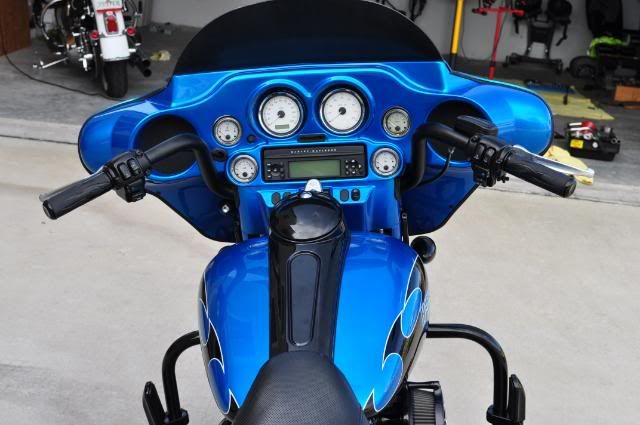
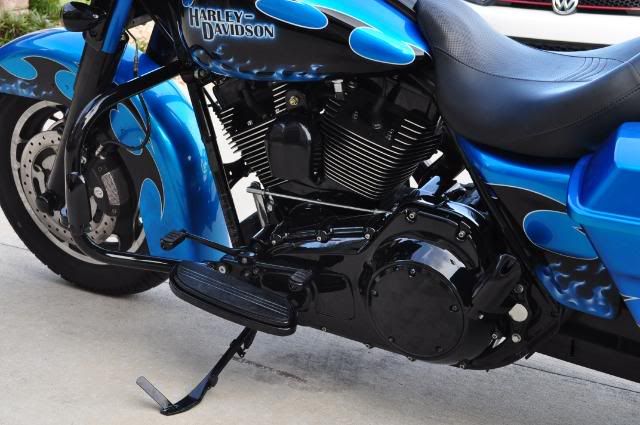
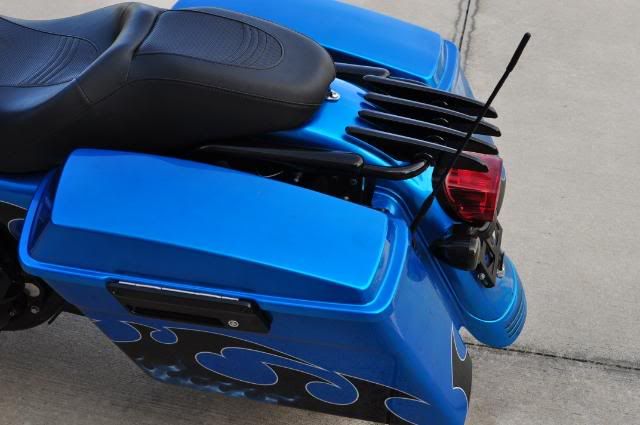
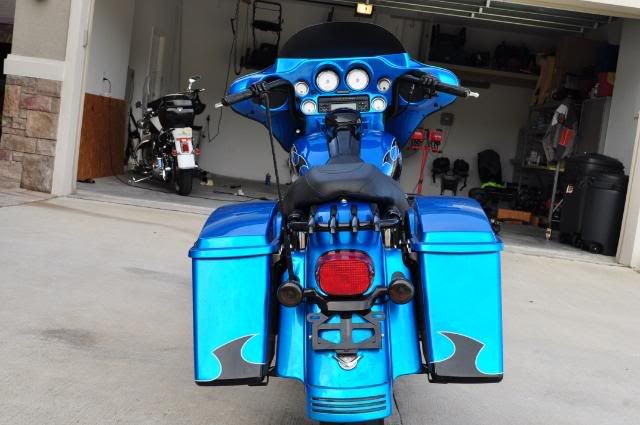
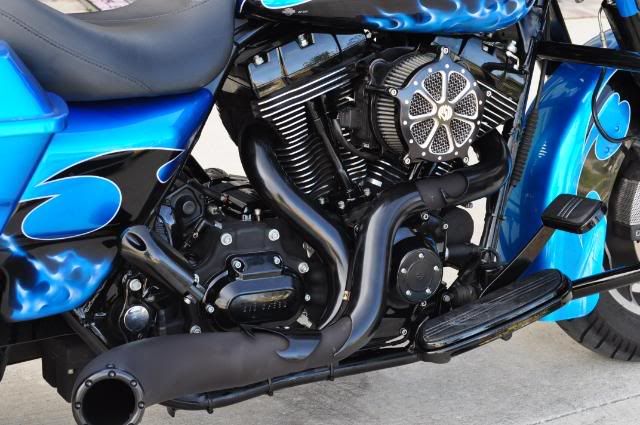
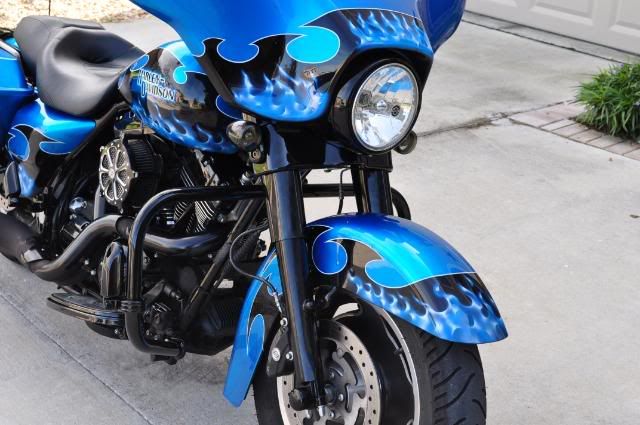
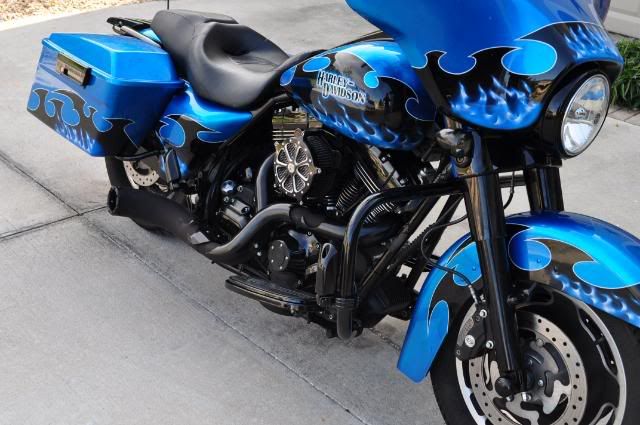
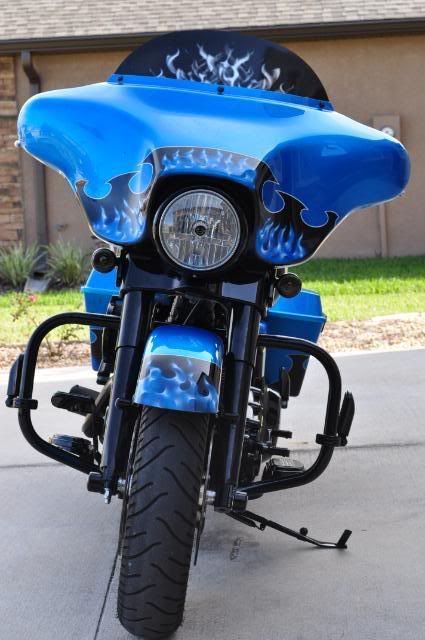
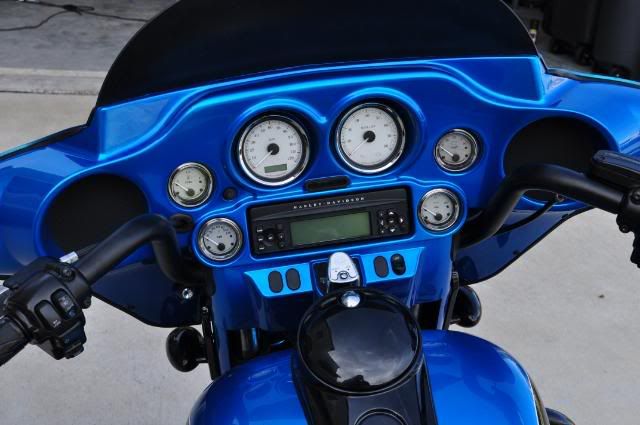
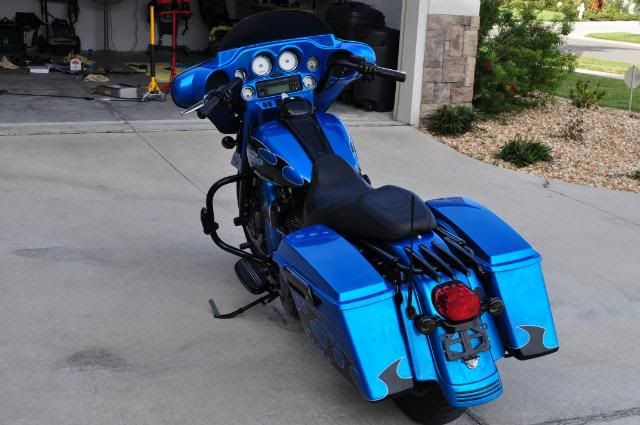
And here is the finished product.
1. Have a service manual ... this is a must
2. Put plastic under the bike prior to starting ... just look at my floor now
3. Have a rubber mallet ... some of the covers are tough as hell of get off ... just play whack-a-mole
4. taking off the rear turn signal bar is a bitch if you dont take off the fender or rear tire.
5. Wash your bike prior to starting
6. Take notes, label things or put the bolts/screws back in where they go
7. You have to take off the front footboard bracket to get the primary cover off.
Anyway...here are some pics so far:
And here is the finished product.
Last edited by SMSgt B; Nov 28, 2009 at 05:29 PM. Reason: Completed Project
Thread Starter
|
Road Master
Joined: Dec 2005
Posts: 844
Likes: 2
From: Tampa, FL
Between 6-9. 6 when idling and just laying back. 9 when you get on it. Extremely deep tone due to big diameter and no baffle.

Cruiser
Joined: Nov 2008
Posts: 193
Likes: 0
From: Denver, CO.
Trending Topics
Ultimate HDF Member
Joined: Nov 2007
Posts: 6,716
Likes: 13
HD Forum Stories
The Best of Harley-Davidson for Lifelong Riders

7 Surprising Harley-Davidson Products that Are Not Motorcycles
Verdad Gallardo
8 Best Harley-Davidson Motorcycles Ever
Pouria Savadkouei
10 Worst Harley-Davidson Motorcycles Ever
Pouria Savadkouei
Killer Custom's Jail Break Is The Breakout That Refused to Blend In
Verdad Gallardo
Crazy Bunderbike Build Looks Amazing, But Is It Impossible to Ride?
Verdad Gallardo
Harley-Davidson Reveals Super Cool Cafe Racer Concept
Verdad Gallardo
Engraved Rebellion: Inside Bundnerbike's Glam Rock II
Verdad Gallardo
10 Motorcycles You Should Never Buy
Joe Kucinski
10 Things Harley-Davidson Needs to Fix in 2026
Verdad Gallardo
Thread Starter
|
Road Master
Joined: Dec 2005
Posts: 844
Likes: 2
From: Tampa, FL
Got tired yesterday and my lighting sucks in the garage. Finish it up today, then count and wrap up all the parts. So far my time has been 4 hours Friday night, 6 hours Saturday and guess about 2 hours today. That is slow for some folks but 1. need to take beer breaks and stretch 2. I have never broke into an engine so reading, reading, reading. 3. Taking notes ... did I mention beer breaks.
Wife goes "I hope you know what you are doing and can get it back together." So do I because I have another project (inner fairing, bars, front end and lowering kit) right after this one ... tackling 1 at a time.
Wife goes "I hope you know what you are doing and can get it back together." So do I because I have another project (inner fairing, bars, front end and lowering kit) right after this one ... tackling 1 at a time.
Thread Starter
|
Road Master
Joined: Dec 2005
Posts: 844
Likes: 2
From: Tampa, FL
Finished up taking the rest off today and definitely learned some things today.
The rear cylinder is WAY more difficult to take a part. Due to the way the engine is mounted, the left side (shifter side) bolts are under the frame and no room to pull them out. Not sure if this was the correct way but here are the steps I had to take get it them out:
(Ensure the push rods are at the cam base (lowest part)...per the service manual)
1. Remove the rocker cover (6 bolts)
2. Remove the right side breather bolt and completely loosen the left side (frame is in the way to get it out)
3. Follow the pattern illustrated in the service manual to remove the 4 bolts holding the rocker plate. You will only be able to get the 2 on the right side out. (So now you have 3 bolts on the left side that needs to come out with the rockers)
4. Side the rocker assembly to the left so you can grab the push rods to remove them. This gives you more room to move the rocker assembly around.
5. While lifting out (like trying to take them out) the 3 bolts so they don't go back down, slide the rocker plate to the right side and tilt up as you come out. This allowed me to get out the rocker assembly with the 3 bolts still in.
6. Follow the pattern illustrated in the service manual to remove the 6 bolts holding the bottom rocker plate.
Hope this makes sense and helps out someone