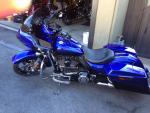
Road Glide Fairing Issue Resolved

Thread Starter
|
Grand HDF Member


Joined: Jun 2008
Posts: 4,012
Likes: 298
From: Central Fl

The dealer is supposed to do the inspection if you want to know and haven't looked for yourself. I had seen pics posted here that showed some major wear on the inside of the outer fairing. Just happened to be installing new speakers at the time and saw for myself the damage. At first the service writer acted as if he had never heard of such a thing. When confronted with info from this forum and the fact their sister store had stated there was a problem and there was also a fix under warranty the ball started to roll. Hope that helps.
Road Master
Joined: Nov 2007
Posts: 1,181
Likes: 7
From: tomball tx
fixed mine myself. 2 part epoxy to fill and a piece of poly-ethylene (sp?). rubber strips on top of brackets. also seemed to "tighten" things up!!! figure if it ever self destructs i'll be ready to convert to street glide...lol
Road Master
Joined: Jan 2008
Posts: 1,048
Likes: 1
From: Canada

Outstanding HDF Member
Joined: Nov 2008
Posts: 2,034
Likes: 128
For those of you who missed out on this earlier. The authorized MOCO fix for this problem is to replace the fairing if the holes have rubbed all the way through, provided the bike is within the 2 year warranty period. If the bracket has only gouged the fairing and not worn completely through, the fix is to remove 1/4" (grind or cut) of metal from the top of the metal bracket and then fill the gouges on the inside of the fairing with a filler like substance. If your bike is in warranty the dealer will do this and bill the MOCO. If your bike is out of warranty you can easily do it yourself if you are handy. The key to all this is to remove the front of the fairing and inspect it before it wears a hole in it. The amazing thing about all this is that this has been going on for 4 or more years and the MOCO has yet to shorten the radio brackets. Talk about being behind the curve.

Road Warrior

Joined: Dec 2006
Posts: 1,352
Likes: 7
From: Keene, CA
My '07 was about halfway through the fairing at 27k miles. Dealer replaced the stereo two months earlier - didn't say a word....
Here's the steps:
1) Go to the local Autozone and buy a package of door edge moulding (25" or longer, 24 is too short), a package of small zip-ties, and a Plastic Bumper Repair Kit (double-syringe epoxy coumpound). Total cost ~$12.
2) Tools needed: T-25 Torx driver, 1/2" wrench, diagonal cutters or fingernail clippers, Allen wrenches, hand-held grinder (I used a 4.5" with a flap disk, some have used a Dremel tool), a thick towel/blanket for covering the front fender, and something to set the fairing on (towel/blanket/carpet/lawn). COVER THE FRONT FENDER BEFORE YOU START!!!!
3) Remove the six Torx screws from the inside edge of the fairing (don't worry - it won't fall off!)
4) Remove the 4 1/2" chrome acorn nuts and washers from the brackets above the engine guard (behind the turn signals). Two of these usually bring the studs with them - that's OK. Pull the turn signals out and move the wiring to the exposed slots.
5) The outer fairing is now being held in place by two hooks behind the headlights, several fingers that interlock with the inner fairing, and whatever of that crappy glue the MoCo uses that has seeped into the joint. USING NO TOOLS, separate the outer fairing from the inner - start at the bottom and lift up and forward. As it separates, it will have to be lifter off the hooks behind the headlights (1/2" or so). As it comes free, it's really NOT - you or your helper must reach in and unplug the headlight wiring harness. Then you can set the outer fairing down and examine the two grooves worn in it.
6) Wipe the grooves clean, mix some bumper repair, and apply it to fill the grooves. Use the tool supplied to smooth the surface. Set aside to dry.
7) Remove the radio by cutting the zip-ties as needed, unplug the antenna and connectot from the back of the radio, and remove the four Allen bolts that hold it in place. The service manual says to take it out through the inner fairing, but my radio has a L-shaped bracket on top that required removing to through the front. Set radio aside.
8) Scribe or mark a line 1/4" down from the top of the radio brackets - see pics in thread https://www.hdforums.com/forum/touri...-pictures.html. Gride to the mark (NOT REAL CRITICAL).
9) Observe the placement of the crappy seal the Moco uses between the outer and inner fairings from the edge of the windshield down the sides to near the forks. Remove it and as much of the glue as you can without scratching the plastic - I used my thumbnail. Replace with the auto door moulding. You will cut off a small piece on each side - save these scraps.
10) I sprayed some black emanel on a Q-tip and used it to paint the raw edges of the radio bracket, then used the scraps of door trim to pad the edge.
11) Replace the radio and zip-ties. Don't forget the antenna (don't ask!)
12) Remove the headlight cover/bezel. The headlights are mounted to a bracket that is then held to the outer fairing by three adjusters. If you pinch the edges of the plastic "nuts" on the adjusters, you can pop the whole assembly out after you unplug one headlight. Doing so gives you a much better way to reinstall the outer fairing, as you can now look through the front to align the hooks.
13) Rehang the outer fairing on the hooks. After it's on the hooks, you can align all the "fingers" between the outer/inner fairings and get the turn signal wiring aligned. When you get it all lined up, replace the Torx screws but do not tighten them until last. Remount the turn signals. When satisfied with fit, tighten them all - don't overtighten the Torx screws, as you will strip the plastic.
14) Plug the headlights back in and "pop" them in place. Replace the cover/bezel.
15) Wipe it down, pop a cold one, admire your work.
Here's the steps:
1) Go to the local Autozone and buy a package of door edge moulding (25" or longer, 24 is too short), a package of small zip-ties, and a Plastic Bumper Repair Kit (double-syringe epoxy coumpound). Total cost ~$12.
2) Tools needed: T-25 Torx driver, 1/2" wrench, diagonal cutters or fingernail clippers, Allen wrenches, hand-held grinder (I used a 4.5" with a flap disk, some have used a Dremel tool), a thick towel/blanket for covering the front fender, and something to set the fairing on (towel/blanket/carpet/lawn). COVER THE FRONT FENDER BEFORE YOU START!!!!
3) Remove the six Torx screws from the inside edge of the fairing (don't worry - it won't fall off!)
4) Remove the 4 1/2" chrome acorn nuts and washers from the brackets above the engine guard (behind the turn signals). Two of these usually bring the studs with them - that's OK. Pull the turn signals out and move the wiring to the exposed slots.
5) The outer fairing is now being held in place by two hooks behind the headlights, several fingers that interlock with the inner fairing, and whatever of that crappy glue the MoCo uses that has seeped into the joint. USING NO TOOLS, separate the outer fairing from the inner - start at the bottom and lift up and forward. As it separates, it will have to be lifter off the hooks behind the headlights (1/2" or so). As it comes free, it's really NOT - you or your helper must reach in and unplug the headlight wiring harness. Then you can set the outer fairing down and examine the two grooves worn in it.
6) Wipe the grooves clean, mix some bumper repair, and apply it to fill the grooves. Use the tool supplied to smooth the surface. Set aside to dry.
7) Remove the radio by cutting the zip-ties as needed, unplug the antenna and connectot from the back of the radio, and remove the four Allen bolts that hold it in place. The service manual says to take it out through the inner fairing, but my radio has a L-shaped bracket on top that required removing to through the front. Set radio aside.
8) Scribe or mark a line 1/4" down from the top of the radio brackets - see pics in thread https://www.hdforums.com/forum/touri...-pictures.html. Gride to the mark (NOT REAL CRITICAL).
9) Observe the placement of the crappy seal the Moco uses between the outer and inner fairings from the edge of the windshield down the sides to near the forks. Remove it and as much of the glue as you can without scratching the plastic - I used my thumbnail. Replace with the auto door moulding. You will cut off a small piece on each side - save these scraps.
10) I sprayed some black emanel on a Q-tip and used it to paint the raw edges of the radio bracket, then used the scraps of door trim to pad the edge.
11) Replace the radio and zip-ties. Don't forget the antenna (don't ask!)
12) Remove the headlight cover/bezel. The headlights are mounted to a bracket that is then held to the outer fairing by three adjusters. If you pinch the edges of the plastic "nuts" on the adjusters, you can pop the whole assembly out after you unplug one headlight. Doing so gives you a much better way to reinstall the outer fairing, as you can now look through the front to align the hooks.
13) Rehang the outer fairing on the hooks. After it's on the hooks, you can align all the "fingers" between the outer/inner fairings and get the turn signal wiring aligned. When you get it all lined up, replace the Torx screws but do not tighten them until last. Remount the turn signals. When satisfied with fit, tighten them all - don't overtighten the Torx screws, as you will strip the plastic.
14) Plug the headlights back in and "pop" them in place. Replace the cover/bezel.
15) Wipe it down, pop a cold one, admire your work.
Last edited by 2011 Road Glide Ultra; May 24, 2010 at 01:36 PM.

Advanced
Joined: Jul 2007
Posts: 84
Likes: 0
From: Beaver Dam, WI
Called my dealer this morning. They looked all the way back to 2006 service bullitens and warranty's. He said he did not see anything about this problem. Is here any number I can tell them that the problem is related too.
HD Forum Stories
The Best of Harley-Davidson for Lifelong Riders

7 Surprising Harley-Davidson Products that Are Not Motorcycles
Verdad Gallardo
8 Best Harley-Davidson Motorcycles Ever
Pouria Savadkouei
10 Worst Harley-Davidson Motorcycles Ever
Pouria Savadkouei
Killer Custom's Jail Break Is The Breakout That Refused to Blend In
Verdad Gallardo
Crazy Bunderbike Build Looks Amazing, But Is It Impossible to Ride?
Verdad Gallardo
Harley-Davidson Reveals Super Cool Cafe Racer Concept
Verdad Gallardo
Engraved Rebellion: Inside Bundnerbike's Glam Rock II
Verdad Gallardo
10 Motorcycles You Should Never Buy
Joe Kucinski