ok guys, how do I fix this trim ring gap..

Thread Starter
|
Outstanding HDF Member
Joined: Oct 2009
Posts: 2,488
Likes: 30
From: Maryland near DC
Don't really get this. I have installed the frenched and visor trim ring on several bikes on 3 different style headlights and have never had the issue with any gap.
-Loosen stock trim ring as much as possible without completely removing it
-Take the screw and nut out of the new trim ring and slide it over the stock ring until it "snaps" into place
-Put the screw and nut back in the new trim ring and tighten it up until you just have enough room to fit a screwdriver between the gap
-Now tighten the original trim ring screw
-Finally tighten the new trim ring.
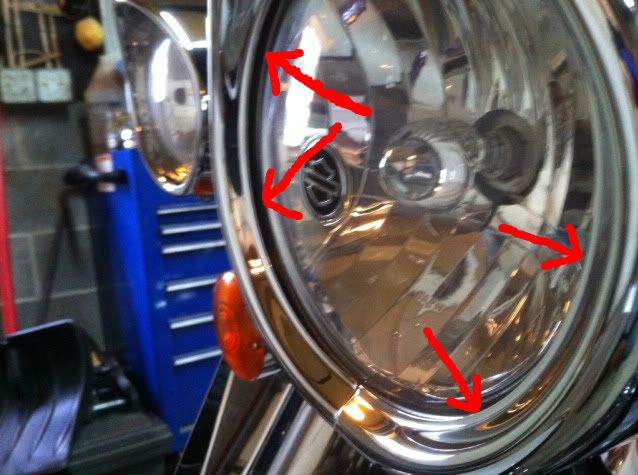
No gap
Not as easy to see but no gap here either

Gapless
Barely see but there is no gap on this one either.

-Loosen stock trim ring as much as possible without completely removing it
-Take the screw and nut out of the new trim ring and slide it over the stock ring until it "snaps" into place
-Put the screw and nut back in the new trim ring and tighten it up until you just have enough room to fit a screwdriver between the gap
-Now tighten the original trim ring screw
-Finally tighten the new trim ring.
No gap
Not as easy to see but no gap here either
Gapless
Barely see but there is no gap on this one either.

Advanced
Joined: Mar 2006
Posts: 82
Likes: 0
From: Kansas
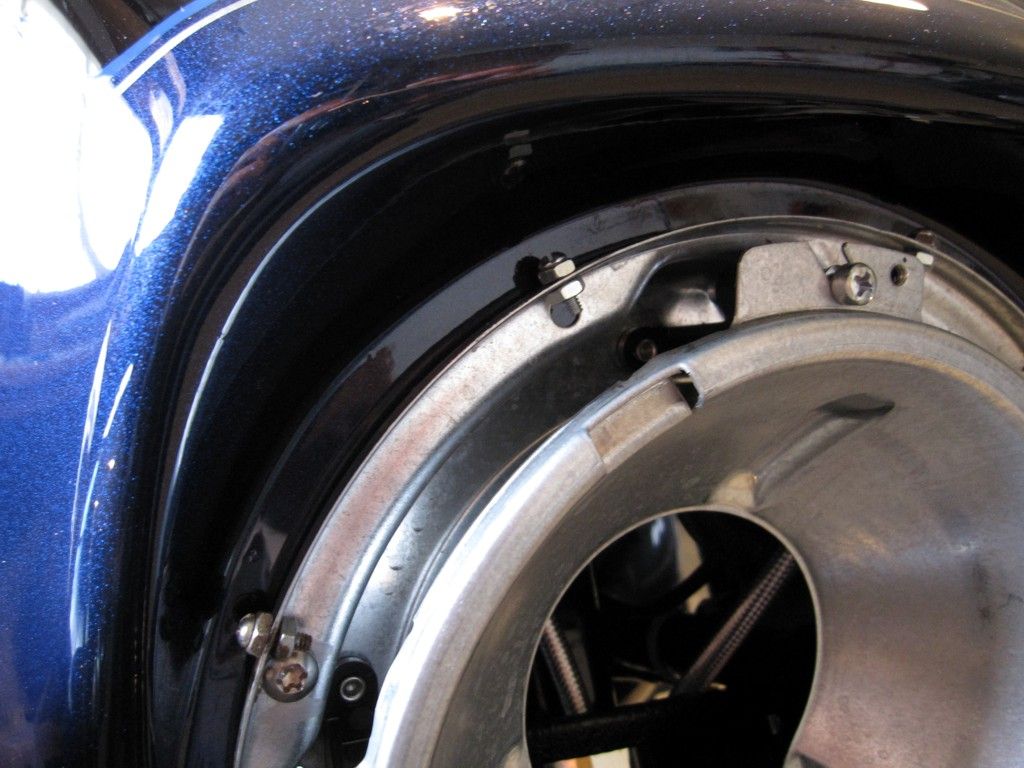
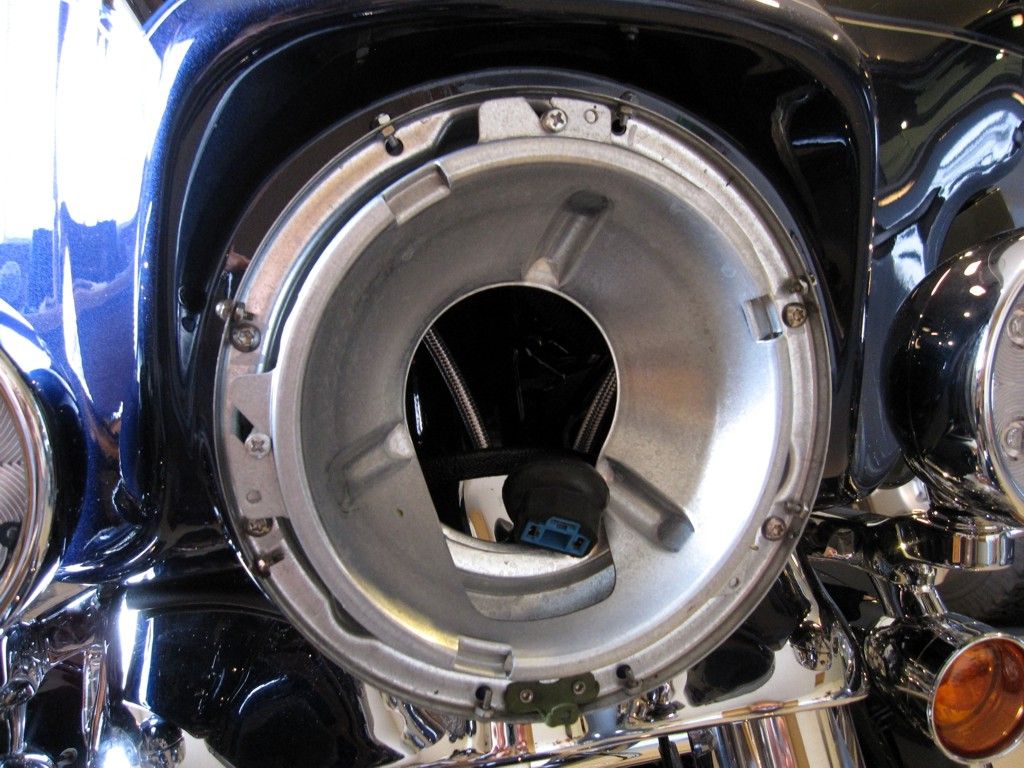
Here's my trick to modify the headlight bezel if you're using a "french" or "visor" trim ring. Harley wants you to install the OEM trim ring underneath the new trim ring. I find this to be a crappy way to do it. However, the new trim ring is too loose without it.
So, what I did was install a series of eight small screws around the headlight bezel. The screws are 8/32" and placed evenly around the bezel while ensuring the headlight adjustment screws or the bezel-to-fairing mount screws are not obstructed. With a small nut on each side, these screws act as posts that fit inside the back-edge lip of the new trim ring, providing a secure and snug fit while eliminating the inner / OEM trim ring completely. And of course, this also gets rid of the trim ring gap as well.
So, what I did was install a series of eight small screws around the headlight bezel. The screws are 8/32" and placed evenly around the bezel while ensuring the headlight adjustment screws or the bezel-to-fairing mount screws are not obstructed. With a small nut on each side, these screws act as posts that fit inside the back-edge lip of the new trim ring, providing a secure and snug fit while eliminating the inner / OEM trim ring completely. And of course, this also gets rid of the trim ring gap as well.
Road Captain
Joined: May 2008
Posts: 616
Likes: 70
Here's my trick to modify the headlight bezel if you're using a "french" or "visor" trim ring. Harley wants you to install the OEM trim ring underneath the new trim ring. I find this to be a crappy way to do it. However, the new trim ring is too loose without it.
So, what I did was install a series of eight small screws around the headlight bezel. The screws are 8/32" and placed evenly around the bezel while ensuring the headlight adjustment screws or the bezel-to-fairing mount screws are not obstructed. With a small nut on each side, these screws act as posts that fit inside the back-edge lip of the new trim ring, providing a secure and snug fit while eliminating the inner / OEM trim ring completely. And of course, this also gets rid of the trim ring gap as well.
So, what I did was install a series of eight small screws around the headlight bezel. The screws are 8/32" and placed evenly around the bezel while ensuring the headlight adjustment screws or the bezel-to-fairing mount screws are not obstructed. With a small nut on each side, these screws act as posts that fit inside the back-edge lip of the new trim ring, providing a secure and snug fit while eliminating the inner / OEM trim ring completely. And of course, this also gets rid of the trim ring gap as well.
- remove the stock ring.
- take up the extra space by wrapping door or window insulation (the kind with the sticky side, you get at any hardware store) all around the lamp.
- try the new ring. if it's loose, add more, too tight take some out.
your done.
Thread Starter
|
Outstanding HDF Member
Joined: Oct 2009
Posts: 2,488
Likes: 30
From: Maryland near DC
well, I took the trim ring back to the store and got another [of the same ] and it fits some better....still a gap but not neer as big....the [not so] funny thing was the parts guy cleaned the one I took back put it back in the package and hung it back up on the wall to sell again...for the next poor sucker to get pissed at.....and to top it off on the way back to the dealer I picked up a nail and had to get the tire fixed while i was there...hell of a day I tell you...i guess if you are going to get a flat it should be at the repair shop...
Outstanding HDF Member

Joined: Sep 2005
Posts: 2,600
Likes: 7
From: Minnesota
I have installed them on 2 bikes and found with the stock trim ring loosened slightly the crack goes away by retightening it after some miles. It seems that it sort of settles in by the vibration, stretching and forming to fit.
There is a discussion to the problem here:
Say no to Headlight Trim Ring Crack
There is a discussion to the problem here:
Say no to Headlight Trim Ring Crack

Seasoned HDF Member


Joined: Apr 2012
Posts: 9,980
Likes: 5,218
From: Michigan
I have the old style rings on all of our bikes with no large gap at the bottom.
As on guy previously suggested, loosen the screw that holds the OEM ring until it is play in it.
Then install the new ring over the OEM ring making sure that it is in behind the OEM ring.
Once this is done, tighten the screw in the OEM ring and then install and tighten the screw and nut in the new ring until the gap fully closes.
Perhaps you had an over sized OEM ring or an undersized new ring?
HD Forum Stories
The Best of Harley-Davidson for Lifelong Riders

7 Surprising Harley-Davidson Products that Are Not Motorcycles
Verdad Gallardo
8 Best Harley-Davidson Motorcycles Ever
Pouria Savadkouei
10 Worst Harley-Davidson Motorcycles Ever
Pouria Savadkouei
Killer Custom's Jail Break Is The Breakout That Refused to Blend In
Verdad Gallardo
Crazy Bunderbike Build Looks Amazing, But Is It Impossible to Ride?
Verdad Gallardo
Harley-Davidson Reveals Super Cool Cafe Racer Concept
Verdad Gallardo
Engraved Rebellion: Inside Bundnerbike's Glam Rock II
Verdad Gallardo
10 Motorcycles You Should Never Buy
Joe Kucinski
10 Things Harley-Davidson Needs to Fix in 2026
Verdad Gallardo
Grand HDF Member


Joined: Oct 2010
Posts: 4,618
Likes: 290
From: Johnstown, PA
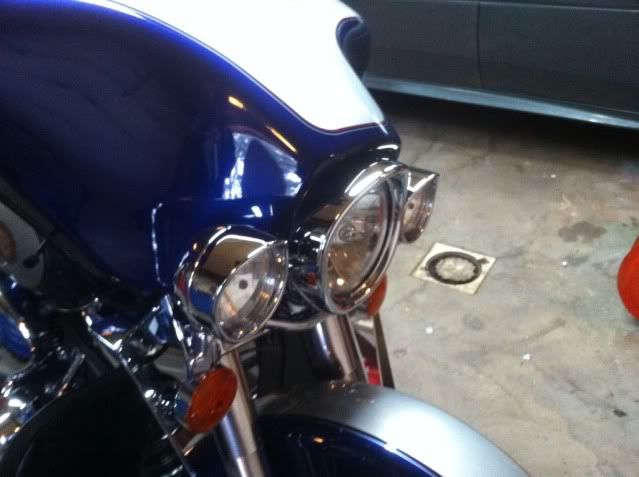
As described in an above post, make sure you loosen the stock trim ring and seat the new one under it. As you can see in my pic, the bottom has no gap, but I gave a gap around the light. It bothered me at first, but I just learned to live with it. I really don't even notice it anymore.