Harley Davidson Touring: How to Safely Jump Start Your Battery
We've all done it: shut off the bike but left the key on. You try to start your bike later and get nothing. Back in the old days, you could kick or push start it back to life, but now with fuel injection, you need a good battery to get it going. Have no fear, you can still get back on the road if you follow these simple steps.
This article applies to the Harley Touring Models (2000-2016).
This article will show you the proper way to jump start a Harley Touring bike from a car or truck.
You can jump start your bike from a car or truck if you do it right. An automotive charging system can put well over 100 amps of current when the engine is running, which is enough to fry your electronics if that current surges into your electrical system. Fortunately, most car and truck batteries are strong enough to start a motorcycle with the engine off, which is how you should do it.

Materials Needed
- Jumper cable set
- Fully charged battery
- Phillips screwdriver to remove seat
- 9/16" socket and ratchet (for 2009 and up battery cover)
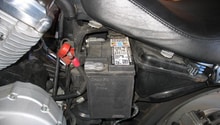
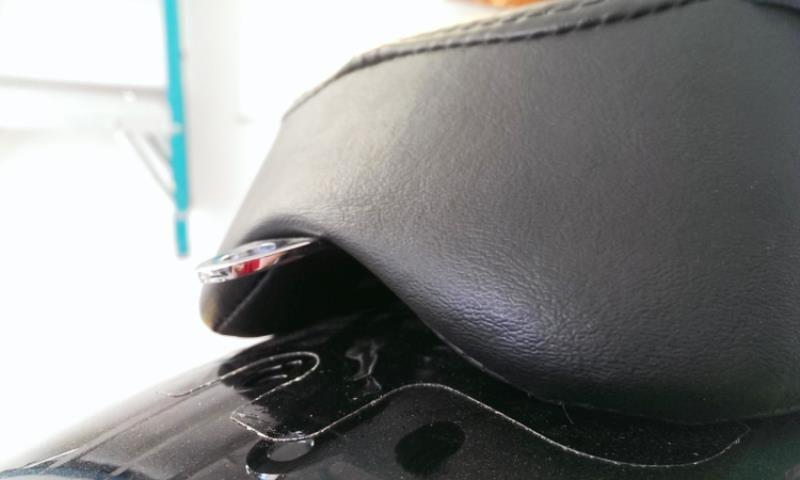
Step 1 – Remove the seat
The seat is typically secured by one thumb screw behind the passenger portion into the fender. Remove that and then slide the seat back to disengage from the gas tank. Some models have a strap that must be removed first. It is usually held on by a Phillips screw at one end.
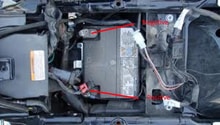
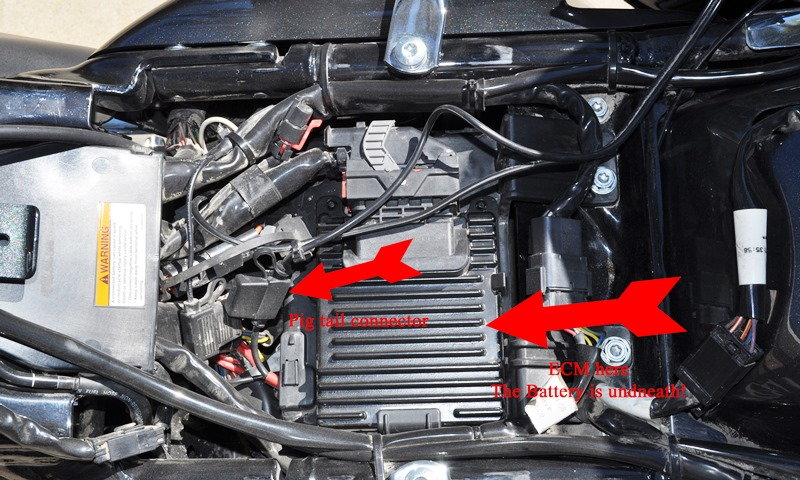
Step 2 – Remove ECU and battery cover (2009-up)
Remove the ECU from the cover and move it to the side. Then remove two bolts that hold the cover to the fender and tilt it up to remove from front tab.
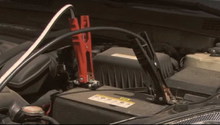
Step 3 – Hook up jumper cables
Warning
The vehicle with the good battery should not be running while jump starting the bike. Hook up the cables correctly and in the correct order. Not following these guideline may result in damage to your bike's electrical system.
Connect the jumper cables in the following order:
- Connect red jumper clamp to the dead battery's positive connection.
- Connect the other red jumper to the good battery's positive connection.
- Connect the black jumper cable to the dead battery's negative connection.
- Connect the other black jumper to a ground connection on the good vehicle.

Warning
DO NOT mix up the positive and negative terminals! Severe damage will occur to the bike and or the vehicle.
Step 4 – Let the battery charge and start bike
Let the bike sit and charge while hooked to the good battery for at least 10 minutes. Then, start the bike. Once the bike starts, leave it running and try to keep the revs above idle, so the charging system can work faster.
Disconnect the jumper cables in the reverse order from above:
- Black jumper clamp from ground
- Black jumper from bike's negative
- Red jumper from good battery's positive
- Red jumper from bike's positive
Step 5 – Reinstall everything
Replace the ECM cover and tighten any screws. Reinstall the seat and strap, if removed.
Ride the bike for at least 30 minutes, being careful not to let it stall and keeping the revs above idle so the battery can charge.
Pro Tip
Fully charge your battery with a battery charger as soon as you can, or at the very least check it. The bike alternator may not be able to supply enough to top it off fully.
Related Discussions
- Safe Way to Jump Start Bike? - HDForums.com
- Jump Starting - HDForums.com
- Jump Start Battery Issues - HDForums.com