Harley Davidson Touring: How to Replace Twin Cam Drive Belt
Harley Davidson moved to a belt drive, vs a chain, years ago because the belt last many thousands of miles more, never needs lubrication, and seldom needs adjustment. However, the endless nature of the drive belt means that when the time does come to change it, it is a much more involved job.
This article applies to the Harley Davidson Touring (1999-2016).
If you need to change out your belt, get prepared for a very difficult task. Chances are this will require at least six hours if you haven't done it before, because the primary drive has to be taken completely off in order to access the output sprocket. The typical professional will do it in four hours, with about $400 in labor charges. If you are going to take this job on, you should really invest in the repair manual and study the job first. The steps outlined here will help guide you through the process of completing one of the most challenging DIY jobs you'll ever face with these bikes.

Materials Needed
- Primary sprocket locking block
- Torx bits and driver
- Allen wrenches
- Replacement inner primary bolts
- Circlip pliers
- Sockets and ratchets
- Wrenches
- Breaker bar
- Torque wrench
- Replacement belt
- 1 quart primary chain oil
This job is made easier using a lift to hold the bike, if you have access to one, but it is not necessary.
Step 1 – Drain primary and remove cover
Locate the primary drain bolt under the primary chain case and drain it completely into a catch pan. If your model has a primary cam inspection window (derby cover), remove the four Torx bolts holding it in place and set it aside. There are 12 Allen head bolts of varying lengths that hold the primary cover in place. Remove each bolt, making note of its location so they can be replaced properly.

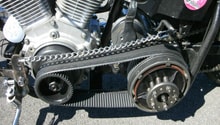
Step 2 – Remove the primary drive
This is the main area of pain. A lot of stuff needs to be removed here and it's not real easy. You will basically tear out the guts of the primary case.
- Remove the primary chain tensioner.
- Lock sprockets with primary drive locking tool between them or wedge block of wood between chain and sprocket.
- Remove clutch adjuster mechanism, and circlip to access clutch basket nut.
- You may need a breaker bar, or even an impact gun, for these next nuts.
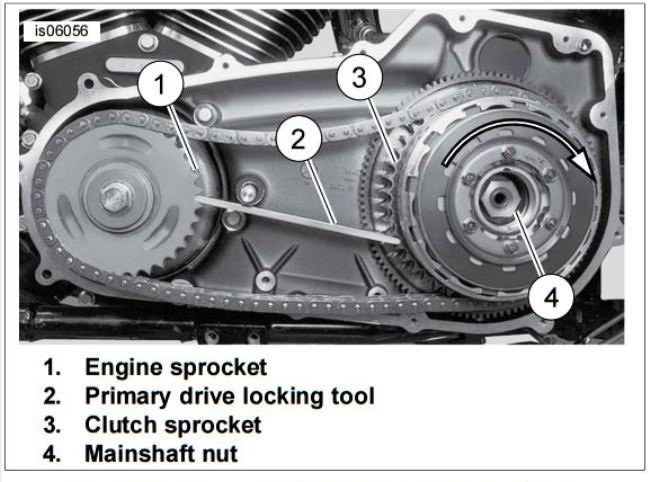
Figure 2. Removing clutch hub mainshaft nut diagram. 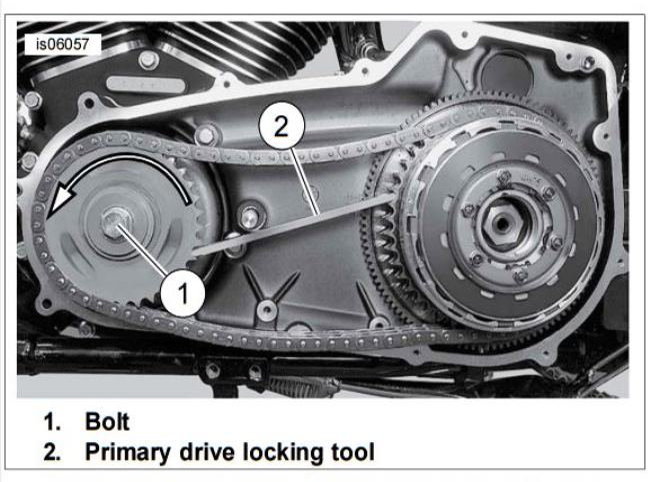
Figure 3. Removing compensating sprocket bolt diagram.
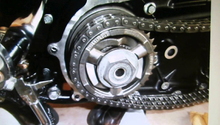
- Clutch basket nut is reverse threaded, so turn it clockwise to loosen and remove.
- Remove compensator retaining nut on crankshaft and then slide off compensator.
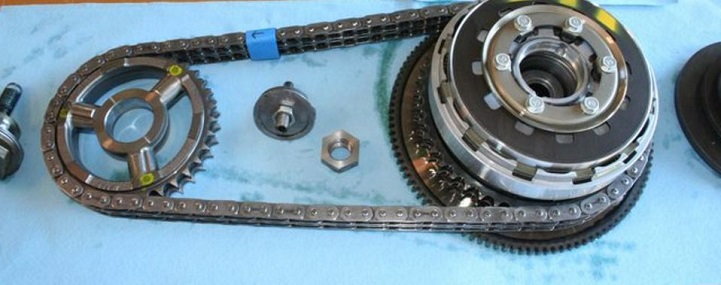
- Pull out the guts of the primary as one unit: the chain, primary sprocket, clutch basket and tensioner. Set it aside.
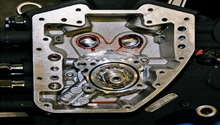
Step 3 – Remove inner primary cover
- Remove the starter bolts from behind the jack shaft above the clutch pushrod. A long Allen wrench works well here.
- Use a soft mallet to knock in the jack shaft, but it doesn't have to be completely removed.
- Remove the five bolts that mount the inner primary cover. These bolts will have to be replaced.
- Pull off the inner primary cover and set aside.
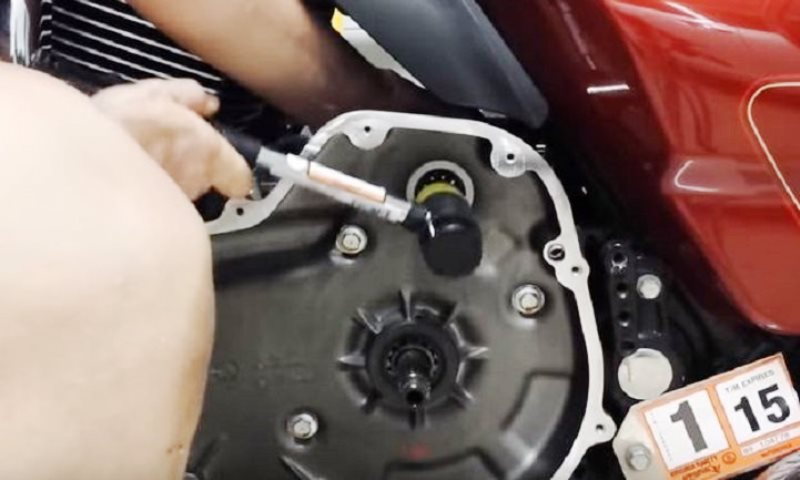
Figure 5. Tap the jack shaft in just flush with the cover so you can pull off the cover. 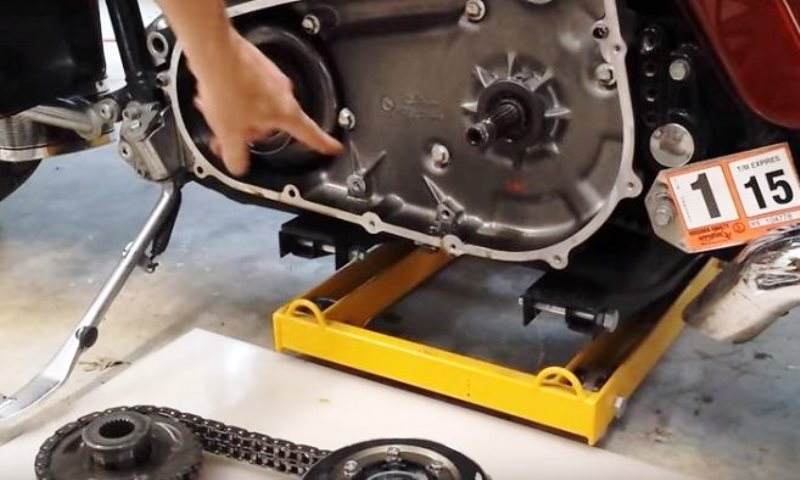
Figure 6. Remove these five screws to take off the inner primary cover. 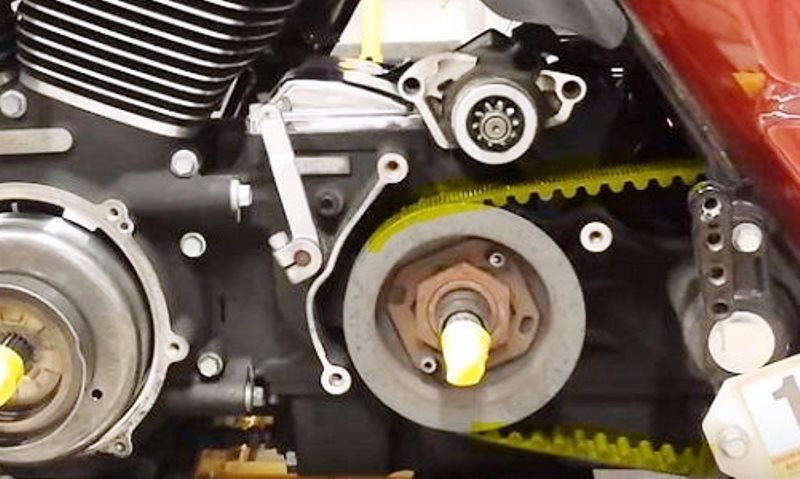
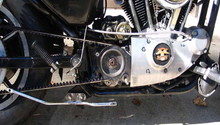
Figure 7. With the inner primary cover off, you now have access to the belt, but you still need to remove the rear wheel and swing arm.
Step 4 – Remove rear end components and replace belt
You will need to remove the rear wheel, the rear brake, the shocks and the swing arm in order to get this belt off and replaced.
- Remove the bolts that hold the upper and lower chain guards and move them out of the way.
- Remove the shock bolt that holds the swing arm in place and then drop it out of the way.
- Remove the rear wheel and brake.
- There may be more parts that need to be removed to allow room for the belt through the frame and around the swing arm.
- Take a good look at the output sprocket and make note of where the alignment is adjusted before removing it.
- Use an Allen wrench to loosen the output sprocket so the belt can now slide off.
- Remove and replace the belt.
- Replace the rear output sprocket to its original setting, making sure the belt has a straight path between the sprockets.
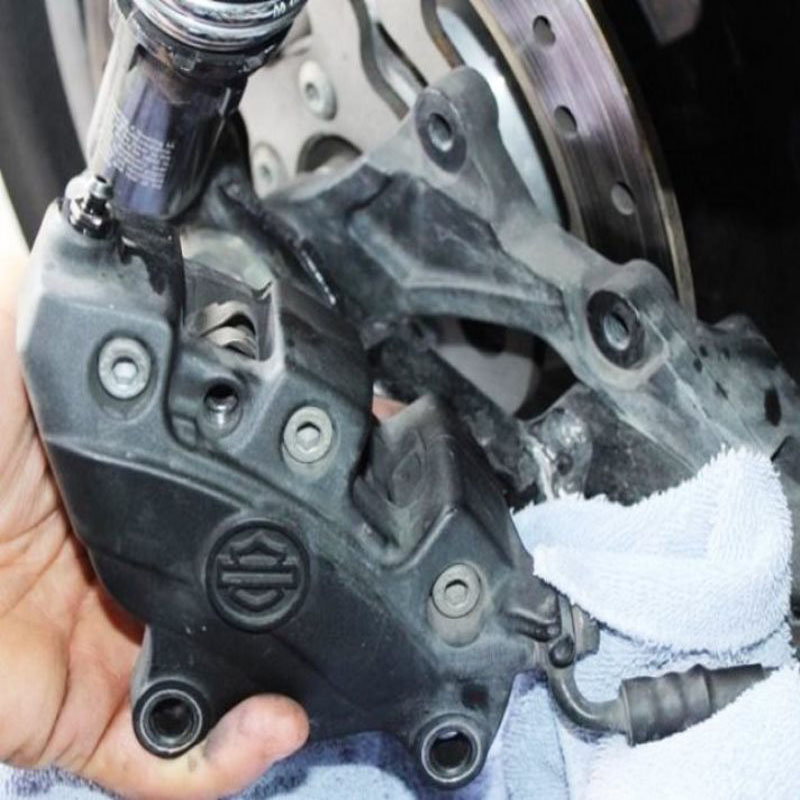
Figure 8. Remove the rear brake and shock along with the wheel and swing arm to get to the drive belt. 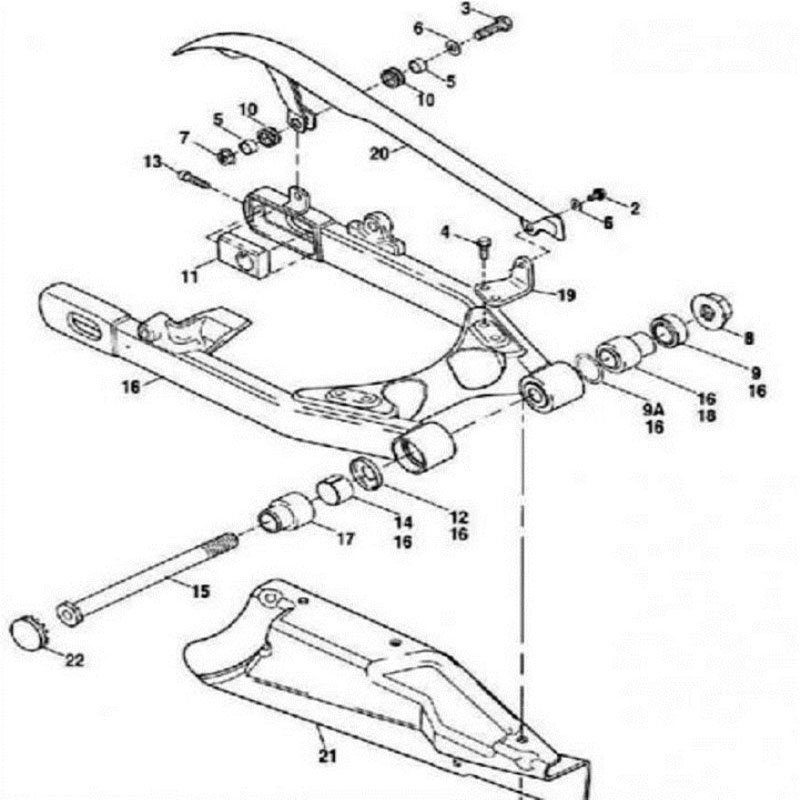
Figure 9. Rear swing arm assembly.
Step 5 – Time to put her back together
- Replace the rear chain guards, swing arm, brake and rear wheel.
- Replace the inner primary cover and be sure to use new bolts.
- Position the tensioner first and replace the washer as well as bolt.
- Make sure that the primary chain is adjusted to the proper tension.
- Reassemble the clutch basket plates, then replace and torque the reverse threaded bolt as well as the retaining ring (110-115 foot-pounds).
- Replace and torque the front primary sprocket 1 1/2" bolt to 155-160 foot-pounds.
- Once the innards are all reassembled, replace the primary cover.
- Before you replace the derby cover, fill up the primary with 1 quart of your preferred chain oil.
- Replace the inspection window and tighten the Torx bolts.
- Take her for a test ride, as if you need an excuse.
Featured Videos: Drive Belt Replacement
-
Ultra Classic Primary Replacement
-
Road King Drive Belt Replacement
Related Discussions
- How to Replace Rear Drive Belt - HDForums.com
- Changing a Drive Belt - HDForums.com
- Broken Drive Belt - HDForums.com
- Drive Belt Tension - HDForums.com
- Drive Belt Life - HDForums.com