


Bike is dead?
Ultimate HDF Member
Joined: May 2008
Posts: 6,642
Likes: 48
From: Ogden, UT
Why you used crimp connectors is beyond me, they are the worst thing you could use in your bars. Looking at the pics you posted you did not stagger them, which with crimp connectors is a big problem, bet it was fun getting everything back in place.
I would re-terminate everything and do it right with either a kit or solder, crimps are not 100% reliable, especially when pulling them in a conduit such as bars.
I would re-terminate everything and do it right with either a kit or solder, crimps are not 100% reliable, especially when pulling them in a conduit such as bars.
Club Member

Joined: Dec 2007
Posts: 4,192
Likes: 168
From: Knoxville, Tn
I use solder sleeves that I get at NAPA. You put the wires in both ends and apply heat. A solder sleeve inside melts and the heat shrink tightens it all up and protects it. We called them environmental splices in the military but NAPA just calls them wire splices.....NAPA know how, NAPA know how...
Correction on NAPA nomenclature...They are made by Belden and are called "solder & seal butt connector."
For 24-22 gage wire the part # is 784400.
Other reasons why I like them are that they are water proof and don't enlarge the size of the wire very much. I still cover them with an extra piece of heat shrink.
Last edited by dyna rider; Aug 16, 2011 at 06:24 PM. Reason: Add Info
Club Member

Joined: Feb 2008
Posts: 11,483
Likes: 39
From: Passaic County, NJ
After draining and refilling the Transmission and Primary fluid, I finally took my Bike out for a spin... but it's acting funny. I shifted to 3rd and the "6" gear light came on for about a second. After I turned it off to go inside the store, I couldn't turn it back on. I turned on a blinker then tried again to turn on and finally it did. I feel terrible for my bike!!! I guess I'm gonna have to check it out with a mechanic. Anyway, here are some pics in order of the process...
I would take 8541hog's suggestion of re-terminating everything and double check your wiring. I would also suggest getting rid of the crimps. Think about how your bike vibrates and such. They will eventually wriggle apart and short out inside the bars.
Solder the wires and then heatshrink the connections. Much more tighter/cleaner than crimps. Easier to feed through the bars based on the smaller thickness you'll have, if you solder them wires correctly.
http://www.dansmc.com/soldering.htm
Ultimate HDF Member
Joined: May 2008
Posts: 6,642
Likes: 48
From: Ogden, UT
Vic
I think the problem is a loose connection in one or more of those crimps, if it was a crossed wire with the signals he could duplicate easily instead of working one time and not another.
I think the problem is a loose connection in one or more of those crimps, if it was a crossed wire with the signals he could duplicate easily instead of working one time and not another.
Outstanding HDF Member
Joined: Nov 2009
Posts: 2,960
Likes: 26
From: Sonoma County, CA
Definitely need to tidy up the connections. Crimp connectors (like others have said) are the worst type of connector you could have chosen. Get a soldering gun, view some "How to" videos...and clean up your mess. The current connectors are already giving you problems, just imagine how they will be after awhile of riding. Just be patient, you will feel much better about yourself (and your bike) when you've done the job right.
ps: When looking at your process step pictures, I find that if I put the cooler full of adult beverages more towards the "end" of the process, things tend to go smoother...
ps: When looking at your process step pictures, I find that if I put the cooler full of adult beverages more towards the "end" of the process, things tend to go smoother...
Road Warrior

Joined: Apr 2008
Posts: 1,998
Likes: 14
From: Central Ohio
You definitely got the beer drinking out of order.
You should have saved that for the end of the project.
It looks like you cut the OEM wiring bundles clean through, crimped on the same length of wire for each lead and
then crimped on the severed ends of the OEM wires to reuse the OEM crimped on pins.
I'm guessing that you've got another big fat bundle of crimp connectors wedged up in the bars some where.
I'd bet $ that 1 or more of those 40 butt splice connectors is the culprit... regardless of what might or might not be working.
You need to do yourself and the next owner of that bike a big favor by redoing that beer induced hack job.
Get the proper tools & supplies and practice some basic solder skills.
You can get new terminal pins from the dealer, pn# 72169-07 (I�m pretty sure that�s the right part number?).
Then all your staggered splice connections can be located preferably in the long straight section of the bars, but this
might have to be done between the buttons & the 90* bend at the top of the bars� which might be a better location for those bars.
You could simplify the job by relocating the signals and then�
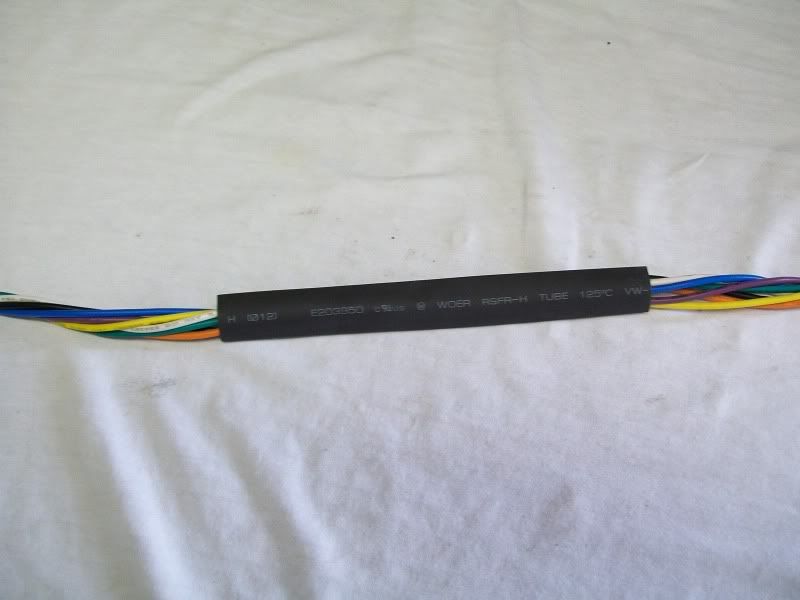
Simply strip, twist & solder on about 2-3� of wire to the staggered splice joints�

Shrink wrap the individual solder connections�

Shrink wrap the bundle of connections�
Wrap all the wires with some F6 Tec Flex� http://www.techflex.com/prod_F6N.asp
Route each mini-harness through the bars and cut the harness to the desired length for each plug.
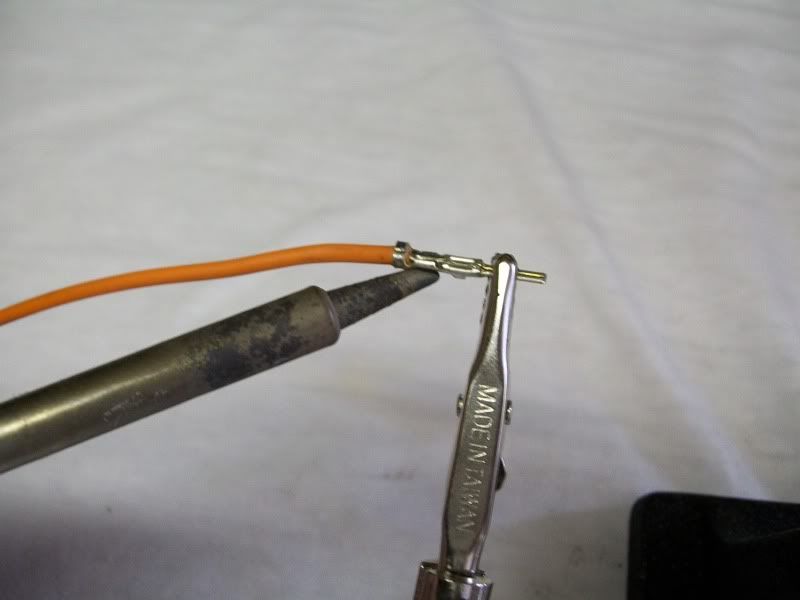
Then (working one wire at a time) strip each end & insert into a terminal pin...

Use the wire cutters to carefully �fold over� each of the four tabs of each pin onto the wire...

Apply a small amount of solder to connect the wire to the pin and give a �test pull� when the pin cools...
Terminate all the wires and re-assemble the connectors.
You should have saved that for the end of the project.
It looks like you cut the OEM wiring bundles clean through, crimped on the same length of wire for each lead and
then crimped on the severed ends of the OEM wires to reuse the OEM crimped on pins.
I'm guessing that you've got another big fat bundle of crimp connectors wedged up in the bars some where.
I'd bet $ that 1 or more of those 40 butt splice connectors is the culprit... regardless of what might or might not be working.
You need to do yourself and the next owner of that bike a big favor by redoing that beer induced hack job.
Get the proper tools & supplies and practice some basic solder skills.
You can get new terminal pins from the dealer, pn# 72169-07 (I�m pretty sure that�s the right part number?).
Then all your staggered splice connections can be located preferably in the long straight section of the bars, but this
might have to be done between the buttons & the 90* bend at the top of the bars� which might be a better location for those bars.
You could simplify the job by relocating the signals and then�
Simply strip, twist & solder on about 2-3� of wire to the staggered splice joints�
Shrink wrap the individual solder connections�
Shrink wrap the bundle of connections�
Wrap all the wires with some F6 Tec Flex� http://www.techflex.com/prod_F6N.asp
Route each mini-harness through the bars and cut the harness to the desired length for each plug.
Then (working one wire at a time) strip each end & insert into a terminal pin...
Use the wire cutters to carefully �fold over� each of the four tabs of each pin onto the wire...
Apply a small amount of solder to connect the wire to the pin and give a �test pull� when the pin cools...
Terminate all the wires and re-assemble the connectors.
Last edited by 08fxdf43202; Aug 16, 2011 at 12:06 PM.
Club Member
Joined: Feb 2008
Posts: 11,483
Likes: 39
From: Passaic County, NJ
Something has been on my mind about this, today.
The bars you installed are, what, 14"?
I can tell you from experience the OEM wiring harness is long enough to handle up to 16" bars. I know that because my first 16" ape install I did not alter my harness one bit. Yes, the harness was snug but it still worked.
If I'm wrong on the bar height you installed then my apologies.
My point is, if they are 14" bars, why extend the harness?
08Fxd...awesome write-up on soldering.
Last edited by SC-Longhair; Aug 16, 2011 at 07:00 PM.
Road Warrior
Joined: Apr 2008
Posts: 1,998
Likes: 14
From: Central Ohio
Thanks SC, I hope it's an encouragement to quality craftsmanship.
Also, I wanted to mention something about that
http://www.techflex.com/prod_F6N.asp
stuff...

If you hold the bundled mini-harness with both hands, spread apart just a bit, then
twist in opposite directions it'll tighten up like Chinese handcuffs.

Absolutely worry free.
Also, I wanted to mention something about that
http://www.techflex.com/prod_F6N.asp
stuff...
If you hold the bundled mini-harness with both hands, spread apart just a bit, then
twist in opposite directions it'll tighten up like Chinese handcuffs.
Absolutely worry free.
HD Forum Stories
The Best of Harley-Davidson for Lifelong Riders

7 Surprising Harley-Davidson Products that Are Not Motorcycles
Verdad Gallardo
8 Best Harley-Davidson Motorcycles Ever
Pouria Savadkouei
10 Worst Harley-Davidson Motorcycles Ever
Pouria Savadkouei
Killer Custom's Jail Break Is The Breakout That Refused to Blend In
Verdad Gallardo
Crazy Bunderbike Build Looks Amazing, But Is It Impossible to Ride?
Verdad Gallardo
Harley-Davidson Reveals Super Cool Cafe Racer Concept
Verdad Gallardo
Engraved Rebellion: Inside Bundnerbike's Glam Rock II
Verdad Gallardo
10 Motorcycles You Should Never Buy
Joe Kucinski
10 Things Harley-Davidson Needs to Fix in 2026
Verdad GallardoOutstanding HDF Member
Joined: Nov 2009
Posts: 2,960
Likes: 26
From: Sonoma County, CA
Something has been on my mind about this, today.
The bars you installed are, what, 14"?
I can tell you from experience the OEM wiring harness is long enough to handle up to 16" bars. I know that because my first 16" ape install I did not alter my harness one bit. Yes, the harness was snug but it still worked.
If I'm wrong on the bar height you installed then my apologies.
My point is, if they are 14" bars, why extend the harness?
08Fxd...awesome write-up on soldering.
The bars you installed are, what, 14"?
I can tell you from experience the OEM wiring harness is long enough to handle up to 16" bars. I know that because my first 16" ape install I did not alter my harness one bit. Yes, the harness was snug but it still worked.
If I'm wrong on the bar height you installed then my apologies.
My point is, if they are 14" bars, why extend the harness?
08Fxd...awesome write-up on soldering.
08FXD.. Great write-up man!