When you click on links to various merchants on this site and make a purchase, this can result in this site earning a commission. Affiliate programs and affiliations include, but are not limited to, the eBay Partner Network.
I'd cover the entire front with painters tape, then draw the slots on the tape and cut with a razor blade. From that I'd use a Dremel and freehand the cuts. You can also just draw the slots and cut to the line.
I did a similar project to a guitar that I wanted to modify.
Here is where it was all taped up and I had drawn my line. I used a drill bit to make a starting hole and used a small router to cut the sound hole I wanted to make.
I used a small Bosch router but with the high speed rotation it was easy to free hand the cut.
After the router I sanded the edges to make sure they were perfectly straight so I could glue on the binding later. This is the finished project. I cut two additional cat eye sound holes as well as an extra pickup as I want the guitar to be a three pickup model.
I'm not trying to derail the thread, just illustrating how I'd do it.
That is good work!! I bet you sweated a few before you started drilling in to there!!
That is good work!! I bet you sweated a few before you started drilling in to there!!
Robert
You know it! I finally just decided if I muck it up, I'll start over. Then I drew in a breath and started drilling and cutting. I'm cutting the bone nut for it now and soon will wire it up and let 'er rip.
I finally just decided if I muck it up, I'll start over. Then I drew in a breath and started drilling and cutting.
I guess that's what I gotta do....I haven't got the nerve up yet to make that first drill hole or cut!!! LOL
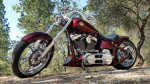
Todays update.....I got the spacers back, they fit great and I installed the front wheel/tire and moved on to the Progressive front lowering kit/springs, but......turns out, to install the springs (on a Rocker), you need to remove the forks!!! You can't just drop them in....so I had to pull it all apart again ....anyway, that's as far as I got today. I'm hoping that's the last of the hold ups, and tomorrow I can finish up what I thought was gonna be a much quicker job....also I found a good local painter that I'll be using, and ordered the paint for the new front fender and chin spoiler, it's actually a tri-coat, so it's really three paints, a base, top and clear coat...$310 for the 3 pints!!! OUCH!!
Last edited by Rocker B; Jun 23, 2016 at 11:45 PM.
Lol, at least you get some practice pulling the front end apart. Makes you faster every time
Hahahaha... I'm getting good at it as well, took it apart last month to put my new signals on, and this month it's apart waiting for a new lower triple tree/steering tube...
Hahahaha... I'm getting good at it as well, took it apart last month to put my new signals on, and this month it's apart waiting for a new lower triple tree/steering tube...
You guys should call for a contest...did you take the time
I think if you use a sharp drill bit and don't push too hard you won't have to worry about cracks. I would drill all of the starter holes for each slot first and then use a Dremel to remove the material for the slots.
I guess that's what I gotta do....I haven't got the nerve up yet to make that first drill hole or cut!!! LOL
Originally Posted by Sarah93003
I think if you use a sharp drill bit and don't push too hard you won't have to worry about cracks. I would drill all of the starter holes for each slot first and then use a Dremel to remove the material for the slots.
Rocker, maybe you should think about sending your chin spoiler to Sarah. Obviously she not only has the knowledge, experience and tools but also the guts to do it
OK... so after trying a few of the suggestions, I came up with a technique that works well to cut the spoiler vents. I experimented on the first one, using a drill, cutting disk, Dremel, and a small file, I ended up finding that the easiest way to get the lines straight is with sand paper......so, on the others I just drilled holes at the ends and used a mini hack saw blade to crudely cut out the vents, then I used a flat, paint stir stick wrapped in sand paper and sanded the edges smooth and straight. Lastly I used a pencil wrapped in sand paper to clean up the rounded ends and get the lengths exact.....It is a little time consuming, but I'm happy with the results so far.... Only one more to go!!!
Last edited by Rocker B; Jun 25, 2016 at 03:10 AM.
7 Surprising Harley-Davidson Products that Are Not Motorcycles
Slideshow: The bar-and-shield logo shows up on far more than motorcycles, some of the company's most unexpected products have nothing to do with riding.
Slideshow: From the troubled AMF years to modern misfires, these bikes earned reputations for reliability issues, questionable engineering, or disappointing performance.
Crazy Bunderbike Build Looks Amazing, But Is It Impossible to Ride?
Slideshow: The Swiss custom shop has taken a Harley Softail and stretched it into something so long and low that it looks closer to a rolling sculpture than a conventional motorcycle.
Engraved Rebellion: Inside Bundnerbike's Glam Rock II
Slideshow: A standard cruiser becomes an intricate metal canvas in the hands of a Swiss custom house known for pushing Harley-Davidson platforms far beyond their factory brief.
Slideshow: Harley-Davidson's challenges aren't abstract; they show up in dropping shipments, shrinking dealer traffic, and strategic decisions that aren't yet translating into growth.











 You can't just drop them in....so I had to pull it all apart again
  ....anyway, that's as far as I got today. I'm hoping that's the last of the hold ups, and tomorrow I can finish up what I thought was gonna be a much quicker job....also I found a good local painter that I'll be using, and ordered the paint for the new front fender and chin spoiler, it's actually a tri-coat, so it's really three paints, a base, top and clear coat...$310 for the 3 pints!!! OUCH!!