


Ape Hanger install difficulty?
Grand HDF Member


Joined: May 2006
Posts: 3,636
Likes: 1,208
From: Ohio
Basic order I followed:
- put on fender cover
- disconnected battery
- removed tank
- removed pipes
- removed air cleaner
- removed bars
- removed risers
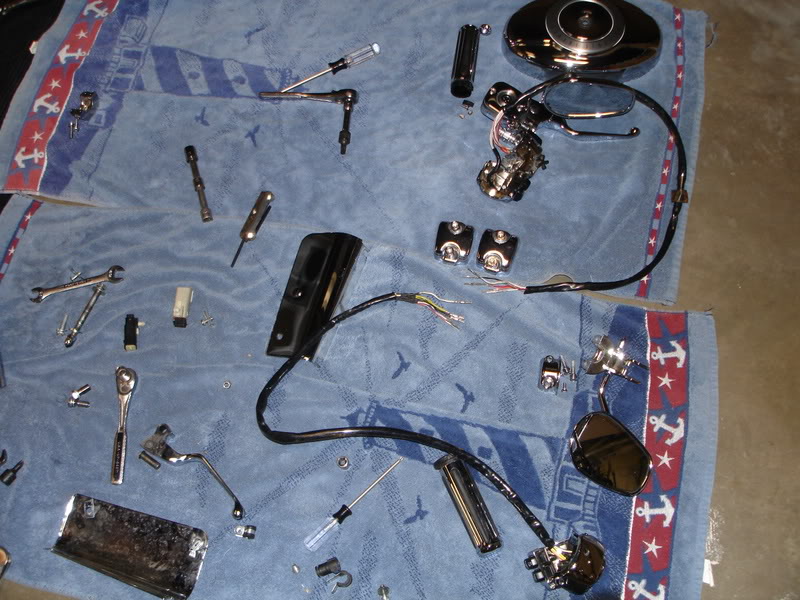
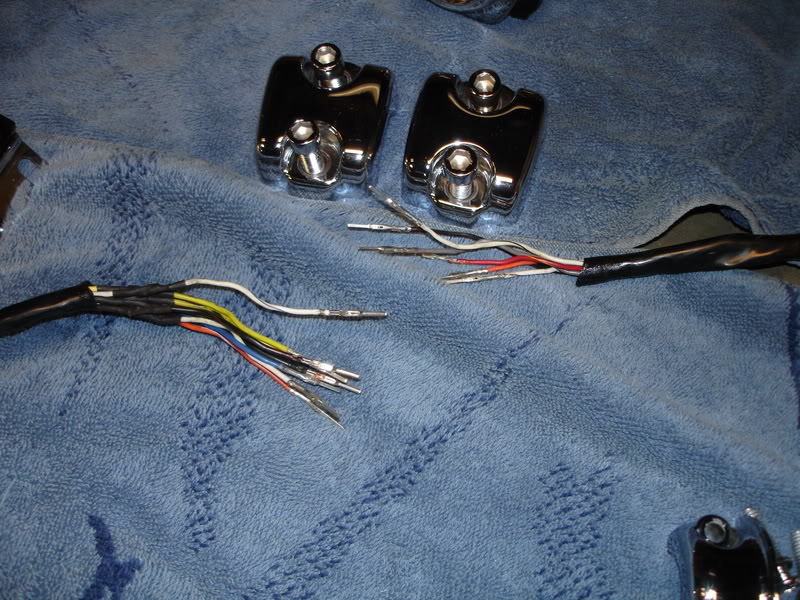
replaced in basically reverse order. If I remember correctly, the wires are unplugged via a molex connector and you have to remove the pins from the connector so you can get them through your new bars. All the wires are color coded but I drew a little diagram for myself anyway. You can extend the wires anywhere along the bar side or on the frame side...it is up to you. I think most folks prefer to extend on the bar side of the molex. You could also buy a couple of molex connectors and pins and make your own extension harness of any length you want. I cannot remember exactly but I think I extended my wiring around 12" for my 16" apes. I think I went +10" on the clutch cable and +8" on the brake and throttle/idle cables. I went with diamond backs from Harley. Pay attention to the wire bundle routing inside the switch housings, things are really tight in there and you could easily pinch a wire if not careful. The instructions for the chrome housings, or maybe the manual, has a pic showing the routing too.
I did the job myself with no help and I am not a mechanic. I did have my wife help me when I bled the front brake. I needed someone to pull the lever while I opened/closed the bleed valve.
I also changed out my pipes, race tuner, high flow AC, Z brake pads, new rotors, new pulley, and a bunch of chrome myself too. I also do most of my maintenance. I have found that it is just part of the fun and experience of owning Harleys. I have invested in a bike jack, some craftsmen sockets, torx, 2 torque wrenches, and a bunch of other tools over the years as I go. What would make it more fun is if some of my friends enjoyed working on them too. None of the guys I ride with that live close work on their bikes.
My best advice is to just take your time and try to enjoy it. Read all the instructions that come with the parts and also the manual.
- put on fender cover
- disconnected battery
- removed tank
- removed pipes
- removed air cleaner
- removed bars
- removed risers
replaced in basically reverse order. If I remember correctly, the wires are unplugged via a molex connector and you have to remove the pins from the connector so you can get them through your new bars. All the wires are color coded but I drew a little diagram for myself anyway. You can extend the wires anywhere along the bar side or on the frame side...it is up to you. I think most folks prefer to extend on the bar side of the molex. You could also buy a couple of molex connectors and pins and make your own extension harness of any length you want. I cannot remember exactly but I think I extended my wiring around 12" for my 16" apes. I think I went +10" on the clutch cable and +8" on the brake and throttle/idle cables. I went with diamond backs from Harley. Pay attention to the wire bundle routing inside the switch housings, things are really tight in there and you could easily pinch a wire if not careful. The instructions for the chrome housings, or maybe the manual, has a pic showing the routing too.
I did the job myself with no help and I am not a mechanic. I did have my wife help me when I bled the front brake. I needed someone to pull the lever while I opened/closed the bleed valve.
I also changed out my pipes, race tuner, high flow AC, Z brake pads, new rotors, new pulley, and a bunch of chrome myself too. I also do most of my maintenance. I have found that it is just part of the fun and experience of owning Harleys. I have invested in a bike jack, some craftsmen sockets, torx, 2 torque wrenches, and a bunch of other tools over the years as I go. What would make it more fun is if some of my friends enjoyed working on them too. None of the guys I ride with that live close work on their bikes.
My best advice is to just take your time and try to enjoy it. Read all the instructions that come with the parts and also the manual.
Seasoned HDF Member
Joined: Nov 2007
Posts: 6,790
Likes: 10
From: Hawaii
Write down the parts you will need before starting the swap... To be sure you have everything you need like Poly Bushing for riser, bango bolts washers, trans cover gasket,
brake fluid and so on. It sucks when you start something and can't finsh because of something you overlooked. Good luck!
brake fluid and so on. It sucks when you start something and can't finsh because of something you overlooked. Good luck!
Road Warrior
Joined: Aug 2007
Posts: 1,727
Likes: 2
From: North Carolina
Basic order I followed:
- put on fender cover
- disconnected battery
- removed tank
- removed pipes
- removed air cleaner
- removed bars
- removed risers
replaced in basically reverse order. If I remember correctly, the wires are unplugged via a molex connector and you have to remove the pins from the connector so you can get them through your new bars. All the wires are color coded but I drew a little diagram for myself anyway. You can extend the wires anywhere along the bar side or on the frame side...it is up to you. I think most folks prefer to extend on the bar side of the molex. You could also buy a couple of molex connectors and pins and make your own extension harness of any length you want. I cannot remember exactly but I think I extended my wiring around 12" for my 16" apes. I think I went +10" on the clutch cable and +8" on the brake and throttle/idle cables. I went with diamond backs from Harley. Pay attention to the wire bundle routing inside the switch housings, things are really tight in there and you could easily pinch a wire if not careful. The instructions for the chrome housings, or maybe the manual, has a pic showing the routing too.
I did the job myself with no help and I am not a mechanic. I did have my wife help me when I bled the front brake. I needed someone to pull the lever while I opened/closed the bleed valve.
I also changed out my pipes, race tuner, high flow AC, Z brake pads, new rotors, new pulley, and a bunch of chrome myself too. I also do most of my maintenance. I have found that it is just part of the fun and experience of owning Harleys. I have invested in a bike jack, some craftsmen sockets, torx, 2 torque wrenches, and a bunch of other tools over the years as I go. What would make it more fun is if some of my friends enjoyed working on them too. None of the guys I ride with that live close work on their bikes.
My best advice is to just take your time and try to enjoy it. Read all the instructions that come with the parts and also the manual.
Good screen name as well. A strat and a Marshall plexi......classic combination!
Ultimate HDF Member
Joined: Mar 2008
Posts: 6,344
Likes: 6
From: my house
yo bike is sick get that outta here LOL jk almost there w/parts list
gatta get trans fluid,brake fluid as well fergot those,seems like most have had good experience w/ novello kit so i get one of them too im lookin forward to doing this me self.
gatta get trans fluid,brake fluid as well fergot those,seems like most have had good experience w/ novello kit so i get one of them too im lookin forward to doing this me self.
Write down the parts you will need before
starting the swap... To be sure you have everything you need like Poly Bushing for riser, bango bolts washers, trans cover gasket,
brake fluid and so on. It sucks when you start something and can't finsh because of something you overlooked. Good luck!
starting the swap... To be sure you have everything you need like Poly Bushing for riser, bango bolts washers, trans cover gasket,
brake fluid and so on. It sucks when you start something and can't finsh because of something you overlooked. Good luck!
Thread Starter
|
Road Master
Joined: Oct 2006
Posts: 812
Likes: 0
From: Alta Loma, CA
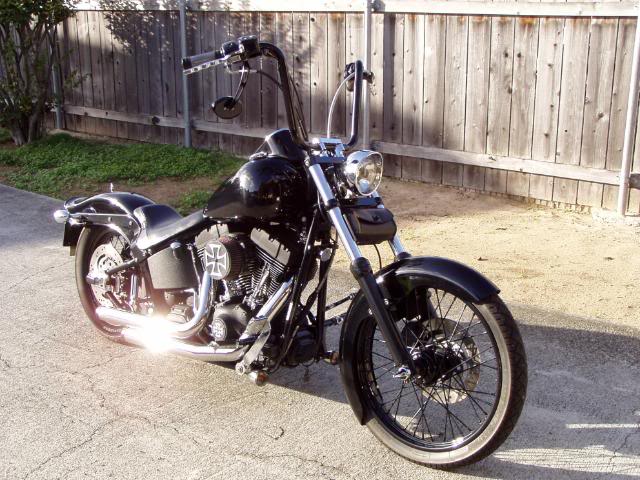
Ok guys I'm right in the middle of doing this whole job myself. So far so good except I snapped the fuel line hose trying to slide the tank back! Gas was everywhere. I think I was high yesterday after breathing gas fumes for a couple hours. I've removed the beach bars and most everything else. Today I'm going to tackle the clutch cable swap. This week I should be getting the Wild1 Fat Riser adaptor kit. Then I'll be able to use my stock 1.25" risers with my Wild1 apes. I also have to do the soldering since the wires are about 10" too short.
So whats the story with the Novello kit? Does it come with the deutch connectors?
So whats the story with the Novello kit? Does it come with the deutch connectors?
HD Forum Stories
The Best of Harley-Davidson for Lifelong Riders

6 Weirdest Harley-Davidsons Ever Sold to the Public
Verdad Gallardo
7 Times Harley-Davidson Chucked Tradition Out the Window
Verdad Gallardo
7 Surprising Harley-Davidson Products that Are Not Motorcycles
Verdad Gallardo
8 Best Harley-Davidson Motorcycles Ever
Pouria Savadkouei
10 Worst Harley-Davidson Motorcycles Ever
Pouria Savadkouei
Killer Custom's Jail Break Is The Breakout That Refused to Blend In
Verdad Gallardo
Crazy Bunderbike Build Looks Amazing, But Is It Impossible to Ride?
Verdad Gallardo
Harley-Davidson Reveals Super Cool Cafe Racer Concept
Verdad Gallardo
Engraved Rebellion: Inside Bundnerbike's Glam Rock II
Verdad Gallardo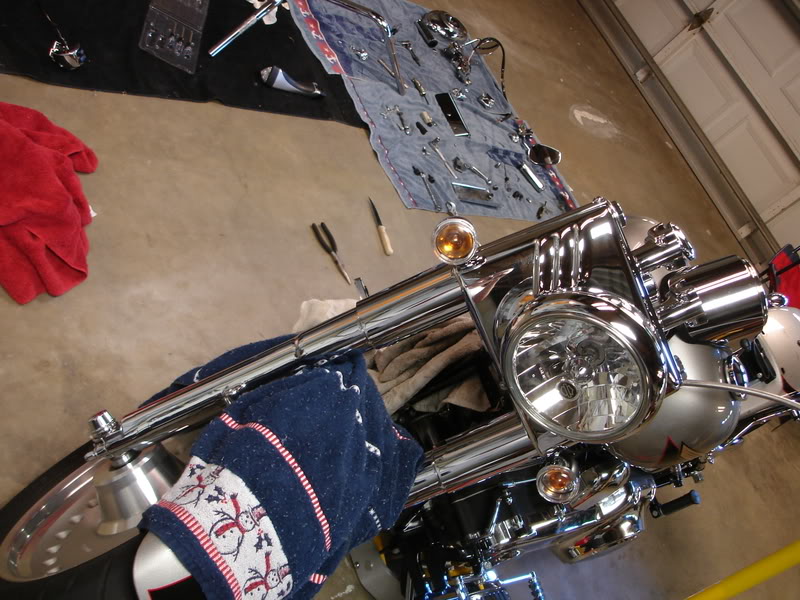
Grand HDF Member
Joined: May 2006
Posts: 3,636
Likes: 1,208
From: Ohio
Ok guys I'm right in the middle of doing this whole job myself. So far so good except I snapped the fuel line hose trying to slide the tank back! Gas was everywhere. I think I was high yesterday after breathing gas fumes for a couple hours. I've removed the beach bars and most everything else. Today I'm going to tackle the clutch cable swap. This week I should be getting the Wild1 Fat Riser adaptor kit. Then I'll be able to use my stock 1.25" risers with my Wild1 apes. I also have to do the soldering since the wires are about 10" too short.
So whats the story with the Novello kit? Does it come with the deutch connectors?
So whats the story with the Novello kit? Does it come with the deutch connectors?