





This was scary - dna wheel

Thread Starter
|
Advanced
Joined: Jan 2008
Posts: 95
Likes: 0
From: new england, worcester county, mass

first off thanks for the good words and advice... to clear some things up: the bolts used were not stock because the stockers bottomed out. they were replacements that were about 1.25" deep in threads. the next ones i will use will go as dep as possible without bottoming out! i couldnt uses heli-coils because the holes are machined too close to the edge of the hub so i had a machine shop drill & tap 5 new holes. i would rather have had sent wheel back but i couldnt get an answer from dna. talked to a person took my # 2 times and never called back. riding season is too short around here so had to take care of it myself. i love the wheel's look & it appears to be high quality. i did some research before i bought it and i'm actually looking at a new front. the wallets getting squeezed though because machining was another 125 and i need a new sprocket too (the chain ripped all the chrome off it)...

Banned
Joined: Mar 2007
Posts: 3,706
Likes: 7
From: Woodstock, Ont , Can
Wow. 1 1/4" deep should have been lots. I have to wonder about the qualilty of the original threads or the hardness of the material itself. Since you got a machine shop to drill and tap them, ask how the material behaved in the process. They can tell good and bad aluminum with how the tools involved behave.
Ron
Ron
Thread Starter
|
Advanced
Joined: Jan 2008
Posts: 95
Likes: 0
From: new england, worcester county, mass
Machine shop said he would have prefered to put helicoils in, but couldnt. he said try again with different hardware and more loctite and if it loosesns up JB Weld it!!! but then i'll have to toss the wheel when its time for a new sprocket. he said the aluminum looked like it was good quality but the threaded holes are too close to the edge of the hub and some of the holes were "egged-out" and one hole actually looks like it twisted. only 1 had threads totally stripped out. i'll try to post a pic...
Banned
Joined: Mar 2007
Posts: 3,706
Likes: 7
From: Woodstock, Ont , Can
Machine shop said he would have prefered to put helicoils in, but couldnt. he said try again with different hardware and more loctite and if it loosesns up JB Weld it!!! but then i'll have to toss the wheel when its time for a new sprocket. he said the aluminum looked like it was good quality but the threaded holes are too close to the edge of the hub and some of the holes were "egged-out" and one hole actually looks like it twisted. only 1 had threads totally stripped out. i'll try to post a pic...
Ron
Last edited by rbabos; Jul 28, 2009 at 03:07 PM.
Thread Starter
|
Advanced
Joined: Jan 2008
Posts: 95
Likes: 0
From: new england, worcester county, mass
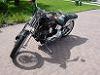
the wheel is a 80 spoke (stainless) with a chromed-billet hub. bolts def. werent overtightened by harley standards. havent heard back from dna as to theirs. i was told by local shop to use harley spec. i dont think threads are the problem as most of them were intact. its a weird situation, almost like the aluminum had "give" and bolts came out without warning. something i didnt mention is that my cousin who i was riding with walked about 100 feet down the road and was able to find the 4 bolts that fell out. 1 was stuck between swingarm and sprocket.
Intermediate
Joined: Oct 2007
Posts: 34
Likes: 0
From: orlando, fl
I think your bolts are too short. I have the same rim, so if we assume that the tolerances are close, then the only difference is the pulley. I cannot tell you the width of the pulley where the bolts head sits since it is recessed and mine is different if you using a chain. The length of the threaded part isn't necessarily what is important since the length of the thread base minus the head base which is the total length of the fastener(unless the threads run up all the way to the head base).
As a test, i would fit the bolt into the rim (without pulley and spacer) to measure the thread depth on the rim. Then measure the pulley depth where bolt is seated, and spacer depth. Subtract maybe 1/16th of an inch and you should get an overall length of how long your bolt should be from tip to head base.
As a test, i would fit the bolt into the rim (without pulley and spacer) to measure the thread depth on the rim. Then measure the pulley depth where bolt is seated, and spacer depth. Subtract maybe 1/16th of an inch and you should get an overall length of how long your bolt should be from tip to head base.

Outstanding HDF Member
Joined: Feb 2009
Posts: 2,228
Likes: 3
From: New Port Richey FL
HD Forum Stories
The Best of Harley-Davidson for Lifelong Riders

7 Surprising Harley-Davidson Products that Are Not Motorcycles
Verdad Gallardo
8 Best Harley-Davidson Motorcycles Ever
Pouria Savadkouei
10 Worst Harley-Davidson Motorcycles Ever
Pouria Savadkouei
Killer Custom's Jail Break Is The Breakout That Refused to Blend In
Verdad Gallardo
Crazy Bunderbike Build Looks Amazing, But Is It Impossible to Ride?
Verdad Gallardo
Harley-Davidson Reveals Super Cool Cafe Racer Concept
Verdad Gallardo
Engraved Rebellion: Inside Bundnerbike's Glam Rock II
Verdad Gallardo
10 Motorcycles You Should Never Buy
Joe Kucinski
