
SE Stage 1 Intake Breather Modification

Thread Starter
|
Tourer
Joined: May 2015
Posts: 375
Likes: 13
From: Salem, IN
 SE Stage 1 Intake Breather Modification
This is the modification that I did to my SE Stage 1 back plate this morning. Now my crankcase vent goes to atmosphere and will not soak my air filter with oil.
Modification Time: 1-2 Hours
Difficulty: 3 out of 10
Parts Needed:
- 1/8" NPT x 1/4" Nipple (2x)
- 1/4" Rubber Fuel Hose (3')
- Valve Cover Breather Filter
- 1/4" x 1/4" x 1/4" Vacuum Tee
- 1/4" x 3/8" Vacuum Reducer
- RTV Ultra Black
- Zip Ties
- Thread Sealant Tape
- Throttle Body Gasket (if your not careful)
Tools Needed:
- T25 Torx Socket (1/4" Drive)
- 13mm Socket (1/4" Drive)
- 1/2" Socket (1/4" Drive)
- Ratchet (1/4" Drive)
- 1/8" NPT Tap
- 21/64" Drill Bit
- Misc. Drill Bits (to step up to 21/64")
- Drill
- Cutter
To start, remove the air filter cover (football or other type cover). Now, with the NPT x Nipple fittings, position them on the outer ears of the back plate and mark the center of where you want the threaded hole to be making sure to keep the rear nipple away from the throttle body electrical plug (See Picture 1 for my location). Then remove the air filter and back plate from the throttle body being sure to save the throttle body gasket.
Once the back plate is removed, start by drilling a small pilot hole on each of the ears. I recommend making 2-3 steps in drill bit size so not to catch the largest drill bit in the metal. Once you have drilled the 21/64" hole, take your 1/8" NPT tap and dip it in lubricating oil and start cutting the threads. Go slow on the threads and make sure to back the tap out after 4-5 turns to clean the tap. Re-lubricate as needed. Once each hole is tapped, clean the shavings and oil off the back plate. I used my air compressor and a blow tip to blow them off, then a rag to get any excess oil off.
Now take your blow tip and blow the crankcase vapor valley that runs into the intake. This will remove any oil that is setting inside the channel. Now cut as small as possible hole in the nozzle on the RTV Ultra Black. Insert the nozzle into the channel and fill the channel until it comes out inside the crankcase vent bolt hole. Allow the RTV to fill all the way to the face of the back plate. Once each side is done, dab the RTV around all 4 holes to create a "bubble". This will eliminate any possibility of the RTV from coming out of the channel. See Pictures 2 & 3 for how mine looked. You will want to let the RVT cure for at lease an hour before installing the crankcase vent bolts. This will eliminate any chance the crank case vent bolts gets into the RTV.
Now you can reinstall the back plate onto the throttle body. Once the back plate is installed, use the pipe tape and wrap a small amount around the threaded end of the 1/8" NPT x nipple fitting. Install each fitting in the holes your drilled and tapped.
Cut 1 piece about 6" off your 1/4" hose and attach it to the top part of the 1/4" Vacuum Tee. Cut 1 piece about 9" off your 1/4" hose and attach it to one side of the 1/4" Vacuum Tee. Now attach the left over hose to the final side of the 1/4" Vacuum Tee. Route the longest section to either the front or rear of the bike and down (personal preference only) leaving it hang. Install the 9" piece of hose on the rear nipple making sure to cut the hose to fit tight up under the intake. Do the same for the 6" piece on the front nipple. Now return to the long piece of hose, cut it to fit, insert the 1/4" x 3/8" Vacuum reducer, and install the small filter on the end. Zip tie the hose and filter up so that it is hidden, will not drag the ground, and will not touch anything hot. See Pictures 4-7 for how my hose is attached and ran.
Reinstall the air filter and cover. Let the bike set for at least 8-12 hours before riding. This allows full cure time for the RTV.
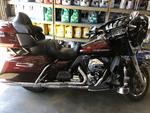
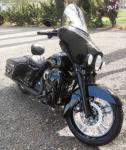
See Pictures 8-9 for my finished install. Unless you know what you are looking for, the hose is pretty well out of sight..
Picture 1:

Picture 2:

Picture 3:

Picture 4:

Picture 5:

Picture 6:

Picture 7:

Picture 8:

Picture 9:

Modification Time: 1-2 Hours
Difficulty: 3 out of 10
Parts Needed:
- 1/8" NPT x 1/4" Nipple (2x)
- 1/4" Rubber Fuel Hose (3')
- Valve Cover Breather Filter
- 1/4" x 1/4" x 1/4" Vacuum Tee
- 1/4" x 3/8" Vacuum Reducer
- RTV Ultra Black
- Zip Ties
- Thread Sealant Tape
- Throttle Body Gasket (if your not careful)
Tools Needed:
- T25 Torx Socket (1/4" Drive)
- 13mm Socket (1/4" Drive)
- 1/2" Socket (1/4" Drive)
- Ratchet (1/4" Drive)
- 1/8" NPT Tap
- 21/64" Drill Bit
- Misc. Drill Bits (to step up to 21/64")
- Drill
- Cutter
To start, remove the air filter cover (football or other type cover). Now, with the NPT x Nipple fittings, position them on the outer ears of the back plate and mark the center of where you want the threaded hole to be making sure to keep the rear nipple away from the throttle body electrical plug (See Picture 1 for my location). Then remove the air filter and back plate from the throttle body being sure to save the throttle body gasket.
Once the back plate is removed, start by drilling a small pilot hole on each of the ears. I recommend making 2-3 steps in drill bit size so not to catch the largest drill bit in the metal. Once you have drilled the 21/64" hole, take your 1/8" NPT tap and dip it in lubricating oil and start cutting the threads. Go slow on the threads and make sure to back the tap out after 4-5 turns to clean the tap. Re-lubricate as needed. Once each hole is tapped, clean the shavings and oil off the back plate. I used my air compressor and a blow tip to blow them off, then a rag to get any excess oil off.
Now take your blow tip and blow the crankcase vapor valley that runs into the intake. This will remove any oil that is setting inside the channel. Now cut as small as possible hole in the nozzle on the RTV Ultra Black. Insert the nozzle into the channel and fill the channel until it comes out inside the crankcase vent bolt hole. Allow the RTV to fill all the way to the face of the back plate. Once each side is done, dab the RTV around all 4 holes to create a "bubble". This will eliminate any possibility of the RTV from coming out of the channel. See Pictures 2 & 3 for how mine looked. You will want to let the RVT cure for at lease an hour before installing the crankcase vent bolts. This will eliminate any chance the crank case vent bolts gets into the RTV.
Now you can reinstall the back plate onto the throttle body. Once the back plate is installed, use the pipe tape and wrap a small amount around the threaded end of the 1/8" NPT x nipple fitting. Install each fitting in the holes your drilled and tapped.
Cut 1 piece about 6" off your 1/4" hose and attach it to the top part of the 1/4" Vacuum Tee. Cut 1 piece about 9" off your 1/4" hose and attach it to one side of the 1/4" Vacuum Tee. Now attach the left over hose to the final side of the 1/4" Vacuum Tee. Route the longest section to either the front or rear of the bike and down (personal preference only) leaving it hang. Install the 9" piece of hose on the rear nipple making sure to cut the hose to fit tight up under the intake. Do the same for the 6" piece on the front nipple. Now return to the long piece of hose, cut it to fit, insert the 1/4" x 3/8" Vacuum reducer, and install the small filter on the end. Zip tie the hose and filter up so that it is hidden, will not drag the ground, and will not touch anything hot. See Pictures 4-7 for how my hose is attached and ran.
Reinstall the air filter and cover. Let the bike set for at least 8-12 hours before riding. This allows full cure time for the RTV.
See Pictures 8-9 for my finished install. Unless you know what you are looking for, the hose is pretty well out of sight..
Picture 1:
Picture 2:
Picture 3:
Picture 4:
Picture 5:
Picture 6:
Picture 7:
Picture 8:
Picture 9:
Last edited by mjonesjr84; Aug 16, 2015 at 04:55 PM.
Thread Starter
|
Tourer
Joined: May 2015
Posts: 375
Likes: 13
From: Salem, IN
I believe the HD filter that comes with the SE Stage 1 is cleanable. Just remember it is a dry filter so don't oil it. I replaces mine with a K&N filter.

Cruiser
Joined: Aug 2015
Posts: 170
Likes: 3
From: sycamore
Trending Topics
Thread Starter
|
Tourer
Joined: May 2015
Posts: 375
Likes: 13
From: Salem, IN
Not particularly. I think the intake has a slight vacuum to it that draws the oil from the engine through the crankcase breathers. I don't like the hot oil/CO displacing the clean oxygen in the combustion chamber either.
HD Forum Stories
The Best of Harley-Davidson for Lifelong Riders

7 Surprising Harley-Davidson Products that Are Not Motorcycles
Verdad Gallardo
8 Best Harley-Davidson Motorcycles Ever
Pouria Savadkouei
10 Worst Harley-Davidson Motorcycles Ever
Pouria Savadkouei
Killer Custom's Jail Break Is The Breakout That Refused to Blend In
Verdad Gallardo
Crazy Bunderbike Build Looks Amazing, But Is It Impossible to Ride?
Verdad Gallardo
Harley-Davidson Reveals Super Cool Cafe Racer Concept
Verdad Gallardo
Engraved Rebellion: Inside Bundnerbike's Glam Rock II
Verdad Gallardo
10 Motorcycles You Should Never Buy
Joe Kucinski