





JIMS Vacuum Fed Fork Filling Tool

Road Master
Joined: Apr 2012
Posts: 1,096
Likes: 17
From: San Jose

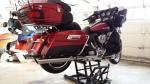
You don't use a jack, do it on the jiffy. Remember you have to hold the front brake and pump the front forks up and down during the process. So that should tell you that you don't put the front wheel in the air.
You must remember that HD thrives on service dollars, which equates to time and materials consumed in their shop. Their are numerous examples of procedures in the service manual where many of the extra steps they list can be avoided while still performing a successful and quality service. Thing is, the HD techs skip those steps too, but they still charge you for the time it would have taken them to do the job had they followed all the steps.
You must remember that HD thrives on service dollars, which equates to time and materials consumed in their shop. Their are numerous examples of procedures in the service manual where many of the extra steps they list can be avoided while still performing a successful and quality service. Thing is, the HD techs skip those steps too, but they still charge you for the time it would have taken them to do the job had they followed all the steps.
There are a few others I have noticed as well, Dawg and ultrantz comes to mind .

p.s. I do not mean to high jack the thread.


Road Master
Joined: Mar 2013
Posts: 1,151
Likes: 14
From: Seattle
Hey Lowcountry Joe - sorry to trouble you but one question to clarify things as I'm looking at the service manual. You said to replace the O-Ring under the cap screw. Do you mean the "Quad Ring Seal"? According to my diagram, the order is 1) Cap bolt, 2) Quad Ring Seal, 3) Fork tube plug, and 4) O-Ring,. 5) spring. Since the Fork tube plug is under pressure, I assume that we're not replacing the O-Ring or are we? Thanks again!

Cruiser
Joined: Jan 2013
Posts: 149
Likes: 0
From: Treasure Coast, FL
Has anyone used one of these? Tool I love tools, but do you think it is worth the money to save some time and work? Plus I'd love to put some heavier oil in my forks.
http://iwblogger.com/2013/jims-vacuu...-filling-tool/
http://iwblogger.com/2013/jims-vacuu...-filling-tool/
Seems pretty easy to create this device at home for ...way... less than $219 (the $219 does not include the MityVac) and honestly I think every HD owner should have a MityVac anyway. Have had one for a long time and used it for countless things. Take a look at the picture of the device and how to use it (and how to make one similar) should be evident. If it's not you probably should let someone else do it ... Cheers
Last edited by zdrifter; Jul 21, 2013 at 01:32 PM. Reason: sp

Elite HDF Member
Joined: Sep 2007
Posts: 4,928
Likes: 69
From: Near Myrtle Beach, SC
Hey Lowcountry Joe - sorry to trouble you but one question to clarify things as I'm looking at the service manual. You said to replace the O-Ring under the cap screw. Do you mean the "Quad Ring Seal"? According to my diagram, the order is 1) Cap bolt, 2) Quad Ring Seal, 3) Fork tube plug, and 4) O-Ring,. 5) spring. Since the Fork tube plug is under pressure, I assume that we're not replacing the O-Ring or are we? Thanks again!
By the way, you can use any copper washer you can find that will fit around the screw. I had to get mine at an autoparts place because the HD dealership did not have any in stock. I couldn't believe that. But what that also tells me is if they had to perform a fork oil change, they probably would re-use the copper washer. In fact, I reused mine after I took a look at them and have had no leaks. Just make sure the area that will be under the washer is very clean before you install the screw and tighten to torque spec of 72-96 inch pounds.
I am glad to help when I can. I have received and continue to receive a lot of helpful info from the guys on this forum. So if I have personal experience with a project, I am prone to throw in my two cents.
Thread Starter
|
Road Master


Joined: Jul 2012
Posts: 876
Likes: 65
From: CT
Awesome Lowcoounty Joe! Thanks. For some reason I thought the fork cap bolt held the spring under pressure, I think my 1988 Sporty was like that. I looked at my service manual after reading your post. I'm going to get the low profile socket and ignition tool and change my oil at my 10k service. What weight did you put in and would you use it again?
Thanks again!!!
Thanks again!!!
What? You don't take the forks off to perform a fork oil change. You don't need fancy vacuum devices either.
Here are the steps I took:
-Have a service manual handy
-Have the right tools (low profile 36mm socket..avail for $16 and a switch alignment tool) You can get by without either, but like I said..the right tools
Here is a pic of both of these tools:

-Have a replacement copper washer to go under the head of the drain screw
-Have a replacement oring for under the 36mm cap screws
-Remove the ignition switch stem
-Remove the inner faring cap. Now the top fork 36mm heads are accessible
-Remove the drain screw down low and in the rear of each leg
-Remove 36mm cap screw to allow all fluid to drain
-Pump forks a few times to ensure all fluid is out
-Reinstall fork leg screw with new copper washer to torque spec
-Fill from the top with 11 oz of your choice of fork oil, pumping a little as you go, easy pumps, nothing drastic
-Install new orings and torque 36mm cap screw to spec
-Reinstall inner faring cap and switch stem
-Take a picture of your old fork oil and post it here on the forum!
Mine looked like this at about 15K:

Here are the steps I took:
-Have a service manual handy
-Have the right tools (low profile 36mm socket..avail for $16 and a switch alignment tool) You can get by without either, but like I said..the right tools
Here is a pic of both of these tools:
-Have a replacement copper washer to go under the head of the drain screw
-Have a replacement oring for under the 36mm cap screws
-Remove the ignition switch stem
-Remove the inner faring cap. Now the top fork 36mm heads are accessible
-Remove the drain screw down low and in the rear of each leg
-Remove 36mm cap screw to allow all fluid to drain
-Pump forks a few times to ensure all fluid is out
-Reinstall fork leg screw with new copper washer to torque spec
-Fill from the top with 11 oz of your choice of fork oil, pumping a little as you go, easy pumps, nothing drastic
-Install new orings and torque 36mm cap screw to spec
-Reinstall inner faring cap and switch stem
-Take a picture of your old fork oil and post it here on the forum!
Mine looked like this at about 15K:

Seasoned HDF Member

Joined: Jun 2006
Posts: 28,549
Likes: 3,954
From: Vermont
If you go to HD they will try and sell you the fork drain screws with the washers, pn#45858-77. They used to sell the washers separately, pn#45708-99 from the chrome drain screw kit, but now they obsoleted them and make you buy the screws and washers. Best to grab the washers and mic them and then buy in bulk from somewhere like McMaster Carr. http://www.mcmaster.com/#copper-sealing-washers/=nq41mm
HD Forum Stories
The Best of Harley-Davidson for Lifelong Riders

7 Surprising Harley-Davidson Products that Are Not Motorcycles
Verdad Gallardo
8 Best Harley-Davidson Motorcycles Ever
Pouria Savadkouei
10 Worst Harley-Davidson Motorcycles Ever
Pouria Savadkouei
Killer Custom's Jail Break Is The Breakout That Refused to Blend In
Verdad Gallardo
Crazy Bunderbike Build Looks Amazing, But Is It Impossible to Ride?
Verdad Gallardo
Harley-Davidson Reveals Super Cool Cafe Racer Concept
Verdad Gallardo
Engraved Rebellion: Inside Bundnerbike's Glam Rock II
Verdad Gallardo
10 Motorcycles You Should Never Buy
Joe Kucinski
10 Things Harley-Davidson Needs to Fix in 2026
Verdad Gallardo
Stellar HDF Member
Joined: Sep 2006
Posts: 3,236
Likes: 95
From: lancaster, pa
I used the rear axle flat wrench in the harley tool kit that came with the bike,works perfect, and a screw driver for the ignition.Note on ignition ut a flash light under ignition cause theres a hole on the bottom which lets light in to see ignition keys better.you can find a lot of short cuts not in the manuel or the web.
ut a flash light under ignition cause theres a hole on the bottom which lets light in to see ignition keys better.you can find a lot of short cuts not in the manuel or the web.
Elite HDF Member
Joined: Sep 2007
Posts: 4,928
Likes: 69
From: Near Myrtle Beach, SC
Awesome Lowcoounty Joe! Thanks. For some reason I thought the fork cap bolt held the spring under pressure, I think my 1988 Sporty was like that. I looked at my service manual after reading your post. I'm going to get the low profile socket and ignition tool and change my oil at my 10k service. What weight did you put in and would you use it again?
Thanks again!!!
Thanks again!!!
I used Amsoil Shock Therapy Medium 10 wt. You can see the bottom half of the container in one of the pictures. I may try the heavy duty Shock Therapy on the next change. I do like the action of the front end now, especially how it handles speed bumps and track crossings. So for now I am satisfied. Nice thing is that it's easy to change the oil to something else and give it a try. You are only talking about 22 ounces total anyway for both forks.
Some guys even combine different weights to get a custom feel in their front end suspension.