Harley Davidson Touring: How to Replace Battery
Swapping out the battery on your Harley Davidson Touring bike is one of the easiest DIY jobs you can undertake. But, if you don't even know where the battery is and suffer a dead one out on the road somewhere, it is going to ruin your whole day.
This article applies to the Harley Davidson Touring (1995-2016).
Changing your motorcycle's battery is one of the easiest maintenance jobs to do on a HD Touring bike. If your suffering with a slow cranking motor and dim lights at idle, it is always better to be proactive and at least test the battery; rather than hoping it will last for just one more ride. If you are planning on taking a long ride into the great wide open especially, you should really consider replacing that battery if it is more than a three years old. Why even take the chance that your three-year-old battery is going to leave you stranded in the middle of nowhere? For about $100, a new battery is cheap insurance that you'll make it back home with great memories to share. This is a simple job that will take you less than an hour to do in your own garage, but to have a pro do it, it would cost you not only the labor, but the hassle of having to drag the bike to the shop. Give yourself a little time and follow this guide to get it done.

Materials Needed
- 7/16" socket and ratchet
- Phillips head screwdriver
- T40 Torx bit and driver
If your bike does not have a frame-mounted seat strap, skip to Step 3.
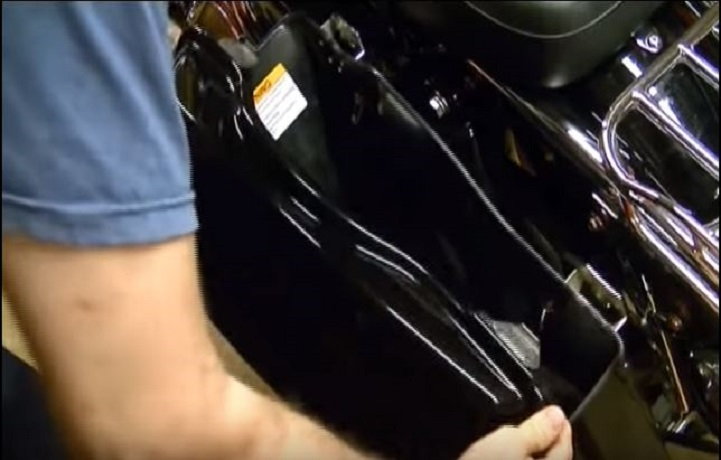
Step 1 – Remove saddlebag
Since Harley moved the battery under the seat in the mid-1990s, you don't have to remove a saddlebag to replace the battery on many bikes. Your battery is hidden under the seat, which may have a strap across it, attached behind the saddlebags. Only one side needs to be removed in order to unbolt the seat strap, if you even have one. If needed, removing the bag is really easy.
- Open the lid of your saddlebag.
- Turn the thumb screws from inside the bag that mounts it to the frame.
- Lift the bag up off of the bike and carefully set it aside.
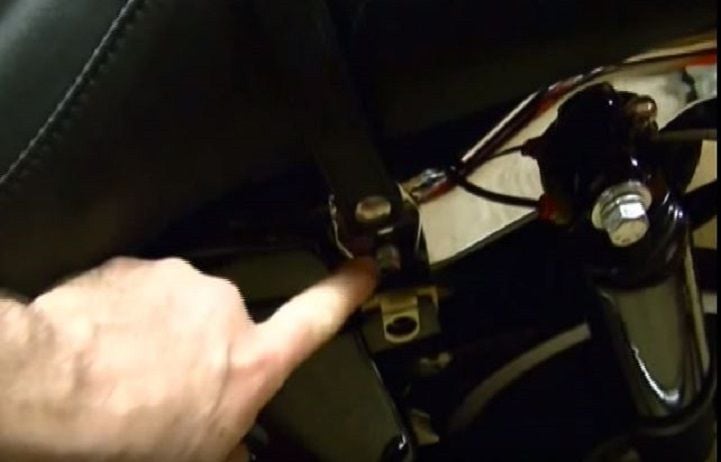
Step 2 – Remove seat strap
Use a 7/16" socket or wrench to remove the bolt that holds the seat strap in place. Only remove one side and the strap can be flipped over to facilitate the removal of the seat.
Step 3 – Remove the seat
There is a Phillips head screw, or on some bikes just a thumb screw, that mounts the seat on the rear fender. If your bike is equipped with a Tour Pack trunk, you may have to open the lid in order to get a screwdriver or your arm down to where the screw is. Carefully remove the screw and slightly lift the rear of the seat up, then pull it straight back to remove it from the bike.

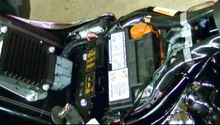
Step 4 – Remove the engine computer (and security system if applicable)
With the seat removed, you'll see a plastic cover over the battery that contains the engine computer management system (ECM), and also the antenna for the security system (on some bikes). If the security system is present, just slide it out of its clip. There are typically tow plastic clips holding the ECM down, and it un-clips easily. There is no need to unplug the wiring. There may be one T40 sized Torx bolt holding it down as well, depending on the year of bike. Use a T40 Torx bit to remove the bolt and pull the caddy off of the battery.

Figure 4. If you have a security system, slide it off and move it aside. 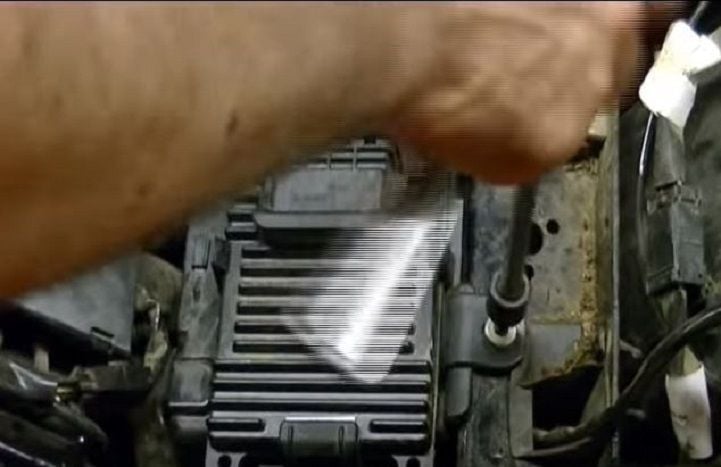
Figure 5. Use a T40 Torx bit to remove the mounting bolt.
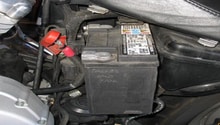
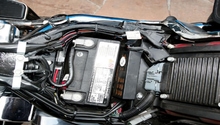
Step 5 – Remove battery
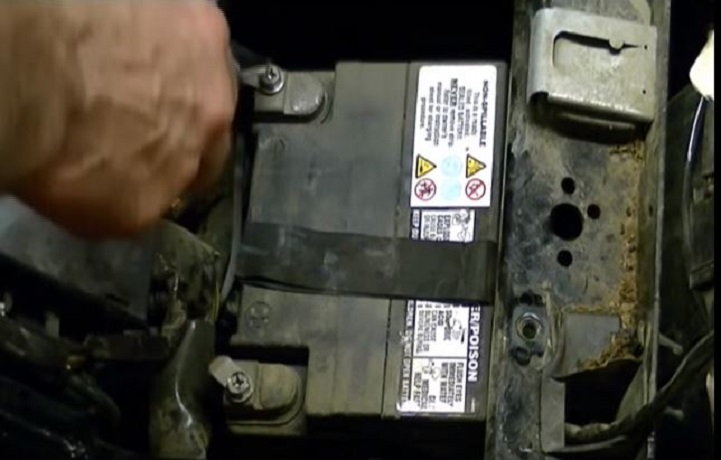
When the ECM is removed, you'll have access to the battery. Use a Phillips head screwdriver to disconnect the terminal cables. Always disconnect the negative (black) terminal first, and then the positive to avoid any voltage spikes that can damage your electronics. Once the terminals are removed, pull the battery up and out. Use the installed strap to help pull up the battery. Be careful, as the small looking battery is deceptively heavy.
Step 6 – Install the new battery
Carefully install the new battery, taking care to position the strap correctly to help remove this battery when its life is up. Reinstall the positive terminal first, followed by the negative. Replace the caddy and the ECM, making sure the Torx bolt is nice and tight. Replace the security system, if equipped.

Step 7 – Replace the seat, seat strap and saddlebag
The hard part is done, now it is just a matter of putting it all back together. Replace the seat, sliding the front into the guide, and then push the back end back down and replace the Phillips head screw. Put the seat strap back and replace the 7/16" inch bolt. Replace the saddlebag, making sure it is secure after turning the thumb screws. Start her up and take her for a test ride, as if you need an excuse.
Featured Video: Exposing the Wiring and the Battery
Related Discussions
- Battery Replacement and Factory Security System - HDForums.com
- Street Glide Battery Replacement - HDForums.com
- Time to Replace Battery...or Not? - HDForums.com
- Good Touring Battery? - HDForums.com
- Battery Replacement on My 2010 FLHTK - HDForums.com