


PowerVision Install
Just ordered the PV2 and A/C from FM. Very excited about the whole deal. If I hadn't already installed some exhaust components I'd of ordered that from them too (and still might). So I've been looking and searching and I found something awhile back but for the life of me can't find it again after spending more time than my boss would prefer.
I want (cause I'm a geek) to install the unit on the bars on my '14 FLHTK. So it looks as though the cable comes up out of the side panel. I got that. Do I need to pull the tank to do the job right to run the cable under the tank or . . . . for those of you that have the unit mounted, what'd ya do to run/route the cable?
Should be here next Tuesday and hoping to get both installed before the weekend when I leave for a long weekend trip.
Thanks in advance!
Road Warrior
Joined: Oct 2012
Posts: 1,451
Likes: 1
From: South Florida
Some lift the tank. I was able to get it up there pretty good by just working it. It never came out or loose. I've heard some guys routing it from the side panel to under the seat then under the console.
I haven't mounted it on my '14 yet as I will need the new cable and then get a new license for it. It's a really nifty tuner.
I haven't mounted it on my '14 yet as I will need the new cable and then get a new license for it. It's a really nifty tuner.

Road Warrior
Joined: Apr 2010
Posts: 1,648
Likes: 37
From: Monroe, Louisiana
I pulled the filler door top loose and ran the PV2 cable under it. Also at the data port end I loosened the 2 bolts that hold the security and fuse panel in place and put the cable behind the top frame rail. When you run the cable out from under the front of the tank console you can remove the screw on the bottom of the fairing and run the wire out the grommet and up the handlebar to the mount. Takes 5 or 10 minutes. Make sure the wire isn't pinched when you put the console back on.
The fuel tank comes off in about 4 minutes.
There are 2 screws and 2 bolts, unhook the quick disconnect on the left side, remove the fuel cap and lay the console upside down on a towel on the fender, lift tank off.
Then you can run your wire in the tray on the backbone, and re-install the tank.
IMHO, quicker than trying to run it another way, and you know it won't work it's way loose or get pinched.
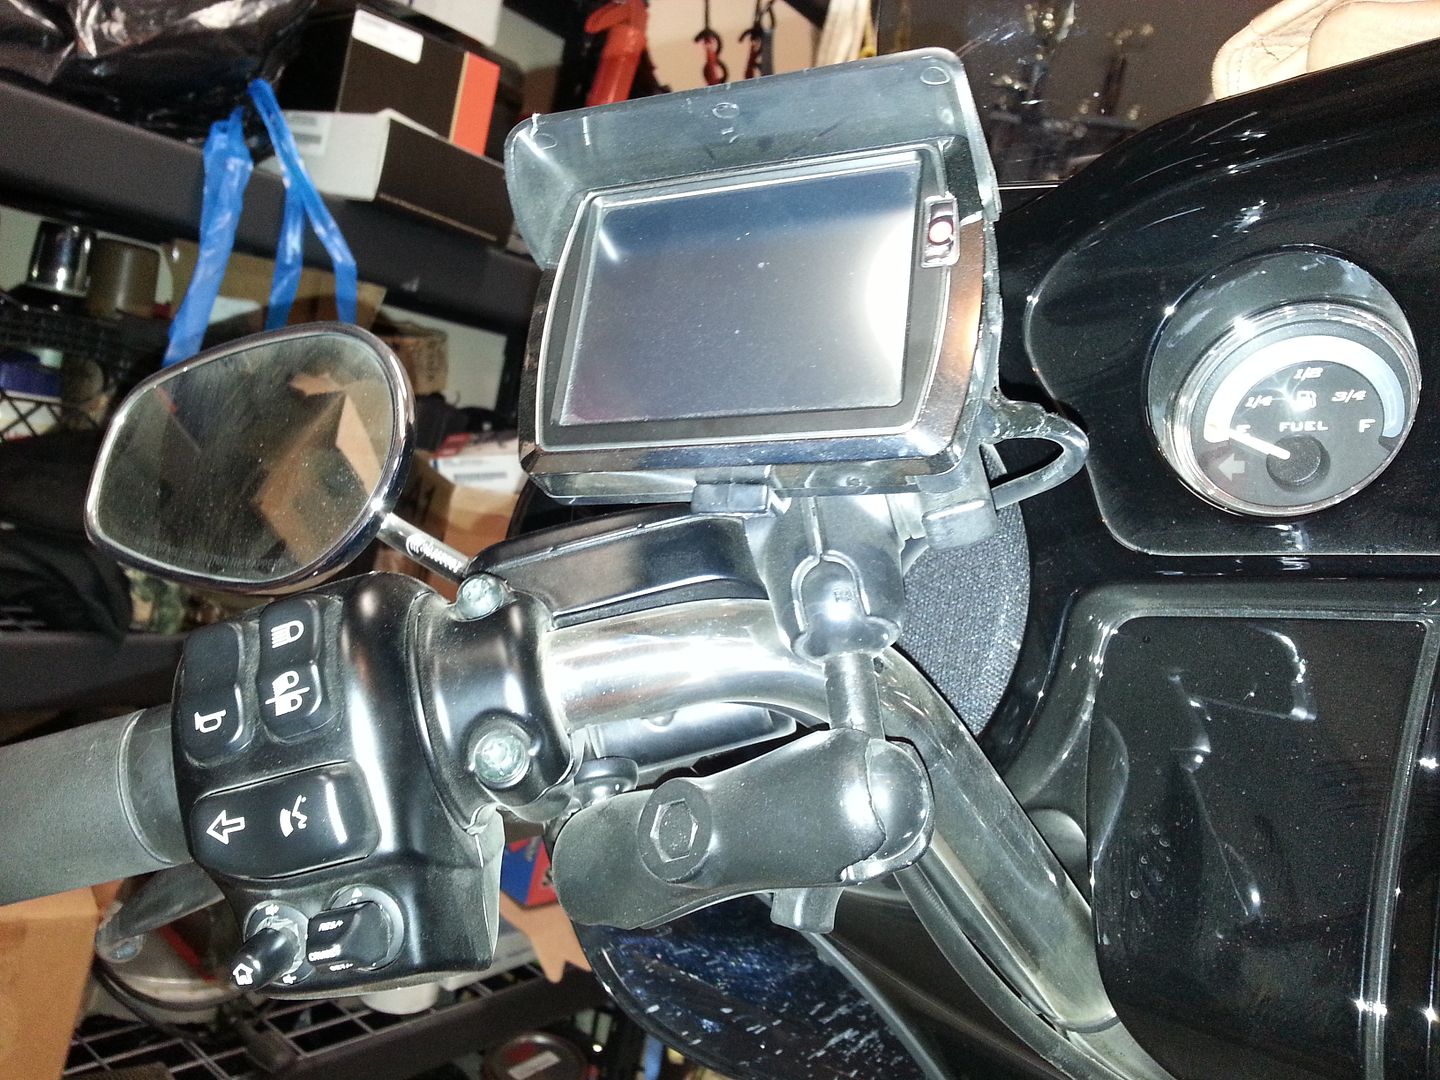
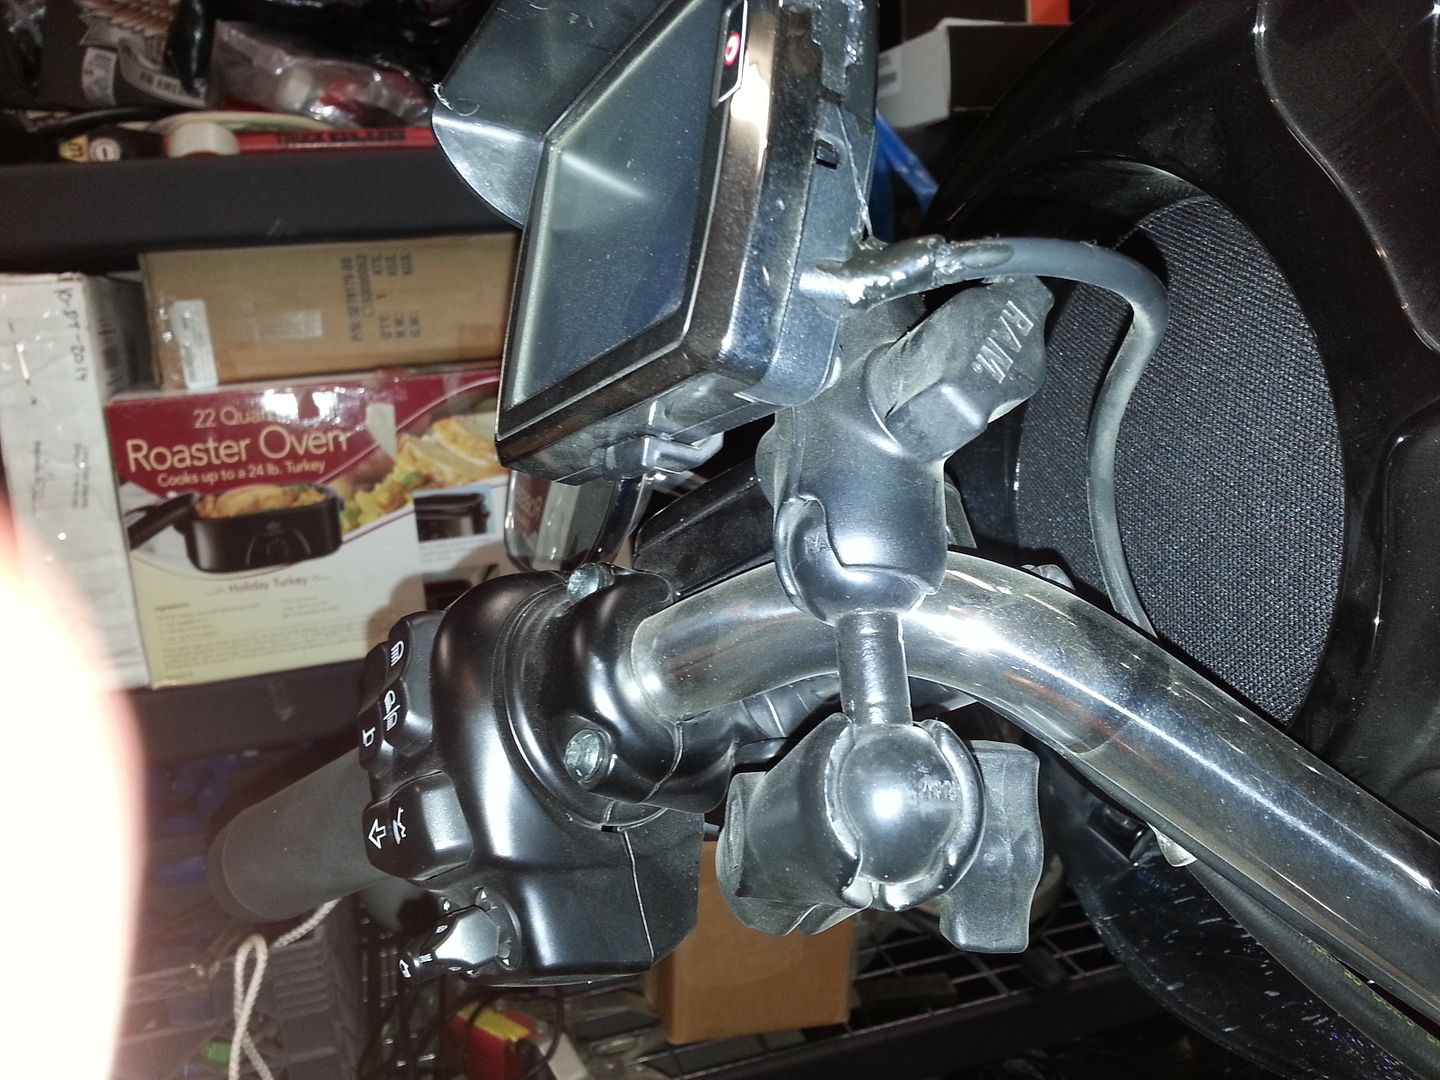
I used a RAM mount, much cleaner looking than the handlebar clamp to me, and I had most of the components already.
There are 2 screws and 2 bolts, unhook the quick disconnect on the left side, remove the fuel cap and lay the console upside down on a towel on the fender, lift tank off.
Then you can run your wire in the tray on the backbone, and re-install the tank.
IMHO, quicker than trying to run it another way, and you know it won't work it's way loose or get pinched.
I used a RAM mount, much cleaner looking than the handlebar clamp to me, and I had most of the components already.


I've always avoided removing the tank, that's probably why I asked. Ugh. Know how much time I spent jacking with installing air cleaners to remove the induction bracket or whatever it is that has to come off without taking the tank off? A lot. Since I'm guessing I need to do it again for the FuelMoto AC I might as well figure it out, take a little extra time and speed up the AC install and fit the cable under the take so I won't have to worry about it.
Thanks for the advice . . .
BTW . . . Amber sure is a beaut!
Thanks for the advice . . .
BTW . . . Amber sure is a beaut!
Road Master
Joined: May 2014
Posts: 881
Likes: 2
From: Madison, AL
And try to take the tank off when the tank is NOT full.
You know if you only want to load a map you don't need to run the cable. If you want to mount it to autotune or use the gauge display then you do. Like above I just pulled the tank. 4 min tops. Very easy to remove.
You know if you only want to load a map you don't need to run the cable. If you want to mount it to autotune or use the gauge display then you do. Like above I just pulled the tank. 4 min tops. Very easy to remove.
Trending Topics
Just ordered the PV2 and A/C from FM. Very excited about the whole deal. If I hadn't already installed some exhaust components I'd of ordered that from them too (and still might). So I've been looking and searching and I found something awhile back but for the life of me can't find it again after spending more time than my boss would prefer.
I want (cause I'm a geek) to install the unit on the bars on my '14 FLHTK. So it looks as though the cable comes up out of the side panel. I got that. Do I need to pull the tank to do the job right to run the cable under the tank or . . . . for those of you that have the unit mounted, what'd ya do to run/route the cable?
Should be here next Tuesday and hoping to get both installed before the weekend when I leave for a long weekend trip.
Thanks in advance!
I want (cause I'm a geek) to install the unit on the bars on my '14 FLHTK. So it looks as though the cable comes up out of the side panel. I got that. Do I need to pull the tank to do the job right to run the cable under the tank or . . . . for those of you that have the unit mounted, what'd ya do to run/route the cable?
Should be here next Tuesday and hoping to get both installed before the weekend when I leave for a long weekend trip.
Thanks in advance!
HD Forum Stories
The Best of Harley-Davidson for Lifelong Riders

7 Surprising Harley-Davidson Products that Are Not Motorcycles
Verdad Gallardo
8 Best Harley-Davidson Motorcycles Ever
Pouria Savadkouei
10 Worst Harley-Davidson Motorcycles Ever
Pouria Savadkouei
Killer Custom's Jail Break Is The Breakout That Refused to Blend In
Verdad Gallardo
Crazy Bunderbike Build Looks Amazing, But Is It Impossible to Ride?
Verdad Gallardo
Harley-Davidson Reveals Super Cool Cafe Racer Concept
Verdad Gallardo
Engraved Rebellion: Inside Bundnerbike's Glam Rock II
Verdad Gallardo
10 Motorcycles You Should Never Buy
Joe Kucinski
10 Things Harley-Davidson Needs to Fix in 2026
Verdad Gallardo
Advanced
Joined: Feb 2014
Posts: 75
Likes: 0
From: Searcy, Arkansas
Let us know how you like the D&D fat cat. I am leaning toward that exhaust. Not sure if I want the gost pipe or not to perserve the symmetry.

Tourer
Joined: Sep 2010
Posts: 253
Likes: 4
Just run the wire under the console, no need to remove the tank. You might need to loosen the clutch handle bracket to install the clamp for the PV display, the clutch cable makes it a tight fit around the handle bar. After installing the clamp, re tighten clutch bracket. The clamp I got from fuel moto placed the screen at an angle that made it impossible to read it the sun. The install took me about 15 minutes. I had mine installed for 2 days then removed it after completing the auto tune.
The PV has a lot of cool features, but it's also a distraction.
The PV has a lot of cool features, but it's also a distraction.