





Front Turn Signal Relocation on 2014 Fat Bob
Thread Starter
|
Advanced
Joined: May 2011
Posts: 93
Likes: 0
From: Huntsville, AL
 Front Turn Signal Relocation on 2014 Fat Bob
I know this has been beaten to death but I am having a couple of issues. I have a 2014 Fat Bob and I am moving my front turn signals to the forks. I have the Kuryakyn 2 piece fork mount. I have been looking at several of the other posts and have a good concept on what I need to do. I know that I need to cut and solder the wires on the bars on the original mounting position. And that I need to use the plugs located under the tank. The help I need is where do I get the wire connector from. I have looked Harley's website and cannot find it.
One forum suggested this wire connector. Will it work for my project?
http://www.guerrillacables.com/2011_Softail.html
Also does anyone know where I can get some parts powder coated.
Thanks for everyone's help.
One forum suggested this wire connector. Will it work for my project?
http://www.guerrillacables.com/2011_Softail.html
Also does anyone know where I can get some parts powder coated.
Thanks for everyone's help.
Ultimate HDF Member
Joined: Dec 2008
Posts: 5,120
Likes: 17
From: Indiana
You don't need to cut and splice anything. Depends on if you want cuts or not. I have nothing against splicing unless I have too. Otherwise I'd rather take the time to keep it clean and not excessively shrink wrapped. Not sure what wire connector you speak of. You should need anything extra except for solder/gun and shrink wrap if you go that route. Otherwise just tools!!
1. Disconnect quick release fuel line
2. Unbolt tank bolts front and rear and slide tank back a few inches watching the fuel cross over.
3. Remove plastic cover on the underside of the backbone.
4. Pull out the bundle of wires and the signal wire connections are the white and black connectors I believe.
5. Disconnect them remove the wires from the neck and disassemble the molenex connectors Molex connector disassembly. Draw the a pic of the wire color locations in the connectors before you take them apart
6. Unscrew the hand controls and the sigs and pull the wires through and now you have the whole assembly with the wires to do as you please with OEM Conduit with no cuts.
7. Mount sigs where you want
8. Rebuild Molenex connectors
9. Route wires back into the neck, connect and reinstall plastic cover and gas tank.
I ran mine all the way down to my forward with no extensions. The excess wire was all stuff in the backbone.
1. Disconnect quick release fuel line
2. Unbolt tank bolts front and rear and slide tank back a few inches watching the fuel cross over.
3. Remove plastic cover on the underside of the backbone.
4. Pull out the bundle of wires and the signal wire connections are the white and black connectors I believe.
5. Disconnect them remove the wires from the neck and disassemble the molenex connectors Molex connector disassembly. Draw the a pic of the wire color locations in the connectors before you take them apart
7. Mount sigs where you want
8. Rebuild Molenex connectors
9. Route wires back into the neck, connect and reinstall plastic cover and gas tank.
I ran mine all the way down to my forward with no extensions. The excess wire was all stuff in the backbone.

Last edited by JaronB; Feb 16, 2015 at 07:21 AM.

Ultimate HDF Member


Joined: Dec 2013
Posts: 6,044
Likes: 336
I relocated mine - I cut the them by the handgrips and shrink-wrapped a small stub of wire that was left exposed.
I then got new plug and play CD lights - found the plugs in the 2 holes that are on either side of the neck of the frame (by the fork lock) plugged them in and was done.
Pain in the *** getting the wires all back in the hole but take your time and it is an easy job
I then got new plug and play CD lights - found the plugs in the 2 holes that are on either side of the neck of the frame (by the fork lock) plugged them in and was done.
Pain in the *** getting the wires all back in the hole but take your time and it is an easy job
Tourer
Joined: Sep 2014
Posts: 369
Likes: 31
From: Marlton, NJ
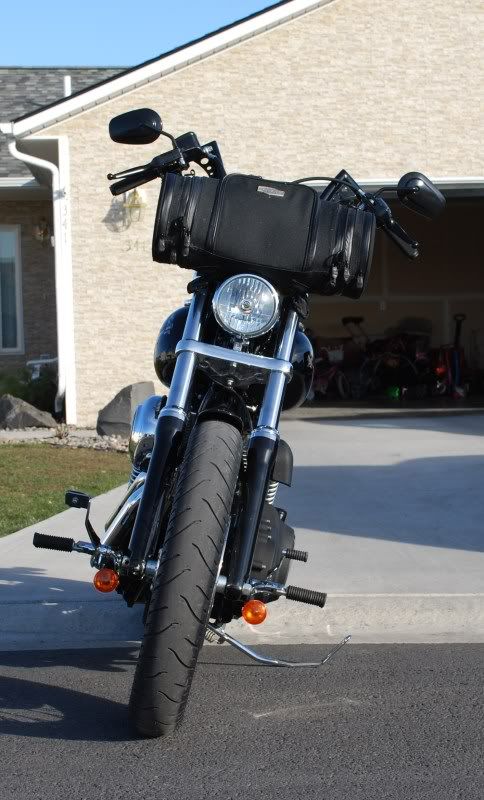
I'm working on doing this right now on 14' fatbob. Originally I had the fork mounted turns spliced into the stub at the bars but decided to clean it up a bit.
I know I will need to extend the turn wires but didn't want to hack off the stock harness connectors at the main harness.
I ordered the 2 molex plugs and crimp ends from kutter.
part numbers:
73153-96BK receptacle housing pack of 2. $2.44
73191-96 receptacle contacts pack of 10. $4.10
I know I will need to extend the turn wires but didn't want to hack off the stock harness connectors at the main harness.
I ordered the 2 molex plugs and crimp ends from kutter.
part numbers:
73153-96BK receptacle housing pack of 2. $2.44
73191-96 receptacle contacts pack of 10. $4.10

Cruiser
Joined: Jul 2005
Posts: 108
Likes: 0
From: Edmonton, Alberta, Canada
I just want to make sure I understand my options:
1: I can remove the wires from the connector in the backbone of the bike, remove the signal lights from the handlebar. I then split the housing on the grip and pull the wires through the backbone and handle bars. Then add the connector back on and route the wires through the grommet and plug them back into the White and Black connectors.
2: I can cut the Signal Light wire at the grommet below the light and pull the wire out of the handle bars and solder them to the wires left on the Signal Light then mount the sigs and put the left over wire into the back Bone of the bike. This option eliminates the need to deal with the connectors in the back Bone under the tank?
TIA....Rob
1: I can remove the wires from the connector in the backbone of the bike, remove the signal lights from the handlebar. I then split the housing on the grip and pull the wires through the backbone and handle bars. Then add the connector back on and route the wires through the grommet and plug them back into the White and Black connectors.
2: I can cut the Signal Light wire at the grommet below the light and pull the wire out of the handle bars and solder them to the wires left on the Signal Light then mount the sigs and put the left over wire into the back Bone of the bike. This option eliminates the need to deal with the connectors in the back Bone under the tank?
TIA....Rob
Trending Topics

Cruiser
Joined: Dec 2012
Posts: 240
Likes: 0
From: North Metro Indianapolis
You don't need to cut and splice anything. Depends on if you want cuts or not. I have nothing against splicing unless I have too. Otherwise I'd rather take the time to keep it clean and not excessively shrink wrapped. Not sure what wire connector you speak of. You should need anything extra except for solder/gun and shrink wrap if you go that route. Otherwise just tools!!
1. Disconnect quick release fuel line
2. Unbolt tank bolts front and rear and slide tank back a few inches watching the fuel cross over.
3. Remove plastic cover on the underside of the backbone.
4. Pull out the bundle of wires and the signal wire connections are the white and black connectors I believe.
5. Disconnect them remove the wires from the neck and disassemble the molenex connectors Molex connector disassembly. Draw the a pic of the wire color locations in the connectors before you take them apart Molex connector disassembly - YouTube
6. Unscrew the hand controls and the sigs and pull the wires through and now you have the whole assembly with the wires to do as you please with OEM Conduit with no cuts.
7. Mount sigs where you want
8. Rebuild Molenex connectors
9. Route wires back into the neck, connect and reinstall plastic cover and gas tank.
I ran mine all the way down to my forward with no extensions. The excess wire was all stuff in the backbone.
1. Disconnect quick release fuel line
2. Unbolt tank bolts front and rear and slide tank back a few inches watching the fuel cross over.
3. Remove plastic cover on the underside of the backbone.
4. Pull out the bundle of wires and the signal wire connections are the white and black connectors I believe.
5. Disconnect them remove the wires from the neck and disassemble the molenex connectors Molex connector disassembly. Draw the a pic of the wire color locations in the connectors before you take them apart Molex connector disassembly - YouTube
6. Unscrew the hand controls and the sigs and pull the wires through and now you have the whole assembly with the wires to do as you please with OEM Conduit with no cuts.
7. Mount sigs where you want
8. Rebuild Molenex connectors
9. Route wires back into the neck, connect and reinstall plastic cover and gas tank.
I ran mine all the way down to my forward with no extensions. The excess wire was all stuff in the backbone.
I didn't have to D/C the quick-release fuel line in my 09 Bob. I went in through the right side grommet, and there is a drop-down plastic filler panel on the underside of the backbone, directly above the front rocker box that gives you access to the wiring harnesses. Find the two turn signal plugs, one white, one black, and remove the pins as shown. The rest of the above instructions are spot on, and very easy to accomplish.
I have heard of guys having problems with the o-rings of the quick release fuel lines getting buggered up, and the MoCo sells only the whole line, not the individual o-rings......
Just my $.02.....
HD Forum Stories
The Best of Harley-Davidson for Lifelong Riders

7 Surprising Harley-Davidson Products that Are Not Motorcycles
Verdad Gallardo
8 Best Harley-Davidson Motorcycles Ever
Pouria Savadkouei
10 Worst Harley-Davidson Motorcycles Ever
Pouria Savadkouei
Killer Custom's Jail Break Is The Breakout That Refused to Blend In
Verdad Gallardo
Crazy Bunderbike Build Looks Amazing, But Is It Impossible to Ride?
Verdad Gallardo
Harley-Davidson Reveals Super Cool Cafe Racer Concept
Verdad Gallardo
Engraved Rebellion: Inside Bundnerbike's Glam Rock II
Verdad Gallardo
10 Motorcycles You Should Never Buy
Joe Kucinski
10 Things Harley-Davidson Needs to Fix in 2026
Verdad Gallardo
Cruiser
Joined: Apr 2012
Posts: 178
Likes: 0
From: Texas