When you click on links to various merchants on this site and make a purchase, this can result in this site earning a commission. Affiliate programs and affiliations include, but are not limited to, the eBay Partner Network.
Dyna Glide ModelsSuper Glide, Super Glide Sport, Super Glide Custom, Dyna Glide Convertible, Super Glide T-Sport, Dyna Glide Police, Dyna Switchback, Low Rider, Street Bob, Fat Bob and Wide Glide.
Yesterday I installed a rear Sputhe Positrac, as well as a new top link. I've never changed my rear mount, and my impression was that it's really difficult to reach. The first thing I found was that it's a rare job where my J&S lift wasn't ideal - I had a hard time getting a jack under the transmission while the bike was on the J&S. I ended up going back to my old Sears jack, which leaves plenty of room to slide a scissor jack underneath as well. The rear mount was actually super easy to remove... Four bolts and it dropped right out of the bottom. I really don't know how old it is, but it looked absolutely fine so I reused it.
The only thing difficult about installing the Sputhe is that the two transverse bolts travel through the frame, through the mount, and thread into the Sputhe side mount outside of the right-hand frame rail. It would have been easier if they passed through completely and then had a nut. It was difficult to hold the mount (which is a heavy piece) in position to accept the bolt while tightening the bolt from the other side. A second person would've made it easy. The instructions don't give torque specs or anything, so I opted for "tight" and used some blue Loctite on the two bolts that hold the stabilizer link. I didn't have to remove the rear wheel or move the rear master cylinder at all.
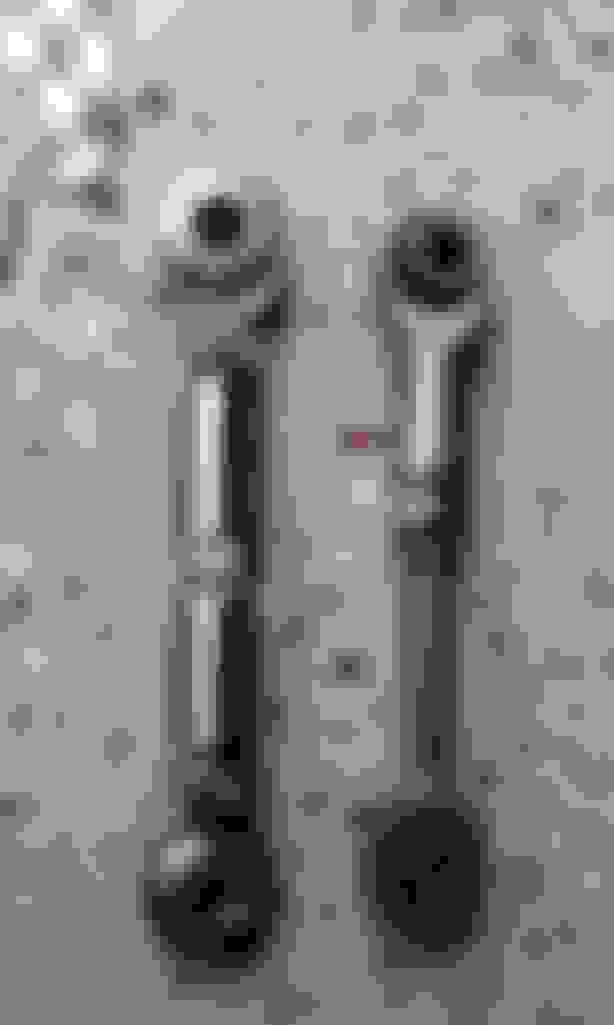
When I recently finished my engine build I put it back together with the OEM top mount, which appears to be a true heim joint but isn't really. The ends actually sit in rubber sleeves, which looked dry rotted and torn. I was going to order individual pieces to make one, but took a chance on this stainless alternator tensioner link intended for a Small Block Chevy. It fit perfectly!
After everything was in, I once again followed the "MattVA Method" for swingarm vertical alignment. In short, you use a level across the top frame rails, and position the bike in a level plane (side to side). I did this by raising the bike on the J&S, and using the scissor jack under the side stand. This allows for precise adjustment to zero out the level.
Once the bike is level, you adjust the top mount until the rear wheel is level in a vertical plane. This was super easy with the new top link, as it has a proper turnbuckle (unlike the OEM link). I also loosened the center bolt in my Predator front mount while adjusting things, as well as the rear exhaust mount. It read .6 at the rear rotor when I started, and it only took a moment to get everything to zero and tightened up.
I took a 40 mile checkout ride, and wow... The handling is honestly transformed. I assume that most of the difference comes from the Sputhe, but I'm sure a true solid top mount and a good alignment helped too. I don't know whether I would recommend this whole setup if your goal is to feel as little engine vibration as possible (I can definitely feel the engine), but it's amazing how much better the chassis tracks in corners. My first time out I used part of the rear tire that had never before seen pavement.
It really worked nicely. Another option: Nemosengineer ordered one from Sputhe, the same link they use on the Positrac but just the link... He reported similar results as I recall...
I was eyeballing this job yesterday but it looked like my modified HF jack would be in the way and I can't put the bike on the ground to reposition (no front end). I may need to look at it again.
Do you put the scissor jack in the "hole" between the lift's pads and stringers?
Always love seeing close pics of your old frame. It's familiar territory and soo beautifully maintained! I was mine was that clean and shiny.
Actually, I put the rear jack pad under the front of the frame, with the front of the jack just sitting in space behind the front wheel. I just lifted it enough to hold the bike straight up and down somewhat securely, and then slid the scissor jack under the tranny. The rear wheel was still on the ground. I was able to turn the scissor jack pretty easily to move the engine/tranny up and down enough to line things up. Since yours can't be moved, maybe you could fit a bottle jack between the pads?
As far as my frame goes... I'm glad it's so nice also, but I really have no idea how it stays so clean! My bike only has about 20,000 miles on it, but it's still 17 years old and 20,000 is still a lot of road time... I clean exposed areas when I can (I always wipe down the tank and fenders), but I would be lying if I said I was fanatical about cleaning the frame... I wish my house and garage would just "stay clean" as well!!!
I have been wanting to do the Sputhe rear mount to go with the Predator mount, now I might as well add this to the mix when I get to it...........maybe this winter.
Tarik, did you have to remove one of the nuts or switch to jam nuts to make that new top link short enough? In your pic it doesn't look like there's enough adjustment to get it down to the length of the stock part.
It really worked nicely. Another option: Nemosengineer ordered one from Sputhe, the same link they use on the Positrac but just the link... He reported similar results as I recall...
Here's my new piece next to the OEM item:
Hi F86,
I am very happy it worked out for you. After the stabilizers, getting the rubber out of the top link, and doing a good alingment, its amazing just how well the big Dynas handle.
7 Surprising Harley-Davidson Products that Are Not Motorcycles
Slideshow: The bar-and-shield logo shows up on far more than motorcycles, some of the company's most unexpected products have nothing to do with riding.
Slideshow: From the troubled AMF years to modern misfires, these bikes earned reputations for reliability issues, questionable engineering, or disappointing performance.
Crazy Bunderbike Build Looks Amazing, But Is It Impossible to Ride?
Slideshow: The Swiss custom shop has taken a Harley Softail and stretched it into something so long and low that it looks closer to a rolling sculpture than a conventional motorcycle.
Engraved Rebellion: Inside Bundnerbike's Glam Rock II
Slideshow: A standard cruiser becomes an intricate metal canvas in the hands of a Swiss custom house known for pushing Harley-Davidson platforms far beyond their factory brief.
Slideshow: Harley-Davidson's challenges aren't abstract; they show up in dropping shipments, shrinking dealer traffic, and strategic decisions that aren't yet translating into growth.