When you click on links to various merchants on this site and make a purchase, this can result in this site earning a commission. Affiliate programs and affiliations include, but are not limited to, the eBay Partner Network.
Dyna Glide ModelsSuper Glide, Super Glide Sport, Super Glide Custom, Dyna Glide Convertible, Super Glide T-Sport, Dyna Glide Police, Dyna Switchback, Low Rider, Street Bob, Fat Bob and Wide Glide.
2013 FXDBP.. As it says, I started the tear down today for new cams, Woods TW 5-6 along with Hillside stage II cylinder heads, 85 cc.. also will be installing a .030" Cometic kit, S&S Precision lifters and quickie pushrods and new Koyo bearings.. I also ordered Power Vision tuner today Should have that in a few days.. I've done a lot of builds on Evo's but this is my first TC.. I was surprised how easy it really is.. I took a lot of pictures and will add the with brief narration... Ok maybe not... Lol...
I was a little surprised to see all the mold under the dash.. There were other areas that had mud in them that shouldn't have been. You'll see in a couple of the pictures that there was more must.. When I replaced the rear pulley with a 68 tooth of a Sportster the insides of the axle was packed as well.. I think this bike was in a Flood... So I replaced the rear wheel bearings as well... Still need to do the front..
Take a good look at the backbone it should be that dirty...
More mud.. looks like Alabama dirt too me... Lol. It don't get up there by itself....
I got the front rocker cover off and everything looked good.. In fact when I took the bolts out for the rocker assembly, there was a little drag on the bolt all the way till it was out.. Tells me the rocker shafts should be ok... I've had the bike out twice so far total of 70 miles and the top end was quiet so I should be ok..
Took a peek at the top of the pistons and was surprised that there was not a lot of carbon build up.. It still has the breathers going into the intake . I will be taking care of that very soon...
So when I took the cylinders off to replace the base o-rings, I was surprised to see the the rings including the oil scrapers we're more lined up than I thought they would be.. Keep in mind there's only 20 k on this motor... It didn't smoke and the compression was good.. I tested it before the tear down.. 178 front and 170 rear..... Anyways good info to have... Keep in mind, anyone doing this type of work should always take a compression test before tearing down if possible... So putting them back into their proper positions shouldn't be an issue...
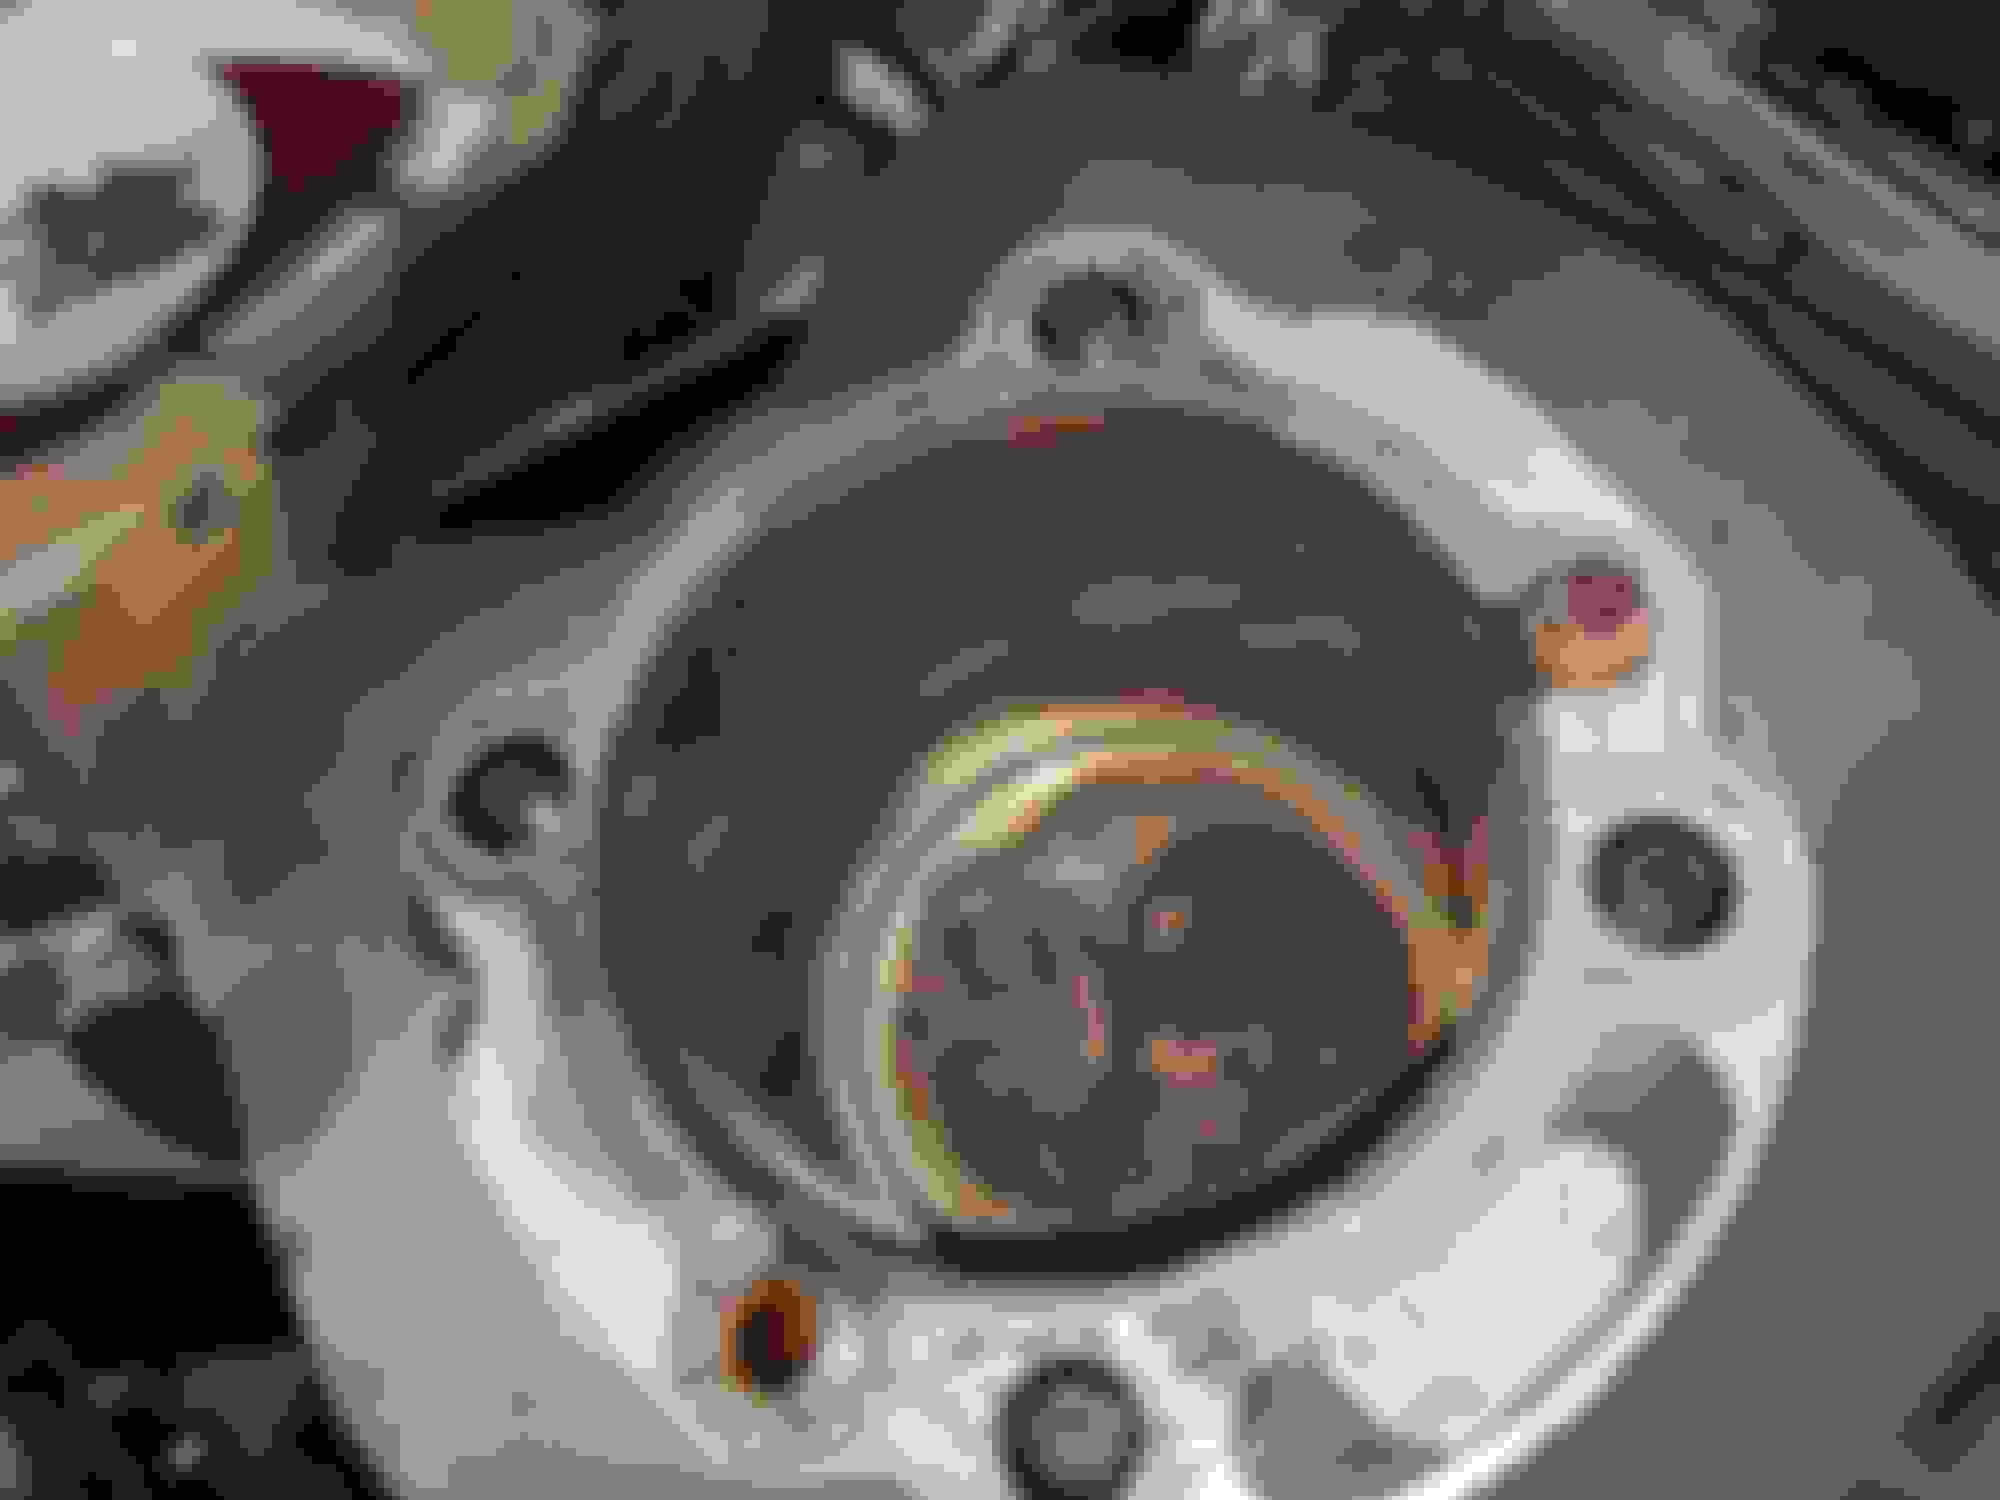
So onto the cam chest. That was even easier than I thought. If you got the right tools, it makes the whole job easier... Only six bolts and off... I have seen other people on here that actually took the oil pump bolts off too.. If you don't have to don't mess with that you pinch a seal you're screwed.. Take the whole assembly off as a unit..
Here's the bearing removal and installation tool. I believe it's from MBS.. The only thing I didn't like about it was the thumb screws to attach it to the case.. So I used my own Allen socket cap screws to secure it.. I was a little nervous when removing the old bearings in fear of damaging the lip on the inside of the case but this tool worked the cat's ***... Installation was as well, had me a little weary being the first time cause I wasn't sure if I was going too far and again I didn't want to do any damage to the lip in the case... So I backed the driver out a couple of times just to make sure..
These are new cams in the pump plate and all lined up. I've heard of guys setting these things off a tooth so I tried to be real careful to make sure that the alignment process was right on. I probably triple checked everything.... Don't want to go back in, lol...
So far all is good can chest is all done and tomorrow I will go to the dealer to get OEM base O-rings and breathers.. I have never seen a breather valve as good as the MOCO's.. So till I get these parts it's gonna sit a little.. should have it all done by the weekend..
By the way all that work took me approximately 7 hours and all hand tools, no air.
Last edited by 98hotrodfatboy; Jan 18, 2021 at 07:12 PM.
No I didn't... I never felt any abnormal vibrations the 2 times I had it out.. Checking run out at the end of the shaft where it goes into the oil pump really ain't as accurate and if you're running chains I don't think it's going to matter much unless it's stupid crazy out... Plus I don't have a trueing stand and I don't want to split the cases..
That's a lot of motor... I'm sure it's fun... I didn't want to go crazy with this bike, just wanted reasonable reliable power... My Evo is my HotRod...
2013 FXDBP.. As it says, I started the tear down today for new cams, Woods TW 5-6 along with Hillside stage II cylinder heads, 85 cc.. also will be installing a .030" Cometic kit, S&S Precision lifters and quickie pushrods and new Koyo bearings.. I also ordered Power Vision tuner today Should have that in a few days.. I've done a lot of builds on Evo's but this is my first TC.. I was surprised how easy it really is.. I took a lot of pictures and will add the with brief narration... Ok maybe not... Lol...
I was a little surprised to see all the mold under the dash.. There were other areas that had mud in them that shouldn't have been. You'll see in a couple of the pictures that there was more must.. When I replaced the rear pulley with a 68 tooth of a Sportster the insides of the axle was packed as well.. I think this bike was in a Flood... So I replaced the rear wheel bearings as well... Still need to do the front..
Take a good look at the backbone it should be that dirty...
More mud.. looks like Alabama dirt too me... Lol. It don't get up there by itself....
I got the front rocker cover off and everything looked good.. In fact when I took the bolts out for the rocker assembly, there was a little drag on the bolt all the way till it was out.. Tells me the rocker shafts should be ok... I've had the bike out twice so far total of 70 miles and the top end was quiet so I should be ok..
Took a peek at the top of the pistons and was surprised that there was not a lot of carbon build up.. It still has the breathers going into the intake . I will be taking care of that very soon...
So when I took the cylinders off to replace the base o-rings, I was surprised to see the the rings including the oil scrapers we're more lined up than I thought they would be.. Keep in mind there's only 20 k on this motor... It didn't smoke and the compression was good.. I tested it before the tear down.. 178 front and 170 rear..... Anyways good info to have... Keep in mind, anyone doing this type of work should always take a compression test before tearing down if possible... So putting them back into their proper positions shouldn't be an issue...
So onto the cam chest. That was even easier than I thought. If you got the right tools, it makes the whole job easier... Only six bolts and off... I have seen other people on here that actually took the oil pump bolts off too.. If you don't have to don't mess with that you pinch a seal you're screwed.. Take the whole assembly off as a unit..
Here's the bearing removal and installation tool. I believe it's from MBS.. The only thing I didn't like about it was the thumb screws to attach it to the case.. So I used my own Allen socket cap screws to secure it.. I was a little nervous when removing the old bearings in fear of damaging the lip on the inside of the case but this tool worked the cat's ***... Installation was as well, had me a little weary being the first time cause I wasn't sure if I was going too far and again I didn't want to do any damage to the lip in the case... So I backed the driver out a couple of times just to make sure..
These are new cams in the pump plate and all lined up. I've heard of guys setting these things off a tooth so I tried to be real careful to make sure that the alignment process was right on. I probably triple checked everything.... Don't want to go back in, lol...
So far all is good can chest is all done and tomorrow I will go to the dealer to get OEM base O-rings and breathers.. I have never seen a breather valve as good as the MOCO's.. So till I get these parts it's gonna sit a little.. should have it all done by the weekend..
By the way all that work took me approximately 7 hours and all hand tools, no air.
Yes I will be.. The cylinders are an excellent condition as well as the pistons and the rings... Definitely not necessary to hone and put in new rings.. That would have been just a waste of money. In fact I was impressed with how clean the skirts on the pistons are.. There's no scuffing no nothing... Also with my compression as good as it was it was a no-brainer... Once I get the motor all back together I'll be doing another compression test with a new heads.. I'm thinking I'm going to be somewhere around 195 CCP.. I also need to check my piston deck height.. actually I'm very curious as to what the piston to deck height is on these TC's from the factory. whenever I've done any type of calculations I've always went on the conservative side at 005 in the hole... Not having a base gasket like the Evo's, you can't adjust for that.. The only thing you can do is have some meat taken off the bottom of the cylinder if you want to get your piston up out of the hole.
Last edited by 98hotrodfatboy; Jan 18, 2021 at 09:54 PM.
Probably too late but you shouldn't put the pump and plate back on as one unit...bad things can happen...way worse than a pinched oring. Plus you need to realign the oil pump anyway. Those pistons sure were clean though. Should be a good runner when you're done.
7 Surprising Harley-Davidson Products that Are Not Motorcycles
Slideshow: The bar-and-shield logo shows up on far more than motorcycles, some of the company's most unexpected products have nothing to do with riding.
Slideshow: From the troubled AMF years to modern misfires, these bikes earned reputations for reliability issues, questionable engineering, or disappointing performance.
Crazy Bunderbike Build Looks Amazing, But Is It Impossible to Ride?
Slideshow: The Swiss custom shop has taken a Harley Softail and stretched it into something so long and low that it looks closer to a rolling sculpture than a conventional motorcycle.
Engraved Rebellion: Inside Bundnerbike's Glam Rock II
Slideshow: A standard cruiser becomes an intricate metal canvas in the hands of a Swiss custom house known for pushing Harley-Davidson platforms far beyond their factory brief.
Slideshow: Harley-Davidson's challenges aren't abstract; they show up in dropping shipments, shrinking dealer traffic, and strategic decisions that aren't yet translating into growth.