


 looks great


MY APE INSTALL

Thread Starter
|
Tourer
Joined: Jul 2006
Posts: 380
Likes: 3
From:
I'm going to go through the installation of apehanger handlebars through a 24 year old kids eyes. First off, BUY THE DARN SERVICE MANUAL. I referred to it many times throughout the install. I bought a set of cyclesmith 14.5" apes. I bought +6 throttle/idle/brake/clutch stainless braided cables. I bought barnett throttle/idle/clutch cables and the brake cable from harley. Some will say that +6 is too long for 14.5s, but I wanted to be able to go to 16s if I felt like it later on. The first and second pics show the bars after I installed the novello wire extension kit and throttle/idle cables. Here goes nothing:
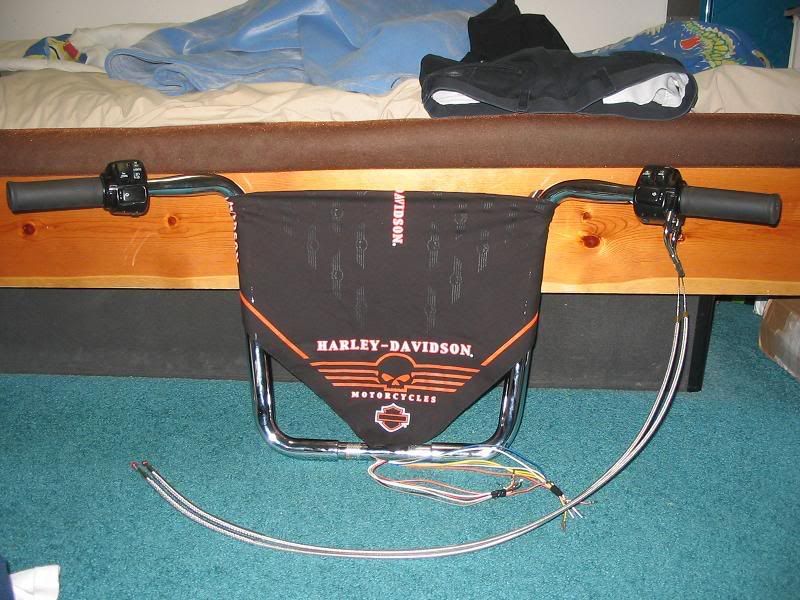
Here are the new bars with the old bars in front:
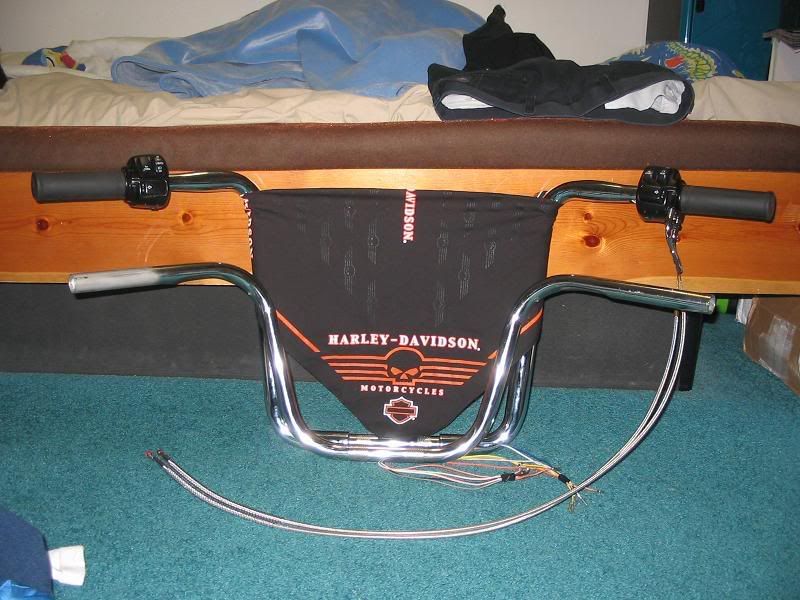
Here is a pic of the new bars by themselves. They are 1-1/4" thick, 14.5" cyclesmith bars as I noted above. They are 1" at the grips and risers, so they work with those stock components. They are pre-drilled for internal wiring and are knurled where they bolt to riser.
The first step is to pull the fuel pump fuse inside electrical caddy. The service manual then states to start bike and let it run until it dies. After it dies, run starter for 3 seconds to purge any fuel left in line. Then you need to push up on coupling and pull down on fuel line.
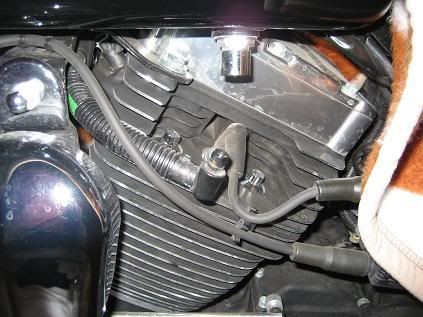
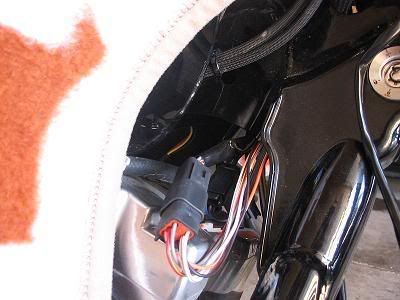
The next step is to pull the two bolts that hold the tank on. One is up front near triple trees, and one is located under the seat. After pulling fuel line from coupling you are able to slide it back a few inches. Be careful though as clamps on either side of tank will scratch rocker box covers. Next you will want to pull the rubber grommets out of either side of frame backbone. I used a pair of pliers as they were in there tight. They weren't damaged at all after doing so. Next I pulled the plastic cover out from underneath backbone. This allowed me to work the wire up and out the holes where grommets were. Some people in the past tried to push the wire from underneath the battery. This would have made it a nightmare. After pulling plastic shield out, it was quite easy to manipulate the wire and work it out. Here is the left side.
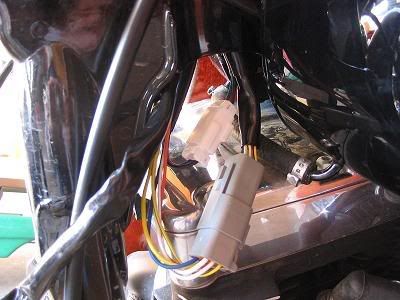
Here is the right side.
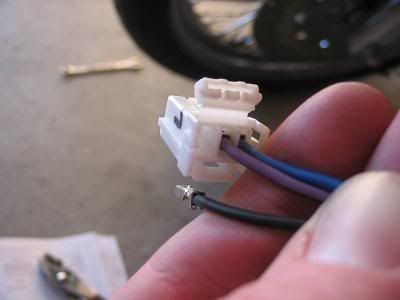
Here is the turn signal connector. It is an amp double interlock style. First you flip up the lip on the wire side of connector and then you need to push up on inside of connector while pulling wire out. I used a pick tool to do so and it was quite easy.
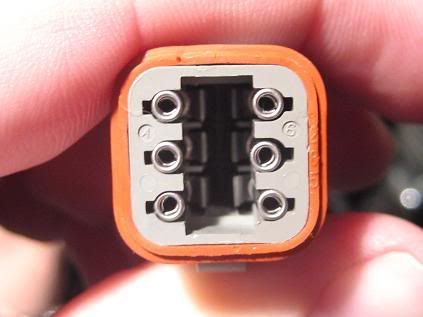
Next I disassembled the deutsch connectors.
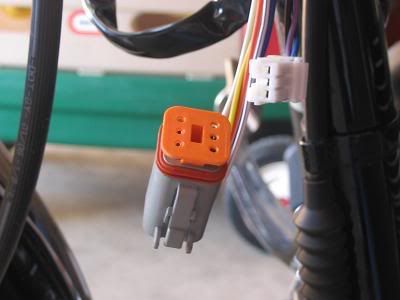
Here is the wedge sticking out.
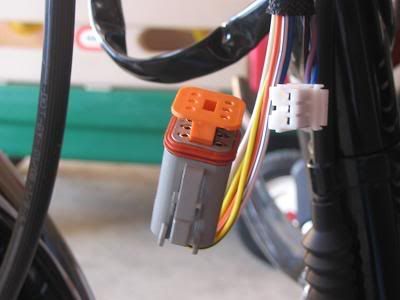
Here is the connector with wedge removed. Notice the little tabs that you must pry down (sideways in this photo) to pull wire out.
Here is the pick tool I used. Made my life very very easy.

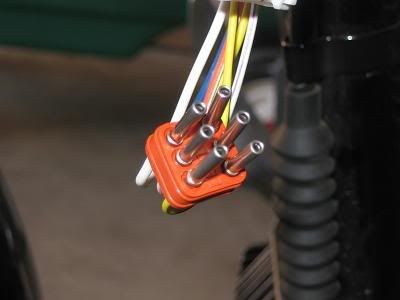
Here are the wires removed from deutsch connector.
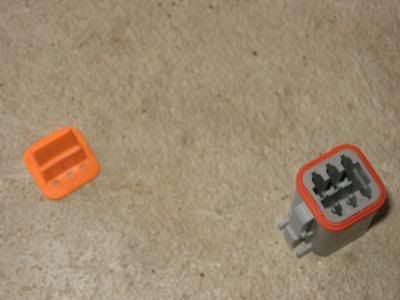
Here is the connector and wedge assembly.
The novell wire extension kit matches up with the stock wiring once removed from deutsch connectors. Extending the wires is a matter of slipping the shrink tube on one of the free ends, mating female to male ends and then hitting tubing with a heat gun or hair dryer. At that point, you can connect the only free end to the deutsch connector. You are now finished with extension of the wiring.
Here are the new bars with the old bars in front:
Here is a pic of the new bars by themselves. They are 1-1/4" thick, 14.5" cyclesmith bars as I noted above. They are 1" at the grips and risers, so they work with those stock components. They are pre-drilled for internal wiring and are knurled where they bolt to riser.
The first step is to pull the fuel pump fuse inside electrical caddy. The service manual then states to start bike and let it run until it dies. After it dies, run starter for 3 seconds to purge any fuel left in line. Then you need to push up on coupling and pull down on fuel line.
The next step is to pull the two bolts that hold the tank on. One is up front near triple trees, and one is located under the seat. After pulling fuel line from coupling you are able to slide it back a few inches. Be careful though as clamps on either side of tank will scratch rocker box covers. Next you will want to pull the rubber grommets out of either side of frame backbone. I used a pair of pliers as they were in there tight. They weren't damaged at all after doing so. Next I pulled the plastic cover out from underneath backbone. This allowed me to work the wire up and out the holes where grommets were. Some people in the past tried to push the wire from underneath the battery. This would have made it a nightmare. After pulling plastic shield out, it was quite easy to manipulate the wire and work it out. Here is the left side.
Here is the right side.
Here is the turn signal connector. It is an amp double interlock style. First you flip up the lip on the wire side of connector and then you need to push up on inside of connector while pulling wire out. I used a pick tool to do so and it was quite easy.
Next I disassembled the deutsch connectors.
Here is the wedge sticking out.
Here is the connector with wedge removed. Notice the little tabs that you must pry down (sideways in this photo) to pull wire out.
Here is the pick tool I used. Made my life very very easy.
Here are the wires removed from deutsch connector.
Here is the connector and wedge assembly.
The novell wire extension kit matches up with the stock wiring once removed from deutsch connectors. Extending the wires is a matter of slipping the shrink tube on one of the free ends, mating female to male ends and then hitting tubing with a heat gun or hair dryer. At that point, you can connect the only free end to the deutsch connector. You are now finished with extension of the wiring.
Last edited by thebestofindica; Aug 3, 2009 at 06:33 PM.

Road Master
Joined: Mar 2006
Posts: 758
Likes: 0
From: O'fallon,MO
Indica,
Those bars are great...You are quite a gentleman to take the time to post it step by step. I appreciate you taking the time to be so detailed and take those pics. I'm sure the first guy that steps up to change bars is going to appreciate your post. I may just have to attempt it myself now...
Thanks,
b
Trending Topics
Great post, I wish it was available a few weeks ago before I started my project.
HD Forum Stories
The Best of Harley-Davidson for Lifelong Riders

6 Weirdest Harley-Davidsons Ever Sold to the Public
Verdad Gallardo
7 Times Harley-Davidson Chucked Tradition Out the Window
Verdad Gallardo
7 Surprising Harley-Davidson Products that Are Not Motorcycles
Verdad Gallardo
8 Best Harley-Davidson Motorcycles Ever
Pouria Savadkouei
10 Worst Harley-Davidson Motorcycles Ever
Pouria Savadkouei
Killer Custom's Jail Break Is The Breakout That Refused to Blend In
Verdad Gallardo
Crazy Bunderbike Build Looks Amazing, But Is It Impossible to Ride?
Verdad Gallardo
Harley-Davidson Reveals Super Cool Cafe Racer Concept
Verdad Gallardo
Engraved Rebellion: Inside Bundnerbike's Glam Rock II
Verdad Gallardo
Tourer
Joined: Jul 2006
Posts: 261
Likes: 0
From: Bartlett IL
sweet youre gonna love it. I did my clutch a little dfferently. Instead of taking apart the trans cover all u have to do is discnnect the hand lever then on the cover there should be enough slack to just turn that little silver thing and pop out the cable. I did my swap earlier this winter (Nov-dec) Now it sucks cause i want to ride!!
Thread Starter
|
Tourer
Joined: Jul 2006
Posts: 380
Likes: 3
From:
ORIGINAL: stbob
sweet youre gonna love it. I did my clutch a little dfferently. Instead of taking apart the trans cover all u have to do is discnnect the hand lever then on the cover there should be enough slack to just turn that little silver thing and pop out the cable. I did my swap earlier this winter (Nov-dec) Now it sucks cause i want to ride!!
sweet youre gonna love it. I did my clutch a little dfferently. Instead of taking apart the trans cover all u have to do is discnnect the hand lever then on the cover there should be enough slack to just turn that little silver thing and pop out the cable. I did my swap earlier this winter (Nov-dec) Now it sucks cause i want to ride!!
Yeah, and actually thats the way I did it the first time, but I had taken no pictures. So the second time I thought I would tear it all apart showing everyone all the components and those darn ***** that may want to fall out of there if you aren't careful.