


Cam amd Lifter How-To
Thread Starter
|
Seasoned HDF Member


Joined: Dec 2010
Posts: 7,736
Likes: 1,524
From: Coromandel Peninsula New Zealand
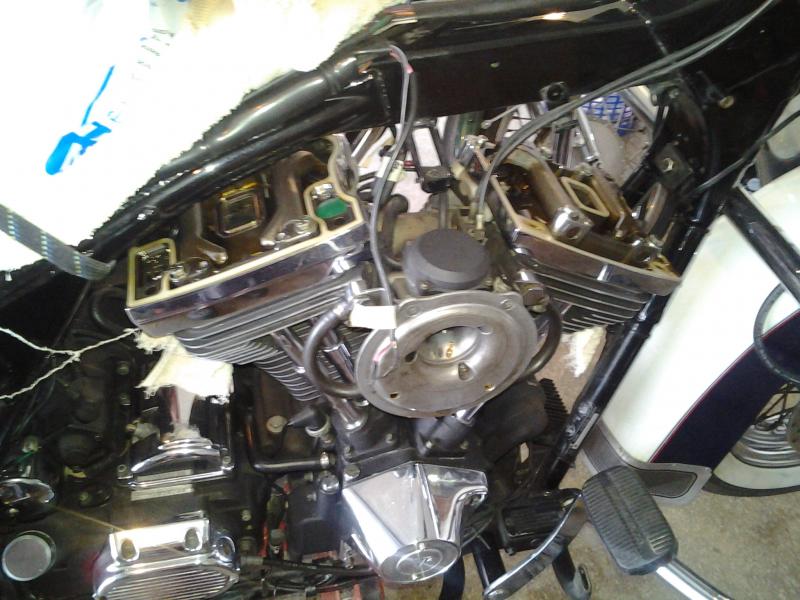
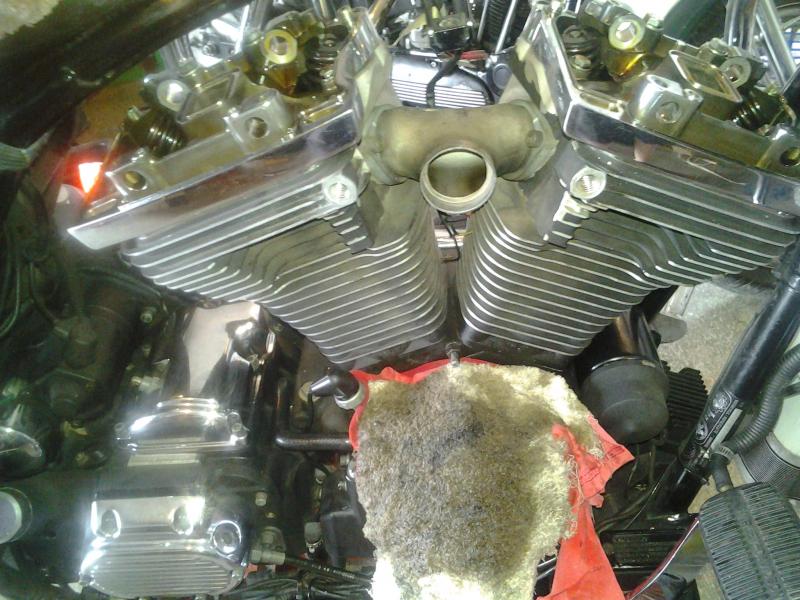
Well Kees turned up with his bike on a trailer as he had already removed the tank and exhausts.
First job was to remove the rocker boxes, which Kees did while I removed the aircleaner and carby.

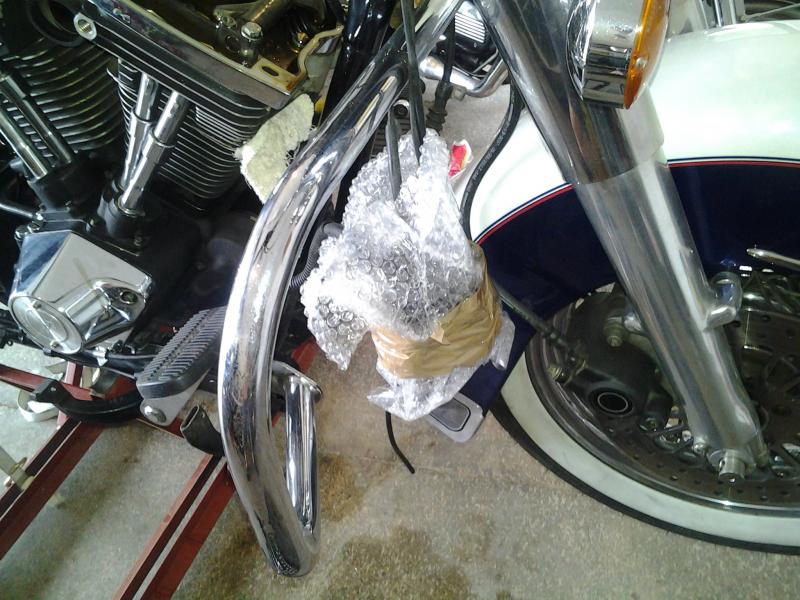
If you are in a hurry as we were because we had to get to the Suzuki Shop to borrow their press before 10:30am, you can leave the carby on the cables but wrap it in bubble wrap so it doesn't damage the paint on the fender.
We also took the shortcut for getting the pushrods out, you can do this if fitting new lifters or if you empty the old ones of oil.
Remove just the two right hand rocker block bolts (put each jug on compression TDC before you loosen the bolts).
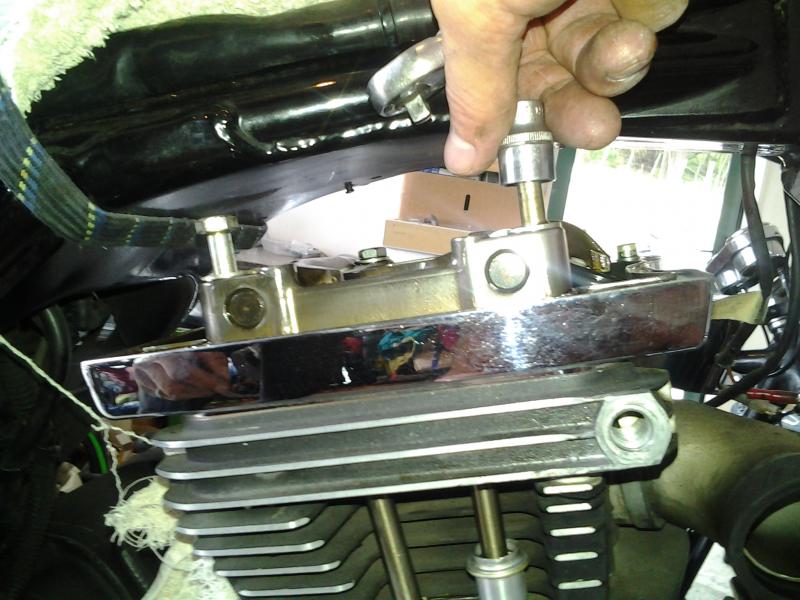
And drift out the rocker shafts.
Then remove the rockers.
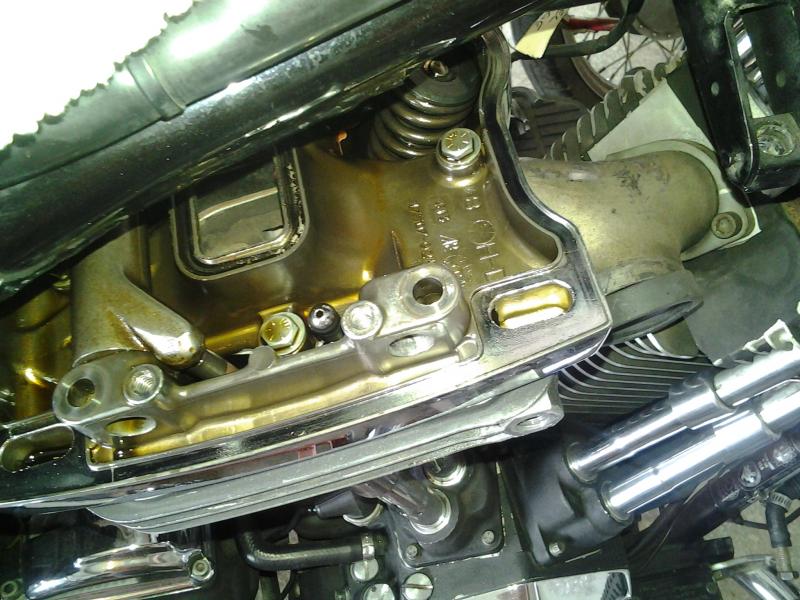
Take out the pushrods and remove the pushrod towers.
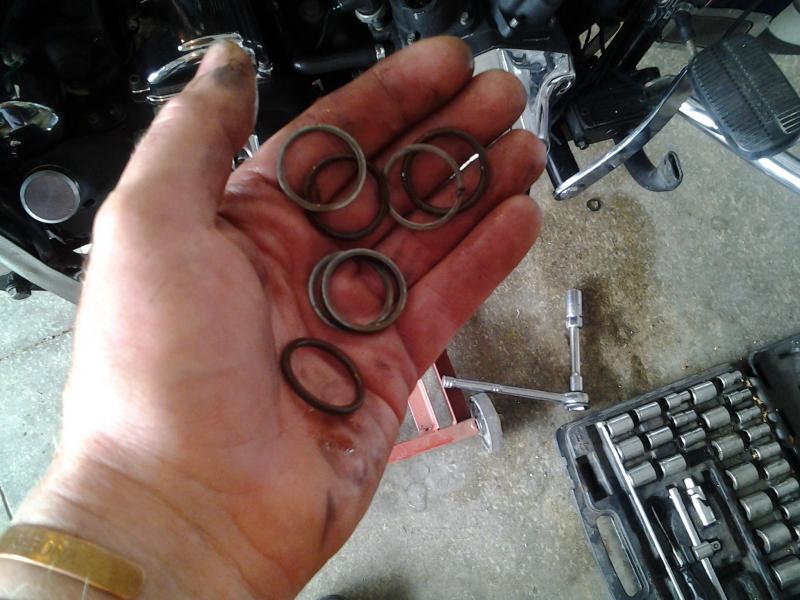
Don't lose the metal rings that sit under the lower pushrod tower seals.
Lifter blocks come off next.
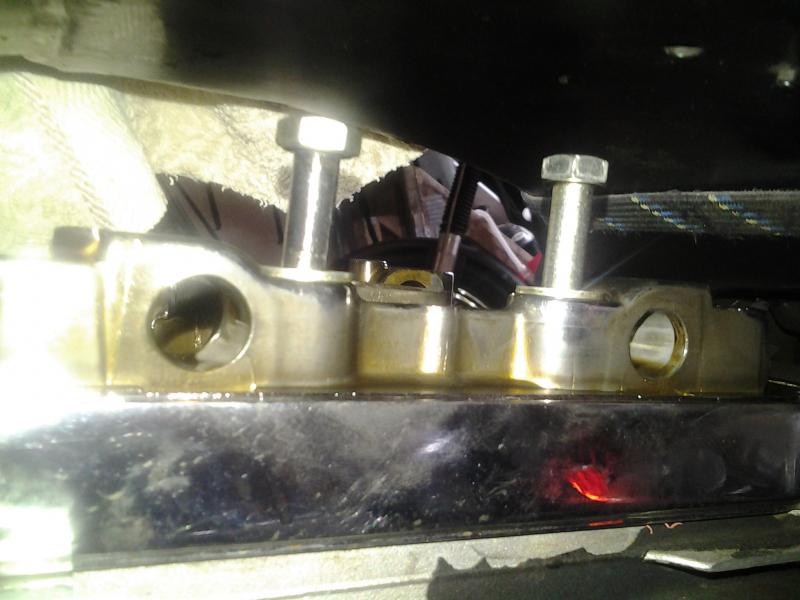
Then drill out the rivets that hold the ign cover on...Kees's bike had had this done by a previous owner and the rivets replaced with screws.
There is a steel plate under the cover, undo the screws and remove it

to reveal the gasket, which can also be removed
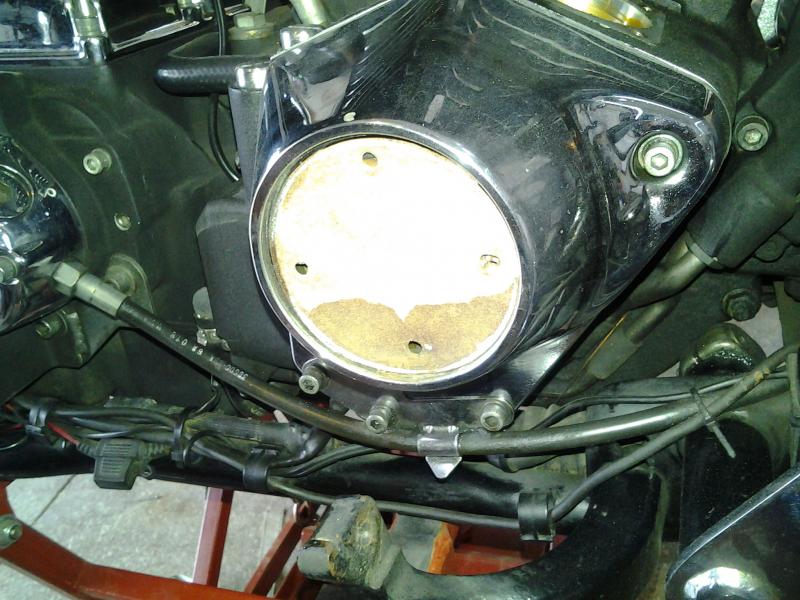
Here we can se that the steel plate screws had been replaced with ones that were too long and the top one had ground a hole in his pick up...nice!
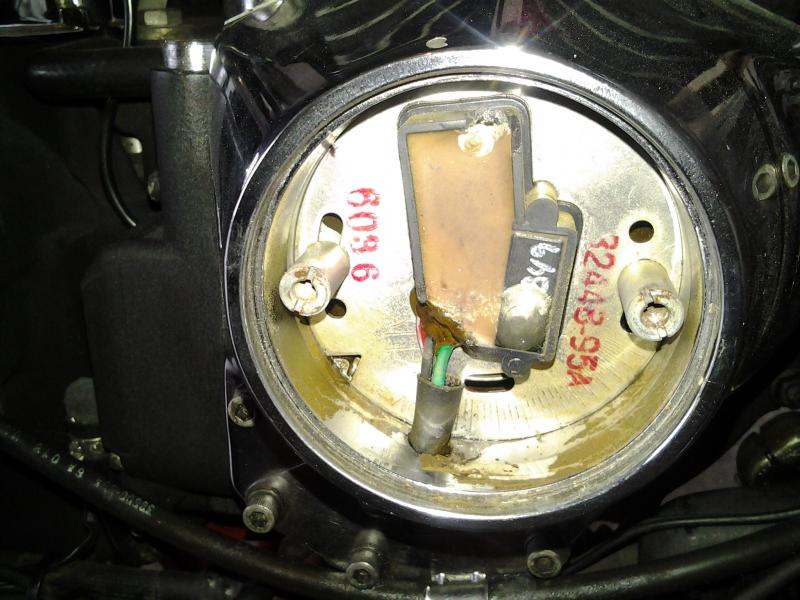
Mark the backplate, this one had already been done and by now we could see that there was already an aftermarket cam installed....
Remove the plate at the bottom of the cam cover to allow you to pull the ign pickup wires through so you can slip the ign backplate out of the way to reveal the ign cup and its bolt.

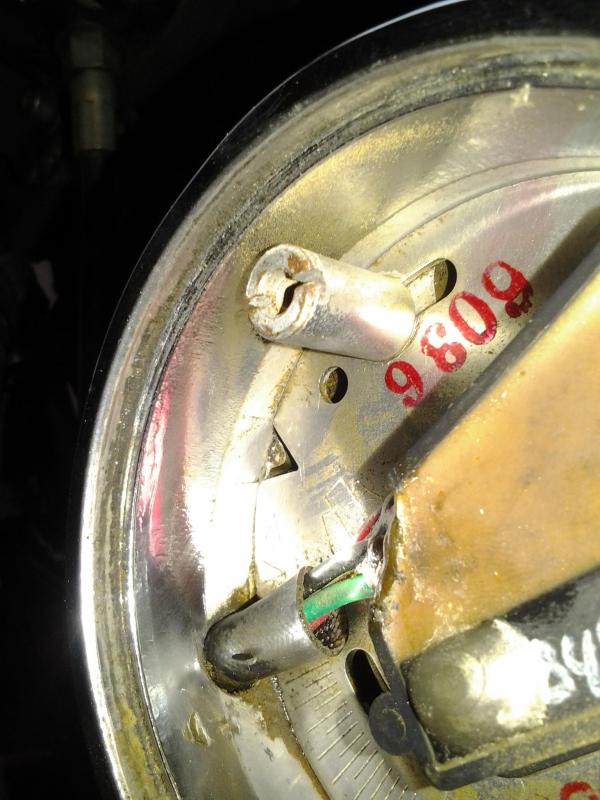
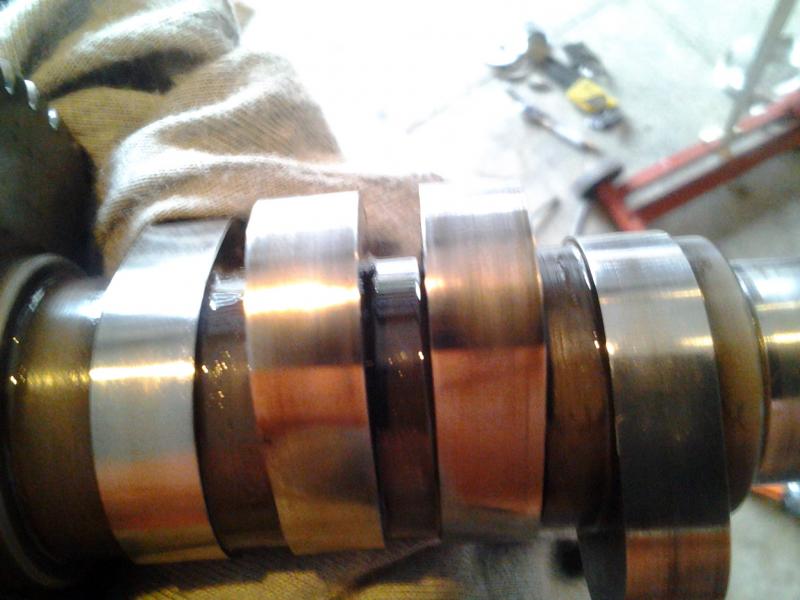
With the cup off and the cover pulled we found there was an EV27 in there but the tips of the lobes were blued and the hardening was starting to pit....so its not going back in, we will use the new VT-3000 that Kees bought a while ago.
Its hard to see the damage to the cam but its there and this made me start to wonder if the bike had been abused.
We rushed off the Suzuki shop to find it was closed....*******! Lucky for us there was an auto repair shop over the road and they let us use their press....and the guys there just happen to be into Harleys!! One has a stroked Flathead, one has a Softail Slim and the other a Breakout....so they didn't want to charge us but Kees forced 10 bucks on them anyway.
I lined up the scribe marks which were already on the gear as it was an Andrews. Gear teeth have crap on them because the press room was a shithole but it got cleaned off.
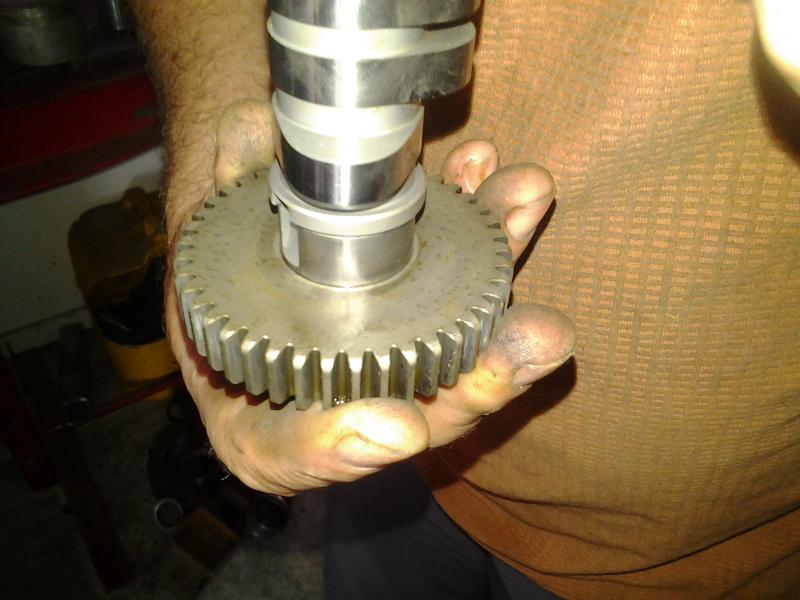
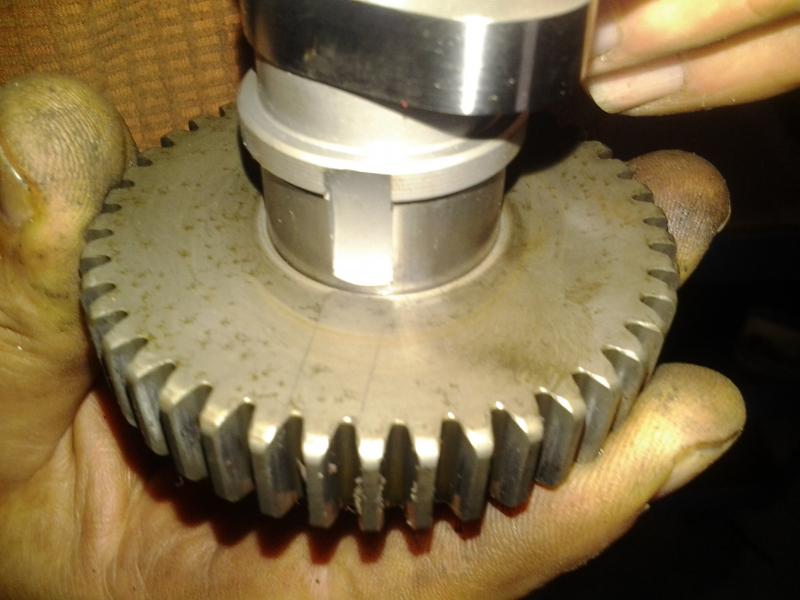
Got the sucker on perfectly aligned first go because I am awesome...
That's my pic limit per post so I will post part 2 in this thread in a few mins.
First job was to remove the rocker boxes, which Kees did while I removed the aircleaner and carby.


If you are in a hurry as we were because we had to get to the Suzuki Shop to borrow their press before 10:30am, you can leave the carby on the cables but wrap it in bubble wrap so it doesn't damage the paint on the fender.

We also took the shortcut for getting the pushrods out, you can do this if fitting new lifters or if you empty the old ones of oil.
Remove just the two right hand rocker block bolts (put each jug on compression TDC before you loosen the bolts).

And drift out the rocker shafts.

Then remove the rockers.

Take out the pushrods and remove the pushrod towers.

Don't lose the metal rings that sit under the lower pushrod tower seals.

Lifter blocks come off next.

Then drill out the rivets that hold the ign cover on...Kees's bike had had this done by a previous owner and the rivets replaced with screws.
There is a steel plate under the cover, undo the screws and remove it

to reveal the gasket, which can also be removed

Here we can se that the steel plate screws had been replaced with ones that were too long and the top one had ground a hole in his pick up...nice!

Mark the backplate, this one had already been done and by now we could see that there was already an aftermarket cam installed....

Remove the plate at the bottom of the cam cover to allow you to pull the ign pickup wires through so you can slip the ign backplate out of the way to reveal the ign cup and its bolt.


With the cup off and the cover pulled we found there was an EV27 in there but the tips of the lobes were blued and the hardening was starting to pit....so its not going back in, we will use the new VT-3000 that Kees bought a while ago.
Its hard to see the damage to the cam but its there and this made me start to wonder if the bike had been abused.

We rushed off the Suzuki shop to find it was closed....*******! Lucky for us there was an auto repair shop over the road and they let us use their press....and the guys there just happen to be into Harleys!! One has a stroked Flathead, one has a Softail Slim and the other a Breakout....so they didn't want to charge us but Kees forced 10 bucks on them anyway.
I lined up the scribe marks which were already on the gear as it was an Andrews. Gear teeth have crap on them because the press room was a shithole but it got cleaned off.


Got the sucker on perfectly aligned first go because I am awesome...

That's my pic limit per post so I will post part 2 in this thread in a few mins.
Last edited by Spanners39; Dec 7, 2013 at 04:19 AM.
Thread Starter
|
Seasoned HDF Member
Joined: Dec 2010
Posts: 7,736
Likes: 1,524
From: Coromandel Peninsula New Zealand
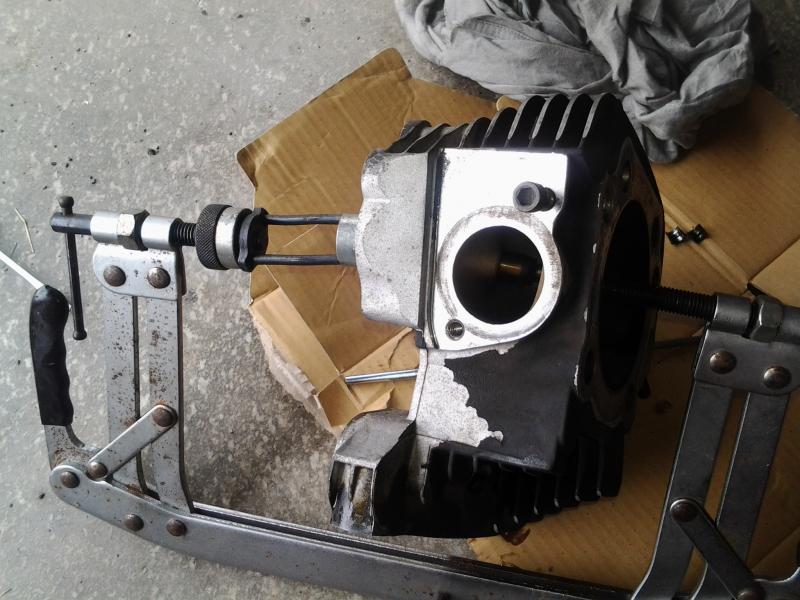
So...we headed back to mine and as we had a new Torrington and I wasn't happy about the state of things in the cam chest we decided to replace it.
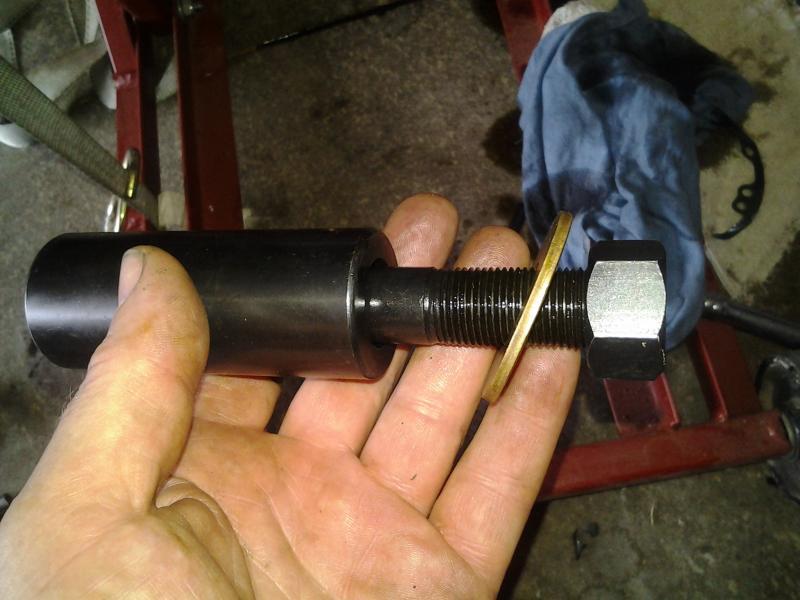
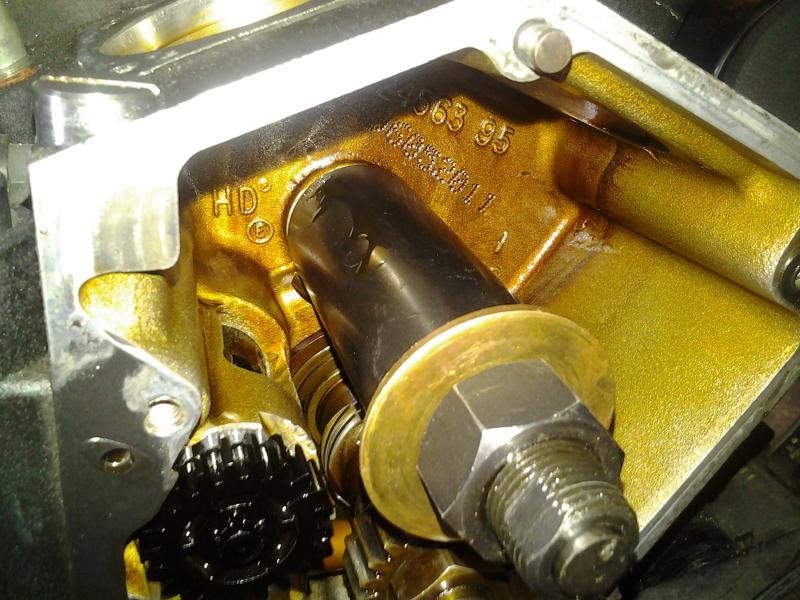
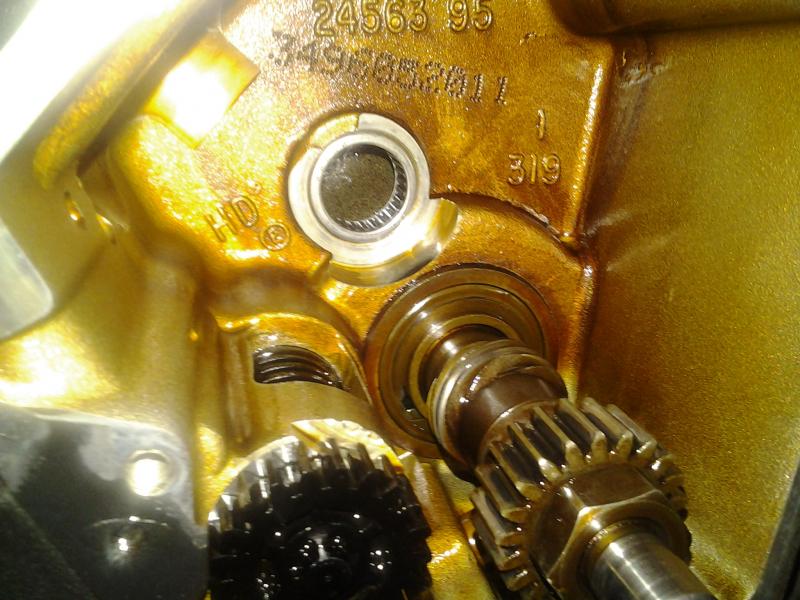
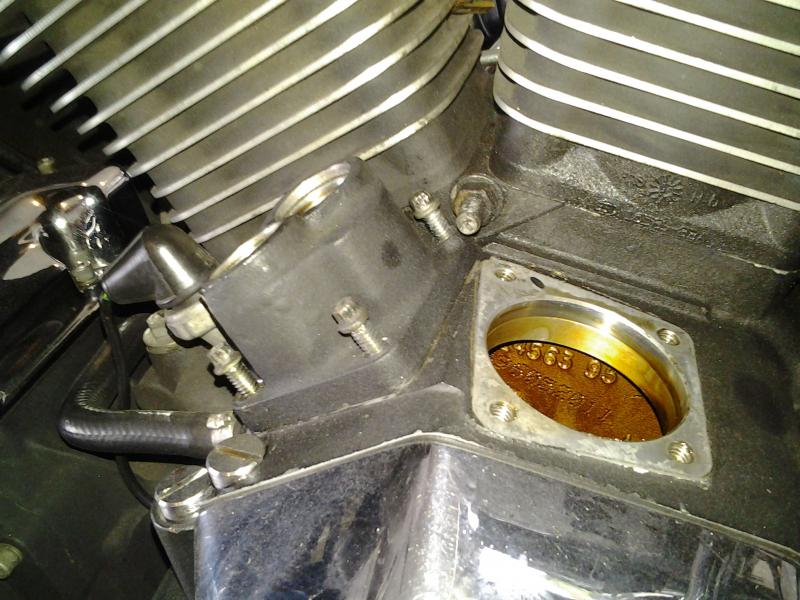
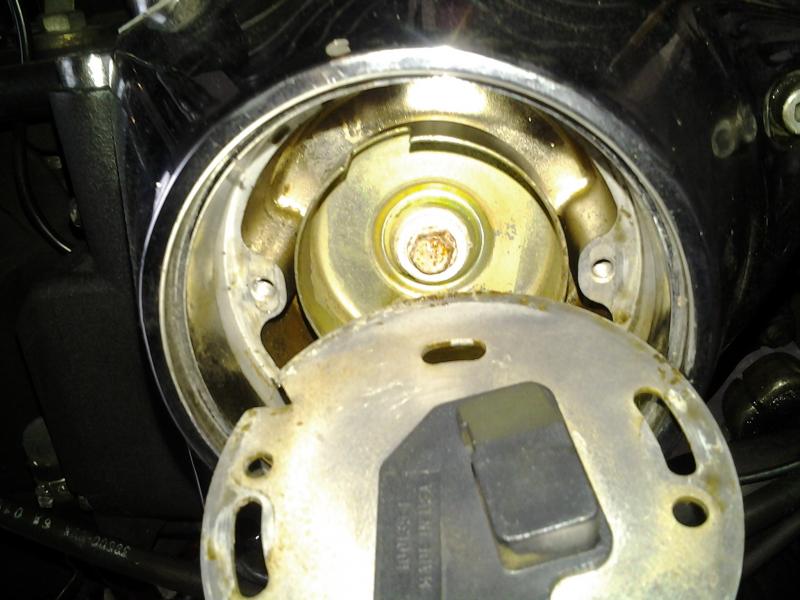
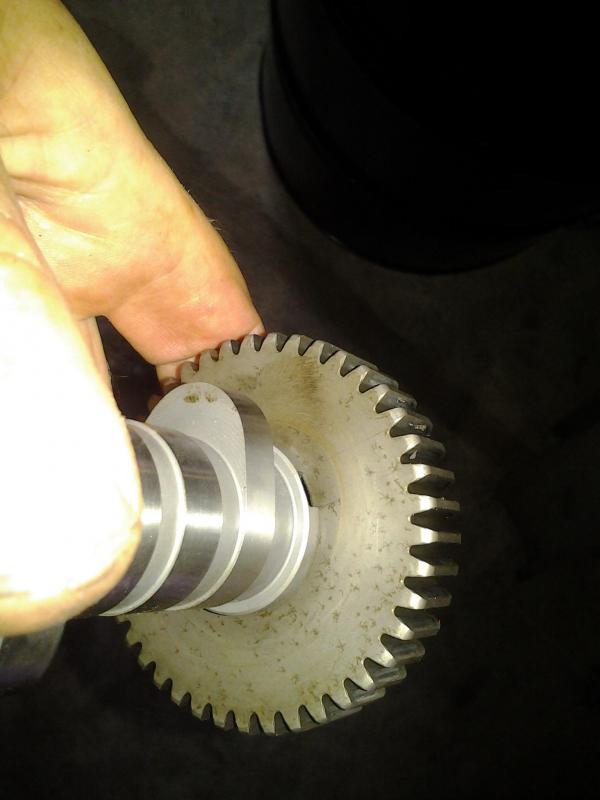
Here is how you time an Evo, the crank mark is very hard to see as the nut gets in the way, so its a good idea to line them up before you pull the cam and then its easier to see how much of the crank pinion mark can be seen....mark the gear if you like.

Kees replaced the cover and we found 0 end float so will get some new shims sent up with the jugs when they come back from HSC but I am getting ahead of myself.
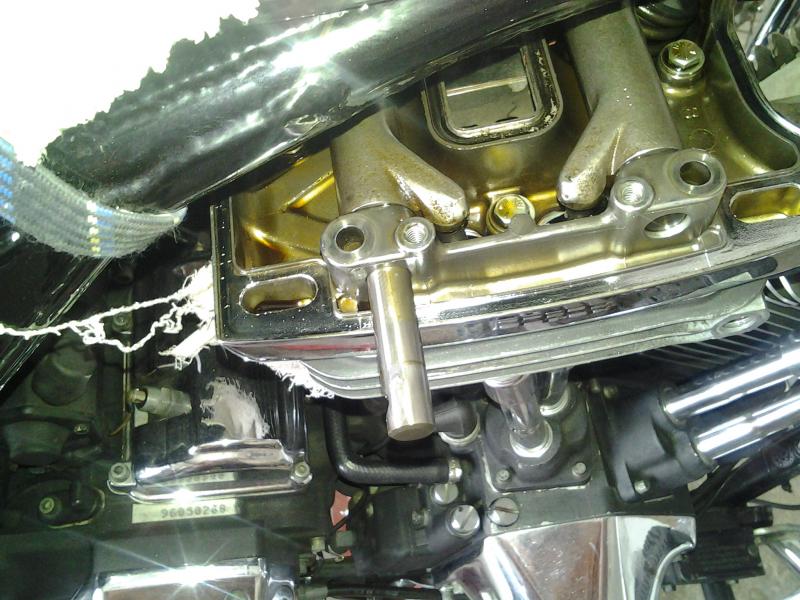
I covered up the lifter block holes as we ain't putting the lifters in until we have the cam end float sorted.
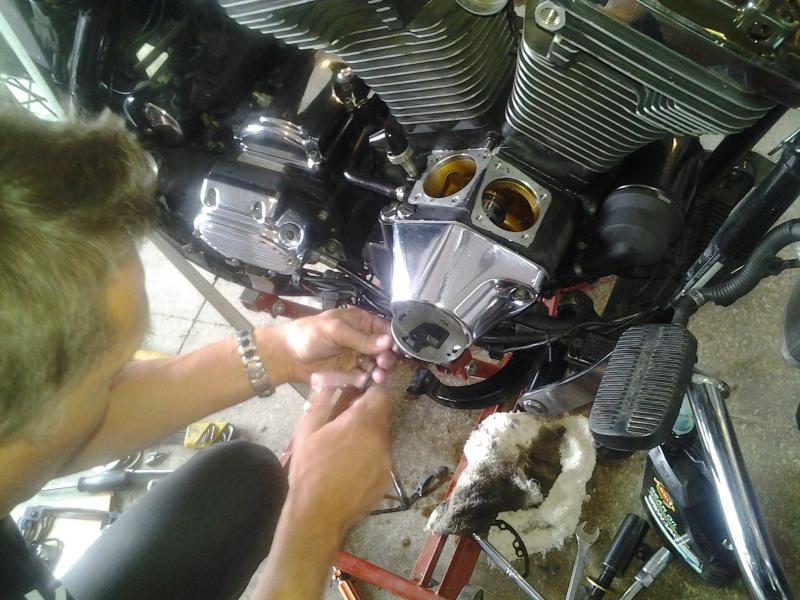
We pulled the rest of the rocker boxes and the complete rocker assembly came off.
On the rear one you can't get the two left hand side half inch bolts out so you pull the lower rocker box with them in their holes.
Next off was the inlet manifold, you don't need to remove the left hand bolts, just back them off to 5mm or so clearance and slide the manifold out once the right hand bolts are out.
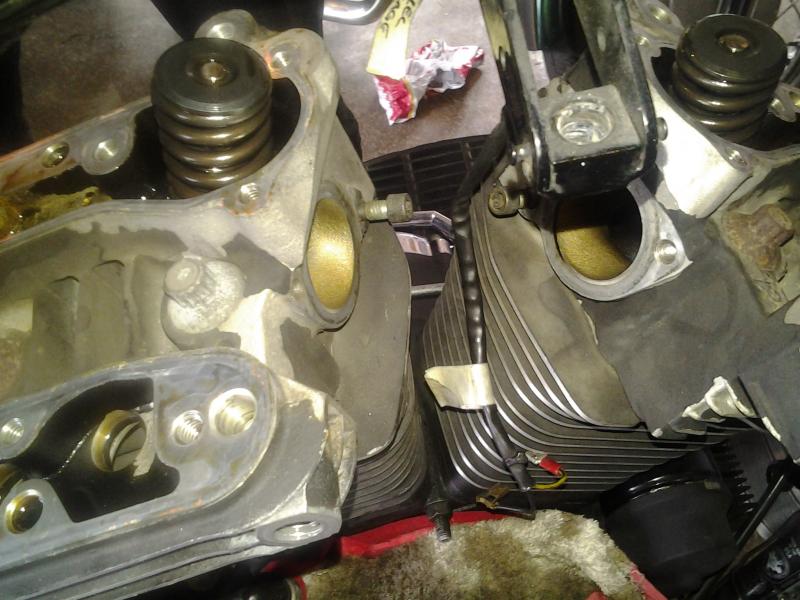
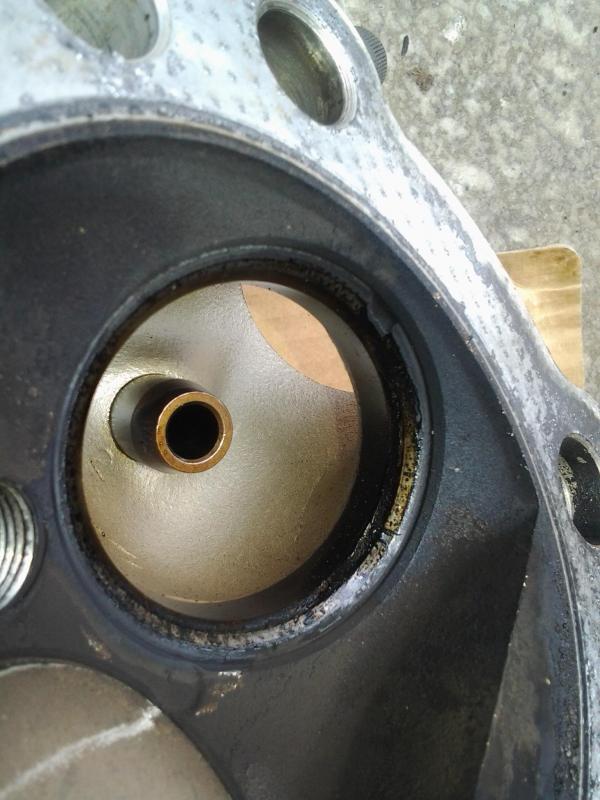
Off came the heads and as I looked at the valves in each one I could see chunks missing from the inlet valve seats on each head!!! Kees started sobbing and muttering about how he wouldn't be able to feed his kids over Xmas but eventually he came round a bit....but he was looking pale.
We pulled the valves.
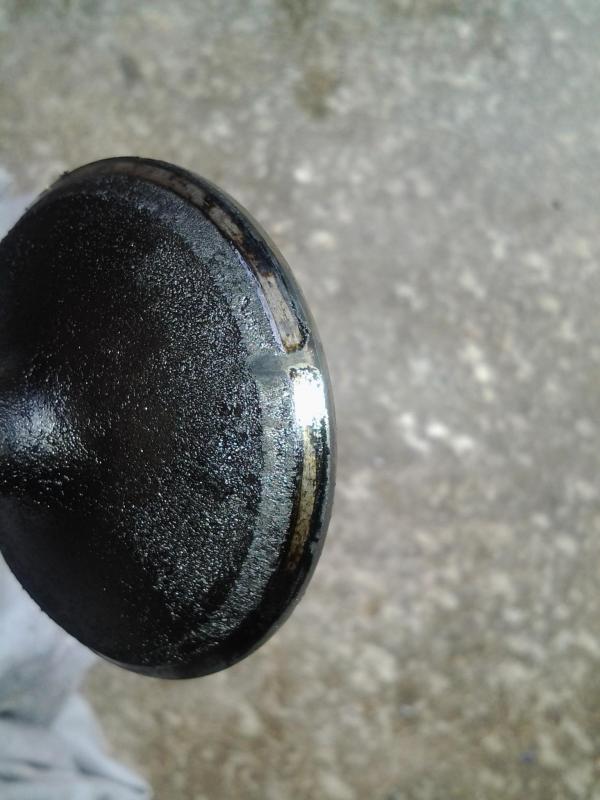
Valve seats and valves (Inlets) are nasty as you can see from the pics. Front head has a big chunk missing and carbon was holding the valve open.

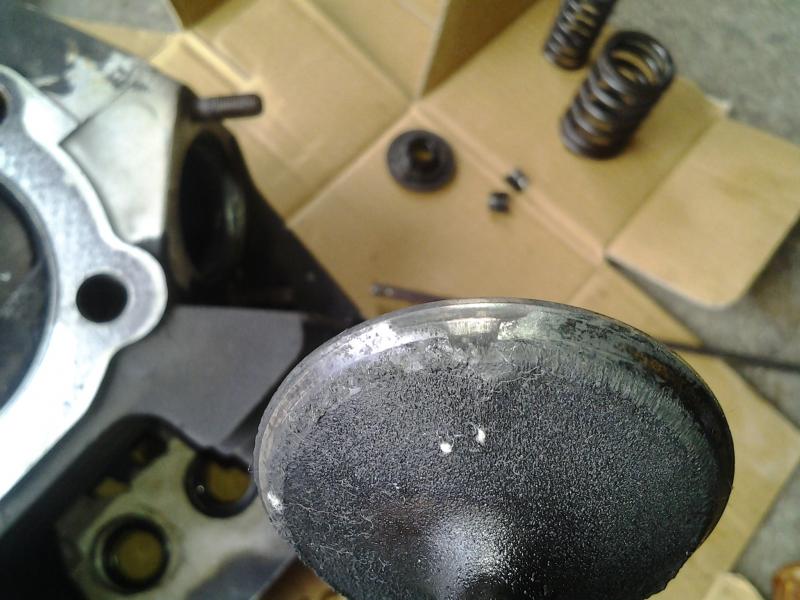
Rear one had on small chunk and the beginnings of a burn out a bit further round the seat.....which also shows up on the valve.
But that's not all!!!
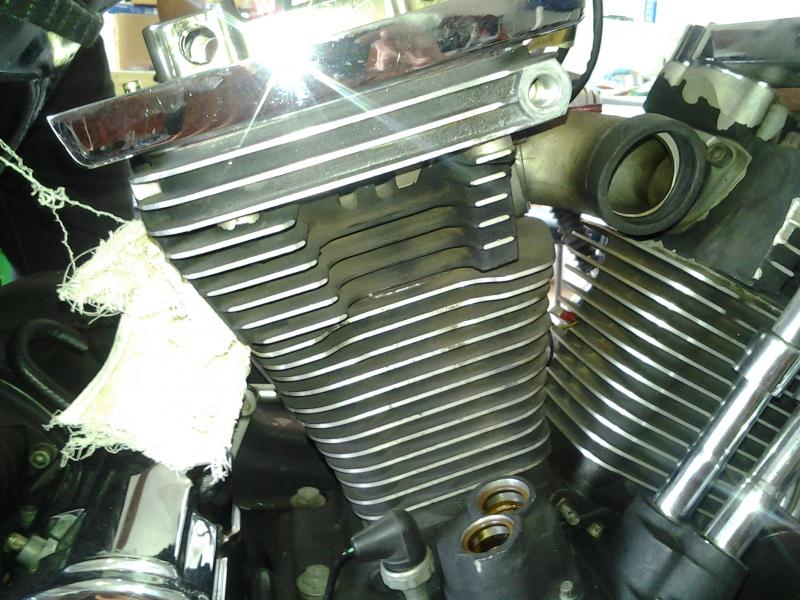
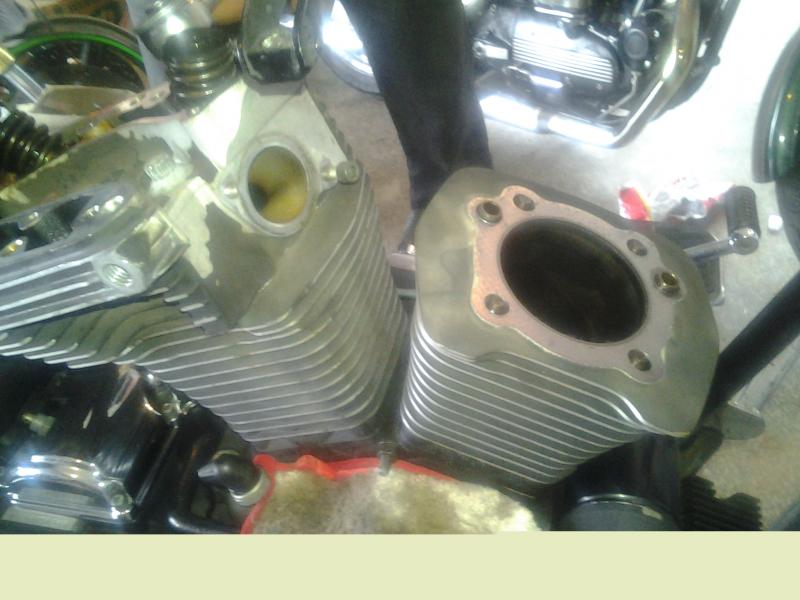
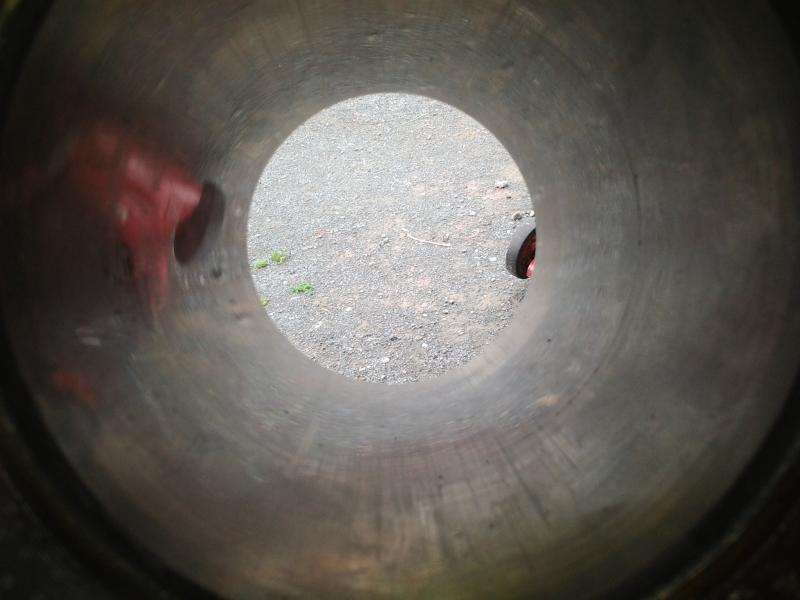
Looking in the jugs we could see the pistons were STD size so its done 100K miles on one set of pistons/bores...so its no surprise its not looking too sharp in the jugs.
I put the middle piston ring down the bore and you could see daylight around a third or more of its circumference....we were expecting new rings and hoping not to rebore it but that hope is gone.
About 40-50 thou end gap and the middle rings were banded horizontally, one silver stripe and one black one....you don't need a feeler gauge to tell you that this motor, although seemingly well maintained is tired...very tired.
Rods checked out OK, in fact the bottom end looks very good and anyway Kees can't afford to pull that apart just yet.
It is my professional opinion that every dollar Kees spends on this refresh will save him 100 bucks because a valve or valve seat was gonna let go big time fairly soon if he hadn't done a compression check and decided that 130/160 warranted whipping the heads off.
Compression checks can tell you an awful lot about the state of a motor...most boating types would never buy an Outboard Motor without a compression check....I suggest you do the same with Harleys....its not the actual numbers, its more than 5-10% difference between the two that should make the red flag fly....Kees had 20%
Anyway....Kees is shipping the heads and jugs to my favourite Indy and when the parts get back here we can put it all back together again and hopefully give you a happy ending to this tale.
One last thing......yes, we could do XYZ to the heads, use 123 cam and spend a shitload of cash but its Xmas, Kees needs all his money for therapy after today and anyway, he's a cruiser by nature so he don't need a heap of HP....
We'll be back


Here is how you time an Evo, the crank mark is very hard to see as the nut gets in the way, so its a good idea to line them up before you pull the cam and then its easier to see how much of the crank pinion mark can be seen....mark the gear if you like.

Kees replaced the cover and we found 0 end float so will get some new shims sent up with the jugs when they come back from HSC but I am getting ahead of myself.

I covered up the lifter block holes as we ain't putting the lifters in until we have the cam end float sorted.

We pulled the rest of the rocker boxes and the complete rocker assembly came off.
On the rear one you can't get the two left hand side half inch bolts out so you pull the lower rocker box with them in their holes.

Next off was the inlet manifold, you don't need to remove the left hand bolts, just back them off to 5mm or so clearance and slide the manifold out once the right hand bolts are out.

Off came the heads and as I looked at the valves in each one I could see chunks missing from the inlet valve seats on each head!!! Kees started sobbing and muttering about how he wouldn't be able to feed his kids over Xmas but eventually he came round a bit....but he was looking pale.

We pulled the valves.

Valve seats and valves (Inlets) are nasty as you can see from the pics. Front head has a big chunk missing and carbon was holding the valve open.


Rear one had on small chunk and the beginnings of a burn out a bit further round the seat.....which also shows up on the valve.


But that's not all!!!
Looking in the jugs we could see the pistons were STD size so its done 100K miles on one set of pistons/bores...so its no surprise its not looking too sharp in the jugs.
I put the middle piston ring down the bore and you could see daylight around a third or more of its circumference....we were expecting new rings and hoping not to rebore it but that hope is gone.
About 40-50 thou end gap and the middle rings were banded horizontally, one silver stripe and one black one....you don't need a feeler gauge to tell you that this motor, although seemingly well maintained is tired...very tired.

Rods checked out OK, in fact the bottom end looks very good and anyway Kees can't afford to pull that apart just yet.
It is my professional opinion that every dollar Kees spends on this refresh will save him 100 bucks because a valve or valve seat was gonna let go big time fairly soon if he hadn't done a compression check and decided that 130/160 warranted whipping the heads off.
Compression checks can tell you an awful lot about the state of a motor...most boating types would never buy an Outboard Motor without a compression check....I suggest you do the same with Harleys....its not the actual numbers, its more than 5-10% difference between the two that should make the red flag fly....Kees had 20%
Anyway....Kees is shipping the heads and jugs to my favourite Indy and when the parts get back here we can put it all back together again and hopefully give you a happy ending to this tale.
One last thing......yes, we could do XYZ to the heads, use 123 cam and spend a shitload of cash but its Xmas, Kees needs all his money for therapy after today and anyway, he's a cruiser by nature so he don't need a heap of HP....
We'll be back
Last edited by Spanners39; Dec 7, 2013 at 02:40 PM.

Road Warrior
Joined: Jul 2013
Posts: 1,476
Likes: 5
From: Florida
Even though you are losing a bit more financial "bottom end" at least the literal bottom end is avoiding dissection, and you have Spanners on your team!
Good fortune with your rebuild, Kees!
(What is the reflection in the cylinder, a mower?)
Good fortune with your rebuild, Kees!
(What is the reflection in the cylinder, a mower?)
Last edited by HarDlife; Dec 7, 2013 at 08:03 AM.
Stellar HDF Member


Joined: Aug 2013
Posts: 3,428
Likes: 3,578
From: Texas
Thanks a bunch for the write up, I have a new cam and bearing coming, should be here next week, will be referring back to your pictures when I do my cam......
Trending Topics
Elite HDF Member
Joined: Oct 2005
Posts: 3,872
Likes: 83
From: Canton, Michigan
How in the hell can you work on a Harley, without having a beer in the picture? 
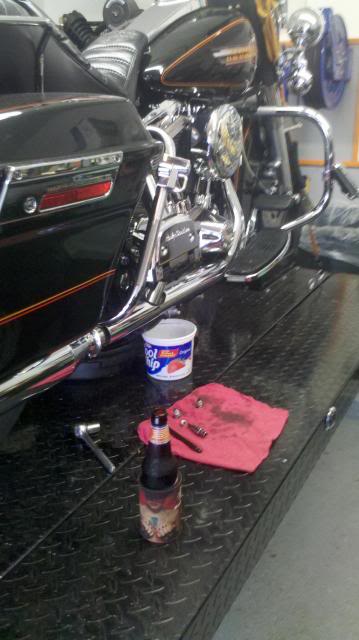
Kees showed up empty handed? Shabby.

Kees showed up empty handed? Shabby.
HD Forum Stories
The Best of Harley-Davidson for Lifelong Riders

7 Surprising Harley-Davidson Products that Are Not Motorcycles
Verdad Gallardo
8 Best Harley-Davidson Motorcycles Ever
Pouria Savadkouei
10 Worst Harley-Davidson Motorcycles Ever
Pouria Savadkouei
Killer Custom's Jail Break Is The Breakout That Refused to Blend In
Verdad Gallardo
Crazy Bunderbike Build Looks Amazing, But Is It Impossible to Ride?
Verdad Gallardo
Harley-Davidson Reveals Super Cool Cafe Racer Concept
Verdad Gallardo
Engraved Rebellion: Inside Bundnerbike's Glam Rock II
Verdad Gallardo
10 Motorcycles You Should Never Buy
Joe Kucinski
