
Help replacing front brake pads

Thread Starter
|
Tourer
Joined: Sep 2008
Posts: 257
Likes: 2
From: Jersey Shore
So I'm planning on replacing the front and rear brake pads this weekend. I started reading through the service manual to see what 's involved and it looks like just to get to the front pads for replacement I will have to take the entire caliper apart? Is that the case or am I mistaken?
Seasoned HDF Member


Joined: Jun 2010
Posts: 9,333
Likes: 3,884
From: Upstate New York
In fact, when I remove the caliper to remove the front wheel, it's hard to keep the pads from falling out (at least the piston side pad). The inside pad is retained with a single screw from the back side.

Stellar HDF Member

Joined: Jan 2009
Posts: 2,578
Likes: 463
From: On a Lake, not far from the Gulf
Just did this yesterday. It is about a 15 min. job, 30 if you really take your time cleaning.
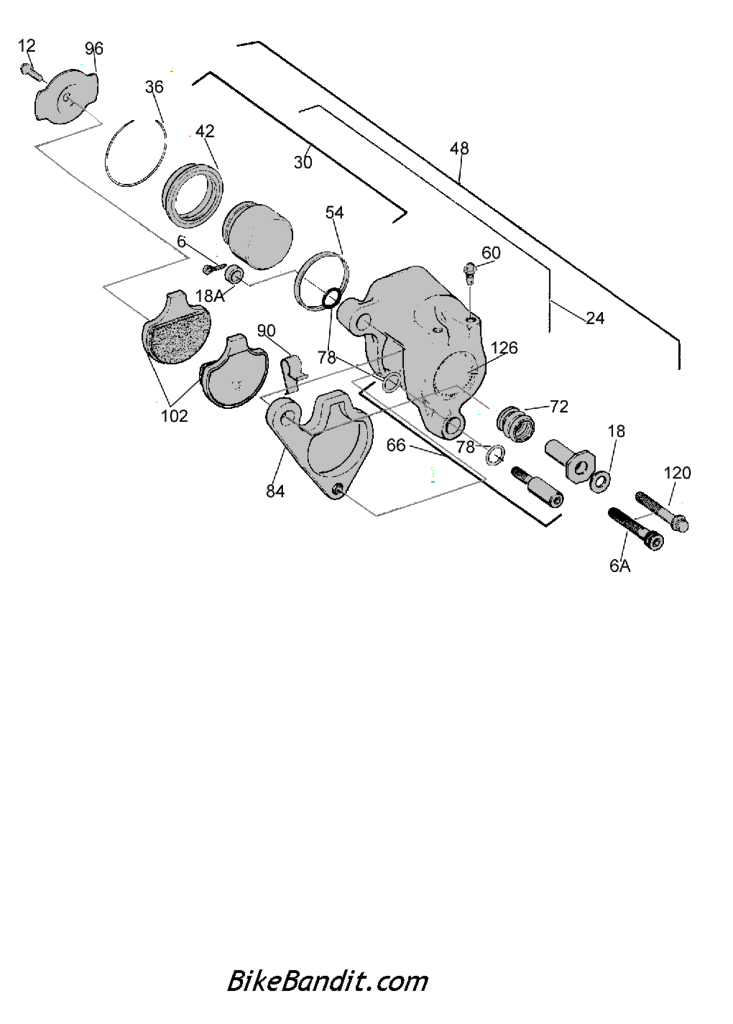
Remove the two allen bolts holding the caliper on. Remove the small bolt (#12 in RidemyEVO's Drawing). That will release the inside pad. Then the outside pad and holder will come out. Remove the outside pad from the holder. Clean everything up. Compress the piston back into the caliper. Replace the pads. Reinstall the caliper. Pump up the brake using the lever. Top off the fluid, and you should be good to go.
Remove the two allen bolts holding the caliper on. Remove the small bolt (#12 in RidemyEVO's Drawing). That will release the inside pad. Then the outside pad and holder will come out. Remove the outside pad from the holder. Clean everything up. Compress the piston back into the caliper. Replace the pads. Reinstall the caliper. Pump up the brake using the lever. Top off the fluid, and you should be good to go.

4th Gear
Joined: Jan 2011
Posts: 8
Likes: 0
Quick note - on Bike Bandit brake schematic, part #90 is very important. If the brake pad is not installed properly into #90, a clunk will be heard when goint over bumps. You will need to hook brake pad into #90, and slide into mounting bracket #84. This holds tension on the brake pad, holding in place.

Thread
Thread Starter
Forum
Replies
Last Post


