When you click on links to various merchants on this site and make a purchase, this can result in this site earning a commission. Affiliate programs and affiliations include, but are not limited to, the eBay Partner Network.
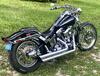
So I’m 6’ 5”. I modified my 98 road king seat so I sit about 2” forward. My wife is really pushed against me and there is seat surface under the back rest.
I’d like to move it 2 inches back. I bought an adjustable (angle) one and thought the problem was solved… Nope. When installed the adjusting ***** don’t allow you to open the bags FAIL.
So, has anyone modified one? What did you do?
I could heat it and bend it back ward.. the bad is it would probably damage the chrome where it’s seen and it would be leaning at an angle, not sure if that’s comfy.
OR
I could cut the the tab brackets horizontally the entire length just under the bar weld so it’s not seen. Then weld it back slid 2” forward. I could paint it afterword leaving what shows chrome and untouched. Any ideas?
Last edited by Rains2much; Oct 26, 2024 at 08:56 AM.
So I’m 6’ 5”. I modified my 98 road king seat so I sit about 2” forward. My wife is really pushed against me and there is seat surface under the back rest.
I’d like to move it 2 inches back. I bought an adjustable (angle) one and thought the problem was solved… Nope. When installed the adjusting ***** don’t allow you to open the bags FAIL.
So, has anyone modified one? What did you do?
I could heat it and bend it back ward.. the bad is it would probably damage the chrome where it’s seen and it would be leaning at an angle, not sure if that’s comfy.
OR
I could cut the the tab brackets horizontally the entire length just under the bar weld so it’s not seen. Then weld it back slid 2” forward. I could paint it afterword leaving what shows chrome and untouched. Any ideas?
If the problem is the ****..
Would the replacement of each adjustment **** with an allen bolt set-up resolve the the saddlebag lid impact with ****?
You will have just the one "set" position when done but in reality that should be all you need once you know the one position.
It may also look nicer or more factory.
*The rear saddle bag lids on a Road King Classic general work better if the TWO top mounting points are spaced away from the bike.
The back rest mounting kit sometimes came with some included thick spacers and longer bolts to replace and be used under the two top mounting brackets.
It pushed the two top mounting brackets on each side away from the bike.
The result is that saddlebags are angled out or pushed away from bike about 3/8 inch at the top.
You can get spacers and longer bolts or just stack some washers plus some longer bolts and get the same results.
Sometimes the included spacers were not enough and it required adding 2 or more washers under the rear mounting point.
**Many of the leather saddlebags have a nick on bike side lid edge of saddlebags because they would scrub when opening or they have a dig on lid...some folks never got or never installed the spacers.
If you look at online pictures of bags for sale there are numerous bags with the saddlebag hinge side edge damage or the ding on center of lid top because the spacers were never installed or used.
If the problem is the ****..
Would the replacement of each adjustment **** with an allen bolt set-up resolve the the saddlebag lid impact with ****?
You will have just the one "set" position when done but in reality that should be all you need once you know the one position.
It may also look nicer or more factory.
*The rear saddle bag lids on a Road King Classic general work better if the TWO top mounting points are spaced away from the bike.
The back rest mounting kit sometimes came with some included thick spacers and longer bolts to replace and be used under the two top mounting brackets.
It pushed the two top mounting brackets on each side away from the bike.
The result is that saddlebags are angled out or pushed away from bike about 3/8 inch at the top.
You can get spacers and longer bolts or just stack some washers plus some longer bolts and get the same results.
Sometimes the included spacers were not enough and it required adding 2 or more washers under the rear mounting point.
**Many of the leather saddlebags have a nick on bike side lid edge of saddlebags because they would scrub when opening or they have a dig on lid...some folks never got or never installed the spacers.
If you look at online pictures of bags for sale there are numerous bags with the saddlebag hinge side edge damage or the ding on center of lid top because the spacers were never installed or used.
The adjusting **** is this massive gear teeth dial… no good way to use it even with mods.. I returned their poorly engineered junk. I thought about spacing them out further but to clear their ridiculous **** they’d have to be pushed out over 4 inches and even then you’d only be able to open the lid 3/4 of the way.
It is a lot bigger than it seems in the pic. The bags closed are about 1/4 inch past half way on that gigantic 3 1/4” thick sun dial.
Last edited by Rains2much; Oct 26, 2024 at 10:55 AM.
I am familiar with thst style.
What happens if ***** are removed as suggested.
And also do the saddlebag mount suggession.
It was constructed in two pieces. There was no way to not use the *****. There was no way to replace the ***** with bolts.
I actually already completed fabbing my back rest. It turned out perfect.
I installed it with no bags. Put tape on them drew a line using a level as low as possible matching at both sides. Cut them horizontally. Removed from bike, Then I moved the top cut off section 1 3/4 inches back and the welded it. It moves the back rest at the exact same angle back 1 3/4 inches. I can add half to 1” spacers between the pad and the sissy bar if I want to adjust it. I painted over the welds with high temp silver paint and then did two coats of chrome paint. The line I welded is between the bags and the fender. You can only see it if you look straight down and you’d never notice it if you weren’t looking for it. I’m pretty pleased with myself.
How thick is the pad? Could you shave an inch or two out of it?
I considered that but it really isn’t as thick as you may think. Maybe 3/4inch max and I really wanted a full 2 inches. Remember I’m 6’5”. My seat pushes me back two inches. I have 2 inch extended pedals & floor boards. The wife is small but it was pretty uncomfortable for me. It pushed me back forward.
Mrs. Rains2much
I’m coming out of my skin wearing the dumb hat. Wife really wanted to go with some friends to this line dancing Western barn… ridiculous. I had to listen to hours of LED Zepplin to get that cancer of music outta my ear. Being in bands I was always the “Rocker”… couldn’t imagine any situation ever being that I’d wear a cowboy hat, be in a line dancing bar or hear that many songs about alcohol, break ups, dogs and tractors.
Last edited by Rains2much; Oct 29, 2024 at 05:56 AM.
Having the same issue. Do you have any pictures that show what you have done?
Yeah… but don’t judge me. The welds look really amateur. I ran out of my flux core wire and wanted to finish.. I found a real I took off maybe 20 years ago because it was funky. I used it and it was Uber tough to weld with. So I’m reluctant to show it lol.
I was gonna just live with it for the trip and then come up with something better, but honestly once installed you don’t see the welds, it’s all hidden between the bags and seat. I like it. It doesn’t look any different installed and my wife said she couldn’t tell any difference. For me it kept her from smothering me and pushing me forward. We’ve done a thousand miles now since this backrest was done. Zero issues.
Last edited by Rains2much; Nov 23, 2024 at 06:38 AM.
7 Surprising Harley-Davidson Products that Are Not Motorcycles
Slideshow: The bar-and-shield logo shows up on far more than motorcycles, some of the company's most unexpected products have nothing to do with riding.
Slideshow: From the troubled AMF years to modern misfires, these bikes earned reputations for reliability issues, questionable engineering, or disappointing performance.
Crazy Bunderbike Build Looks Amazing, But Is It Impossible to Ride?
Slideshow: The Swiss custom shop has taken a Harley Softail and stretched it into something so long and low that it looks closer to a rolling sculpture than a conventional motorcycle.
Engraved Rebellion: Inside Bundnerbike's Glam Rock II
Slideshow: A standard cruiser becomes an intricate metal canvas in the hands of a Swiss custom house known for pushing Harley-Davidson platforms far beyond their factory brief.
Slideshow: Harley-Davidson's challenges aren't abstract; they show up in dropping shipments, shrinking dealer traffic, and strategic decisions that aren't yet translating into growth.







 Passenger back rest modification for moving back?