When you click on links to various merchants on this site and make a purchase, this can result in this site earning a commission. Affiliate programs and affiliations include, but are not limited to, the eBay Partner Network.
I have recently upgraded my front lighting with the addition of Darla LED lights from Clearwater Lights. These lights are 2" in diameter & output 2000 lumens each (4,000 lumens for the pair).
I mounted the lights using Clearwater's kit # D104. The kit included a pair of Darla lights, mounting brackets for attachment to the forward front fender mounts & associated hardware, and complete wiring harness that includes a relay & a "volume control" pot.
I added the center switch to the left switch console to control the Darla lighting. I also added the accessories control wiring harness, using a low current switched output to control the Darla wiring relay, with the main (& fused) power to the lights connected to the battery.
I mounted the volume control pot to the left side lower fairing cover. It was necessary to epoxy this pot in place because the cover was too thick to use the normal threads & nut for mounting. I chose this location in order to help hide the wiring & keep the standard handlebar mount off the handlebar for a "cleaner" install.
This pot is used to control output level of the Darla lights between a low of 15% power to a high of 85% power. An additional control wire is spliced into the bike's high beam circuit. When high beam is selected, the Darla lights will go to full power. When low beam is selected, Darla output level is controlled by the pot. At any time, the Darla light can be turned off using the center switch of the left console switchpack.
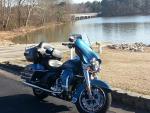
These pictures show how inconspicuous the Darla lights are when mounted to the front forks.
And finally, here's a picture of what these lights look like in broad daylight as compared to the rest of my Limited's LED lighting (note - front running/turn signals are CD's Dynamic Rings).
Front fender/fork mount is not the only mounting option.
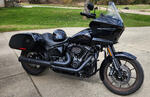
Here's a couple photos showing the lights mounted to the front engine guards of a late model CVO (not mine) using H-D's mounts for their LED Fog Lamps.
Seems the engine guard mount would keep the light more constant in the twisties at night, similar to how the Road Glide lights do. I am interested to know how much more helpful they are in the twisties. That's the part that I hate about the LED projectors.
Seems the engine guard mount would keep the light more constant in the twisties at night, similar to how the Road Glide lights do. I am interested to know how much more helpful they are in the twisties. That's the part that I hate about the LED projectors.
With all lights on at night (high beam) the combination of headlights. aux lights & Darlas, I can see everything from beyond the ditches on either side from just a few feet in front of the bike to almost full reach of the high beam with no dark areas. Have only done 3 night rides with them so far, but very pleased with my ability to see at night.
The post reads like an advertisement for the product....
I am in no way affiliated with nor have I received any type compensation from this company. In fact, I purchased this product prior to their current sale.
To do the on/off button, did you use the harley kit?
Essentially, yes. However my limited already had the oem switchpack installed (that is included in that kit). The switch is only $14. This allows using this https://www.harley-davidson.com/stor...ion-update-kit. That saves a bunch of money over the "kit" w/o ending up with extra parts laying around.
7 Surprising Harley-Davidson Products that Are Not Motorcycles
Slideshow: The bar-and-shield logo shows up on far more than motorcycles, some of the company's most unexpected products have nothing to do with riding.
Slideshow: From the troubled AMF years to modern misfires, these bikes earned reputations for reliability issues, questionable engineering, or disappointing performance.
Crazy Bunderbike Build Looks Amazing, But Is It Impossible to Ride?
Slideshow: The Swiss custom shop has taken a Harley Softail and stretched it into something so long and low that it looks closer to a rolling sculpture than a conventional motorcycle.
Engraved Rebellion: Inside Bundnerbike's Glam Rock II
Slideshow: A standard cruiser becomes an intricate metal canvas in the hands of a Swiss custom house known for pushing Harley-Davidson platforms far beyond their factory brief.
Slideshow: Harley-Davidson's challenges aren't abstract; they show up in dropping shipments, shrinking dealer traffic, and strategic decisions that aren't yet translating into growth.









 Front Lighting Upgrade