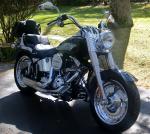




Shovel Chopper Build

Thread Starter
|
Road Captain


Joined: Jan 2013
Posts: 546
Likes: 606
From: Out West


Got to take an inch out of the rear fender. I take masking tape and run it dead center. I then just grabbed some rattlecan, and marked it. This is my cut guide.
I cringe everytime I see someone chopping a fender with a cut-off wheel, but you have to use the tools that are available.
I then took it to a bandasw, and got a super even cut.


With a near perfect mating surface, and with proper welding, you can get a distortion free job. I never had to use an English Wheel or a hammer to even things out on this one. I don't need Bondo to get it even either, this method really minimizes the work to get it paint ready.
I work on them when I am in the mood. So basically at this point, I am an out of control hobbyist


Making a Marchesini wheel fit a Harley. I made stainless steel wheel internals so that I could run a 3/4" axle.
I made the axle and nuts from stainless steel, and also made stainless frame inserts on the rear dropouts of the frame.
I also made lift stand buttons from 7075 T6 aluminum that go into barrels that I welded to the frame. This makes chain adjustments and wheel maintenance easy. It's a carry over from my race bike days.
I made the sissy bar from stainless steel, and you can see my first mockup on that part.
I am also running a rear Brembo caliper, and made a hanger to tie it into the rear disc.
Last edited by ChickinOnaChain; May 15, 2018 at 11:08 AM.
Thread Starter
|
Road Captain
Joined: Jan 2013
Posts: 546
Likes: 606
From: Out West

Since a Marchesini sprocket is made for a narrower race bike chain, I had to make a sprocket that works with a 530 Harley size chain. Its a 48 tooth.

Made my own alternator cover, it's not done in the pic, but it's getting there.

Made a rear fender tie-in that goes on the bottom. I just took a really thin strip of aluminum, and got my angles. I then machined a part, and made a bend jig.

Made a carb support, and it follows the lightweight theme.


I am running all my wires exposed and inside stainless sleeving like on a payphone. I made a "lollipop" to hold the grommet to run to the coils, and made a clamp that goes on the oil pump to route it.
Never mind the cut rubber hose, that was there to test fire the bike before I got in too deep! It fired on the third kick, and the ignition was just slapped on. When I get her dialed, she's gonna be a 2 kicker all day.


Made a seat hinge to go with my custom seat.
I made a stainless steel seatpan that follows the frame, and rides flush on top. It's a chopper, so I already have no rear suspension, straight pipes and a drag bike mill in the frame. What's having a soft seat going to change!
The leatherwork was done by Clinton Case at Bruiser Custom Cycle in SoCal. He did a fantastic job. I wanted to stay classic, and had it hand-tooled like a Western saddle. Nothing crazy or trendy.
Last edited by ChickinOnaChain; May 15, 2018 at 11:09 AM.
Thread Starter
|
Road Captain
Joined: Jan 2013
Posts: 546
Likes: 606
From: Out West

Drilling the backbone for a hidden gas tank mount.
I made an aluminum block that takes drill bushings so that I could locate and center my weld in cylinders. I taped a little level on it so that I could see if anything shifted when I hand drilled through the frame. I used a super powerful 1/2" drill, and it took some muscle to fight it.
I want these as straight as possible because this will ensure that my tank gets mounted without any tweaking loads. I have found that if you fight a tank or even a fender to mount it during the final build, you run a risk for either paint, metal, or both to crack. Especially on a Harley. Just going the extra effort to minimize it pays dividends down the road. Sometimes you are going to have to push/pull a part into position to mount it, but the less the better.

Elite HDF Member
Joined: Oct 2009
Posts: 3,922
Likes: 826
From: Toronto Canada
i probably only understand 30% of what you're doing , but damn it looks good !
i also get the feeling you could have just started with some aluminum and steel and built the whole bike except for the tires . probably only would have taken a couple more days too !
great work , looking forward to seeing more .
i also get the feeling you could have just started with some aluminum and steel and built the whole bike except for the tires . probably only would have taken a couple more days too !
great work , looking forward to seeing more .
HD Forum Stories
The Best of Harley-Davidson for Lifelong Riders

7 Surprising Harley-Davidson Products that Are Not Motorcycles
Verdad Gallardo
8 Best Harley-Davidson Motorcycles Ever
Pouria Savadkouei
10 Worst Harley-Davidson Motorcycles Ever
Pouria Savadkouei
Killer Custom's Jail Break Is The Breakout That Refused to Blend In
Verdad Gallardo
Crazy Bunderbike Build Looks Amazing, But Is It Impossible to Ride?
Verdad Gallardo
Harley-Davidson Reveals Super Cool Cafe Racer Concept
Verdad Gallardo
Engraved Rebellion: Inside Bundnerbike's Glam Rock II
Verdad Gallardo
10 Motorcycles You Should Never Buy
Joe Kucinski