


Custom homemade tank bib. -PICS-
I've been thinking about this for some time but w always intimidated by the idea. Well the other day I figured why not, it's just leather!
So I made a template from my original bib, and made the bottom a but larger so it covered the whole tank seam. The stock piece left gaps between the bottom of the tank and top of the leather. Also, I hated the frill.
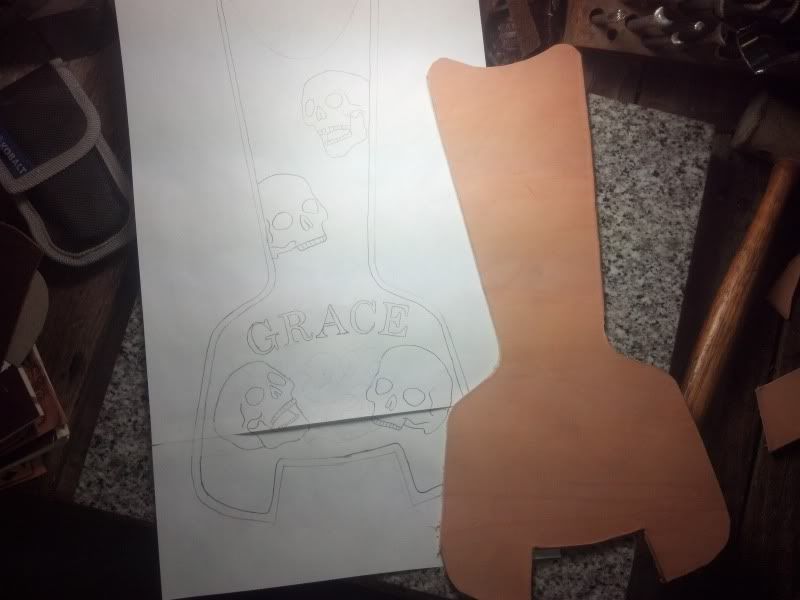
So I got a large piece of leather and cut out my new, larger shape. I also drew out my pattern on a piece of paper.
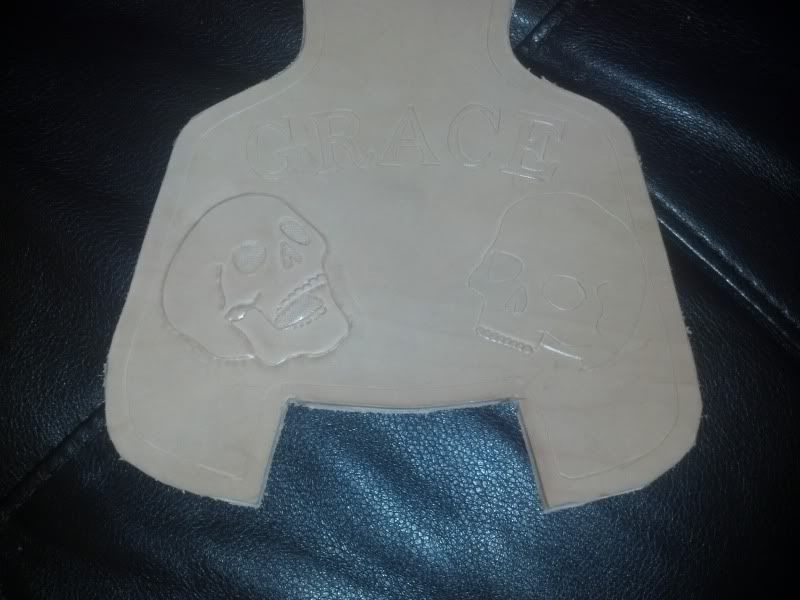
I wet the leather to it was easier to work with and simply traced my patern into the leather. The lettering was slightly off, so now is where I i fixed it. I have never done this so i practiced on some scrap first.
Here is the traced image in the leather:
Didn't get pictures of myself working. This is new to me and wasn't sure it would turn out. After hours of hammering and stamping and adding detail, it was time to check the fit of my piece.
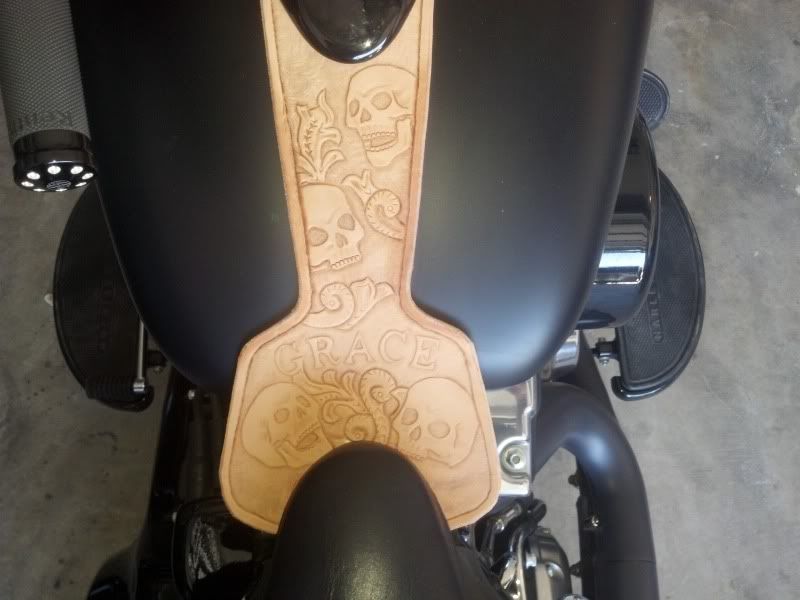
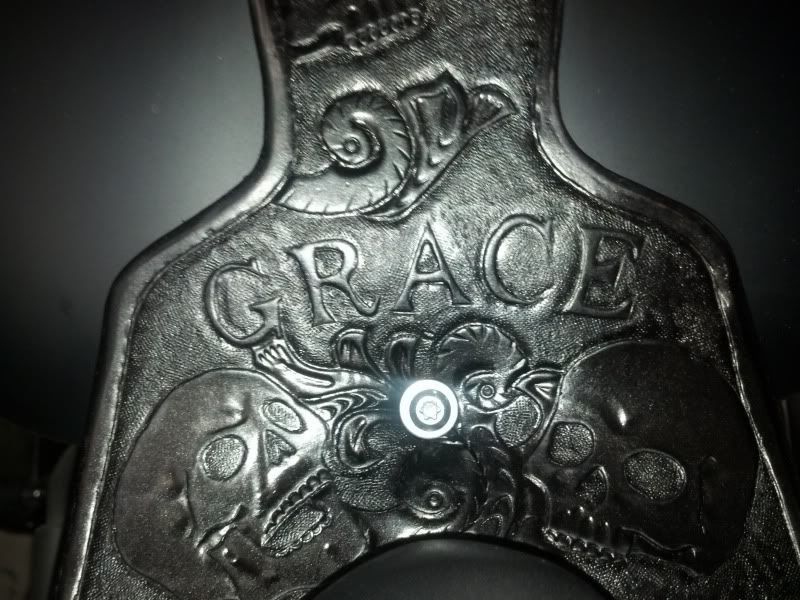
Once I knew it fit and I was happy with the art, it was time to start the finish work. I beveled the edges and use an egde coat on them. Then I dyed the leather black.
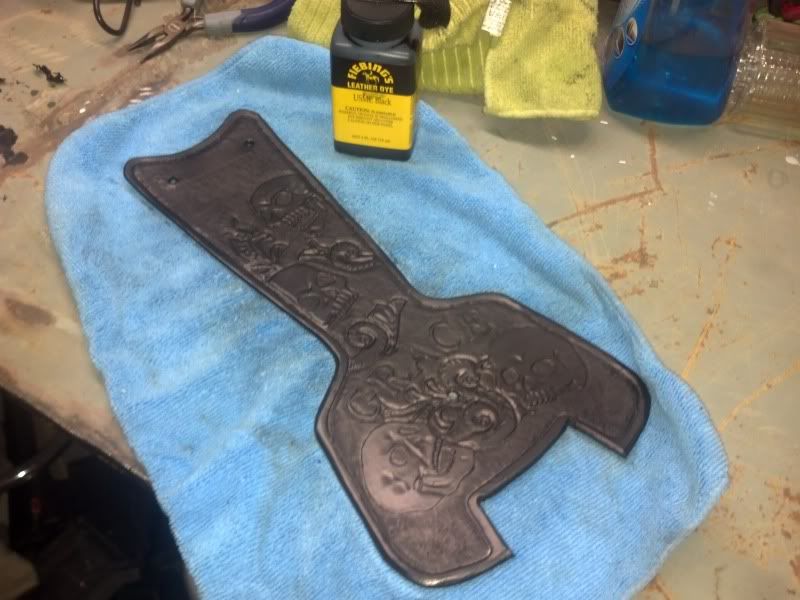
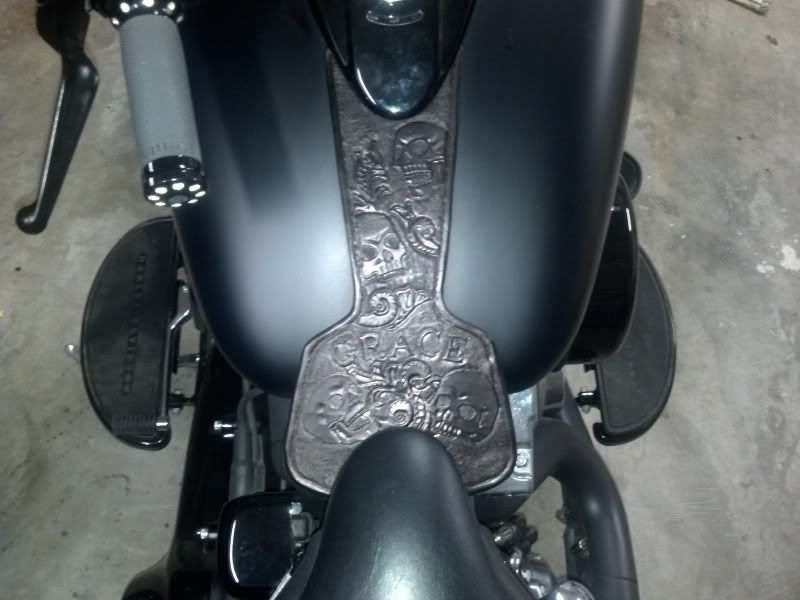
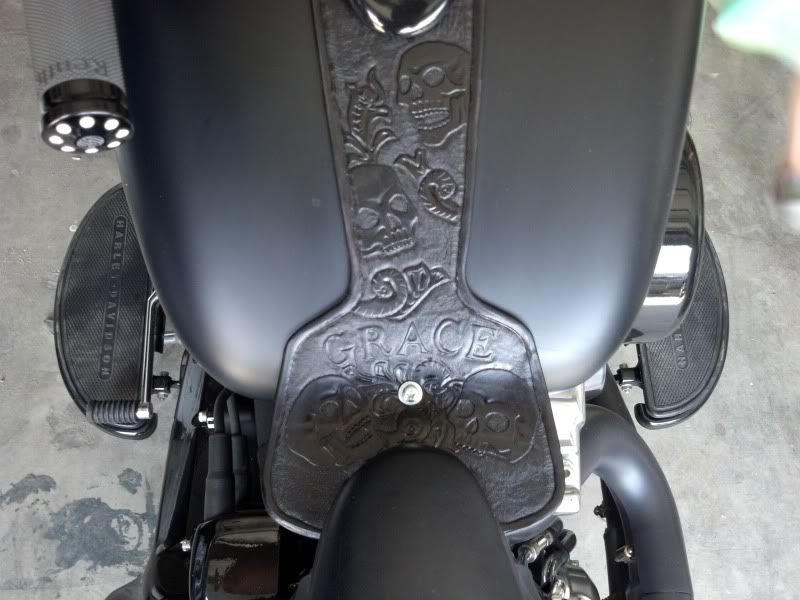
Once the dye had dried completely i buffed it to a sheen. Then I used a sealer on the skin side and buffed that too. The buffing brought the art back out. I was worried the black would hide it, but it looks very nice. Once the sealer dried and it was buffed I installed the part and now I'm ready to ride. I need to get a pic in the sunlight. I'll get on and post it in just a bit.
So I made a template from my original bib, and made the bottom a but larger so it covered the whole tank seam. The stock piece left gaps between the bottom of the tank and top of the leather. Also, I hated the frill.
So I got a large piece of leather and cut out my new, larger shape. I also drew out my pattern on a piece of paper.
I wet the leather to it was easier to work with and simply traced my patern into the leather. The lettering was slightly off, so now is where I i fixed it. I have never done this so i practiced on some scrap first.
Here is the traced image in the leather:
Didn't get pictures of myself working. This is new to me and wasn't sure it would turn out. After hours of hammering and stamping and adding detail, it was time to check the fit of my piece.
Once I knew it fit and I was happy with the art, it was time to start the finish work. I beveled the edges and use an egde coat on them. Then I dyed the leather black.
Once the dye had dried completely i buffed it to a sheen. Then I used a sealer on the skin side and buffed that too. The buffing brought the art back out. I was worried the black would hide it, but it looks very nice. Once the sealer dried and it was buffed I installed the part and now I'm ready to ride. I need to get a pic in the sunlight. I'll get on and post it in just a bit.
Here's the picture with sunlight as I promised. I'm very happy with the results!
That's an understatement. I've had a lot of fun doing this. Started on the design work Wednesday afternoon, just finished it this morning. Couldn't stop.
I don't think I'm there yet, but I have more leather and plan to do more. If I was a little better I wouldn't mind making them for people if they were interested. I have found i can do pretty much any design. I can draw so that helps.
Thanks for the replies everyone.
Trending Topics

Novice
Joined: May 2013
Posts: 20
Likes: 0
From: Hattieville ar
HD Forum Stories
The Best of Harley-Davidson for Lifelong Riders

7 Surprising Harley-Davidson Products that Are Not Motorcycles
Verdad Gallardo
8 Best Harley-Davidson Motorcycles Ever
Pouria Savadkouei
10 Worst Harley-Davidson Motorcycles Ever
Pouria Savadkouei
Killer Custom's Jail Break Is The Breakout That Refused to Blend In
Verdad Gallardo
Crazy Bunderbike Build Looks Amazing, But Is It Impossible to Ride?
Verdad Gallardo
Harley-Davidson Reveals Super Cool Cafe Racer Concept
Verdad Gallardo
Engraved Rebellion: Inside Bundnerbike's Glam Rock II
Verdad Gallardo
10 Motorcycles You Should Never Buy
Joe Kucinski
