


Internal Handlebar Wiring

Intermediate
Joined: Jan 2014
Posts: 31
Likes: 0
From: Saint Augustine Fl
just a simple question....why are people spending over $100 for special wiring harness extensions and tools to repin the connectors? Radio shack has plenty of wire, solder, shrink wrap and wire loom you can do the whole thing for like 20 bucks if you want to.
Thread Starter
|
Elite HDF Member
Joined: Nov 2011
Posts: 3,908
Likes: 19
From: Dayton
I spent about $19 bucks on a set of wire extensions with pins already crimped in place. Came with shrink wrap too.
Outstanding HDF Member
Joined: Oct 2011
Posts: 3,492
Likes: 19
From: Illinois
It may be a pita right now Benway but when it's done you will be very glad you did it. It just cleans up the front end so nicely. You will get many people who will stop and look at your bike and admire it. The way I like my bikes to look all those cables flopping around just isn't me. If I could not do internal wiring on this bike I doubt I would have even put apes on it in the first place.
Intermediate
Joined: Jan 2014
Posts: 31
Likes: 0
From: Saint Augustine Fl
I am just saying I have seen kits for $200 to do it. You can get the same results and splice into the wiring and make your own kit for 15-20 bucks. You got a good deal, if I saw a kit for 20 bucks I would do it too, otherwise , wires tripping time for me. I have done a few for friends and myself over the years. can be just as clean and in some cases cleaner looking then some kits.
Thread Starter
|
Elite HDF Member
Joined: Nov 2011
Posts: 3,908
Likes: 19
From: Dayton
Final piece of the puzzle. Need a new front brake line. I have a Diamonback stainless lower, but can't find a damn place to order a specific length for the upper (32").
Any leads on where to order?
Any leads on where to order?
May our Moderator Rest in Peace
Joined: Sep 2006
Posts: 11,386
Likes: 35
From: Rochester, NY
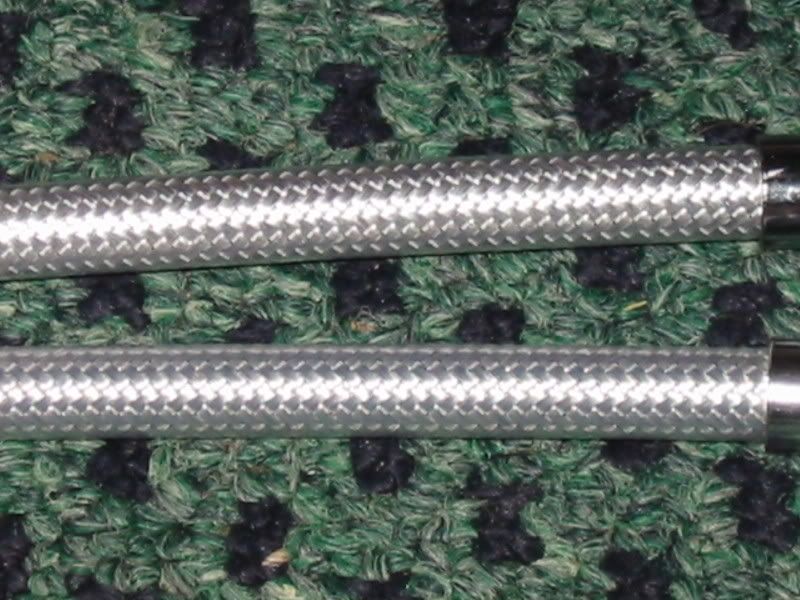
Way back when I was doing exactly what your trying to do I had both a set of the Harley Diamondbacks and a set of Magum Sterling Chromite II's.
If I didn't have labels on them I would have had a tough time figuring which was which.
When I picked up the set of Magnum's at the factory, its here in town I noticed a wall display, Harley no less that showed all of their different cables.
Just like the ones in the wall in every Harley dealer.
When I asked the girl at the counter why they had it she said that they were the primary supplier of Diamondback cables for Harley.
Here's a pic I took of the two side by side, good luck figureing out which is which.
I forgot which is which a long time ago.
Anyway, here's alink to their web site, they can make them in any length you need.
https://www.magnumshielding.com/
Have fun and please PRAY for warmer weather, we REALLY need it around here.
I'm getting a severe case of cabin fever up here in what feels like a mile or less south of the north pole.
Thread Starter
|
Elite HDF Member
Joined: Nov 2011
Posts: 3,908
Likes: 19
From: Dayton
Anyway, here's alink to their web site, they can make them in any length you need.
https://www.magnumshielding.com/
Thread Starter
|
Elite HDF Member
Joined: Nov 2011
Posts: 3,908
Likes: 19
From: Dayton
Ok, 55� today, so I dove into this project.
First thing I did was get a 1/4" tube and drain the tank of all the gas I could get out. That leaves little to deal with at the cross-over tube.
Next, improvising time. I saw a youtube video where a guy spent 20 minutes creating an elaborate funnel system for this. Not me. Plus, by syphoning out most all the fuel, I only had this much to deal with:

Surprise! This bike had an elaborate engine lighting kit! No longer worked, (I'll find out why), but it had 4 light blocks stuck under the tank, one up front of the engine and one on either side:

Well, the fun stuff comes next: Wire extensions, new stainless throttle cables and brake cable...
OK, after wasting half the afternoon trying to get the wires out of these goddamn plugs, anyone have any pointers? Sorry the pic isn't any clearer, but it's a Deutsch Plug I do believe. The videos I did find all removed a center 'lock' which these don't have...

First thing I did was get a 1/4" tube and drain the tank of all the gas I could get out. That leaves little to deal with at the cross-over tube.
Next, improvising time. I saw a youtube video where a guy spent 20 minutes creating an elaborate funnel system for this. Not me. Plus, by syphoning out most all the fuel, I only had this much to deal with:
Surprise! This bike had an elaborate engine lighting kit! No longer worked, (I'll find out why), but it had 4 light blocks stuck under the tank, one up front of the engine and one on either side:
Well, the fun stuff comes next: Wire extensions, new stainless throttle cables and brake cable...
OK, after wasting half the afternoon trying to get the wires out of these goddamn plugs, anyone have any pointers? Sorry the pic isn't any clearer, but it's a Deutsch Plug I do believe. The videos I did find all removed a center 'lock' which these don't have...
Last edited by Benway; Feb 22, 2014 at 03:09 PM.
HD Forum Stories
The Best of Harley-Davidson for Lifelong Riders

7 Surprising Harley-Davidson Products that Are Not Motorcycles
Verdad Gallardo
8 Best Harley-Davidson Motorcycles Ever
Pouria Savadkouei
10 Worst Harley-Davidson Motorcycles Ever
Pouria Savadkouei
Killer Custom's Jail Break Is The Breakout That Refused to Blend In
Verdad Gallardo
Crazy Bunderbike Build Looks Amazing, But Is It Impossible to Ride?
Verdad Gallardo
Harley-Davidson Reveals Super Cool Cafe Racer Concept
Verdad Gallardo
Engraved Rebellion: Inside Bundnerbike's Glam Rock II
Verdad Gallardo
10 Motorcycles You Should Never Buy
Joe Kucinski
10 Things Harley-Davidson Needs to Fix in 2026
Verdad GallardoMay our Moderator Rest in Peace
Joined: Sep 2006
Posts: 11,386
Likes: 35
From: Rochester, NY
If you haven't disconnected the brake line yet.
Here's a trick I used for bleeding all the air out of the new line that worked for me.
First dismount the brake caliper and let it hang.
Put a small flat bladed screw driver between the pads and pull the lever until the pads grip the screwdriver shaft.
Now you can disconnect the line and put in the new one.
Once the new line is in place loosen the top of the brake master cylinder and use a larger screwdriver to pry the pads back as far as you can.
Do it slowly and watch or have someone else watch the brake reservoir.
Once it stops bubbling and starts to fill it back up with fluid your done.
Doing it that way forces any air in the line or caliper back up the line to the reservoir so you don't get any air in the caliper or line that can often be a PITA to get out.
Thread Starter
|
Elite HDF Member
Joined: Nov 2011
Posts: 3,908
Likes: 19
From: Dayton
Update: Got 'er all back together Saturday and fired it up. What a sweet sound that was after having this thing tore all apart for so long.
High-lites: It took ordering 3 sets of throttle cables before I got the right ends and length. Note: You HAVE to measure with tank off and handlebars in place because there is NO place to put even an inch extra throttle cable. It has to be exact.
Even went to the Harley dealer to order, thinking they'd know what stock length is to start. Nope. Guy went out to a Heritage on the floor and proceeded to try to measure a length. He came up with 40 inches. I left and ordered through J&P. Turns out 34" was the exact length I needed.
Did not fvck with trying to get the pins out of these damn connectors. My kit didn't have any extra pins and you almost always screw one up. I just stagger-spliced in two spots (one at the plug and one towards the handlebars) and put shrink tubing over everything. Left a loop should me or anyone want to go with taller bars.
I had a hand vacuum pump to bleed the front brake for the new stainless line, so that was a breeze.
Weather was too bad to take it out for a ride, so I let it run and went through the gears and such, pushing the clutch and brake to make sure everything worked. So now, it's poised for this shitty weather to break.
I'll post some pics when I get it out.
Notes on Handlebars and their looks:
This is my forth set of bars. First was the stock 07 Heritage bars. These things look like complete *** (IMHO). They went right away for a set of RK bars. Just a set of bars, but were great for handling and comfort. No style though.
Third set was the beech bars you see in the sig pic. That bike will never look as good as it looks there. Trouble was, handling as slow speeds (especially with a passenger) sucks *****. Leverage point was too low for all that weight and too twitchy at low speeds and stopping. I remember one time I had the wife on the back and had stopped on a steep, curved incline. I tell ya, It was all I could do to hold that bike and passenger up with those low handlebars. No thanks.
This forth set (wild1 chubbys) should be a good compromise between style and still being able to turn around in a parking lot. Not too tall where I'm reaching for the sky and can't reach the grip in a full turn, and not too short so's not to look stock. With my low LePera riding position, it puts my hands right at shoulder height, so I'll still have great handling. There's also the bit about taller bars letting you feel you're riding IN the bike, not perched on top like with the beech bars.
So, for me, it's a bit about compromise (I hate to say). Going extreme in either the low or tall direction compromises slow speed maneuverability (and in the case of the beech bars - stability) too much.
Last edited by Benway; Mar 24, 2014 at 09:39 AM.