


 where did you get them from?

V&H Monster Oval Install STEP BY STEP
Thread Starter
|
Outstanding HDF Member
Joined: Sep 2008
Posts: 2,458
Likes: 0
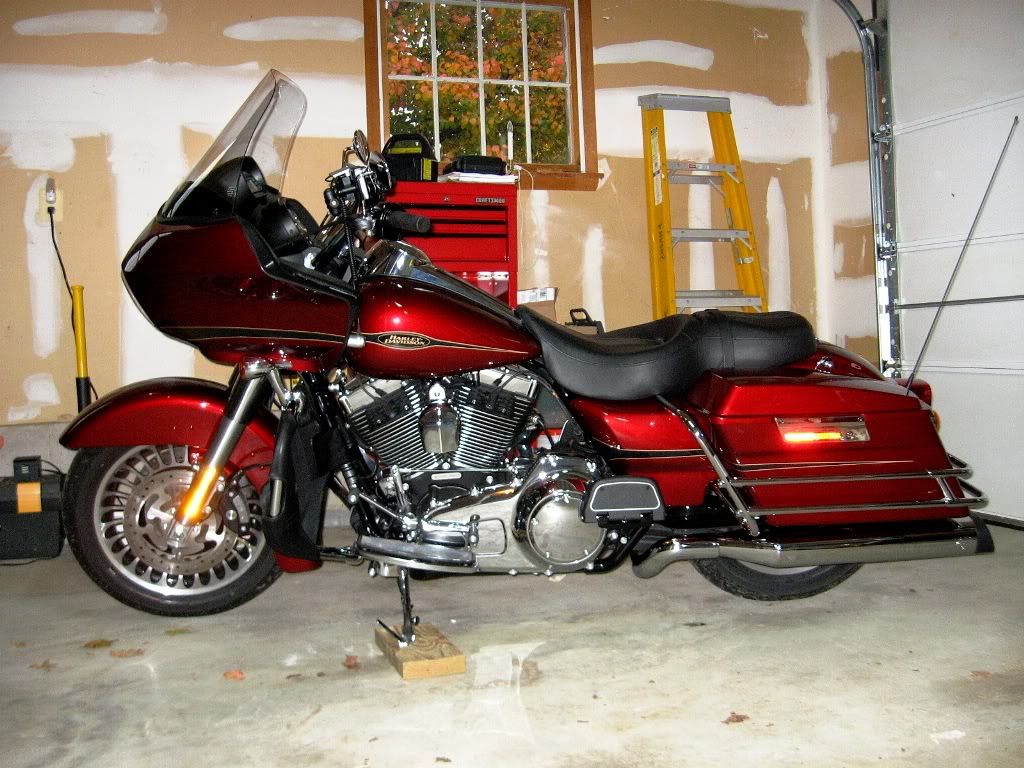
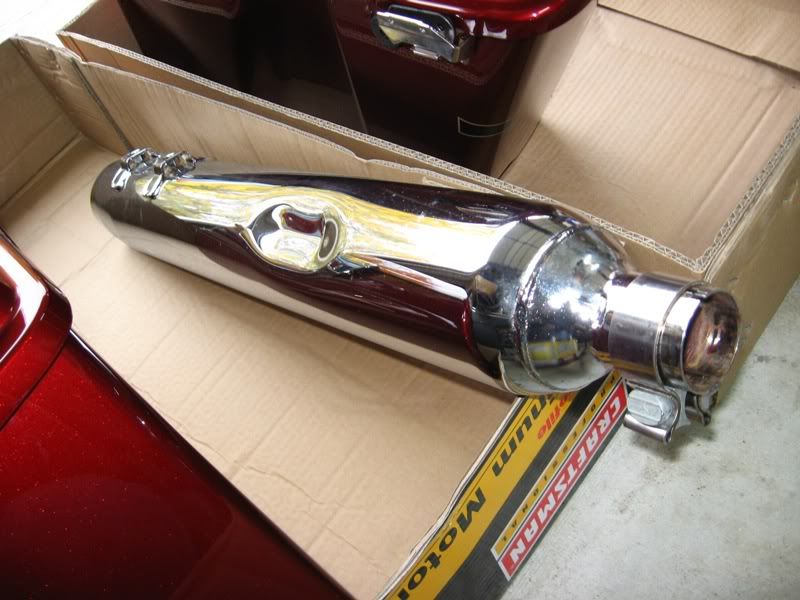
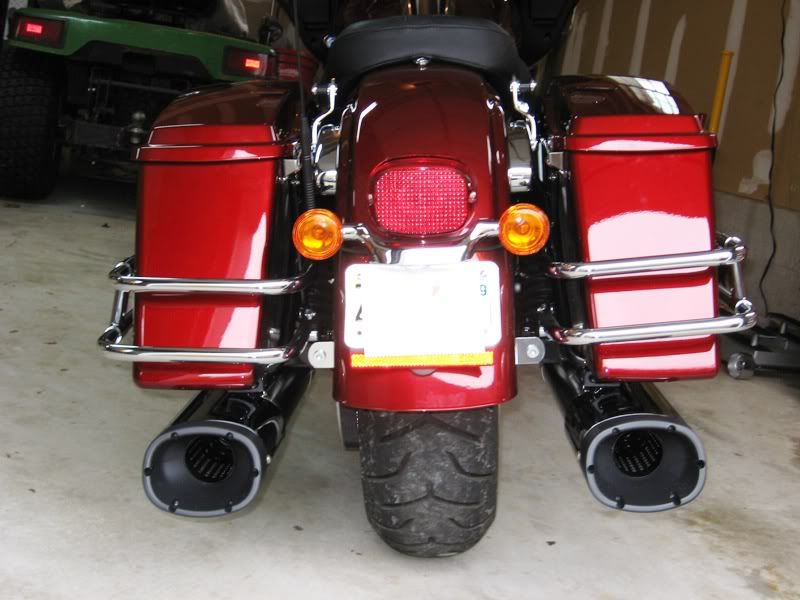
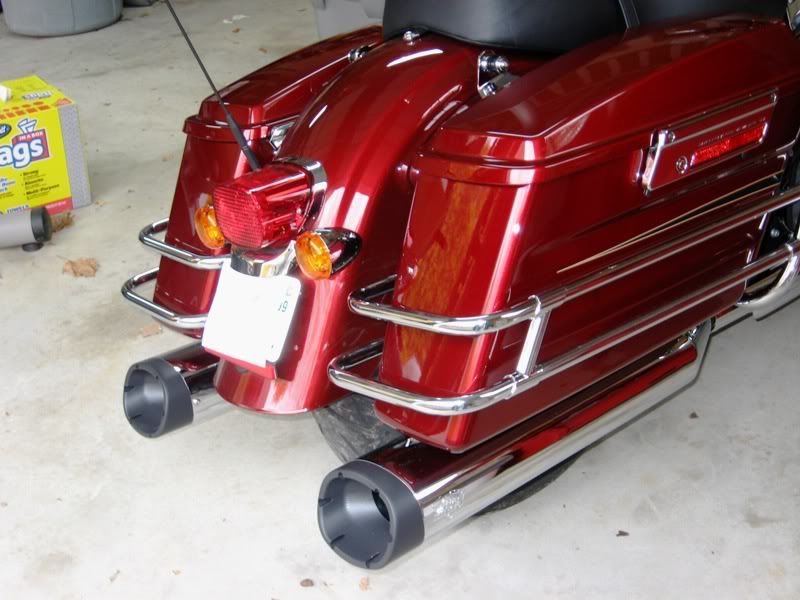
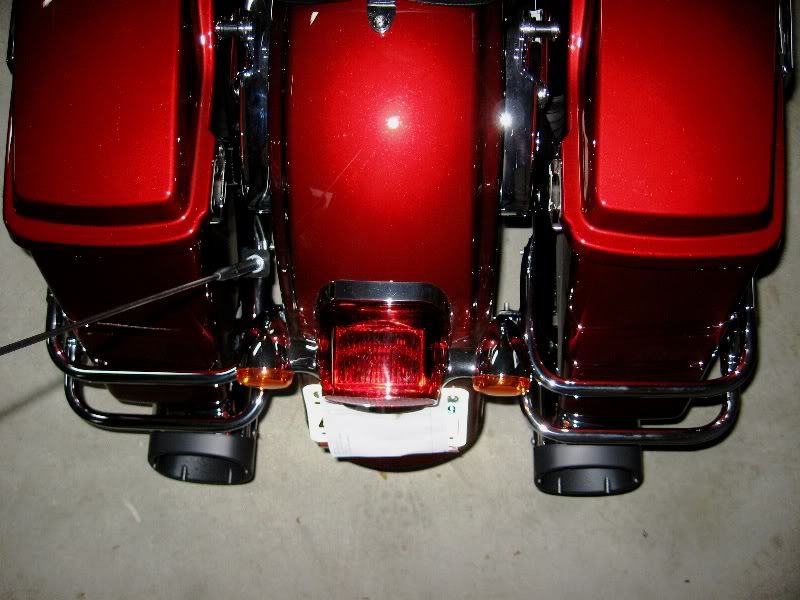
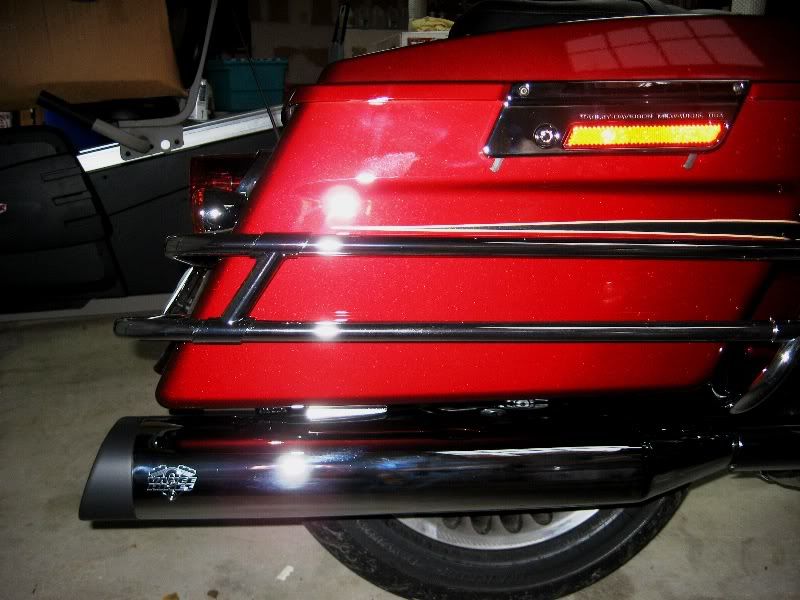
Rainy day project here in New Jersey, I decided to install my new Monster Ovals and share a few photos and tips:
TWO short Videos here:
http://s190.photobucket.com/albums/z...t=MVI_0642.flv
http://s190.photobucket.com/albums/z...t=MVI_0648.flv
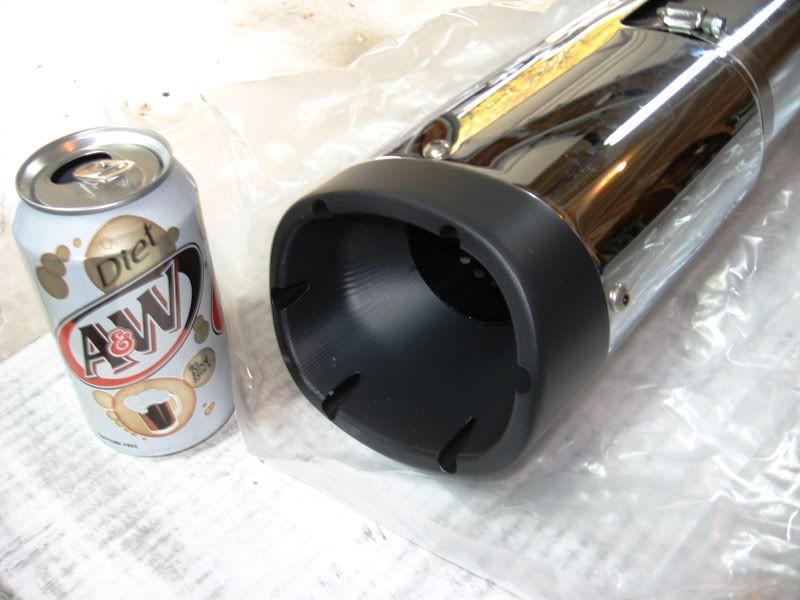
These Cans are HUGE and HEAVY too!
-
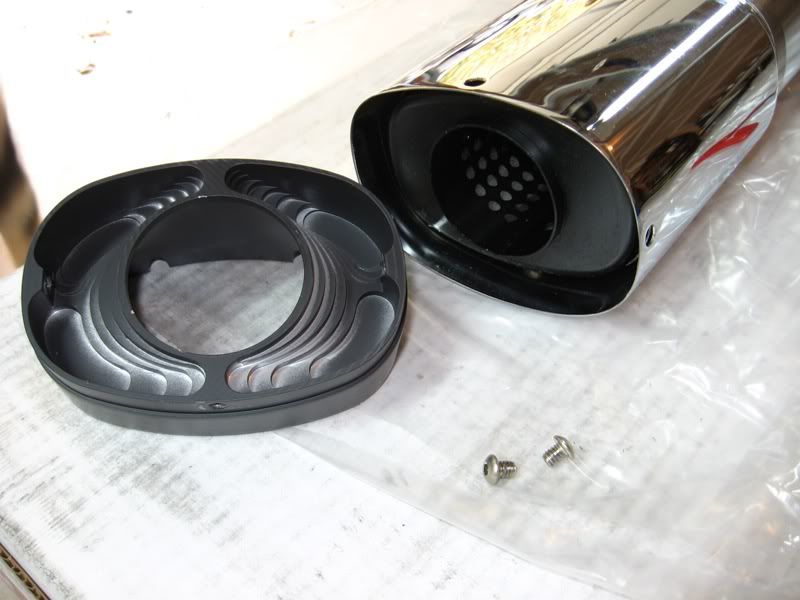
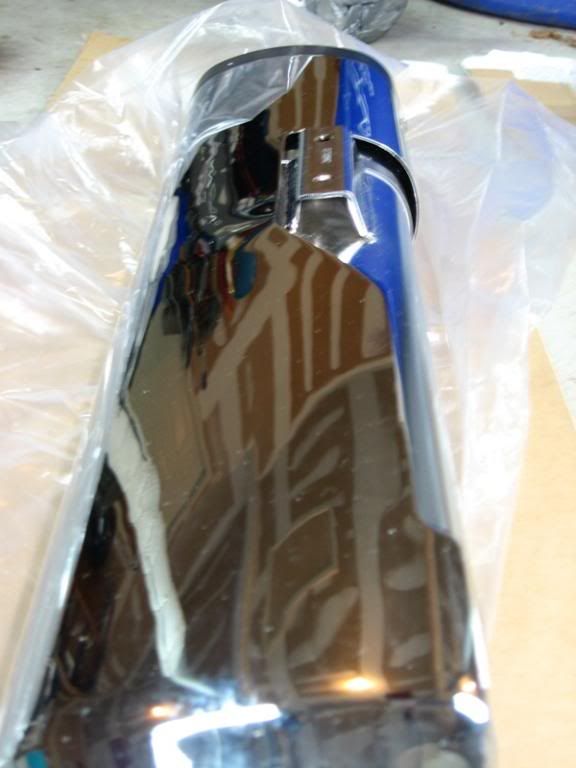
The first thing I did was pull off the end caps and reverse them, using lock-tite on the two allen head screws. The Caps have holes on both sides so you can use the same cap on the same pipe but the pipe itself only has two holes. Just turn the cap over (if desired) and reinstall it.
-
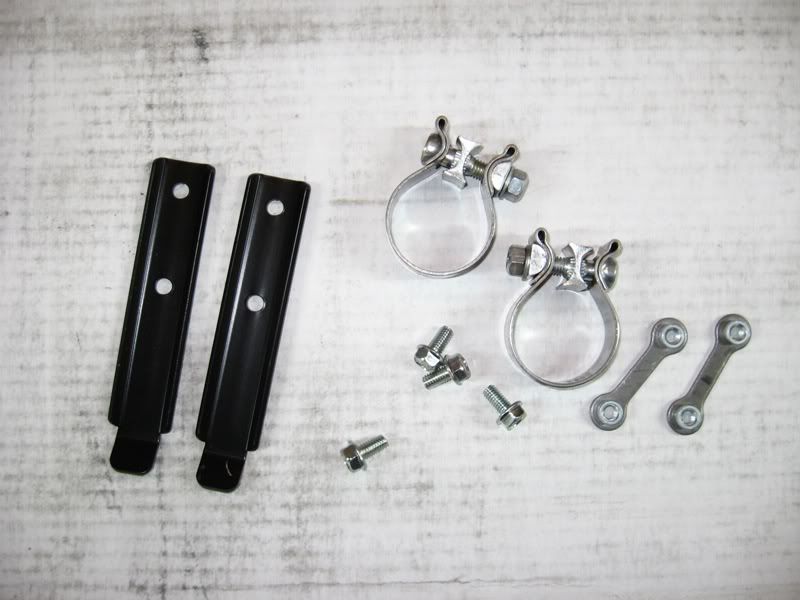
The Mufflers come with complete hardware and V&H even supplies new muffler "clamps" which was a nice surprise. I hear you should never reuse muffler clamps.
-
The stock factory mufflers have an indented part to clear the axle nut and movement.
-
V&H changed the 2009 Monsters by either relocating the rear bracket and / or cutting the heat shield so it doesn't interfere.
-
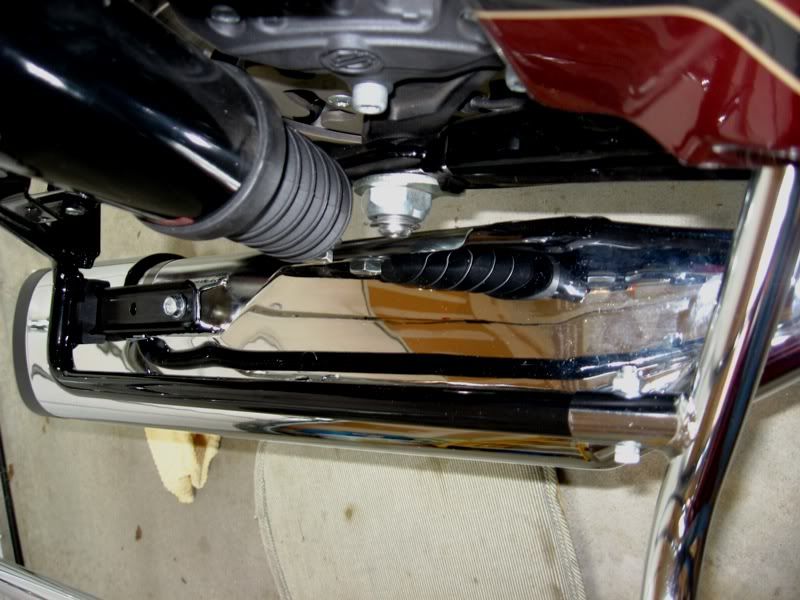
The rear bracket is replaced with the V&H supplied one, only the rubber is retained. You can see the heat shield located to clear the axle nut.
-
The hardest part of the installation is getting these pipes straight. They said to tighten the rear nuts first then do the muffler clamps. I myself first tightened the muffler clamps half way to help hold alignment then I used two extra people to assist me. One I had sit on the bike and hold it upright straight and the other person about 12 feet behind the bike to look at the alignment while I adjusted the mufflers and did the final tightening. At this point I lock-tited the rear bolts and tightened them completely and then moved to the muffler clamps and tightened them completely.
-
Before replacing your saddlebags or starting your bike, first be sure to wipe the pipes, heat shields and head pipes down with rubbing alcohol to remove any finger prints or oils which could permanently stain the chrome.
-
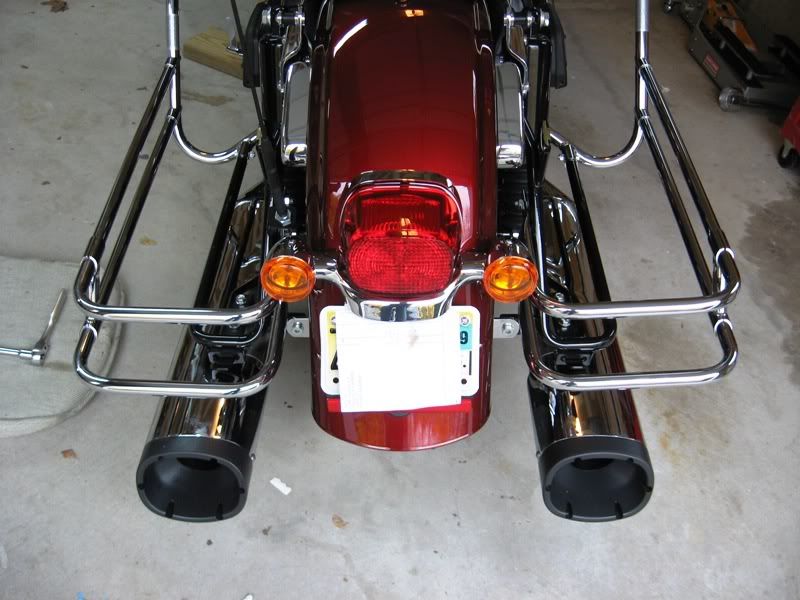
They sound AWESOME!
-
-
TWO short Videos here:
http://s190.photobucket.com/albums/z...t=MVI_0642.flv
http://s190.photobucket.com/albums/z...t=MVI_0648.flv
These Cans are HUGE and HEAVY too!
-
The first thing I did was pull off the end caps and reverse them, using lock-tite on the two allen head screws. The Caps have holes on both sides so you can use the same cap on the same pipe but the pipe itself only has two holes. Just turn the cap over (if desired) and reinstall it.
-
The Mufflers come with complete hardware and V&H even supplies new muffler "clamps" which was a nice surprise. I hear you should never reuse muffler clamps.
-
The stock factory mufflers have an indented part to clear the axle nut and movement.
-
V&H changed the 2009 Monsters by either relocating the rear bracket and / or cutting the heat shield so it doesn't interfere.
-
The rear bracket is replaced with the V&H supplied one, only the rubber is retained. You can see the heat shield located to clear the axle nut.
-
The hardest part of the installation is getting these pipes straight. They said to tighten the rear nuts first then do the muffler clamps. I myself first tightened the muffler clamps half way to help hold alignment then I used two extra people to assist me. One I had sit on the bike and hold it upright straight and the other person about 12 feet behind the bike to look at the alignment while I adjusted the mufflers and did the final tightening. At this point I lock-tited the rear bolts and tightened them completely and then moved to the muffler clamps and tightened them completely.
-
Before replacing your saddlebags or starting your bike, first be sure to wipe the pipes, heat shields and head pipes down with rubbing alcohol to remove any finger prints or oils which could permanently stain the chrome.
-
They sound AWESOME!
-
-
Last edited by RODEO; Nov 8, 2008 at 05:00 PM.

Outstanding HDF Member
Joined: Sep 2006
Posts: 2,380
Likes: 14
From: Atlanta
Those things were MADE for the Road Glide! I heard a pair the other day and I don't think I have ever heard a deeper, more pleasant muffler on a Harley. Your install has definitely inspired lust....

Cruiser
Joined: Sep 2008
Posts: 109
Likes: 0
From: Rolla, Mo
Interesting series of pictures -- thanks for posting! I'm a little concerned that it took three people to get them straight.
A set of these are on a UPS truck headed for my house right now. $595 and shipping from M&M Cycle (419-624-8739).
Bryon
A set of these are on a UPS truck headed for my house right now. $595 and shipping from M&M Cycle (419-624-8739).
Bryon
Trending Topics
Thread Starter
|
Outstanding HDF Member
Joined: Sep 2008
Posts: 2,458
Likes: 0


HD Forum Stories
The Best of Harley-Davidson for Lifelong Riders

7 Times Harley-Davidson Chucked Tradition Out the Window
Verdad Gallardo
7 Surprising Harley-Davidson Products that Are Not Motorcycles
Verdad Gallardo
8 Best Harley-Davidson Motorcycles Ever
Pouria Savadkouei
10 Worst Harley-Davidson Motorcycles Ever
Pouria Savadkouei
Killer Custom's Jail Break Is The Breakout That Refused to Blend In
Verdad Gallardo
Crazy Bunderbike Build Looks Amazing, But Is It Impossible to Ride?
Verdad Gallardo
Harley-Davidson Reveals Super Cool Cafe Racer Concept
Verdad Gallardo
Engraved Rebellion: Inside Bundnerbike's Glam Rock II
Verdad Gallardo
10 Motorcycles You Should Never Buy
Joe Kucinski
Cruiser
Joined: Sep 2008
Posts: 109
Likes: 0
From: Rolla, Mo
OK, I admit it -- you did have it all figured out!
Bryon

Road Warrior
Joined: Apr 2006
Posts: 1,469
Likes: 0
From: 310
Nice instructional. When I installed mine, I had the left muffler move out further from where it was initially installed. What I did was place it back in the original spot, tighten the clamp, took the bike out for a ride to warm it up, got home, waited for it to cool down and re-tightened it again. It hasn't moved since. Just something to let you know just in case it happens to you.
Oh ya, those black tips look great. They would look even better on my bike. You ready to trade?
Oh ya, those black tips look great. They would look even better on my bike. You ready to trade?
Last edited by r8rs4lf; Nov 8, 2008 at 03:55 PM.