





2" pull back Bars on 08 Ultra

Thread Starter
|
Intermediate
Joined: Jun 2008
Posts: 45
Likes: 0
 2" pull back Bars on 08 Ultra
I have read posts on here about pull backs until my eyes blead. Who's is better, which one will fit, police bars and heritage are the same and are set back more than a stock 08.
I found a site that had actual measurements and confused me more which aint hard.
I settled on the Harley #56176-08 2" pullback bars. My dealer wanted $179.00 for them and said I would need to replace the clutch cable, brake line, some additional harness piece and other stuff along with 4 hours labor for a total of around $1600.00
I did some initial poke'in around behind the fairing and was pretty sure I didn't need all of the "other" stuff.
I took a chance and ordered them from Sirdykes for $122.00 but the down side was the 4 week wait because they were backordered.
Here's my take on what I think was an easy to average do it yourself project.
I started by taking comparison photos to reference later.
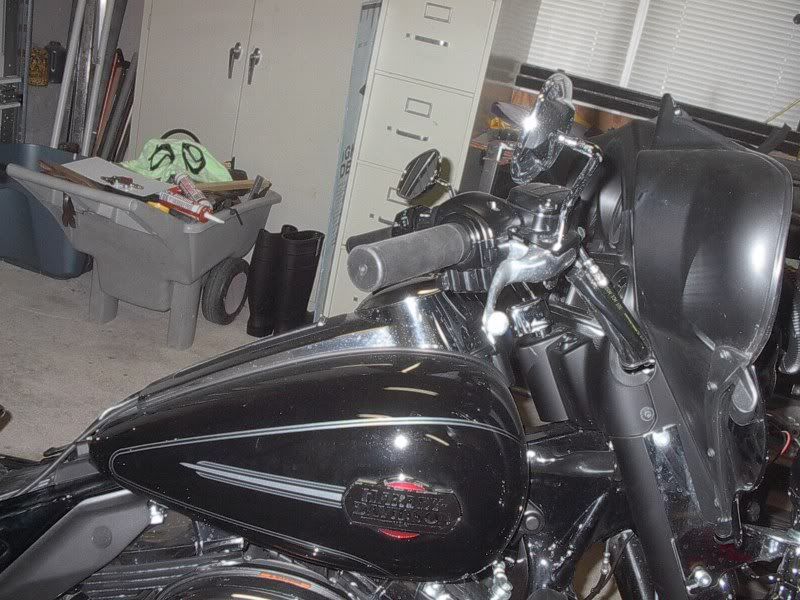
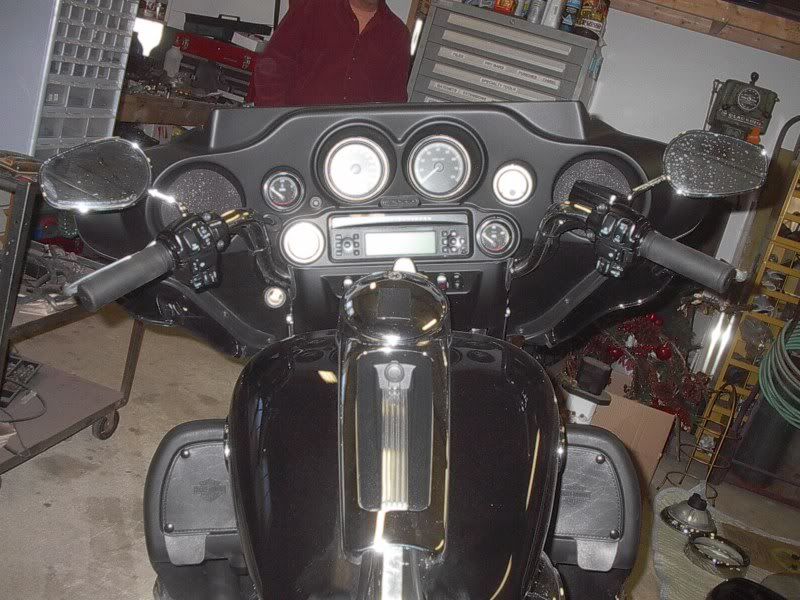
The whole fairing assy could easily be unbolted and rolled forward to do this but I had other things to do in there so it came apart and everything removed from the old bars. Don't know if it matters but I kept the master cylinder upright to keep from possible brake bleeding.
New bars went on and set at same angle as old.
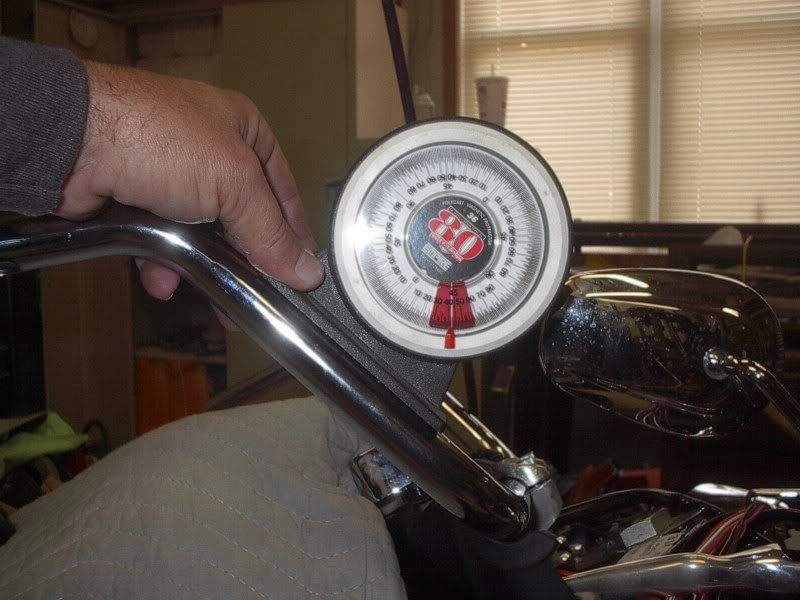
First to reassemble was the Heat Demon grip heaters, At this time I'll tell you I found not only do the bars have slots milled where the stock bars had recessed dimples the 56176-08 bars uses .060 thicker tube than the stock Ultra bars and I had to ream the right or throttle side bar .020 to get the heating element in with the TBW assy.
Works fine without the heaters.
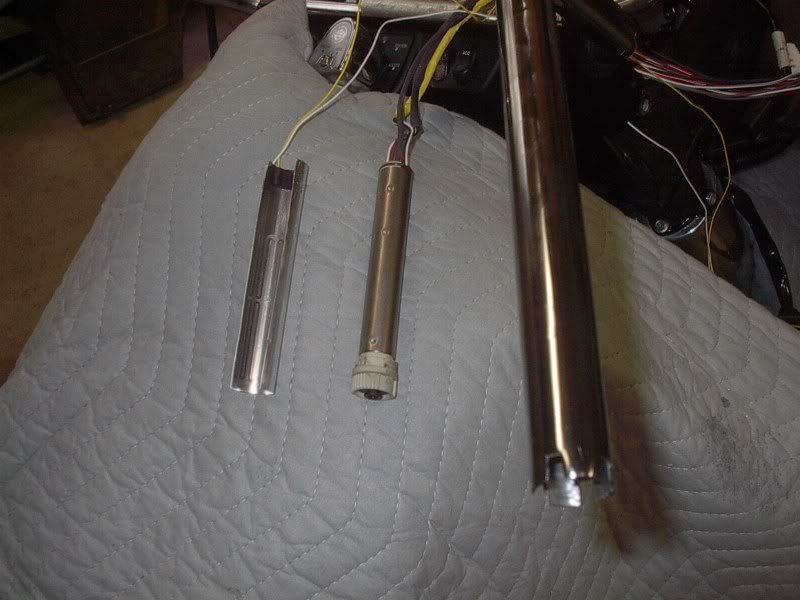
I also wanted to run my wires internal so I started by taking the plugs apart for the controls only to find they semi assemble the plug and then crimp the pins on the wire, no deal.
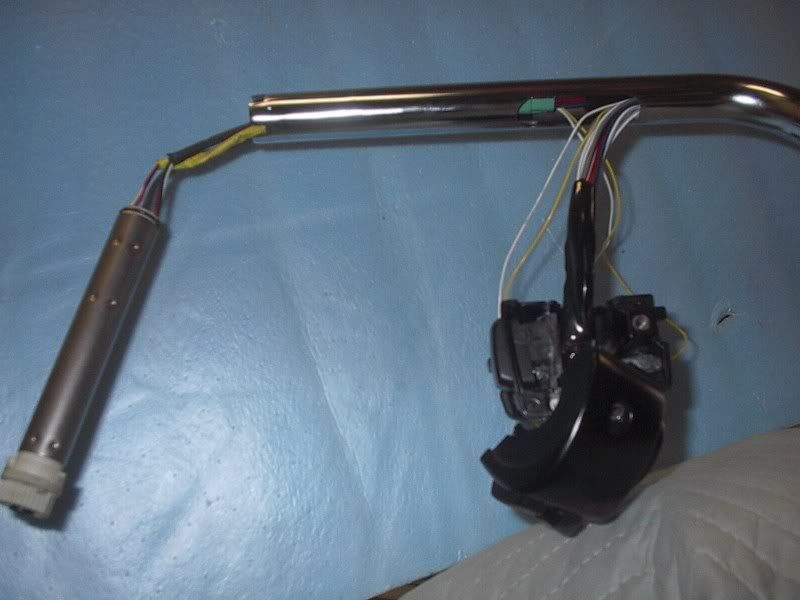
Next was to cut the plug off. I staggered my cuts on the wires to spread out the solder and heatshrink joints and pulled them through the bar. You have to remove the black plastic sleave over the right or throttle side wires or they will not fit in the bar with the green TBW plug. With it removed everything fits loosely in the bar.
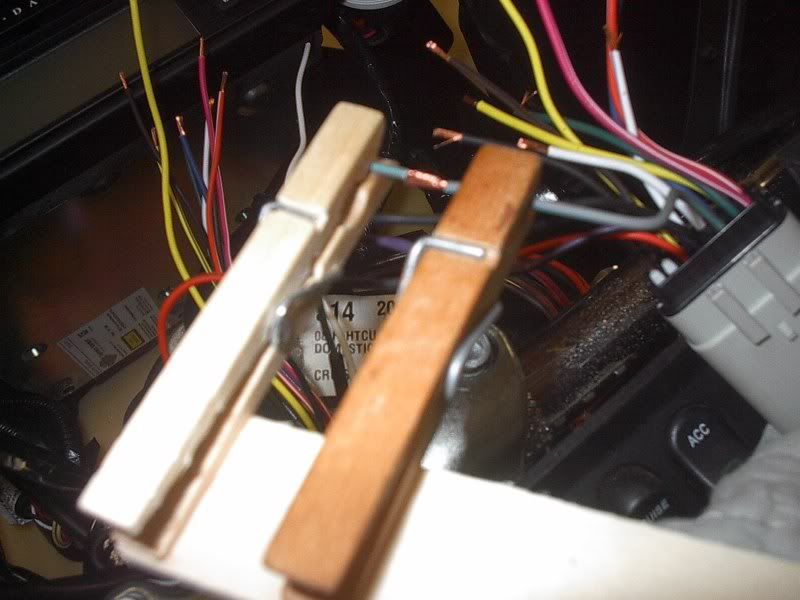
When you work alot by yourself, you become creative, Here's my little low budget helper I used for soldering, Two wooden clothespins super glued to a paint stick.
Left side assembly was same as right with the exception of reaming the bar. Heating element back in tube and assemble.
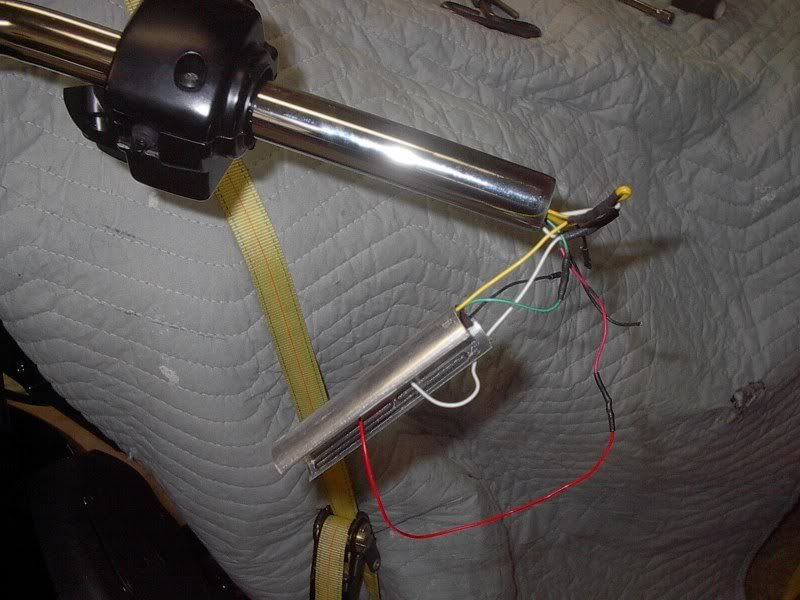
Check out the control switch for the heated grips, can you find it?
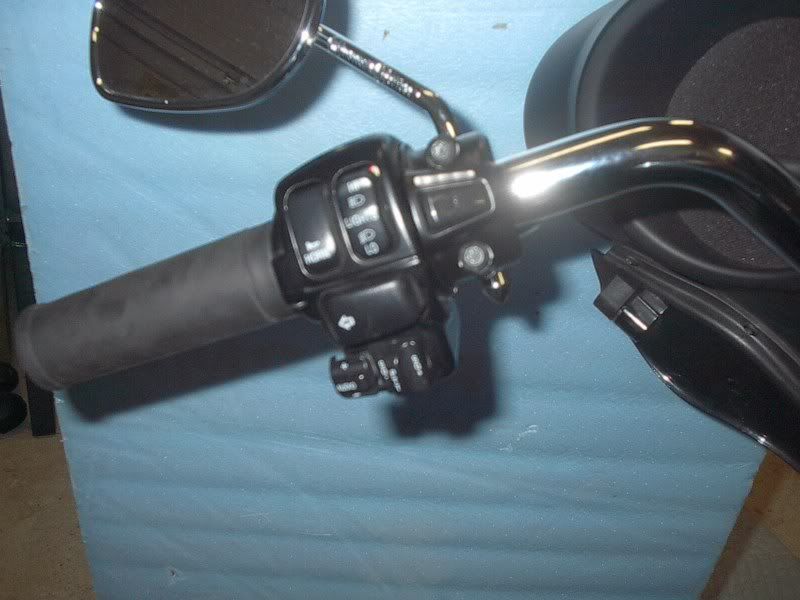
That's pretty much it, plug it all back in and reassemble. It took me two mornings to do this by myself. I really like the wires run inside the bars.
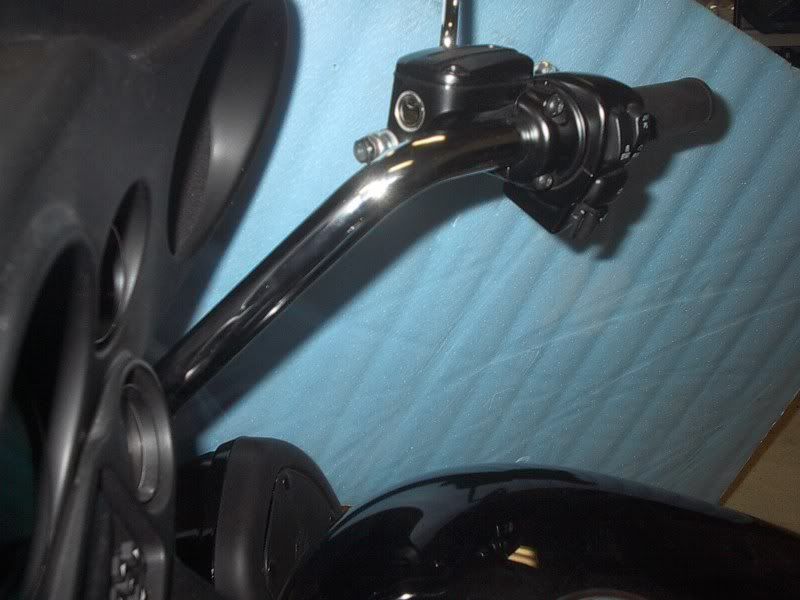
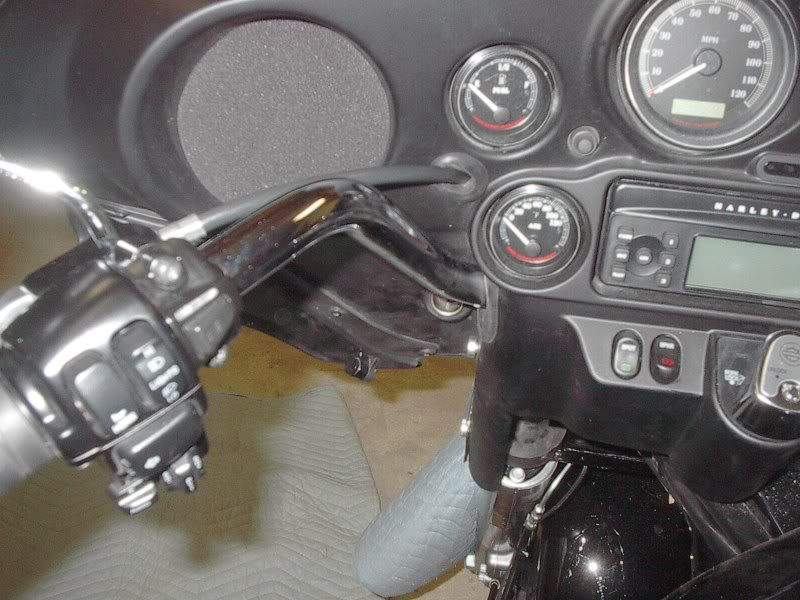
Here are some before and after shots of the bar position.
Before
After
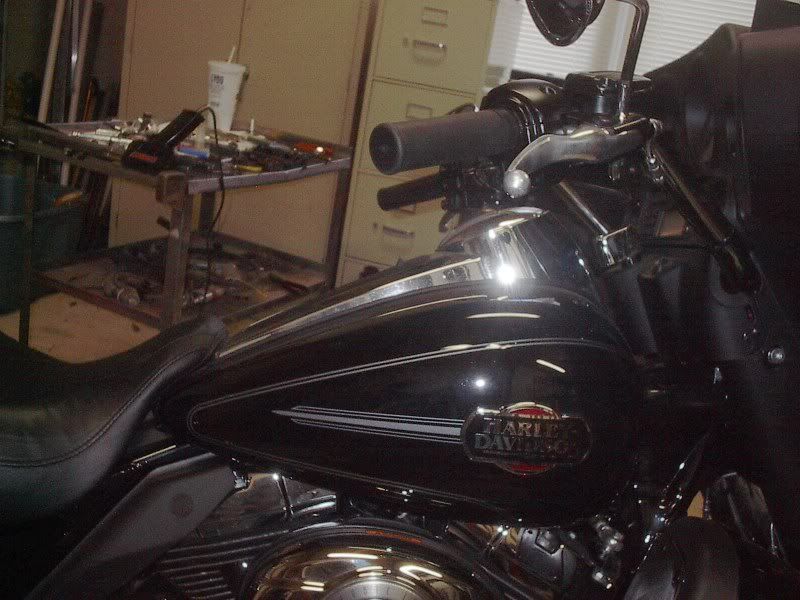
Before
After
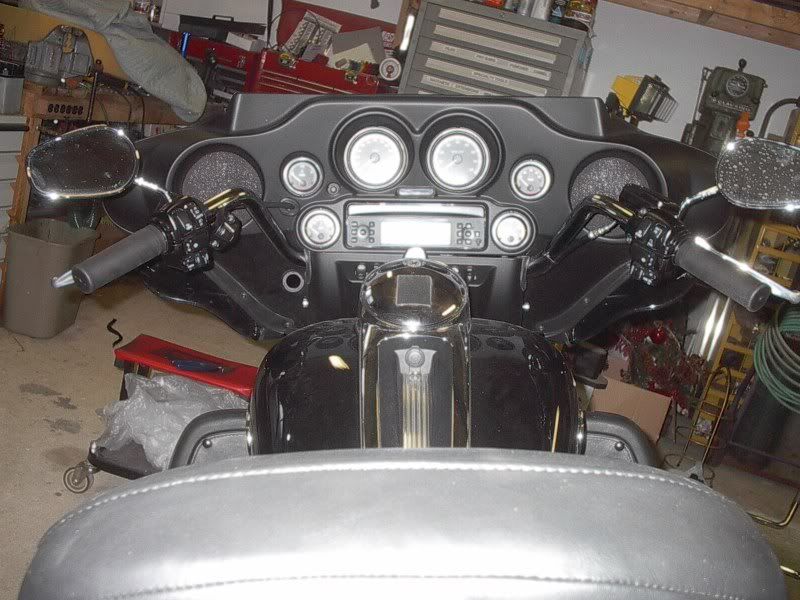
I hope this has answered some questions out there and will be helpful to others looking to tackle this upgrade. Mitch
I found a site that had actual measurements and confused me more which aint hard.
I settled on the Harley #56176-08 2" pullback bars. My dealer wanted $179.00 for them and said I would need to replace the clutch cable, brake line, some additional harness piece and other stuff along with 4 hours labor for a total of around $1600.00
I did some initial poke'in around behind the fairing and was pretty sure I didn't need all of the "other" stuff.
I took a chance and ordered them from Sirdykes for $122.00 but the down side was the 4 week wait because they were backordered.
Here's my take on what I think was an easy to average do it yourself project.
I started by taking comparison photos to reference later.
The whole fairing assy could easily be unbolted and rolled forward to do this but I had other things to do in there so it came apart and everything removed from the old bars. Don't know if it matters but I kept the master cylinder upright to keep from possible brake bleeding.
New bars went on and set at same angle as old.
First to reassemble was the Heat Demon grip heaters, At this time I'll tell you I found not only do the bars have slots milled where the stock bars had recessed dimples the 56176-08 bars uses .060 thicker tube than the stock Ultra bars and I had to ream the right or throttle side bar .020 to get the heating element in with the TBW assy.
Works fine without the heaters.
I also wanted to run my wires internal so I started by taking the plugs apart for the controls only to find they semi assemble the plug and then crimp the pins on the wire, no deal.
Next was to cut the plug off. I staggered my cuts on the wires to spread out the solder and heatshrink joints and pulled them through the bar. You have to remove the black plastic sleave over the right or throttle side wires or they will not fit in the bar with the green TBW plug. With it removed everything fits loosely in the bar.
When you work alot by yourself, you become creative, Here's my little low budget helper I used for soldering, Two wooden clothespins super glued to a paint stick.
Left side assembly was same as right with the exception of reaming the bar. Heating element back in tube and assemble.
Check out the control switch for the heated grips, can you find it?
That's pretty much it, plug it all back in and reassemble. It took me two mornings to do this by myself. I really like the wires run inside the bars.
Here are some before and after shots of the bar position.
Before
After
Before
After
I hope this has answered some questions out there and will be helpful to others looking to tackle this upgrade. Mitch
Thread Starter
|
Intermediate
Joined: Jun 2008
Posts: 45
Likes: 0
There is plenty of harness (and some to spare) under the fairing to compensate for the additional bar length.
The TBW green plug was the only issue until I removed the black plastic over the wires.
Without the heated grips the TBW part will slide right up the tube and reassemble like factory.
Without disassembling the whole fairing to do the other things and added time pulling the wires through the bars I could have done this in one morning.

Elite HDF Member
Joined: Jul 2008
Posts: 4,741
Likes: 45
From: Indian Land, SC
That's good to know....I'm assuming that the Ultra has the same set up as the SG and if so, I know what my next project will be.....
I see your using bar mounted mirrors. Do the new bars block the fairing mounted mirrors which I really want to retain.
I see your using bar mounted mirrors. Do the new bars block the fairing mounted mirrors which I really want to retain.
Last edited by HDV-GLIDE; Nov 20, 2008 at 09:16 AM.

Elite HDF Member
Joined: Sep 2008
Posts: 3,929
Likes: 1
From: Grayland, WA.
Great post!! And I love the clothes pin/pop sickle tool! My dealer did tell me that I wouldn't have to replace any cables or lines for the 2" pull back. Really good post! Thanks!
Trending Topics

Ultimate HDF Member


Joined: Mar 2008
Posts: 5,788
Likes: 203
From: SW Florida
Nice job Mitch. 
I would like to add one point, there is no need to cut any wires for internal wiring. The Molex connector used on the 08 comes apart and the wires are easily removable with a paper clip. Here are the instructions from the Service Manual covering the Molex connectors for future reference.
I would like to add one point, there is no need to cut any wires for internal wiring. The Molex connector used on the 08 comes apart and the wires are easily removable with a paper clip. Here are the instructions from the Service Manual covering the Molex connectors for future reference.
HD Forum Stories
The Best of Harley-Davidson for Lifelong Riders

7 Surprising Harley-Davidson Products that Are Not Motorcycles
Verdad Gallardo
8 Best Harley-Davidson Motorcycles Ever
Pouria Savadkouei
10 Worst Harley-Davidson Motorcycles Ever
Pouria Savadkouei
Killer Custom's Jail Break Is The Breakout That Refused to Blend In
Verdad Gallardo
Crazy Bunderbike Build Looks Amazing, But Is It Impossible to Ride?
Verdad Gallardo
Harley-Davidson Reveals Super Cool Cafe Racer Concept
Verdad Gallardo
Engraved Rebellion: Inside Bundnerbike's Glam Rock II
Verdad Gallardo
10 Motorcycles You Should Never Buy
Joe Kucinski
10 Things Harley-Davidson Needs to Fix in 2026
Verdad Gallardo
Thread Starter
|
Intermediate
Joined: Jun 2008
Posts: 45
Likes: 0
Nice job Mitch.
I would like to add one point, there is no need to cut any wires for internal wiring. The Molex connector used on the 08 comes apart and the wires are easily removable with a paper clip. Here are the instructions from the Service Manual covering the Molex connectors for future reference.
I would like to add one point, there is no need to cut any wires for internal wiring. The Molex connector used on the 08 comes apart and the wires are easily removable with a paper clip. Here are the instructions from the Service Manual covering the Molex connectors for future reference.
Damn, learn something new everyday!! I had the 1st plug apart and thought I looked it over pretty good.
Thanks Bertk, Hope I havent lead anyone down the wrong path yet. Gotta love this site.
I Just went out and sat on my bike and can see the area where the fairing mirrors would be on the SG but cant say if vision would be blocked by arm or hands.

Tourer
Joined: Oct 2008
Posts: 335
Likes: 0
From: So. Calif.
2 thoughts and they are just on technique:
Frist, the clothes pin soldering jig is a great idea. Keeping the 2 wires from moving relative to each other as the joint cools is imjportant to avoid a cold or high resistance solder joint. You could enhance it by gluing some thin aluminium or copper in the jaws to act as a heat sink, if you find the insulation is discoloring from the soldering iron.
Second, after the solder joint has cooled, put a drop of silicone sealant on the wires before sliding on the heat shrink tubing. When the heat shrink shrinks, it will extrude a little sealant out the ends and form a perfect watertight seal over your solder joint and provide a little extra thickness of insulation over the joint in case it rubs under vibration.
This may be overkill, but it has worked well for me over the years.
Frist, the clothes pin soldering jig is a great idea. Keeping the 2 wires from moving relative to each other as the joint cools is imjportant to avoid a cold or high resistance solder joint. You could enhance it by gluing some thin aluminium or copper in the jaws to act as a heat sink, if you find the insulation is discoloring from the soldering iron.
Second, after the solder joint has cooled, put a drop of silicone sealant on the wires before sliding on the heat shrink tubing. When the heat shrink shrinks, it will extrude a little sealant out the ends and form a perfect watertight seal over your solder joint and provide a little extra thickness of insulation over the joint in case it rubs under vibration.
This may be overkill, but it has worked well for me over the years.