



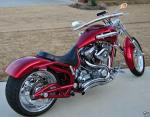



Homelink - customized

Thread Starter
|
Advanced
Joined: Apr 2009
Posts: 77
Likes: 0
From: Las Vegas
 Homelink - customized
So I have been thinking about this before I even had the bike... So i got a homelink but had to wait for the bike (on order) to find a place to mount it. I went to radio shack to find some switches, wire and connectors.
All the connectors at the shack were HUGE compared to what I wanted and thought I needed. I checked a few other stores locally and then went online. I ended up using connectors for RC cars. The perfect size connectors but the wires could be a little smaller gauge.... not a real issue, just have to be careful when soldering...
I have a few pics of of the progress so far. I need more switches because I only bought one to see if it will fit. I decided to drill out the two blanks for the switches next to the key. Drilling into the inner fairing scares me. It's so permanent. I also may add tweeters later and that limits my options.
Now that all the wires are run to the PCB (printed circuit board) I want to fill the case with resin... not sure what to use yet. Still need to research that. If any one knows what I can use, let me know.
I have a temporary LED soldered onto the wires. I need the get a little mounting clip. I ground the top of the LED down so it wouldn't be blinding at night.
You can see two of the three switch wires soldered along with the LED wires.
If you look close you can see the stock IC mount LED to the left.

Here it is back in the case.
I cut one end of the case off to let the wires come out and I will fill it from this side with resin to make it waterproof.
You can see one switch assembly and the blanks from the fairing.

Here is what I have for a switch. While it will fit the blank, the lock nut that goes on the back will not fit in the recess.
I will epoxy them into the blank from the back.

All the connectors at the shack were HUGE compared to what I wanted and thought I needed. I checked a few other stores locally and then went online. I ended up using connectors for RC cars. The perfect size connectors but the wires could be a little smaller gauge.... not a real issue, just have to be careful when soldering...
I have a few pics of of the progress so far. I need more switches because I only bought one to see if it will fit. I decided to drill out the two blanks for the switches next to the key. Drilling into the inner fairing scares me. It's so permanent. I also may add tweeters later and that limits my options.
Now that all the wires are run to the PCB (printed circuit board) I want to fill the case with resin... not sure what to use yet. Still need to research that. If any one knows what I can use, let me know.
I have a temporary LED soldered onto the wires. I need the get a little mounting clip. I ground the top of the LED down so it wouldn't be blinding at night.
You can see two of the three switch wires soldered along with the LED wires.
If you look close you can see the stock IC mount LED to the left.
Here it is back in the case.
I cut one end of the case off to let the wires come out and I will fill it from this side with resin to make it waterproof.
You can see one switch assembly and the blanks from the fairing.
Here is what I have for a switch. While it will fit the blank, the lock nut that goes on the back will not fit in the recess.
I will epoxy them into the blank from the back.
Thread Starter
|
Advanced
Joined: Apr 2009
Posts: 77
Likes: 0
From: Las Vegas
OK. Part two: I work nights and work on this in the morning when I get home...
I picked up two more switches and an LED bezel at radi shack the other day. I soldered on the leads and fixed the LED plus added heat shrink to keep anthing from shorting.... first pic is the assembly with three switches and the LED mounted. This is perfect as I have a two gargage doors and a gate to get into the development.

This shot is the the whole system. The switches can all disconnect from the transmitter and the LED should come out of the bezel. I will probably have to extend the leads for the power... I'm not quite ready to pull the fairing... its a little intimidating...

The only problem I had was the epoxy I used to seal the PCB. It sets in only one minute but thats a long time when its running everywhere. I kind of made a mess. The little black box it came in had some holes in it and didn't seal the well around the edges. Next time I'll have to find a better box and a better epoxy sealer....
I'll get some pics of it installed on the bike if I can get the switch block back in without having to remove evrything. For you chrome guys this could be done with some little shiny metal switches....
I picked up two more switches and an LED bezel at radi shack the other day. I soldered on the leads and fixed the LED plus added heat shrink to keep anthing from shorting.... first pic is the assembly with three switches and the LED mounted. This is perfect as I have a two gargage doors and a gate to get into the development.
This shot is the the whole system. The switches can all disconnect from the transmitter and the LED should come out of the bezel. I will probably have to extend the leads for the power... I'm not quite ready to pull the fairing... its a little intimidating...
The only problem I had was the epoxy I used to seal the PCB. It sets in only one minute but thats a long time when its running everywhere. I kind of made a mess. The little black box it came in had some holes in it and didn't seal the well around the edges. Next time I'll have to find a better box and a better epoxy sealer....
I'll get some pics of it installed on the bike if I can get the switch block back in without having to remove evrything. For you chrome guys this could be done with some little shiny metal switches....

Road Captain
Joined: Nov 2007
Posts: 544
Likes: 0
From: MD
I have still seen it at the Dealer's..This is a nice setup because it is hidden, and he can hook it up so it won't be powered unless the bike is powered.
Trending Topics

Road Warrior
Joined: Jun 2008
Posts: 1,319
Likes: 1
From: Deep South Texas
Damn dude, I thought you were making a bomb at first.
Looks like it should work well. I would also recommend the HD odometer switch, I believe someone posted the part number on this forum at one time.
Looks like it should work well. I would also recommend the HD odometer switch, I believe someone posted the part number on this forum at one time.
HD Forum Stories
The Best of Harley-Davidson for Lifelong Riders

7 Surprising Harley-Davidson Products that Are Not Motorcycles
Verdad Gallardo
8 Best Harley-Davidson Motorcycles Ever
Pouria Savadkouei
10 Worst Harley-Davidson Motorcycles Ever
Pouria Savadkouei
Killer Custom's Jail Break Is The Breakout That Refused to Blend In
Verdad Gallardo
Crazy Bunderbike Build Looks Amazing, But Is It Impossible to Ride?
Verdad Gallardo
Harley-Davidson Reveals Super Cool Cafe Racer Concept
Verdad Gallardo
Engraved Rebellion: Inside Bundnerbike's Glam Rock II
Verdad Gallardo
10 Motorcycles You Should Never Buy
Joe Kucinski
10 Things Harley-Davidson Needs to Fix in 2026
Verdad Gallardo
Thread
Thread Starter
Forum
Replies
Last Post
GBogard
Sportster Models
10
May 26, 2013 08:28 AM
