


Brass Fairing Inserts (pics)

6th Gear
Joined: Mar 2012
Posts: 14
Likes: 0
From: CT
I have always used an inch pound torque wrench on these, but one came loose and wouldn't tighten up. I thought I would find striped threads but what it does is break loose from the plastic.
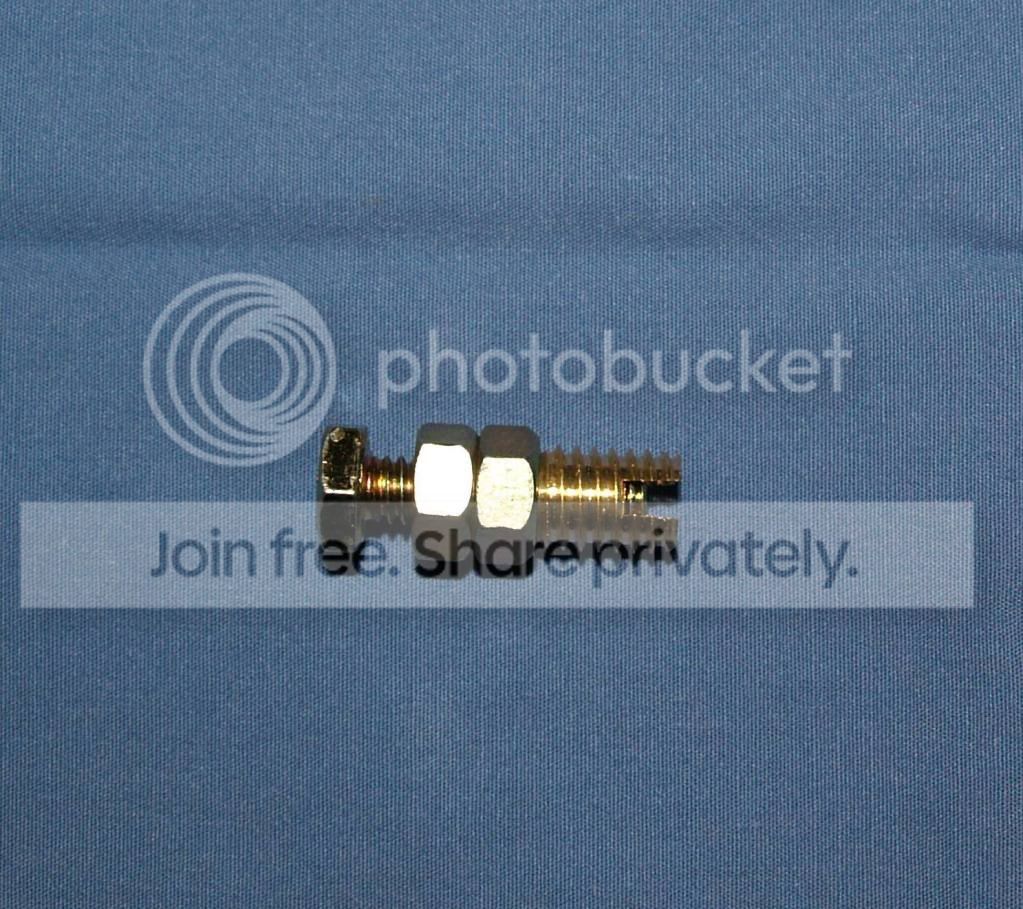
The repair insert is threaded on the inside and on the outside. 1/4x20 inside...3/8x16 outside. It is made to cut its own threads into the plastic when you thread it in.
I went ahead and used a bottoming tap to cut the first few threads in the plastic to make sure it was going in nice and stright.
I used a 1/4" bolt with two nut locked in place as a driver to finish the install.
Make sure the slotted end of the repair bushing goes into the plastic first.
Turn it in untill it is sticking out the same distance as the others two.
In the pictures the old bushing is on the left side and the new bushing on the right.
This is a cheap and easy repair.
I was afraid to attempt this,because i didnt want the inner faring to crack and i didnt want to spend more money.. Harley-Jones, i just wanted to say thanks personally, your method worked perfect and was so easy, tap and bolt sizes were perfect.. thanks so much for this thread..
Intermediate
Joined: Sep 2011
Posts: 43
Likes: 0
From: Odessa, MO
Bought two threaded inserts and three new windshield bolts and got out of the dealership for $5.29 total.
The parts guy mentioned heating up the insert with a propane torch for a few seconds, then just threading it into the plastic while hot. Figured I'd try it and it worked perfectly. I used the double nutted bolt with the new insert threaded onto the end. The only bolt I had the correct size was phillips head on the end instead of hex. I was a little concerned I wouldn't get enough torque on the phillips head to screw it in, but gave it a shot anyway. I heated up the new insert on the end of the bolt for about 10 seconds and it screwed right in like butter. I figured I'd let it cool before trying to break loose the double nut and backing out the bolt. After it cooled, I just grabbed the phillips and cranked on it. It popped and then the bolt backed right out without undoing the nuts. The insert held in tight and didn't budge with the plastic perfectly form fitted around it after cooling.
Put a little anti-seize on the threads of the three new bolts and just snugged them down by hand with a folding torx set.
Thanks again for the info on the part. If I knew it was that easy, I would have fixed it a long time ago.
Last edited by AbrasiveHD; Jun 27, 2012 at 08:19 PM.
have to replace 2 of mine this weekend, I went ahead and bought all 7, does anyone know how to take the ones that haven't broke free yet out?? thought I might as well replace all of them at one time...
HD Forum Stories
The Best of Harley-Davidson for Lifelong Riders

7 Surprising Harley-Davidson Products that Are Not Motorcycles
Verdad Gallardo
8 Best Harley-Davidson Motorcycles Ever
Pouria Savadkouei
10 Worst Harley-Davidson Motorcycles Ever
Pouria Savadkouei
Killer Custom's Jail Break Is The Breakout That Refused to Blend In
Verdad Gallardo
Crazy Bunderbike Build Looks Amazing, But Is It Impossible to Ride?
Verdad Gallardo
Harley-Davidson Reveals Super Cool Cafe Racer Concept
Verdad Gallardo
Engraved Rebellion: Inside Bundnerbike's Glam Rock II
Verdad Gallardo
10 Motorcycles You Should Never Buy
Joe Kucinski
10 Things Harley-Davidson Needs to Fix in 2026
Verdad GallardoIntermediate
Joined: Sep 2011
Posts: 43
Likes: 0
From: Odessa, MO
Since the originals are only knurled and not threaded, I wouldn't think it would take much. I guess if it were me, I'd try the heating technique, only in reverse. Insert a bolt into the one you want to remove then heat up the end of the bolt farthest from the insert until enough heat transfers through the insert that it will pull out. A steady pull on the bolt with a pair of pliers while heating it and I'd bet it would slip right out. This is just me thinking out loud, never tried it other than to put the new one in.

Had to replace 2 inserts in my 01 flhtc. 1 was broke when traded it in. took chrome strip off of it to put on 12 and stripped 1 right off the bat so this is just what i needed thanks guys A+ Mike 