


Deluxe Tour-pak Hinges

Thread Starter
|
Road Warrior

Joined: Jan 2010
Posts: 1,290
Likes: 20
From: Salem, Or
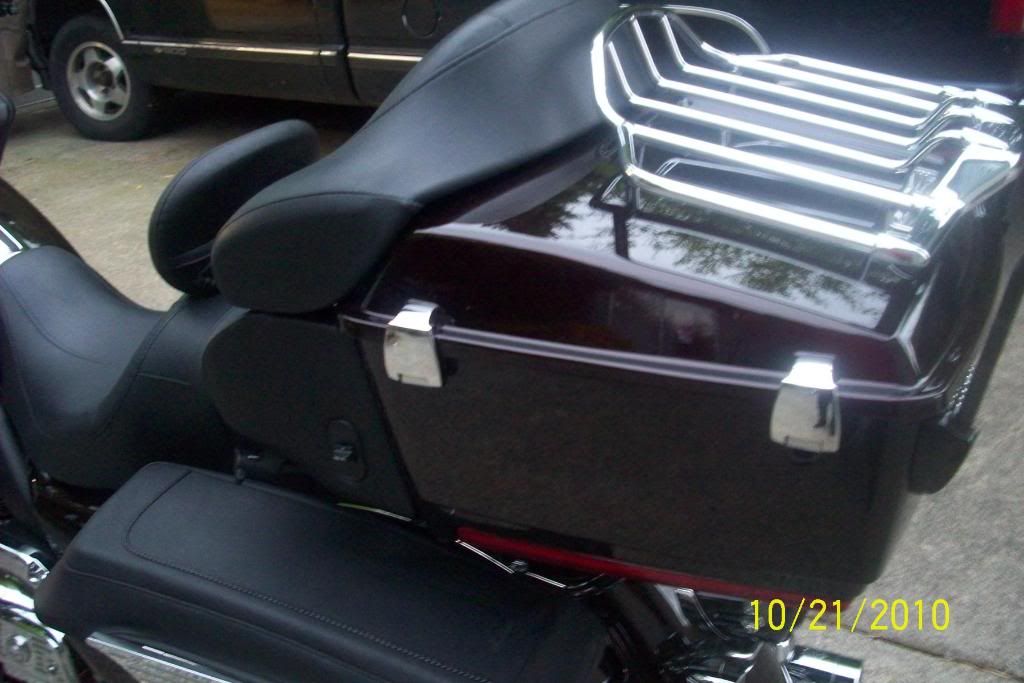
I just got done installing the Deluxe Tour-Pak hinges and what a difference in looks. I had a buddy come over and lend an extra set of hands which sure made the installo much easier. If you want to upgrade your tour-Pak these are a must.
Outstanding HDF Member
Joined: Oct 2007
Posts: 3,437
Likes: 15
I installed them and it is easy. You are only drilling the head of the rivit off so the rivet can pop out.
Elite HDF Member
Joined: Jun 2006
Posts: 3,698
Likes: 11
From: Longview, Washington
I've done two sets of these. Here are my suggestions to make the job easier.
1. Follow the directions and remove the stock hinge pins and lid before you start removing rivets.
2. Drilling the rivets works however I found that grinding the heads off with a Dremel is much easier then drilling around the lid seal. You're working on the opposite side away from the seal.
3. Use blue tape to cover the paint in any area you are working. One slip with the drill or dremel and you'll wish you did.
4. You will need to drill the holes out for the new screws since the screws are slightly bigger than the rivets.
5. You will only need extra hands when it comes time to bolt the lid back on. I managed without help.
I think they are one of the best $50 upgrades you can make.
How do they look????
Trending Topics
Thread Starter
|
Road Warrior
Joined: Jan 2010
Posts: 1,290
Likes: 20
From: Salem, Or
I've done two sets of these. Here are my suggestions to make the job easier.
1. Follow the directions and remove the stock hinge pins and lid before you start removing rivets.
2. Drilling the rivets works however I found that grinding the heads off with a Dremel is much easier then drilling around the lid seal. You're working on the opposite side away from the seal.
3. Use blue tape to cover the paint in any area you are working. One slip with the drill or dremel and you'll wish you did.
4. You will need to drill the holes out for the new screws since the screws are slightly bigger than the rivets.
5. You will only need extra hands when it comes time to bolt the lid back on. I managed without help.
I think they are one of the best $50 upgrades you can make.
How do they look????
1. Follow the directions and remove the stock hinge pins and lid before you start removing rivets.
2. Drilling the rivets works however I found that grinding the heads off with a Dremel is much easier then drilling around the lid seal. You're working on the opposite side away from the seal.
3. Use blue tape to cover the paint in any area you are working. One slip with the drill or dremel and you'll wish you did.
4. You will need to drill the holes out for the new screws since the screws are slightly bigger than the rivets.
5. You will only need extra hands when it comes time to bolt the lid back on. I managed without help.
I think they are one of the best $50 upgrades you can make.
How do they look????
HD Forum Stories
The Best of Harley-Davidson for Lifelong Riders

7 Surprising Harley-Davidson Products that Are Not Motorcycles
Verdad Gallardo
8 Best Harley-Davidson Motorcycles Ever
Pouria Savadkouei
10 Worst Harley-Davidson Motorcycles Ever
Pouria Savadkouei
Killer Custom's Jail Break Is The Breakout That Refused to Blend In
Verdad Gallardo
Crazy Bunderbike Build Looks Amazing, But Is It Impossible to Ride?
Verdad Gallardo
Harley-Davidson Reveals Super Cool Cafe Racer Concept
Verdad Gallardo
Engraved Rebellion: Inside Bundnerbike's Glam Rock II
Verdad Gallardo
10 Motorcycles You Should Never Buy
Joe Kucinski
10 Things Harley-Davidson Needs to Fix in 2026
Verdad Gallardo
Intermediate
Joined: May 2010
Posts: 32
Likes: 0
From: Aurora , colorado
Installed mine this summer. The stock ones drove me nuts, what cheap crap. Looked like something from s 80's goldwing ! Just another item that should be stock on the bike that Harley can sell for $50. I agree that drilling the rivets is nerve racking.