


Oil Temp Gauge Install - 2011 RGC
Thread Starter
|
Outstanding HDF Member
Joined: Jan 2011
Posts: 2,333
Likes: 77
From: Orlando, FL
Oil Temperature Gauge - Fairing Mount Silver Face - 75324-05A

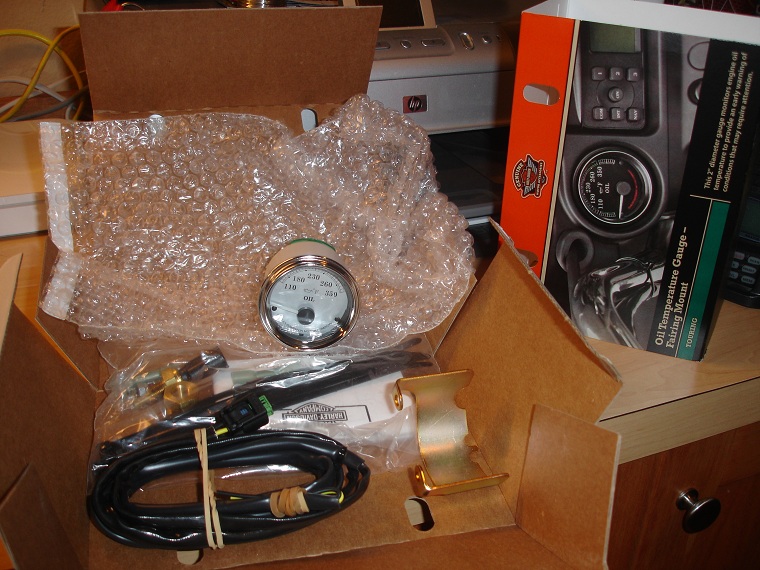
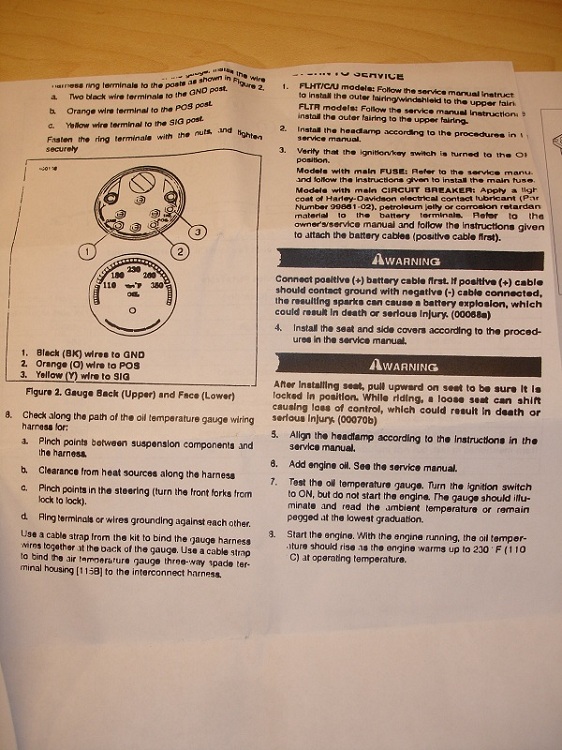
From the pdf file downloaded from HD:

The ones included in the box... looks like a copy of a copy of a copy and the paper moved so part of the instructions are cut out, Again, glad that they have the original instructions in pdf format in the parts catalog online. So if this is the same in your case, just go to the HD parts site online, look up the oil temp gauge (Part Number - 75324-05A) and download a pdf version of the install instructions.
First off, remove the front fairing. Don't know how?? Here you go: Front Fairing Removal-Install 2011 RGC
Instructions asks you to drain the oil, remove the plug, install the adapter and then install the sensor... I was not ready to do an oil change. So, I installed the sensor in the adapter and removed the plug and installed the sensor and adapter as one piece... very little oil lost in the process.

Also, instructions are documented as if you will remove the air temp gauge and install it there. I wanted both oil gauges to be on the same side. So after looking at it for awhile, I notice that the Volt gauge has no additional sensor wire. It just feeds two grounds and two positives... easy. I move the Volt gauge over to where the air temp gauge was and installed the oil temp in its place.
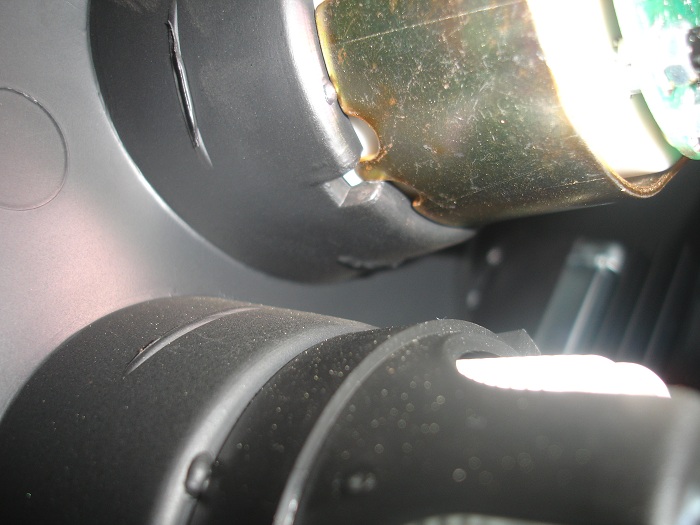
Removing Volt gauge
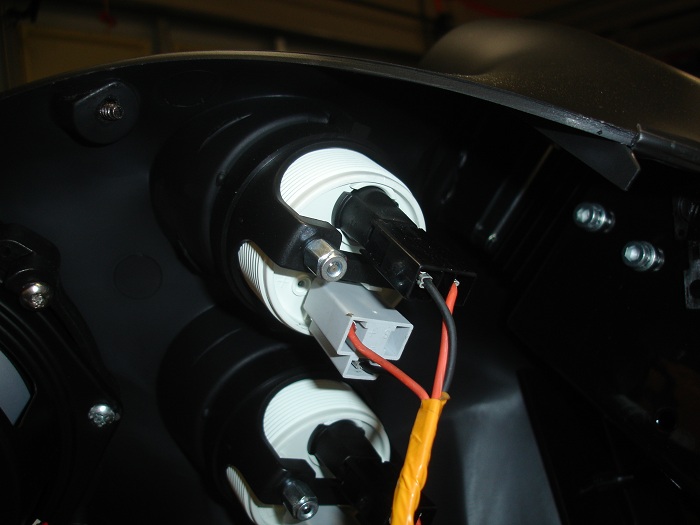
Just unplug the two plugs, unbolt those two nuts, and the plastic black ring comes out. Once you have done that you can gently push out the gauge while holding it from the front.
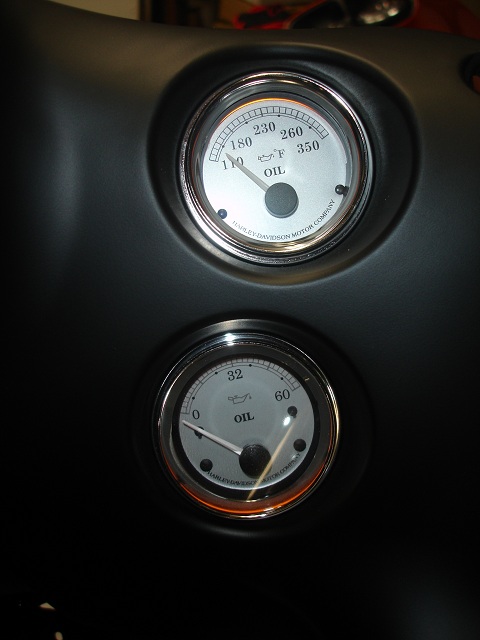
New oil temp gauge installed:
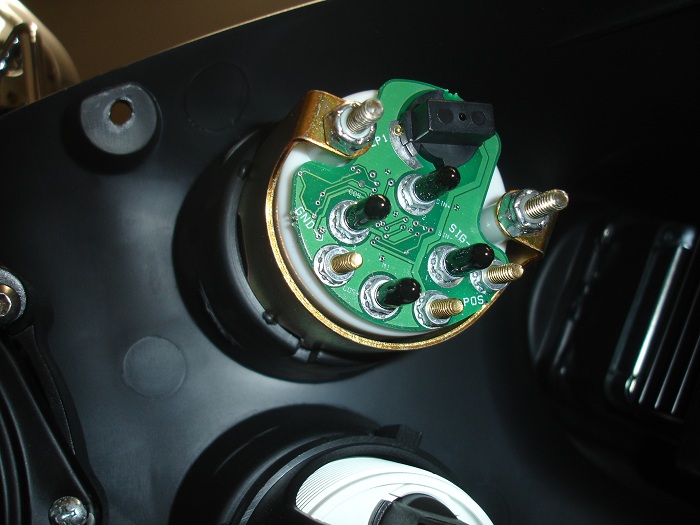
And no worries that it would go in crooked, there is a tab in the ring that holds it down to avoid that.
Install it where the Air Temp Gauge is, plug the black plug in place (provides power to the gauge light. I then remove the air temp sensor wire from the plug and plugged that into the gauge. I put some shrinking wrap around the terminal to avoid it contacting anything... regular electrical tape works fine too. That side was done.
EDIT: You really do not need to remove the sensor terminal from the plug as the Volt gauge does not have a third tab...so you could just plug it in and be done with it...
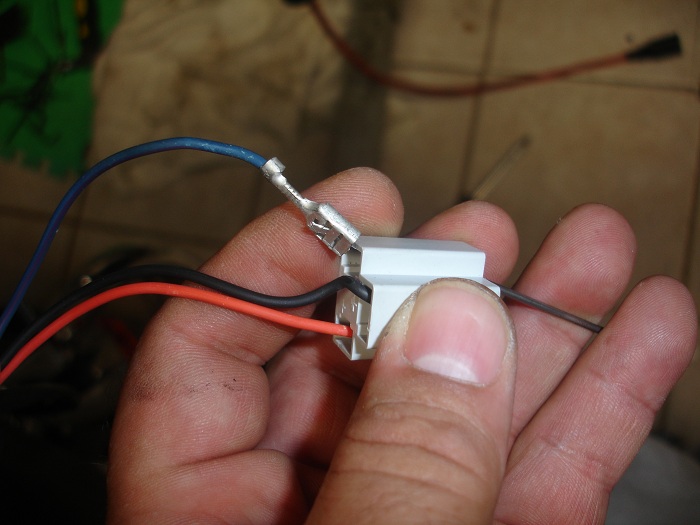

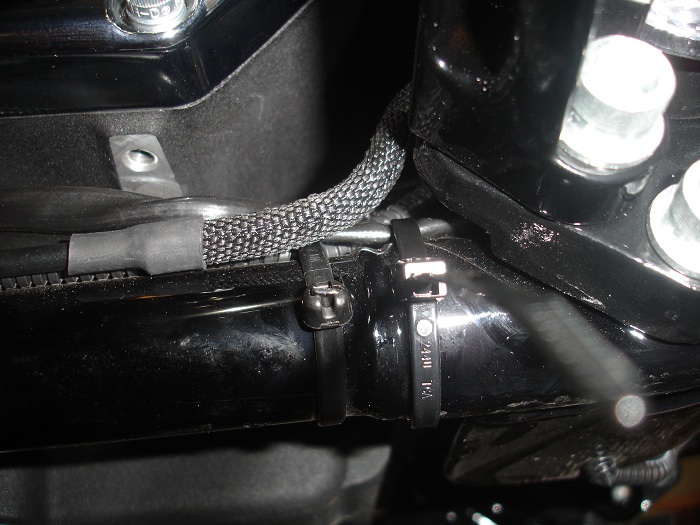
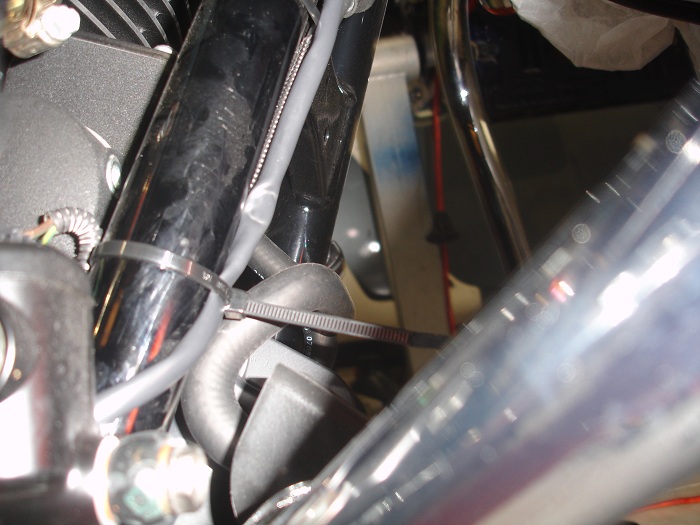
Connected the harness to the sensor, routed the harness and held it in place with the tie wraps provided in the kit. There is a caution to not tie it to the brake lines. In through the neck. Wire terminal climping tool used to secure the terminal to the wire. Follow the instruction on what wire goes where (two blacks to ground, two reds to positve, yellow to sensor terminal). Install the nuts.


Stand back and admire your work. Clean any oil around the oil pan or floor. Have a glass of your favorite install fluid...
From the pdf file downloaded from HD:
The ones included in the box... looks like a copy of a copy of a copy and the paper moved so part of the instructions are cut out, Again, glad that they have the original instructions in pdf format in the parts catalog online. So if this is the same in your case, just go to the HD parts site online, look up the oil temp gauge (Part Number - 75324-05A) and download a pdf version of the install instructions.
First off, remove the front fairing. Don't know how?? Here you go: Front Fairing Removal-Install 2011 RGC
Instructions asks you to drain the oil, remove the plug, install the adapter and then install the sensor... I was not ready to do an oil change. So, I installed the sensor in the adapter and removed the plug and installed the sensor and adapter as one piece... very little oil lost in the process.
Also, instructions are documented as if you will remove the air temp gauge and install it there. I wanted both oil gauges to be on the same side. So after looking at it for awhile, I notice that the Volt gauge has no additional sensor wire. It just feeds two grounds and two positives... easy. I move the Volt gauge over to where the air temp gauge was and installed the oil temp in its place.
Removing Volt gauge
Just unplug the two plugs, unbolt those two nuts, and the plastic black ring comes out. Once you have done that you can gently push out the gauge while holding it from the front.
New oil temp gauge installed:
And no worries that it would go in crooked, there is a tab in the ring that holds it down to avoid that.
Install it where the Air Temp Gauge is, plug the black plug in place (provides power to the gauge light. I then remove the air temp sensor wire from the plug and plugged that into the gauge. I put some shrinking wrap around the terminal to avoid it contacting anything... regular electrical tape works fine too. That side was done.
EDIT: You really do not need to remove the sensor terminal from the plug as the Volt gauge does not have a third tab...so you could just plug it in and be done with it...
Connected the harness to the sensor, routed the harness and held it in place with the tie wraps provided in the kit. There is a caution to not tie it to the brake lines. In through the neck. Wire terminal climping tool used to secure the terminal to the wire. Follow the instruction on what wire goes where (two blacks to ground, two reds to positve, yellow to sensor terminal). Install the nuts.
Stand back and admire your work. Clean any oil around the oil pan or floor. Have a glass of your favorite install fluid...
Last edited by wachuko; Mar 17, 2011 at 09:28 AM.
Thread Starter
|
Outstanding HDF Member
Joined: Jan 2011
Posts: 2,333
Likes: 77
From: Orlando, FL
No kidding, guy doing the copies must have had a few shots of Jack Daniels, or something, lol.
It is a fairly straight forward install, but thought it would be good to share photos of my install in case someone was reluctant to do this themselves.
Cheers!
Thread Starter
|
Outstanding HDF Member
Joined: Jan 2011
Posts: 2,333
Likes: 77
From: Orlando, FL
I read of folks using an inexpensive alternative from Autozone but I did not find the part number.
I also got a set of used 5.25 J&M Speakers, I ordered the newer set of grills with the tweeter and mid-range and want to install everything the same day to avoid having to take that front fairing again... those screw tabs scare me if one was to break...
Road Warrior
Joined: Jul 2009
Posts: 1,979
Likes: 2
From: Northern Colorado
I got the same copy of a copy of a copy. It's pretty sad that for $140 they can't even give you a decent set of instructions. It would also be nice if there was a torque spec for the sending unit and adapter fitting.
Trending Topics
Supporter


Joined: Dec 2006
Posts: 6,724
Likes: 234
From: Altoona, Pa.

Thanks for doing that and sharing it. Know there has been some talk before but wondering if HD has made a gauge and face to match my others for a 2010 SE Ultra.
HD Forum Stories
The Best of Harley-Davidson for Lifelong Riders

6 Weirdest Harley-Davidsons Ever Sold to the Public
Verdad Gallardo
7 Times Harley-Davidson Chucked Tradition Out the Window
Verdad Gallardo
7 Surprising Harley-Davidson Products that Are Not Motorcycles
Verdad Gallardo
8 Best Harley-Davidson Motorcycles Ever
Pouria Savadkouei
10 Worst Harley-Davidson Motorcycles Ever
Pouria Savadkouei
Killer Custom's Jail Break Is The Breakout That Refused to Blend In
Verdad Gallardo
Crazy Bunderbike Build Looks Amazing, But Is It Impossible to Ride?
Verdad Gallardo
Harley-Davidson Reveals Super Cool Cafe Racer Concept
Verdad Gallardo
Engraved Rebellion: Inside Bundnerbike's Glam Rock II
Verdad Gallardo
awesome write-up... im doing mine next week when i get my new scoot... question... when u will have to change ure oil, will you have to unplug sensor and unscrew fitting to sensor only and not fitting to the Pan. so it wont it wont strip the Pan threads over time??.. would using a T-fitting make more sense so when u drain the oil , so don't have to remove Oil sensor plug ??
Outstanding HDF Member
Joined: Oct 2007
Posts: 3,437
Likes: 15
Now do yourself a favor and cover up the temp qauge with some black tape lol. I had one on my 04 and swore I would not get another. Just wait until you are stuck in traffic and the temp starts creeping towards melt down.