When you click on links to various merchants on this site and make a purchase, this can result in this site earning a commission. Affiliate programs and affiliations include, but are not limited to, the eBay Partner Network.
I had this put on my 19 RGS with the mid-frame air deflectors. In heavy traffic, my bike went from "I hate riding when it's so hot, I can't stand it", to "Wow, it's barely warm, I could sit here all day". Well worth the price, to me. In city traffic, it come on when you get slow enough for the heat to boil up, and turns off when you get your speed back up. I never hear it, and just leave it in "Auto" mode all of the time. If you do any rush hour or city riding, it is well worth a look.
I just installed one on my 15 SGS and I only use it when it gets hot at lights or stopped, not while riding. I also installed Love Jugs and the 2 combined do great
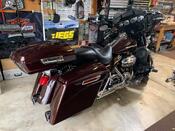
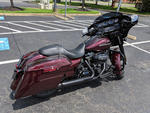
I started with pic 5. Installed pic 2 behind pic 1. The second one is installed in the horn cover. That cools the intake. The other one takes the header heat and blows it out the back.
Very noticable on hot days. Work great
I've had mine on my 2014 with on/off only switch since January.
My GOD, this thing is worth its weight in gold. I leave it on no matter what the speed. Book says it doesn't do anything over about 35 but there's nothing about it actually doing negative stuff other than the standard it's another electrical widget that takes amperage.
It's been 100+ for a couple weeks here with 50+ percent humidity. I intentionally turn it off upon occasion at stop lights just to see if there is an actual difference. Yes. There is a difference. Wow.
I turn it off when I've got the accessory settings on to listen to the radio. It's really difficult to ignore the high pitched whine and forget to turn it off then.
I'd buy it again in a minute if my next bike didn't come with one out of the factory.
Just got my fan with an accessory plug doubler harness. Your post has me convinced I made the right choice to buy one. 130 for both parts from Surdyke. Seems the hardest part is going to be knocking/drilling out the deflector nut pressed into the frame and then working the nuts on from the inside next to the battery tray. Pretty tight clearances in there.
Just got my fan with an accessory plug doubler harness. Your post has me convinced I made the right choice to buy one. 130 for both parts from Surdyke. Seems the hardest part is going to be knocking/drilling out the deflector nut pressed into the frame and then working the nuts on from the inside next to the battery tray. Pretty tight clearances in there.
To remove the deflector nut, squeeze the backside edges as they mushroom out inside the hole to seat the nut. Do not try to pound out from the back (will mushroom more) or the front (there is a lip). This is how I captured the new nut inside my 1/4 inch socket...I then used a couple extensions to make my way to the fan screws.
Last edited by GregGillette; Sep 16, 2019 at 09:49 PM.
Just got my fan with an accessory plug doubler harness. Your post has me convinced I made the right choice to buy one. 130 for both parts from Surdyke. Seems the hardest part is going to be knocking/drilling out the deflector nut pressed into the frame and then working the nuts on from the inside next to the battery tray. Pretty tight clearances in there.
I don't have a garage, just a clamshell at the top of the driveway so I find little stuff for the shop to do when I'm on vacation and I leave it there. This was one of those things. They can figure it out
Just got finished installing the fan. Easier than I thought to get out the clinch nut which is soft metal. I couldn't get a hold of it from the inside with vice grips. A couple whacks on the outside lip with a flathead screwdriver and a hammer bent the lip inward enough to work it out from the inside. Access next to the battery tray was a no go but under the right side cover was plenty enough room to get my fingers in there and put on a couple of washers and wing nuts with thread locker. I used a short stack of washers instead of the outside spacers. The fan is a lot stronger than I expected. Here's a video I took:
Clinch Nut:
Outside lip bent inward allows nut to be removed from the inside.
Wing nuts from my spare parts bin made for an easy task of securing the fan. Thread locker will keep them on tight. My wife always asks me why I save nuts, bolts, washers, springs, etc. This is why.
Last edited by HDSledge; Sep 17, 2019 at 04:30 PM.
7 Surprising Harley-Davidson Products that Are Not Motorcycles
Slideshow: The bar-and-shield logo shows up on far more than motorcycles, some of the company's most unexpected products have nothing to do with riding.
Slideshow: From the troubled AMF years to modern misfires, these bikes earned reputations for reliability issues, questionable engineering, or disappointing performance.
Crazy Bunderbike Build Looks Amazing, But Is It Impossible to Ride?
Slideshow: The Swiss custom shop has taken a Harley Softail and stretched it into something so long and low that it looks closer to a rolling sculpture than a conventional motorcycle.
Engraved Rebellion: Inside Bundnerbike's Glam Rock II
Slideshow: A standard cruiser becomes an intricate metal canvas in the hands of a Swiss custom house known for pushing Harley-Davidson platforms far beyond their factory brief.
Slideshow: Harley-Davidson's challenges aren't abstract; they show up in dropping shipments, shrinking dealer traffic, and strategic decisions that aren't yet translating into growth.