When you click on links to various merchants on this site and make a purchase, this can result in this site earning a commission. Affiliate programs and affiliations include, but are not limited to, the eBay Partner Network.
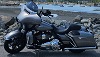
Well, I am finally doing my stage 4. 2014 Roadking with the 103 HO. I have restored a few cars, rebuilt some chevy and pontiac engines but this is the first shot at rebuilding a Harley engine. I had a co-worker that said he would help me, he has all the tools. Well, he announced he was quitting but still would help. So I quickly tore it down and got ready to install the componants. Well, he never showed up, never texted, didn't answer my call. So I called another buddy from my club and he had the tools, I have the manual, we are all set. So, here it goes.... First thing in order was to organize my new tool box. I used a sharpie to label what is in each drawer. I set up a couple 6 ft tables to put the tins and stuff on, started taking off tank, seat, right floorboard, exhaust, etc Heads and jugs off. Nasty tops for only 20K on the engine. popped off the c-clips and pushed out the wrist pins. Had the jugs honed at a local machine shop. $42, wiped with clean engine oil, and slid the piston in and mounted it by sliding it down to get to the connecting rod and push the pin through. install remaining c-clip. The other one I used a ring compressor. I didn't have it available when i did the first one. Boy that makes it a lot easier. Had to modify a 13/16 spark plug socket to transfer the ACR's. Worked like a charm. These are CNC Screamin eagle heads with heavy duty valve springs. Had to cut down this allen to get to the back head bolt under the rear part of the frame, and the inboard lifter blocks. Pulled the cam out. Borrowed a cam bearing puller/installer. will change the bearings them install the cams. 259E's came with the kit.
Good luck! Things not to forget and recomendations. In the middle of a rebuild myself, old Shovelhead.
Assembly lube, the connecting rods, wrist pins, any metal to metal mechanical surface
Ring end gap
Ring order as well as direction
Rings go in dry, do not lube
The wrist pin "c-clips" are directional, sharp edge out and opening faces down
Pistons typically have a cam side indicator
Cylinders should just have a very light wipe of oil
ARP ultra-torque is fantastic stuff, make sure to use on clean, dry bolts and threads
Gasket mating surfaces, wipe with general purpose solvent (I like Wurth), let them dry and assemble
I received this tool from Amazon, it is a Hartland product, made in China. Notice how F'd one of the collets is? I believe the plate itself was part of the problem not allowing the collet to align up properly. Also, notice the smaller collet, how expanded the gaps are. The damaged one was the same way and instead of pushing in through the bearing rather easily, I had to force it through and it made metal, and even damaged the cage. It should have been pretty straight forward but it wasn't. Luckily, a buddy lent me his plate, from a better quality set. I used his plate and the Hartland collet, because his didn't have the 1 inch collet to begin with. It worked, and I hope I got all the shavings out. I used a good magnet to get out as much as I could. I am sending it back. There is a sticker on the box saying if Amazon won't return it, they will. Next is to put the bump stix in. Have to change the orings for the oil pump, there are 3.
How do you expand the collets? The set I have has an inverted wedge type bolt that runs the whole way thru it to expand it, built in to each puller I don't see that in either of yours. The lower one looks seriously pooched!
How do you expand the collets? The set I have has an inverted wedge type bolt that runs the whole way thru it to expand it, built in to each puller I don't see that in either of yours. The lower one looks seriously pooched!
The T handle in the picture is shoved through the collet, thus expanding the end to grab the bearing. The problem I think was that the plate wasn't made right and it didn't align the collet to the bearing.
After getting my heater hooked up and take the chill out of the garage, I bolted the cam/oil pump in, put a new tensioner shoe on, and set the timing chain. Need to lower it so I can torque the new bolts down. Will use red lock tite. The inside chain shoe was perfect, this one visible was worn so I got on amazon and ordered new ones, comes in sets of two. The oil pin and spring come out easily, but getting the insert took some tinkering. I ended up using snap ring pliers to grip the inside and pulled until I over came the suction of the pocket. Just now notice the kit doesn't have the cam cover gasket, sheesh. Back to Amazon.
7 Surprising Harley-Davidson Products that Are Not Motorcycles
Slideshow: The bar-and-shield logo shows up on far more than motorcycles, some of the company's most unexpected products have nothing to do with riding.
Slideshow: From the troubled AMF years to modern misfires, these bikes earned reputations for reliability issues, questionable engineering, or disappointing performance.
Crazy Bunderbike Build Looks Amazing, But Is It Impossible to Ride?
Slideshow: The Swiss custom shop has taken a Harley Softail and stretched it into something so long and low that it looks closer to a rolling sculpture than a conventional motorcycle.
Engraved Rebellion: Inside Bundnerbike's Glam Rock II
Slideshow: A standard cruiser becomes an intricate metal canvas in the hands of a Swiss custom house known for pushing Harley-Davidson platforms far beyond their factory brief.
Slideshow: Harley-Davidson's challenges aren't abstract; they show up in dropping shipments, shrinking dealer traffic, and strategic decisions that aren't yet translating into growth.
















 DIY Stage 4 install