When you click on links to various merchants on this site and make a purchase, this can result in this site earning a commission. Affiliate programs and affiliations include, but are not limited to, the eBay Partner Network.
Dyna Glide ModelsSuper Glide, Super Glide Sport, Super Glide Custom, Dyna Glide Convertible, Super Glide T-Sport, Dyna Glide Police, Dyna Switchback, Low Rider, Street Bob, Fat Bob and Wide Glide.
I wouldn't jump up and say we are full of hate here. Plenty of people getting support for doing things their own way. You just rubbed somebody the wrong way. No biggie.
Thanks for the follow up.
Wish you would have gotten a bit more creative with the bracket, tho. In the pic I thought it was the actual DK part. That's a testament to the quality of your work.
FWIW, I also made a DK clone but of their 636v air cleaner. Not to save money, but because I wanted a different mounting method and lighter construction. Also have a coil relocation that's a bit unique. I think my build is kinda "doing it my way" and haven't gotten any flak for it. Just give us some time.
Hate wasn�t a good word to use. Just what came to mind. But I understand. Just wasn�t expecting so much backlash from a motorcycle community, especially being a forum and not a Facebook troll group. Lol but thank you. I had a few different ideas on the bracket, like mounting it upside down or putting a bend in it so it wouldn�t protrude so far, but that wouldn�t work because of the connector in the back being so close. So I had to go back to the basics. It works and I like it.
Thats awesome. Have a post where I can see the air cleaner?
Most of the older pics in my build thread have broken links and I can't go back and edit. (Stupid forum rule)
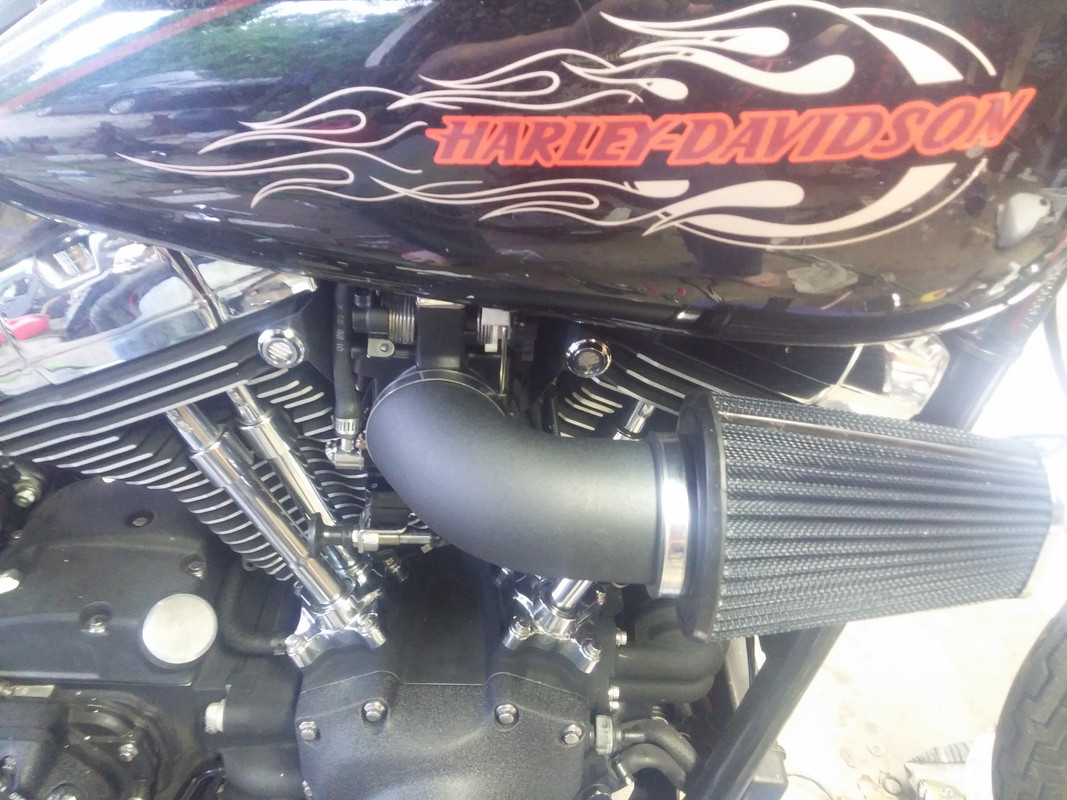
Aluminum tube from EBay cut and formed to fit a slightly modified Mikuni carb. K&N filter dyed black with Rit dye.
Well, good hustle on using the ole' saw blade chunk, always good to get a second use out of something like that and for a good cause no less!
But now you still got that unsightly mess of wires and fuel line hanging down ruining the work you just did! Not to worry, still easy to clean up
I once looked at the horror of wires under the seat like the kid on Home Alone looked at the furnace in the basement It ain't.
Anyway, remove the seat, remove the battery, remove the three simple bolts that hold the battery box in place and all will be revealed
You can run a long narrow zip-tie around the backbone frame and to it you can throw a lasso small zip-tie around the positive cable coming from the battery to the starter, cinch it up to pull it out of the way. Bam Blamo, that one's taken care of!
You can now find the best route for your exhaust sensor to best obscure it, no need for it to ruin the work you've done either!
And what about the damn pesky fuel line that you'd swear Moco f'ed it up on purpose, well, bam blam blamo, you don't have to put up with that Bellshirt either
Then of course, there is that damn mount just sitting there looking at you like it's a third eye, like a cojoined dick growing out of the electrical caddy
Well, you don't have to put up with that either, you can clean that all up and put both your fists behind the cylinder!
Massive agreement on the old coil mount bracket. I cut mine off and it really does make a huge difference. I seriously dig the empty space behind the engine. Not sure why.
The wiring reroute/cleanup is a hassle but it's also very worthwhile if you're the kind of person that notices those little things.
Here are a few tricks to make it easy and clean. This stunt-double Electrical Caddy (EC)-[not to be confused with God] is for demonstration purposes only, I did all alterations/modifications to my EC while it was mounted.
I did all work with a hacksaw blade (blade itself only, gloved hand) and a Dremel with a little sander bob thing whatever they are.
Make a little cap like a thumb drive cap out of the part of the mount you saw off to make the coil purge cap out of.
7 Surprising Harley-Davidson Products that Are Not Motorcycles
Slideshow: The bar-and-shield logo shows up on far more than motorcycles, some of the company's most unexpected products have nothing to do with riding.
Slideshow: From the troubled AMF years to modern misfires, these bikes earned reputations for reliability issues, questionable engineering, or disappointing performance.
Crazy Bunderbike Build Looks Amazing, But Is It Impossible to Ride?
Slideshow: The Swiss custom shop has taken a Harley Softail and stretched it into something so long and low that it looks closer to a rolling sculpture than a conventional motorcycle.
Engraved Rebellion: Inside Bundnerbike's Glam Rock II
Slideshow: A standard cruiser becomes an intricate metal canvas in the hands of a Swiss custom house known for pushing Harley-Davidson platforms far beyond their factory brief.
Slideshow: Harley-Davidson's challenges aren't abstract; they show up in dropping shipments, shrinking dealer traffic, and strategic decisions that aren't yet translating into growth.


 It ain't.


