




Directions for front signal relocation.

Thread Starter
|
Road Warrior
Joined: May 2007
Posts: 1,586
Likes: 1
From: Clinton, Ohio
 Directions for front signal relocation.
Hey all, I got my Kury front signal relocation brackets, but of course, there are no instructions. I tried using the search feature, but to no avail. Does anyone have detalied instructions on moving the front turn signals, especially the wiring?
Thanks!!!
Thanks!!!

Tourer
Joined: Dec 2006
Posts: 314
Likes: 0
From: North Hills California
RE: Directions for front signal relocation.
To do it by the book, you need to remofe the tank, and pull the gromets out of the frame where the wiring harness goes in just behind the steering head. then you pulll the wires outr of the connectors, and pull them up through the sheaths. Pain in the ***. Get yourself a soldering iron, and save yourself alot of time and headache.

Tourer
Joined: Aug 2007
Posts: 329
Likes: 0
From: Stafford, KS
RE: Directions for front signal relocation.
I just put the HD relocation kit on my stepdads bike last night, not to tough. First you need to remove the tank. Secondly, all of the wires are hiddin in the frame under the tank, you need to pull those wires out and expose them. Next, look for two connectors, one white and one black, with three wires in them, possibly blue, violet, and black. You then need to remove those wires from the connectors and pull the wires up thought the frame so all you have left is the turn signal and the wires. Relocate the sigs and follow the procedure in reverse. It took use about 2 hrs to do the install. The wire colors might not be exact but that is what they were for me. Good Luck, post some pics when you get done. I just got to thunking have you looked for instructions on the Kury website?

Road Master
Joined: May 2007
Posts: 1,168
Likes: 1
From: Cornwall UK
RE: Directions for front signal relocation.
Blade you are keeping your wiring external of the bars right?
If so you can make life a little easier. Remove the screws so that you can access the wiring inside the handlebar switches. Cut the wires to the indicators leaving enough cable to be able to make an inline joint with your new two core cable extention.
Run this extention cable inside the sheath with the other electrical cables downto the area at the back of the headlight.
Here you make a small cut in the cable sheath for the extention cable to exit and run across to the new position of the indicators.
Put your indicators in position so that you can work out your cable length, but don,t fit them yet.
Remove the indicator "glass" and pull out the reflector, and ditch the rubber grommets (its easier to use new ones)
Put a new grommet on the indicator body, slide the extention cable through (electrical oil helps)
Make a new joint then screw the fork clamp to the indicator body i put a backing nut on the inside of the indicator body for extra strength ( i found that the screws supplied were a different thread to my Dynas soyou can either run a tap through or getscrews of the correct thread)
Push the reflector back into the indicator body and pop in the "glass"and your done
Repeat for the other side
It may sound long winded but its easy just give yourself time and you,ll crack it.
If so you can make life a little easier. Remove the screws so that you can access the wiring inside the handlebar switches. Cut the wires to the indicators leaving enough cable to be able to make an inline joint with your new two core cable extention.
Run this extention cable inside the sheath with the other electrical cables downto the area at the back of the headlight.
Here you make a small cut in the cable sheath for the extention cable to exit and run across to the new position of the indicators.
Put your indicators in position so that you can work out your cable length, but don,t fit them yet.
Remove the indicator "glass" and pull out the reflector, and ditch the rubber grommets (its easier to use new ones)
Put a new grommet on the indicator body, slide the extention cable through (electrical oil helps)
Make a new joint then screw the fork clamp to the indicator body i put a backing nut on the inside of the indicator body for extra strength ( i found that the screws supplied were a different thread to my Dynas soyou can either run a tap through or getscrews of the correct thread)
Push the reflector back into the indicator body and pop in the "glass"and your done
Repeat for the other side
It may sound long winded but its easy just give yourself time and you,ll crack it.
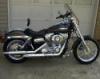
Road Master
Joined: Jul 2005
Posts: 916
Likes: 3
From: Mauldin, SC
RE: Directions for front signal relocation.
You'll need a couple 5/16-24 x 3/4 button head cap screws and four jam (thin) nuts to fasten the lights to the Kuryakyn clamps. The screws that come with the clamps are 5/16-18 and won't match the threads in the lights.
I cut my wires about 6" from where they exit the frame and soldered them back together. This way, you can stuff the splices back in the frame.
I cut my wires about 6" from where they exit the frame and soldered them back together. This way, you can stuff the splices back in the frame.
Trending Topics
Thread Starter
|
Road Warrior
Joined: May 2007
Posts: 1,586
Likes: 1
From: Clinton, Ohio
RE: Directions for front signal relocation.
ORIGINAL: murphdog
You'll need a couple 5/16-24 x 3/4 button head cap screws and four jam (thin) nuts to fasten the lights to the Kuryakyn clamps. The screws that come with the clamps are 5/16-18 and won't match the threads in the lights.
I cut my wires about 6" from where they exit the frame and soldered them back together. This way, you can stuff the splices back in the frame.
You'll need a couple 5/16-24 x 3/4 button head cap screws and four jam (thin) nuts to fasten the lights to the Kuryakyn clamps. The screws that come with the clamps are 5/16-18 and won't match the threads in the lights.
I cut my wires about 6" from where they exit the frame and soldered them back together. This way, you can stuff the splices back in the frame.
You want to give me a hand since we're basically neighbors?

HD Forum Stories
The Best of Harley-Davidson for Lifelong Riders

7 Surprising Harley-Davidson Products that Are Not Motorcycles
Verdad Gallardo
8 Best Harley-Davidson Motorcycles Ever
Pouria Savadkouei
10 Worst Harley-Davidson Motorcycles Ever
Pouria Savadkouei
Killer Custom's Jail Break Is The Breakout That Refused to Blend In
Verdad Gallardo
Crazy Bunderbike Build Looks Amazing, But Is It Impossible to Ride?
Verdad Gallardo
Harley-Davidson Reveals Super Cool Cafe Racer Concept
Verdad Gallardo
Engraved Rebellion: Inside Bundnerbike's Glam Rock II
Verdad Gallardo
10 Motorcycles You Should Never Buy
Joe Kucinski
