


Rear Positak Installation a B*TcH!

Thread Starter
|
Road Master
Joined: Jul 2006
Posts: 754
Likes: 2
From: New Bern, NC
 Installation Pictures
Here's some pics of the installation process. Took a couple of tries to get the pics working, but finally....
These are the 2 - 3 inch bolts that go in from the left side. The transmission mount originally had 2 nuts on this side.
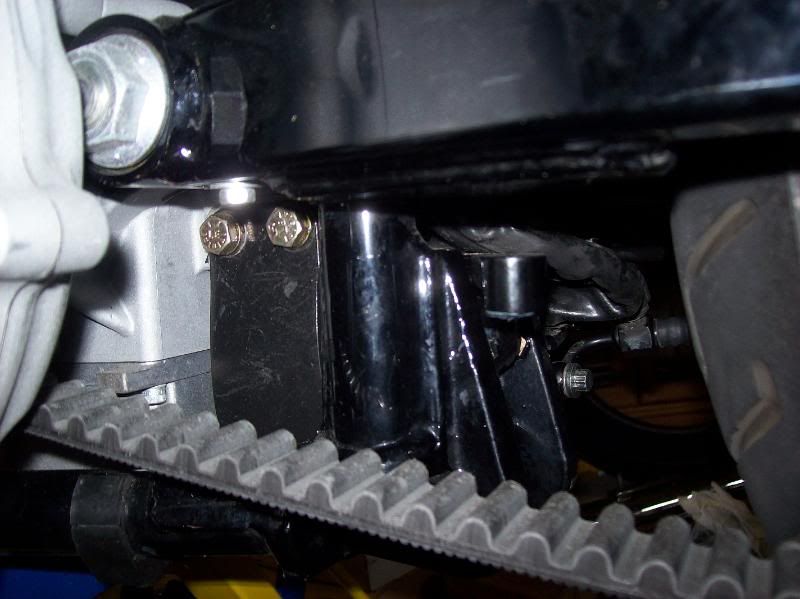
Here you can see where I loosened the banjo nut and moved the brake switch out of it;s original slot so the transmission bracket can slide in. You need someone to help with mounting the bracket as the bolt heads are now on the left side.
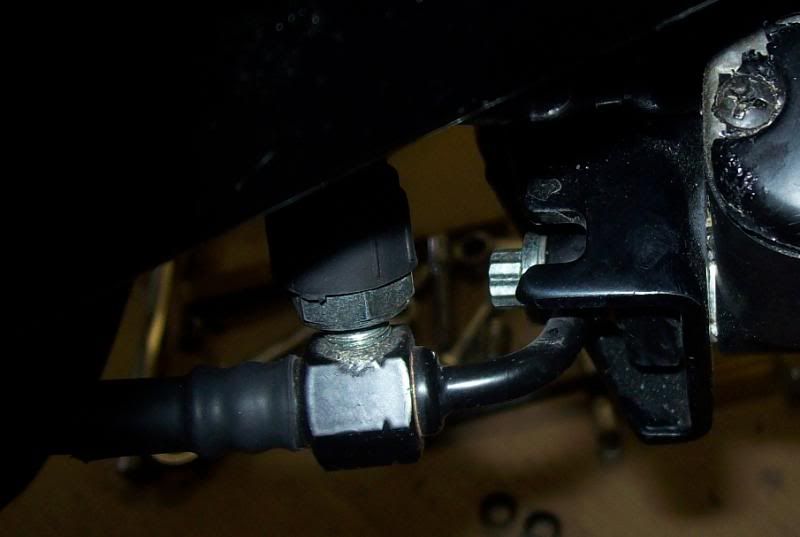
This is the Rear Frame Mount. you'll need a jack to keep the motor and transmission from dropping. Also, you can see the "pinch bolts" that are locked against the frame. Looks like I left the Top Bolt out, so I took an inspection mirror to verify I had it installed. Good practice to re-check everything. Something I kept from being a Jet Engine Mechanic for so many years,
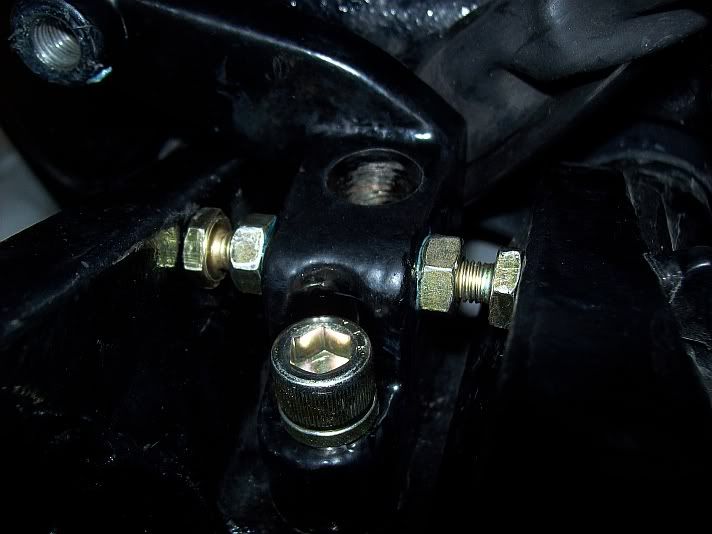
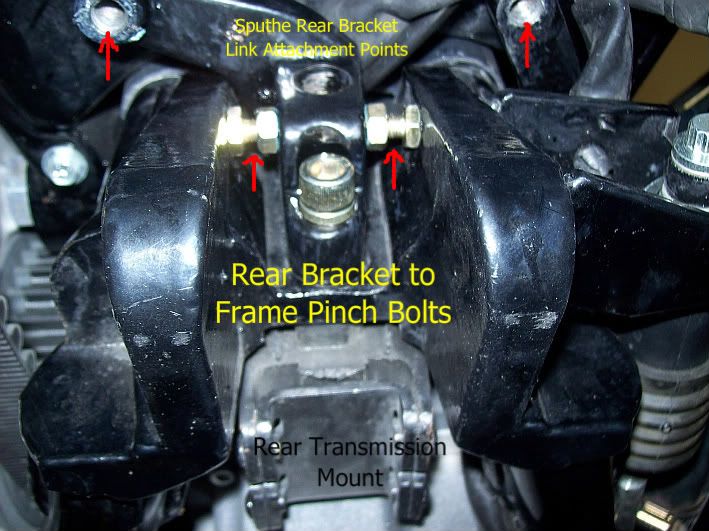
Here is the Rear Frame Mount with the Parts Identified. The top arrows indicate where the cross link goes. Relax, take some time here. It's a tight fight and must be done right to avoid stripping the 3/4 X 24 threaded holes. Even running the bolts through one time to make sure I had the threads cleaned, I still had fiddle with the adjustment to keep it from cross-threading.
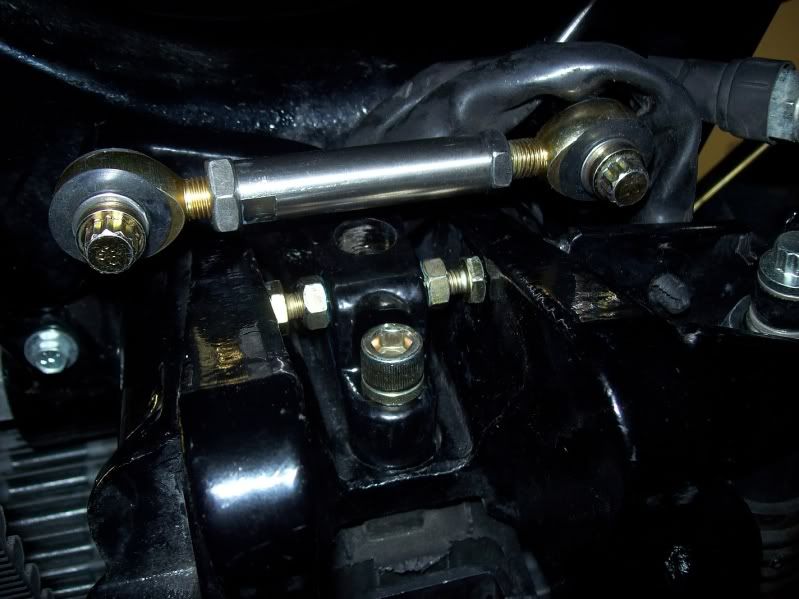
Final Installation Complete! Sputhe has rubber cups that compress over the heim bearings to keep dust out. Don't know if True Track offers these or not. But it should be a similar installation.
Just another view of the completed installation.
[IMG]http://i104.photobucket.com/albums/m196/dlstanf2/Sputhe%20Positrac%20Installation/SputhePositracRearInstalled-1.jpg[IMG]
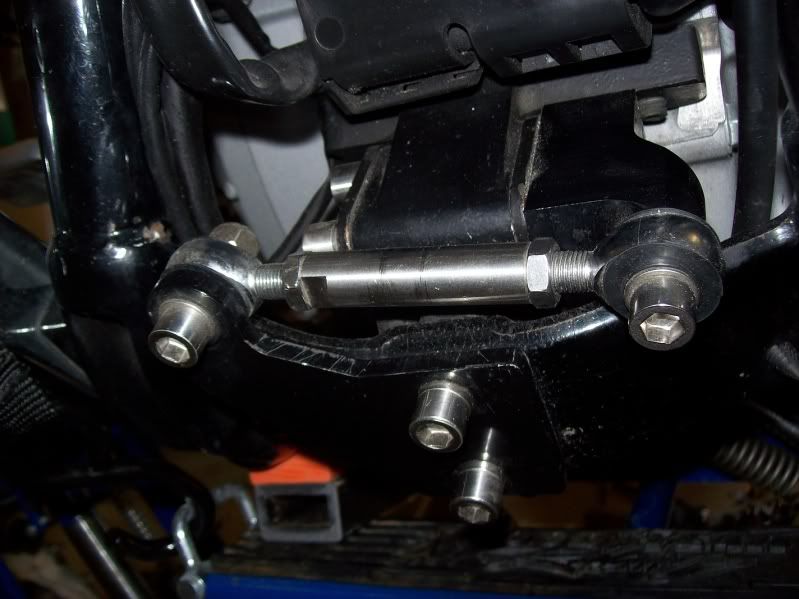
This is the easy part, the Front Stabilizer Installation Completed. You should also use a jack here to keep the engine from dropping down. You can also see the rubber caps Sputhe provides with their unit.
Hope this helps. I could not find anything when I was installing mine.
While mine bike on the lift, I took a day just to polish and detail everything. Best therapy there is to lay underneath your bike and detail everything.
These are the 2 - 3 inch bolts that go in from the left side. The transmission mount originally had 2 nuts on this side.
Here you can see where I loosened the banjo nut and moved the brake switch out of it;s original slot so the transmission bracket can slide in. You need someone to help with mounting the bracket as the bolt heads are now on the left side.
This is the Rear Frame Mount. you'll need a jack to keep the motor and transmission from dropping. Also, you can see the "pinch bolts" that are locked against the frame. Looks like I left the Top Bolt out, so I took an inspection mirror to verify I had it installed. Good practice to re-check everything. Something I kept from being a Jet Engine Mechanic for so many years,
Here is the Rear Frame Mount with the Parts Identified. The top arrows indicate where the cross link goes. Relax, take some time here. It's a tight fight and must be done right to avoid stripping the 3/4 X 24 threaded holes. Even running the bolts through one time to make sure I had the threads cleaned, I still had fiddle with the adjustment to keep it from cross-threading.
Final Installation Complete! Sputhe has rubber cups that compress over the heim bearings to keep dust out. Don't know if True Track offers these or not. But it should be a similar installation.
Just another view of the completed installation.
[IMG]http://i104.photobucket.com/albums/m196/dlstanf2/Sputhe%20Positrac%20Installation/SputhePositracRearInstalled-1.jpg[IMG]
This is the easy part, the Front Stabilizer Installation Completed. You should also use a jack here to keep the engine from dropping down. You can also see the rubber caps Sputhe provides with their unit.
Hope this helps. I could not find anything when I was installing mine.
While mine bike on the lift, I took a day just to polish and detail everything. Best therapy there is to lay underneath your bike and detail everything.

Stage II
Joined: Dec 2010
Posts: 2
Likes: 0

You'd think the manufacturers would post a similar sequence, huh.
Did you actually do this install 4 years ago, or just not set the date/time on the Kodak C316?
Corel's PaintShop Photo Pro (~$35 from corel; <$30 on other sites) will preserve EXIF data when cropping, btw.
I see there's quite a bit of adjustment in the links... was there any alignment procedure once the kit's all installed?
Thread Starter
|
Road Master
Joined: Jul 2006
Posts: 754
Likes: 2
From: New Bern, NC
I forgot to pixalate the date. When I changed batteries I forgot to set the date. My bad.
I just thought we needed a good set of pics for this installation.
It REALLY WORKS in the handling department now.
I just thought we needed a good set of pics for this installation.
It REALLY WORKS in the handling department now.
Road Warrior
Joined: May 2010
Posts: 1,382
Likes: 4
From: Kennewick, WA
No. You just adjust the link until it aligns and bolt it up. That part of the install was easy. The only difficult part is in threading the rear two 3" long transverse bolts to the transmission mount. That will require a helper, some patience and a wobble extention.
The banjo will need to be rotated to the outside. I dreaded the thought of having to bleed the brakes. In the end, I bled the brakes anyway, but didn't need to. Just loosen it enough to pass over the U-groove and tighten it down again.

Thread
Thread Starter
Forum
Replies
Last Post










