


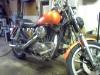


Waking from a 30 year slumber

A Mikuni VM-38 might be your best choice. It comes already set up to run on an IronHead. No tuneup runs required. If you would consider this let me know and i'll post more info.
Thread Starter
|
Cruiser
Joined: Oct 2011
Posts: 153
Likes: 0
From: Bellmawr NJ
I found a pretty complete looking kit on the Sudco website, I sent an email just asking for details on what is in the kit (I need a new manifold and my old band clamps should be replaced with T-bars.)
Picked up the bike from the shop today. They confirmed that when they started it it smelled like raw gas. When I rode it home 12 miles, the first 2 where a little rough and I had to be really easy with the throttle. After that it ran perfectly and strong, though I still had the idle high (1500) mostly because I wanted to wait until daylight to start futzing with the carb. When I parked it at home it was dark, but it definitely was not "drinking" the same way with the petcock open as it had been. It never bogged sitting at lights or in a patch of traffic either. Could it have been particles in the seat that somehow got washed away with the gas? I will have a better idea of the whole thing sunday when I get some time with the bike.
When I cracked the throttle once from a stop, the generator light came on for half a second at high RPM before I shifted into 2nd. Nothing else happened or seemed strange during and after the light. Either way it felt great to ride it on the new tires, it feels like an ice-skate cutting its own path through the street.
Picked up the bike from the shop today. They confirmed that when they started it it smelled like raw gas. When I rode it home 12 miles, the first 2 where a little rough and I had to be really easy with the throttle. After that it ran perfectly and strong, though I still had the idle high (1500) mostly because I wanted to wait until daylight to start futzing with the carb. When I parked it at home it was dark, but it definitely was not "drinking" the same way with the petcock open as it had been. It never bogged sitting at lights or in a patch of traffic either. Could it have been particles in the seat that somehow got washed away with the gas? I will have a better idea of the whole thing sunday when I get some time with the bike.
When I cracked the throttle once from a stop, the generator light came on for half a second at high RPM before I shifted into 2nd. Nothing else happened or seemed strange during and after the light. Either way it felt great to ride it on the new tires, it feels like an ice-skate cutting its own path through the street.
Sounds like good news!
The gen perhaps could use some cleaning up. I do mine every winter whether it need it or not. It is not a difficult task. Let me know if you want some hints.
The gen perhaps could use some cleaning up. I do mine every winter whether it need it or not. It is not a difficult task. Let me know if you want some hints.
Thread Starter
|
Cruiser
Joined: Oct 2011
Posts: 153
Likes: 0
From: Bellmawr NJ
New issues arise: Starter is crapping out. Tried to ride to work on a 25 degree morning and the battery could barely turn the motor (is this common?) Anyways took it inside and the cells were very low, I could see bare metal and its a brand new harley battery. Filled and charged and tried again the next morning. Took kind of awhile, had a backfire while starting that sounded like a .22 went off but it fired up and I rode to work.
While at work the brand new tire deflated itself, got a tow (free thanks to rider insurance!) to the shop that installed it, they fixed it back up for free in 45 mins but then the starter was really struggling. It was always a little spotty but this time it was just spinning and all my attempts drained the battery good. A motivated service tech heard my troubles and came out with a jump pack, after 10 minutes of trying and different "ways" of hitting the button it finally caught and fired up. The tech said it will need a new starter clutch. Commence research!
During the ride home I took a freeway for the first time. It seemed to run rough at 65mph (is the main jet dirty? still float needle issues?). During this ride the headlight did not work, but it did work when I parked the bike after turning the ignition off and on. EDIT: Also, I could hear the carb burping/farting at highway speeds.
So my 78 sportster doesn't leak gas, but I suspect it may be dumping some in the cylinders (causing that backfire) and now I need to check out this starter. Still no oil leaking from anywhere. As far as the battery being crapped out, is it because it is working too hard spinning a crappy starter or should I check out the voltage regulator and genny?
While at work the brand new tire deflated itself, got a tow (free thanks to rider insurance!) to the shop that installed it, they fixed it back up for free in 45 mins but then the starter was really struggling. It was always a little spotty but this time it was just spinning and all my attempts drained the battery good. A motivated service tech heard my troubles and came out with a jump pack, after 10 minutes of trying and different "ways" of hitting the button it finally caught and fired up. The tech said it will need a new starter clutch. Commence research!
During the ride home I took a freeway for the first time. It seemed to run rough at 65mph (is the main jet dirty? still float needle issues?). During this ride the headlight did not work, but it did work when I parked the bike after turning the ignition off and on. EDIT: Also, I could hear the carb burping/farting at highway speeds.
So my 78 sportster doesn't leak gas, but I suspect it may be dumping some in the cylinders (causing that backfire) and now I need to check out this starter. Still no oil leaking from anywhere. As far as the battery being crapped out, is it because it is working too hard spinning a crappy starter or should I check out the voltage regulator and genny?
Last edited by Krazyshark; Nov 1, 2011 at 09:06 AM. Reason: Left out some info.
Thread Starter
|
Cruiser
Joined: Oct 2011
Posts: 153
Likes: 0
From: Bellmawr NJ
Also, if I am going to adjust the tappets and the timing, should I do one before the other? It doesn't seem to me that the points and condensor have any issues, but if I am going to adjust the timing should I replace them anyways?
Tappet adjust is usually referred to as pushrod adjust, sometimes valve adjust. All the same thing on these bikes. This must be done with the engine stone cold. What i do is prepare the night before by removing the air cleaner etc, and loosening the pushrod covers etc so that it is ready to do first thing in the morning.
The procedure involves checking them before adjusting so that any that are good can be left as is. There is a YouTube video for the procedure ...
http://www.youtube.com/watch?v=_S2qbld6m-c
Also my notes ...
Ironhead Push Rod Adjustment
Do this procedure with the engine stone cold. I usually do it first thing in the morning.
1. Remove the spark plugs. Remove A/C to make room to work.
2. Using a flat blade screwdriver pry the spring keeper off of each push rod; the bottom of the keeper pops out first, then the top. Alternately, use a 3/4" open end wrench to push down on the top of the spring retainer, then pry out the spring keeper with the screwdriver.
3. The lower push rod covers may be stuck tight against the bottom o-rings, but they can be loosened by pinching between thumb and finger [or carefully using a shop rag and a pliers] and twisting or rotating. Lift these up and secure each with a tall-S-shaped piece of 12 or 14 gauge household wire [not cable] [or a long piece of Plumbers solder such as 95/5 hooked over the rocker cover and under the push rod cover.
4. Jack up back end of the bike so that rear wheel is off the ground, shift to 2nd gear, rotate wheel until it clicks, repeat until you get to 4th gear. Now by rotating the rear wheel you are rotating the engine. Almost impossible with the plugs in; very difficult in lower gears.
5. To adjust a particular push rod, its valve must be fully closed [the valve spring is relaxed]. Valve position for a particular cylinder is determined by observing the corresponding push rod of the other cylinder. For example, when the rear cylinder intake valve tappet is raised [valve fully open, spring compressed], the front cylinder intake valve is fully closed, and the front intake push rod can be adjusted.
6. Check [and adjust if necessary] the push rods:
[a] use the rear wheel rotate the engine so that the rear cylinder exhaust push rod tappet is fully raised. The front cylinder push rod is adjusted correctly if it has no vertical or horizontal play, and you can just rotate the push rod between thumb and forefinger with no trace of binding or dragging.
[b] to adjust if needed: hold the adjusting screw in place with a wrench; with another wrench loosen the split locknut. Then turn the adjusting screw using fingers only until the pushrod's ball end is seated in the tappet with a "slight amount of play". Then tighten further as follows:
Option 1: Adjust on the tighter end of the range: There should be no vertical or horizontal play, and you should be just able to rotate the push rod between thumb and forefinger with no trace of binding or dragging.
Option 2: Adjust on the looser end of the range: Set the adjusting screw to finger tight so that you cannot turn the push rod between forefinger and thumb. Undo it a tiny bit so that it is just barely loose. Then loosen it 1 "side" for an exhaust or 1/2 "side" for an intake. "Side" refers to one side of the 6-sided adjusting nut.
EDIT: Experience here is that Option 2 is the better and most likely the correct choice.
[c] hold the adjusting screw in place with the one wrench; with the other wrench tighten the locknut.
[d] recheck the adjustment; it is common for the adjustment to go out as you do step [c], in which case [b] and [c] must be redone.
[e] repeat for the other push rods.
7. Use a flat blade screwdriver to push the upper push rod covers up, and seat them into the upper o-ring or cork washer.
8. Install the spring keepers, top end first, by prying them in under the bottom with a flat blade screwdriver.
The procedure involves checking them before adjusting so that any that are good can be left as is. There is a YouTube video for the procedure ...
http://www.youtube.com/watch?v=_S2qbld6m-c
Also my notes ...
Ironhead Push Rod Adjustment
Do this procedure with the engine stone cold. I usually do it first thing in the morning.
1. Remove the spark plugs. Remove A/C to make room to work.
2. Using a flat blade screwdriver pry the spring keeper off of each push rod; the bottom of the keeper pops out first, then the top. Alternately, use a 3/4" open end wrench to push down on the top of the spring retainer, then pry out the spring keeper with the screwdriver.
3. The lower push rod covers may be stuck tight against the bottom o-rings, but they can be loosened by pinching between thumb and finger [or carefully using a shop rag and a pliers] and twisting or rotating. Lift these up and secure each with a tall-S-shaped piece of 12 or 14 gauge household wire [not cable] [or a long piece of Plumbers solder such as 95/5 hooked over the rocker cover and under the push rod cover.
4. Jack up back end of the bike so that rear wheel is off the ground, shift to 2nd gear, rotate wheel until it clicks, repeat until you get to 4th gear. Now by rotating the rear wheel you are rotating the engine. Almost impossible with the plugs in; very difficult in lower gears.
5. To adjust a particular push rod, its valve must be fully closed [the valve spring is relaxed]. Valve position for a particular cylinder is determined by observing the corresponding push rod of the other cylinder. For example, when the rear cylinder intake valve tappet is raised [valve fully open, spring compressed], the front cylinder intake valve is fully closed, and the front intake push rod can be adjusted.
6. Check [and adjust if necessary] the push rods:
[a] use the rear wheel rotate the engine so that the rear cylinder exhaust push rod tappet is fully raised. The front cylinder push rod is adjusted correctly if it has no vertical or horizontal play, and you can just rotate the push rod between thumb and forefinger with no trace of binding or dragging.
[b] to adjust if needed: hold the adjusting screw in place with a wrench; with another wrench loosen the split locknut. Then turn the adjusting screw using fingers only until the pushrod's ball end is seated in the tappet with a "slight amount of play". Then tighten further as follows:
Option 1: Adjust on the tighter end of the range: There should be no vertical or horizontal play, and you should be just able to rotate the push rod between thumb and forefinger with no trace of binding or dragging.
Option 2: Adjust on the looser end of the range: Set the adjusting screw to finger tight so that you cannot turn the push rod between forefinger and thumb. Undo it a tiny bit so that it is just barely loose. Then loosen it 1 "side" for an exhaust or 1/2 "side" for an intake. "Side" refers to one side of the 6-sided adjusting nut.
EDIT: Experience here is that Option 2 is the better and most likely the correct choice.
[c] hold the adjusting screw in place with the one wrench; with the other wrench tighten the locknut.
[d] recheck the adjustment; it is common for the adjustment to go out as you do step [c], in which case [b] and [c] must be redone.
[e] repeat for the other push rods.
7. Use a flat blade screwdriver to push the upper push rod covers up, and seat them into the upper o-ring or cork washer.
8. Install the spring keepers, top end first, by prying them in under the bottom with a flat blade screwdriver.
There are many horror stories about how cr@ppy are the points assemblies from offshore - many quite simply can never be made to work. If you are going to replace them insist on USA made or at least USA brand parts. I have heard that parts made in Mexico are OK, as are ACCEL parts.
There is a Youtube vid also for setting the points ...
http://www.youtube.com/watch?v=mKVh4pbyh2A
There is a Youtube vid also for setting the points ...
http://www.youtube.com/watch?v=mKVh4pbyh2A
HD Forum Stories
The Best of Harley-Davidson for Lifelong Riders

7 Surprising Harley-Davidson Products that Are Not Motorcycles
Verdad Gallardo
8 Best Harley-Davidson Motorcycles Ever
Pouria Savadkouei
10 Worst Harley-Davidson Motorcycles Ever
Pouria Savadkouei
Killer Custom's Jail Break Is The Breakout That Refused to Blend In
Verdad Gallardo
Crazy Bunderbike Build Looks Amazing, But Is It Impossible to Ride?
Verdad Gallardo
Harley-Davidson Reveals Super Cool Cafe Racer Concept
Verdad Gallardo
Engraved Rebellion: Inside Bundnerbike's Glam Rock II
Verdad Gallardo
10 Motorcycles You Should Never Buy
Joe Kucinski
10 Things Harley-Davidson Needs to Fix in 2026
Verdad Gallardo
The starting system consists of ...
the button, which may need to be replaced
the wires to/from the button and their connections
the starter relay and its wires/connections
the starter solenoid and its wires/connections
the starter motor and its wires/connections
the battery and its wires/connections
You need to have the factory parts and service manuals in hand and a good wire diagram. The Haynes manual has a full color diagram.
Then be prepared for at least a full day of work, perhaps two or three. Check everything. Be methodical. Forget about riding and get into a wrenching frame of mind. The problem is not necessarily the starter clutch - it could involve any of these parts, and there could very well be more than one problem.
Check inside the headlite bucket, connections to the headlite.
Running rough, is it sputtering or bogging? The former is lack of fuel, the latter is too much fuel. When mine was sputtering at hiway speeds the float was too low and it was running out of fuel. If i let off the throttle the bowl would re-fill and it would be good for a while until it ran low again.
the button, which may need to be replaced
the wires to/from the button and their connections
the starter relay and its wires/connections
the starter solenoid and its wires/connections
the starter motor and its wires/connections
the battery and its wires/connections
You need to have the factory parts and service manuals in hand and a good wire diagram. The Haynes manual has a full color diagram.
Then be prepared for at least a full day of work, perhaps two or three. Check everything. Be methodical. Forget about riding and get into a wrenching frame of mind. The problem is not necessarily the starter clutch - it could involve any of these parts, and there could very well be more than one problem.
Check inside the headlite bucket, connections to the headlite.
Running rough, is it sputtering or bogging? The former is lack of fuel, the latter is too much fuel. When mine was sputtering at hiway speeds the float was too low and it was running out of fuel. If i let off the throttle the bowl would re-fill and it would be good for a while until it ran low again.
Thread Starter
|
Cruiser
Joined: Oct 2011
Posts: 153
Likes: 0
From: Bellmawr NJ
I would say more of a bog then a sputter. I suspect the starter issue is more "mechanical" as opposed to electrical as it was always clunky but the starter motor never fails to spin when I push the button. I have the FSM but not the parts manual.
Thanks for the write up on tappet/valve/pushrod adjustment.
Thanks for the write up on tappet/valve/pushrod adjustment.