When you click on links to various merchants on this site and make a purchase, this can result in this site earning a commission. Affiliate programs and affiliations include, but are not limited to, the eBay Partner Network.
Yes, what is most likely ANOTHER pulley bolt thread...
I did the 30/70 swap last year, and have been riding for a year of hard use, without any issues. I did my research on the bolts when I did the swap, but I have no idea what I found now, as I don't think I wrote much down. there are 2 threads I started on here, (and have scoured them with no info) last night I sheered all 5 bolts on the rear pulley.
I have 12,000km on the bike with these bolts (and pulleys), including 20-40 passes at the drag strip, so i'm leaning towards the bolts didn't loosen off themselves, especially with a very through detailing on the bike, including polishing the rear pulley, the night before the failure, and having noticed no play whatsoever while polishing the pulley. I also don't have any evidence of movement on the bolt heads I have in my hand.
on to the question! is there an issue working with higher strength bolts on the pulley? the bolts I used were ASTM a574 cap screws, instead of the grade 8 factory ones. everything I can find shows the a574 bolts meeting or exceeding the numbers on grade 8 in all manners. there is a possibility of overtorquing, I don't know if I used a dry spec, or a wet spec, but I remember i did torque them all, I did locktite them all, and the bolts were all brand new.
the biggest reason I ask all of this, I am planning on re-using all of the parts I can, and replacing the bolts with the same, if possible, as I had to buy a box of 25.
Thanks for the reply Dan, I hadn't thought about changing them on a schedule, but I might start thinking about it. I don't have that much done though, just the pulleys and a stage 1, but I do ride hard, although not harder than some of the guys I ride with...
The bolts I used were more likely to be too long than too short, and the correct 7/16-14 bolts, I went with 2" long. Made sure to run the bolts in without the pulley, so I know the holes don't bottom out too early, got the pulley and spacer on, torqued it, locktite...
I'm finding more and more evidence of what might have happened, as I pull the bike apart. Rear wheel bearings need to be replaced, they are done. But sounded fine and rolled fine on the road... Or so I thought...
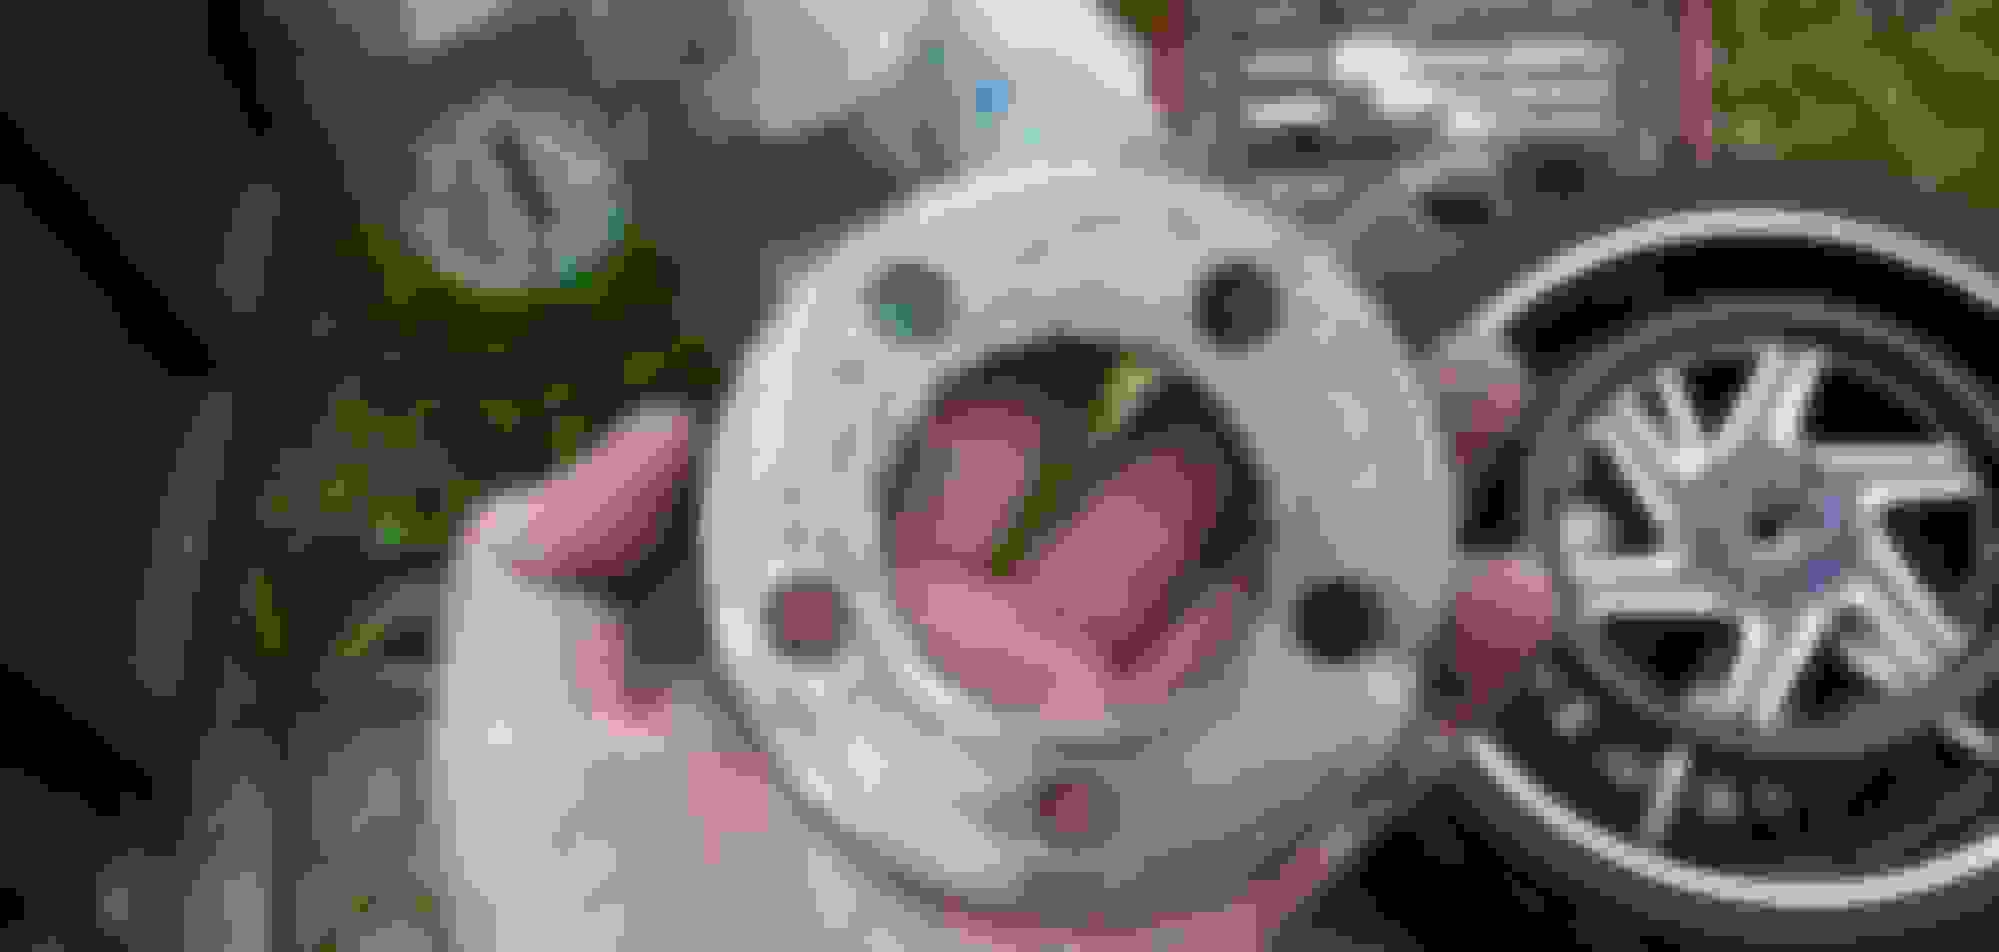
So I'm wondering if they caused the pulley failure. There's also weird rust spots on one of the bolts (#4), so it looks like it was cracked or there was a flaw in some manner.
Then the pulley has scrapes near 4 of the 5 holes, from movement, so I am thinking for whatever reason, the weakened bolt let go, which broke traction between the pieces, putting more stress on the remaining 4, which then let go
Hard to tell much from pictures, but bolts 3 and 4 have distinct fatigue fractures.That smooth area on the left of them in that picture will have lines in it. They are called beach marks because they look like where the waves come up and leave a series of ripples in the sand. Those smooth fracture faces with lines in them are high cycle fatigue fractures. The rough grey area is the ductile fracture, or the all at once break where it let go. The pointy areas are the shear lip and were the last portion of the bolt to separate. Bolts 1, 2 and 4 appear to have fatigue fractures coming in from both sides of the bolt. This would be seen in a reverse bending fatigue fracture. In other words, the sprocket was working back and forth against the shank of the bolt as you accelerated and decelerated. The little steps on the fracture faces are called ratchet marks.
Bolts 1 and 2 have polishing under the head, which could indicate that they were stretched, lost torque, or the other bolts relaxed, allowing the pulley to shift under them causing that polishing while they still carried clamping force. The mating surfaces of the wheel and pulley will have evidence of micro welding, or galling, to support that the pulley moved while there was still significant clamping force from the bolts.
One thing that is difficult to tell from the pictures is if the bolts elongated, or went plastic. This would indicate that they were over torqued. It would be evident by the fracture areas being pointed and the threads pulled open.
Last edited by Gas Smasher; Jun 18, 2019 at 10:02 PM.
hey sorry guys, I was posting the pics directly from my phone, I thought I posted the pic of the back of the pulley, small thumbnails I posted the face instead. I'll edit this comment (from my phone with the pics) as soon as i post it (from my computer) as for the working back and forth, and seeing the surfaces, I did have a stainless steel pulley spacer in there, .303" so that absorbed a LOT of the evidence, and I don't know orientation as it all came apart in pieces. but I can take better pics of anything if you need
thanks for the really thorough explanation on the failure. I have the stubs in the back yard and I can take pics of them, but the broken edge is mostly gone from drilling them out. they fit together and look like a nice straight bolt again, i didn't inspect super closely though.
Just a side note, I wasn't able to save my rim, after much inspection one hole, the threads are just a little too far gone. was able to pick up another stock one brand new, locally
Last edited by weezl; Jun 19, 2019 at 08:33 PM.
Reason: Upload pics from phone
I agree with Max that there is a lot of evidence that the pulley was shifting back and forth before the total failure. The micro welding on the spacer tells you that things started shifting back and forth while they were still clamped pretty tightly, but obviously the clamping force on the joint was relaxing over time.
My theory on what happened, biased on what I can see in the pictures, would be that the bolts developed some fatigue fractures that started in the root of the threads. As these progressed the bolts slowly lost some clamping force and it simply progressed until there was a complete failure. Once the clamping force started relaxing the failure progressed more rapidly until it all let go.
The recommendation to replace the bolts on some type of schedule is good advise. Cheap insurance too. Make sure those mating surfaces and clean and smooth every time too.
Another thing to be aware of is the type of aluminum used in the pulley, if it is softer the area around the bolts may weaken (squish) and give way allowing the bolts to loose torque. You probably cannot see this by visual inspection. Is it cast or billet aluminum?
This may be evidenced by bolts #1 & #2 as Gas Smasher stated in his previous post. Or the aluminum area around the bolts squished enough and the bolts stayed locked in the wheel because of the loctite and the pulley worked loose. Replacement schedule and perform a re-torque of the bolts before the loctite hardens.
May want to check the specifications on the aluminum pulley as you are racing with it.
Many different factors at work here as stated, the bolts, the pulley, the bolt threads, the wheel threads, the spacer.
7 Surprising Harley-Davidson Products that Are Not Motorcycles
Slideshow: The bar-and-shield logo shows up on far more than motorcycles, some of the company's most unexpected products have nothing to do with riding.
Slideshow: From the troubled AMF years to modern misfires, these bikes earned reputations for reliability issues, questionable engineering, or disappointing performance.
Crazy Bunderbike Build Looks Amazing, But Is It Impossible to Ride?
Slideshow: The Swiss custom shop has taken a Harley Softail and stretched it into something so long and low that it looks closer to a rolling sculpture than a conventional motorcycle.
Engraved Rebellion: Inside Bundnerbike's Glam Rock II
Slideshow: A standard cruiser becomes an intricate metal canvas in the hands of a Swiss custom house known for pushing Harley-Davidson platforms far beyond their factory brief.
Slideshow: Harley-Davidson's challenges aren't abstract; they show up in dropping shipments, shrinking dealer traffic, and strategic decisions that aren't yet translating into growth.