


DIY Cheap Mods
Advanced
Joined: Jul 2008
Posts: 84
Likes: 0
From: El Paso, Tx (temp)
Citori, great idea with the soldering kit. \\; One recommendation though is to always twist your wires at least a couple of times before soldering. \\; This way they won't pull apart if you inadvertently apply a pull on the installation. \\;
 \\;
I noticed on your blinker wires you had all your ends cut the same length. \\; I always stagger the cut ends so there's no big bulge in one spot. \\; With all the crimped ends there's always a hassle finding a place to tuck that big bulge in some tight spots on todays bikes. \\;
 \\;
I will definately be ordering some of that mesh sheathing. \\; I am doing my turn signals and want that same clean look. \\; Thanks for the numbers, that makes it easy. \\; Great idea for this thread.
 \\;
I noticed on your blinker wires you had all your ends cut the same length. \\; I always stagger the cut ends so there's no big bulge in one spot. \\; With all the crimped ends there's always a hassle finding a place to tuck that big bulge in some tight spots on todays bikes. \\;
 \\;
I will definately be ordering some of that mesh sheathing. \\; I am doing my turn signals and want that same clean look. \\; Thanks for the numbers, that makes it easy. \\; Great idea for this thread.
Outstanding HDF Member
Joined: Mar 2007
Posts: 2,881
Likes: 7
From: North Georgia
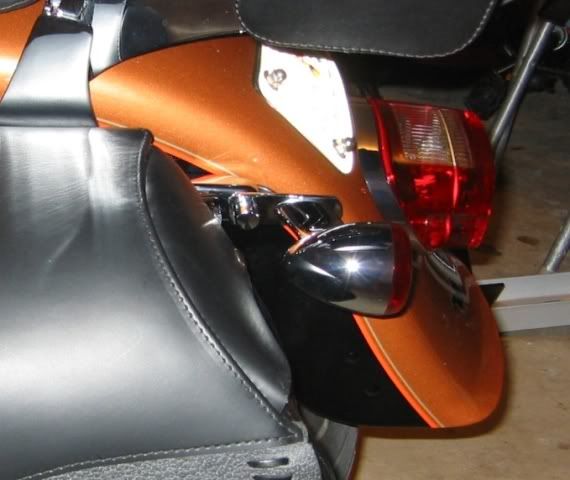
Unable to find relocation kit from HD. They have a part number but no one has the kit in stock (or available).
I needed to move the rear turn signals so the HD Fatboy Saddlebags could go on and off their rail system that came stock with the bags.
I made my own. IM or email me for additional pics or info. I was able to relocate the stock signals (that have that wing or flare stand-off off the stock side bracket)
J&P Cycle Part numbers:
4420125 3" chrome universal flat strap $3.99 each (you need two of them)
970-297 3/8" Chrome Hot Toppers covers $1.99
1. Mark and drill one extra hole to pass wires through flat strap.
2. All stock side rail holes are reused to pass wires and mount strap.
3. Stock turnsignal wing stand-offs are fit perfectly onto flat strap.
You now have room for saddlebags to slide on and off rail mounts.
Thread Starter
|
May our Moderator Rest in Peace
Joined: Sep 2006
Posts: 11,386
Likes: 35
From: Rochester, NY
Citori, great idea with the soldering kit. One recommendation though is to always twist your wires at least a couple of times before soldering. This way they won't pull apart if you inadvertently apply a pull on the installation.
I noticed on your blinker wires you had all your ends cut the same length. I always stagger the cut ends so there's no big bulge in one spot. With all the crimped ends there's always a hassle finding a place to tuck that big bulge in some tight spots on todays bikes.
I noticed on your blinker wires you had all your ends cut the same length. I always stagger the cut ends so there's no big bulge in one spot. With all the crimped ends there's always a hassle finding a place to tuck that big bulge in some tight spots on todays bikes.
You have obviously used a soldering iron before and understand that it really isn't rocket science. What I was trying to do however is show the novice the simplest/easiest/best way to get a reliable/safe connection.
Your right about twisting the wires. But with the "helper" it isn't really required. A good solder connection is nearly impossible to pull apart and if one should come apart during installation the odds are that you had a bad or cold solder joint that would have given you trouble sooner or later anyway. Better it comes apart during the installation and force you to do it over (even if it is a pain in the butt) than have it cause strange electrical gremlins or fail outright out in the middle of nowhere someday.
Also most people who do the cut and splice routine do it either because they don't want to or can't remove major parts of the bike, like the tank, or are a little unsure about taking the end connectors off. So twisting wires together with the ends on can be a bit difficult especially if you forget to back twist them first. One wire is easy, but put several together in a bundle and it can be very frustrating.
Your also right about the staggering, however remember it was geared to the novice and as long as the wires are soldered/shrink wrapped properly (not taped, tape sucks) and your only dealing with no more than 4 or 5 wires the bulge is minimal and again just easier for the novice to deal with. More than 5 or so wires and I have to agree that staggering becomes nearly mandatory.
Auto zone sells toppers in the engine dress up section, dozens of them cheap. I have put \\;them all over my bike. For the large CAD bolts I put a dab of silicone glue (instead of the fastener) and smack it with a rubber mallet. They been on there of thousands of miles. Glued one remove very easy by prying or grabbing with a plyers.
def not a cheap mod but very cool!


Advanced
Joined: Jul 2008
Posts: 84
Likes: 0
From: El Paso, Tx (temp)
Citori... you are exactly right. I forgot the theme of the thread...simple home made fixes or improvements.
I just finished most of the additions to my Rocker and will be taking a few pieces off to use some of the suggestions from this thread. The brake discs are getting polished for sure and I'm gonna take my shifter and rear brake arms off and slot them on a milling machine. That will save me a few bucks but that leads me to a question...
After I machine them is there anything I can do to seal the bare metal that will be exposed? I don't want it rusting the first night?
Thread Starter
|
May our Moderator Rest in Peace
Joined: Sep 2006
Posts: 11,386
Likes: 35
From: Rochester, NY
I'm not sure but I think those parts are chromed, at least they are on my Custom. So ANY cutting into them is going to require some special treatment or the first hint of moisture is going to start lifting the chrome off at the edge of the cuts.
My first suggestion would be to radius the edges of the cuts to match the outer edges. If you don't the sharp edges of the cuts will allow the chrome to flake off a lot easier.
Then use either a clear coat over the whole thing to seal it. Or for a little bit of contrast how about painting the inner edges or sides of the new holes either black or the same color paint that's on the fenders and tank. Then clear coat the whole thing. Covering the cuts with a different color should hide the fact that there is no chrome under it better than clear coating alone would. As a bonus if its done carefully it will look noticeably different and keep the dreaded rust from wrecking an otherwise nice looking piece.
You can always chrome the whole thing later when you either have some extra cash or get tired of how it looks.
PS just remember that you need to COMPLETELY degrease and clean the parts before you do any painting. I suggest a decent grade of primer or Rust-o-lium for bare metal before using the color paint. It will adhere better than straight color paint and resist chipping better.
Last edited by In Memoriam Citoriplus; Aug 9, 2008 at 12:56 AM.
Thread Starter
|
May our Moderator Rest in Peace
Joined: Sep 2006
Posts: 11,386
Likes: 35
From: Rochester, NY
I have seen it done before with contrasting colors like red and yellow on things like the I beam frame work on carnival rides. But never on a bike and for the life of me I can't think of a decent reason why you couldn't or shouldn't do it. It would make for a really unique look that's not going to break your piggy bank the way a customs set of pedals would.
Last edited by In Memoriam Citoriplus; Aug 10, 2008 at 07:43 PM.
HD Forum Stories
The Best of Harley-Davidson for Lifelong Riders

Harley-Davidson Fat Boy Becomes a Dark, Decepticon-Inspired Custom
Verdad Gallardo
6 Weirdest Harley-Davidsons Ever Sold to the Public
Verdad Gallardo
7 Times Harley-Davidson Chucked Tradition Out the Window
Verdad Gallardo
7 Surprising Harley-Davidson Products that Are Not Motorcycles
Verdad Gallardo
8 Best Harley-Davidson Motorcycles Ever
Pouria Savadkouei
10 Worst Harley-Davidson Motorcycles Ever
Pouria Savadkouei
Killer Custom's Jail Break Is The Breakout That Refused to Blend In
Verdad Gallardo
Crazy Bunderbike Build Looks Amazing, But Is It Impossible to Ride?
Verdad Gallardo
Harley-Davidson Reveals Super Cool Cafe Racer Concept
Verdad GallardoElite HDF Member
Joined: Sep 2006
Posts: 3,592
Likes: 6
From: Florida
That finish idea works on the brake rotors as well. HD rotors are apparently semi-stainless so if you use a dremel and some small sanding drums or tootsie rolls you can remove all the rust and then spray them with clear (taping off the scrub area) or do the contrast paint in the holes and then clear.....then they will match that mod and look bitchin'! I have not done mine yet but it's on the list...LOL
P.S. You need to use high temp (engine) paint on those. Brake caliper paint (ceramic) works good too.
P.S. You need to use high temp (engine) paint on those. Brake caliper paint (ceramic) works good too.
