



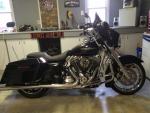

Chrome Front Lowers
Grand HDF Member


Joined: Feb 2010
Posts: 4,230
Likes: 477
From: Southwest VA

I did some research on the forums before attempting the project, seemed complicated. I was scared to death to tackle the job. Its turned out to be a pretty simple with the proper tools. Just do your homework before attempting.

Road Captain
Joined: Jul 2009
Posts: 545
Likes: 1
From: Miami, Florida
I just replaced the lowers (sliders) and fork springs this past weekend on a ElectraGlide. New chrome lowers and lowering the front end.
The only really obstacle is setting the bushing and seals within the lowers. This was easily accomplished with a tool made from a 18" length of 1-1/2" PVC pipe (18" was necessary in order to extend out beyond the slider tube and allow you to drive the bushing/seal into place). The outside diamter of 2" PVC will not fit inside the FLH slider tube, and 1-1/2" would not fit over the fork tube. Easily solved by carefully cutting a 1/16" slot throughout the length (parallel w/ pipe) of 1-1/2" PVC. Cutting an 18" straight line can be tricky with a handheld jigsaw (a table saw w/ blade depth set is best), so I used several layers of blue masking tape to form a fence which the jigsaw base rode against. The PVC tool can now be effectively 'spread' (w/ screwdrivers) to fit around the fork tube and the 18" length extends away from the slider tube. Use a block of wood w/ rubber mallet to drive the bushing and seal (lube both w/ fork oil) up against the machined stop within the slider tube. Both easily drove into position. One thing, use the existing 2" steel washer up against the rubber seal (not to damage seal) and ensure correct placement, as one could easily install the seal backwards.
The other thing I observed is an excessive torque rating (IMHO) for the 6mm slider bolts. I used the minimal setting, and still felt it was a bit too much.
Hope I didn't confuse you too much.
Good luck.
The only really obstacle is setting the bushing and seals within the lowers. This was easily accomplished with a tool made from a 18" length of 1-1/2" PVC pipe (18" was necessary in order to extend out beyond the slider tube and allow you to drive the bushing/seal into place). The outside diamter of 2" PVC will not fit inside the FLH slider tube, and 1-1/2" would not fit over the fork tube. Easily solved by carefully cutting a 1/16" slot throughout the length (parallel w/ pipe) of 1-1/2" PVC. Cutting an 18" straight line can be tricky with a handheld jigsaw (a table saw w/ blade depth set is best), so I used several layers of blue masking tape to form a fence which the jigsaw base rode against. The PVC tool can now be effectively 'spread' (w/ screwdrivers) to fit around the fork tube and the 18" length extends away from the slider tube. Use a block of wood w/ rubber mallet to drive the bushing and seal (lube both w/ fork oil) up against the machined stop within the slider tube. Both easily drove into position. One thing, use the existing 2" steel washer up against the rubber seal (not to damage seal) and ensure correct placement, as one could easily install the seal backwards.
The other thing I observed is an excessive torque rating (IMHO) for the 6mm slider bolts. I used the minimal setting, and still felt it was a bit too much.
Hope I didn't confuse you too much.
Good luck.
Grand HDF Member
Joined: Feb 2010
Posts: 4,230
Likes: 477
From: Southwest VA
you don't have to but it would look like crap, the stock cans are stainless.
Stellar HDF Member
Joined: Feb 2010
Posts: 3,395
Likes: 266
From: Southern California
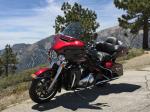
I used an old seal, after cleaning off the rubber on the old seal with a wire wheel, to act as an adapter between the PVC pipe and the new seal. Doing it this way there was never any contact between the PVC pipe and the lip or soft rubber parts of the new seals.

Road Captain
Joined: Sep 2008
Posts: 525
Likes: 0
From: Utah
I used the same method for installing the fork seal as Nickrc3. I would also take extra precaution to wrap the cowbells as they scratch and dent super easy - this happened to me so I ended up having to replace them. If you don't feel comfortable pressing in the fork seals, you can talk a dealer into doing for a nominal charge (that was my backup plan) - they quoted me between $25-50.
Trending Topics
Thread Starter
|
Advanced
Joined: May 2010
Posts: 93
Likes: 0
From: Abingdon, MD
Excellent feedback everyone!!! I appreciate it, just got them in the mail today so wish me luck - gotta get the cow bells first though.
HD Forum Stories
The Best of Harley-Davidson for Lifelong Riders

7 Surprising Harley-Davidson Products that Are Not Motorcycles
Verdad Gallardo
8 Best Harley-Davidson Motorcycles Ever
Pouria Savadkouei
10 Worst Harley-Davidson Motorcycles Ever
Pouria Savadkouei
Killer Custom's Jail Break Is The Breakout That Refused to Blend In
Verdad Gallardo
Crazy Bunderbike Build Looks Amazing, But Is It Impossible to Ride?
Verdad Gallardo
Harley-Davidson Reveals Super Cool Cafe Racer Concept
Verdad Gallardo
Engraved Rebellion: Inside Bundnerbike's Glam Rock II
Verdad Gallardo
10 Motorcycles You Should Never Buy
Joe Kucinski
10 Things Harley-Davidson Needs to Fix in 2026
Verdad Gallardo
Cruiser
Joined: Mar 2010
Posts: 147
Likes: 0
Make sure you check them at the store. There were some quality issues with some of them.


Thread
Thread Starter
Forum
Replies
Last Post
