




Installing the 422's this weekend.
Thread Starter
|
Tourer
Joined: Sep 2010
Posts: 436
Likes: 3
From: Norway
 Installing the 422's this weekend.
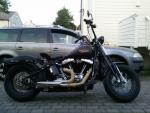
As the title says, I'm about to install the progressive sustensions 422 on my crossbones. I'm thinking I'll drop it 1 1/2 inches.
So do any of you guys have any guidelines for the rebound? Since it's a pain in the *** to adjust, I'm hoping to get it close to perfect on the first try.
I'm about 185 pounds and rides solo 95% of the time....
So do any of you guys have any guidelines for the rebound? Since it's a pain in the *** to adjust, I'm hoping to get it close to perfect on the first try.
I'm about 185 pounds and rides solo 95% of the time....

Outstanding HDF Member
Joined: Oct 2011
Posts: 3,492
Likes: 19
From: Illinois
I'll probably catch chit for this but if you already know it's going to be a pain in the *** why go with it then? I know based on all that I have read on here, those who went with the 422's wish they has waited, saved and gotten the Shotgun. In fact, I know guys who went with the 422's and after just 1 riding season they were sorry they did it. They then ended up removing them, try to sell them to buy the Shotgun. It was an expensive lesson, or so I was told. I have NEVER seen anyone say they were sorry they went with the Shotgun then remove it to try to sell it to get something else. I know they are a pretty penny and I know times are hard but thats the only reason I mention it, so your sure and don't waste any of your hard earned money. Seriously, that is the ONLY reason I mention it.
JayOhh,
Here's a few tips that may help you.
For adjusting the preload, you can find some instructions in the service manual (and owners manual) on how to adjust the shocks, but they are not the greatest instructions.
So here are a few tips:
1) Jack the bike up so the rear tire is off the ground. Don't forget to strap the bike down. Try to position the jack so you have as clear access to the front of the shock canister as possible (the rnd of the shock towards the front of the bike).
2) Loosen the jam nut that is against the adjuster plate (the one with all the holes around it) all the way out. Its a 1-11/16" nut. If it doesn't want to loosen easily (which is often the case), soak it in some penetrating lube.
3) With a spanner wrench (HD p/n 94448-82B or an aftermarket spanner wrench that fits) turn the adjuster plate counter-clockwise (so the shock housing/adjuster plate moves towards the front of the bike) until its up against the jam nut. (Note: if you know the adjustment has never been changed, you can turn the adjuster plate clockwise until it bottoms out at the lightest setting (probably less than one turn) and then calculate your adjustment from that point).
4) Then take a light colored paint pen, or a piece of duct tape, and mark the 6 o'clock position on the adjuster plate to use as a reference point when doing your adjustment. Don't worry if they're not in exactly the same position on both shocks. Thats normal.Now your ready to adjust the shocks to your weight/load.
5) With the spanner wrench, turn the adjuster plate clockwise no more then 4 complete turns by counting how many times the mark from step 4 crosses the 6 o'clock position. 0 turns is the stiffest setting, and 4 turns is the softest setting.
6) While holding the adjuster plate in place with the spanner wrench, tighten the jam nut up against the adjuster plate by turning the nut clockwise.
7)Now repeat the exact same process on the other shock.
The key is to adjust both shocks equally.The general rule of thumb for adjustment is:4
4 turns for load less than 180 lbs
3 turns for 180lbs - 235lbs
2 turns for 235lbs - 300lbs
1 turn for 300lbs - 375lbs
0 turns for greater than 375 lbs
Examples:
235lbs solo rider: 3 full turns
235lbs solo rider + 32lbs pack: 2.5 turns
235lbs rider + 150lbs passenger + 32lbs pack: 0.5 turns
Also it may be a big help to get yourself an open end wrench that is 1-1/16". The one that comes with the 422's is very difficult to use. You can also cut the wrench in half to make adjusting the preload easier with the bike on thr kickstand.
Hope this helps.
Here's a few tips that may help you.
For adjusting the preload, you can find some instructions in the service manual (and owners manual) on how to adjust the shocks, but they are not the greatest instructions.
So here are a few tips:
1) Jack the bike up so the rear tire is off the ground. Don't forget to strap the bike down. Try to position the jack so you have as clear access to the front of the shock canister as possible (the rnd of the shock towards the front of the bike).
2) Loosen the jam nut that is against the adjuster plate (the one with all the holes around it) all the way out. Its a 1-11/16" nut. If it doesn't want to loosen easily (which is often the case), soak it in some penetrating lube.
3) With a spanner wrench (HD p/n 94448-82B or an aftermarket spanner wrench that fits) turn the adjuster plate counter-clockwise (so the shock housing/adjuster plate moves towards the front of the bike) until its up against the jam nut. (Note: if you know the adjustment has never been changed, you can turn the adjuster plate clockwise until it bottoms out at the lightest setting (probably less than one turn) and then calculate your adjustment from that point).
4) Then take a light colored paint pen, or a piece of duct tape, and mark the 6 o'clock position on the adjuster plate to use as a reference point when doing your adjustment. Don't worry if they're not in exactly the same position on both shocks. Thats normal.Now your ready to adjust the shocks to your weight/load.
5) With the spanner wrench, turn the adjuster plate clockwise no more then 4 complete turns by counting how many times the mark from step 4 crosses the 6 o'clock position. 0 turns is the stiffest setting, and 4 turns is the softest setting.
6) While holding the adjuster plate in place with the spanner wrench, tighten the jam nut up against the adjuster plate by turning the nut clockwise.
7)Now repeat the exact same process on the other shock.
The key is to adjust both shocks equally.The general rule of thumb for adjustment is:4
4 turns for load less than 180 lbs
3 turns for 180lbs - 235lbs
2 turns for 235lbs - 300lbs
1 turn for 300lbs - 375lbs
0 turns for greater than 375 lbs
Examples:
235lbs solo rider: 3 full turns
235lbs solo rider + 32lbs pack: 2.5 turns
235lbs rider + 150lbs passenger + 32lbs pack: 0.5 turns
Also it may be a big help to get yourself an open end wrench that is 1-1/16". The one that comes with the 422's is very difficult to use. You can also cut the wrench in half to make adjusting the preload easier with the bike on thr kickstand.
Hope this helps.

Outstanding HDF Member
Joined: Jun 2007
Posts: 2,796
Likes: 36
From: Toronto, Ontario
I agree with '4', and 1.4" will be fine, it will ride much better than lowering bolts, it will be great on corners, I have those now .. and after 3 years I am replacing with shotguns, only because I drag on the corners so much and I have floorboards that are totally scraped, and now coming to the mounting block itself.
So, if you are not aggressive on corners, the 422 will be a great improvement for the price.
So, if you are not aggressive on corners, the 422 will be a great improvement for the price.
Thread Starter
|
Tourer
Joined: Sep 2010
Posts: 436
Likes: 3
From: Norway
The painintheass-part, was about taking the bike on and of the lift between testrides, to get the rebound right. As soon as it's ok, I don't think I'll be messing with it. So I'm only asking about theh initial setup.
klf33: What do you mean "4" and 1,4" ? Is "4" the stiffest setting?
And yeah, maybe I'll go with the shotguns when I get a new rear fender in the future, but as of now, I'm pretty shure I'll be happy with the Progressive's.
klf33: What do you mean "4" and 1,4" ? Is "4" the stiffest setting?
And yeah, maybe I'll go with the shotguns when I get a new rear fender in the future, but as of now, I'm pretty shure I'll be happy with the Progressive's.

Intermediate
Joined: Jul 2015
Posts: 30
Likes: 2
From: Napanee Ontario Canada
JayOhh,
Here's a few tips that may help you.
For adjusting the preload, you can find some instructions in the service manual (and owners manual) on how to adjust the shocks, but they are not the greatest instructions.
So here are a few tips:
1) Jack the bike up so the rear tire is off the ground. Don't forget to strap the bike down. Try to position the jack so you have as clear access to the front of the shock canister as possible (the rnd of the shock towards the front of the bike).
2) Loosen the jam nut that is against the adjuster plate (the one with all the holes around it) all the way out. Its a 1-11/16" nut. If it doesn't want to loosen easily (which is often the case), soak it in some penetrating lube.
3) With a spanner wrench (HD p/n 94448-82B or an aftermarket spanner wrench that fits) turn the adjuster plate counter-clockwise (so the shock housing/adjuster plate moves towards the front of the bike) until its up against the jam nut. (Note: if you know the adjustment has never been changed, you can turn the adjuster plate clockwise until it bottoms out at the lightest setting (probably less than one turn) and then calculate your adjustment from that point).
4) Then take a light colored paint pen, or a piece of duct tape, and mark the 6 o'clock position on the adjuster plate to use as a reference point when doing your adjustment. Don't worry if they're not in exactly the same position on both shocks. Thats normal.Now your ready to adjust the shocks to your weight/load.
5) With the spanner wrench, turn the adjuster plate clockwise no more then 4 complete turns by counting how many times the mark from step 4 crosses the 6 o'clock position. 0 turns is the stiffest setting, and 4 turns is the softest setting.
6) While holding the adjuster plate in place with the spanner wrench, tighten the jam nut up against the adjuster plate by turning the nut clockwise.
7)Now repeat the exact same process on the other shock.
The key is to adjust both shocks equally.The general rule of thumb for adjustment is:4
4 turns for load less than 180 lbs
3 turns for 180lbs - 235lbs
2 turns for 235lbs - 300lbs
1 turn for 300lbs - 375lbs
0 turns for greater than 375 lbs
Examples:
235lbs solo rider: 3 full turns
235lbs solo rider + 32lbs pack: 2.5 turns
235lbs rider + 150lbs passenger + 32lbs pack: 0.5 turns
Also it may be a big help to get yourself an open end wrench that is 1-1/16". The one that comes with the 422's is very difficult to use. You can also cut the wrench in half to make adjusting the preload easier with the bike on thr kickstand.
Hope this helps.
Here's a few tips that may help you.
For adjusting the preload, you can find some instructions in the service manual (and owners manual) on how to adjust the shocks, but they are not the greatest instructions.
So here are a few tips:
1) Jack the bike up so the rear tire is off the ground. Don't forget to strap the bike down. Try to position the jack so you have as clear access to the front of the shock canister as possible (the rnd of the shock towards the front of the bike).
2) Loosen the jam nut that is against the adjuster plate (the one with all the holes around it) all the way out. Its a 1-11/16" nut. If it doesn't want to loosen easily (which is often the case), soak it in some penetrating lube.
3) With a spanner wrench (HD p/n 94448-82B or an aftermarket spanner wrench that fits) turn the adjuster plate counter-clockwise (so the shock housing/adjuster plate moves towards the front of the bike) until its up against the jam nut. (Note: if you know the adjustment has never been changed, you can turn the adjuster plate clockwise until it bottoms out at the lightest setting (probably less than one turn) and then calculate your adjustment from that point).
4) Then take a light colored paint pen, or a piece of duct tape, and mark the 6 o'clock position on the adjuster plate to use as a reference point when doing your adjustment. Don't worry if they're not in exactly the same position on both shocks. Thats normal.Now your ready to adjust the shocks to your weight/load.
5) With the spanner wrench, turn the adjuster plate clockwise no more then 4 complete turns by counting how many times the mark from step 4 crosses the 6 o'clock position. 0 turns is the stiffest setting, and 4 turns is the softest setting.
6) While holding the adjuster plate in place with the spanner wrench, tighten the jam nut up against the adjuster plate by turning the nut clockwise.
7)Now repeat the exact same process on the other shock.
The key is to adjust both shocks equally.The general rule of thumb for adjustment is:4
4 turns for load less than 180 lbs
3 turns for 180lbs - 235lbs
2 turns for 235lbs - 300lbs
1 turn for 300lbs - 375lbs
0 turns for greater than 375 lbs
Examples:
235lbs solo rider: 3 full turns
235lbs solo rider + 32lbs pack: 2.5 turns
235lbs rider + 150lbs passenger + 32lbs pack: 0.5 turns
Also it may be a big help to get yourself an open end wrench that is 1-1/16". The one that comes with the 422's is very difficult to use. You can also cut the wrench in half to make adjusting the preload easier with the bike on thr kickstand.
Hope this helps.
Trending Topics

Stellar HDF Member


Joined: Feb 2015
Posts: 3,415
Likes: 1,124
From: USA
With the 422's I spent a little extra money on the RAP kit, simply twist the **** and dial in your preload. I gave consideration to air, Legend or Shotgun, and it certainly wasn't a money thing. I researched, looked and asked around, for my application the 422's were a perfect match, along with the Monotubes upfront. I've read more positive feedback on the 422's then negative. I'm not knocking air, I just don't think it's for everyone.
I tour a lot, solo and 2up, not every local indy shop or dealer carries spare parts for an aftermarket air ride suspension kit, I blow a seal on Softail shock or have an issue, I can be up and out of a dealer most likely the same day. I feel there's a lot more that can go wrong with air then a gas charged shock. JMHO.
I tour a lot, solo and 2up, not every local indy shop or dealer carries spare parts for an aftermarket air ride suspension kit, I blow a seal on Softail shock or have an issue, I can be up and out of a dealer most likely the same day. I feel there's a lot more that can go wrong with air then a gas charged shock. JMHO.
HD Forum Stories
The Best of Harley-Davidson for Lifelong Riders

7 Surprising Harley-Davidson Products that Are Not Motorcycles
Verdad Gallardo
8 Best Harley-Davidson Motorcycles Ever
Pouria Savadkouei
10 Worst Harley-Davidson Motorcycles Ever
Pouria Savadkouei
Killer Custom's Jail Break Is The Breakout That Refused to Blend In
Verdad Gallardo
Crazy Bunderbike Build Looks Amazing, But Is It Impossible to Ride?
Verdad Gallardo
Harley-Davidson Reveals Super Cool Cafe Racer Concept
Verdad Gallardo
Engraved Rebellion: Inside Bundnerbike's Glam Rock II
Verdad Gallardo
10 Motorcycles You Should Never Buy
Joe Kucinski
10 Things Harley-Davidson Needs to Fix in 2026
Verdad Gallardo
Thread
Thread Starter
Forum
Replies
Last Post
96SpringerSoftail
Softail Models
4
May 11, 2008 12:24 PM