





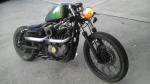

Nightster Winter Makeover

Thread Starter
|
Road Master
Joined: Jul 2011
Posts: 1,166
Likes: 7
From: NY

Thanks Michael. I couldn't have, and probably wouldn't have even started it without this place. All the bikes and mods everyone shows off and demonstrates are really the inspiration behind my whole project.
hahahahahah! fuken A flatiron! that was hands down the most liberating day with my sporty so far. cheers big ears!

Thread Starter
|
Road Master
Joined: Jul 2011
Posts: 1,166
Likes: 7
From: NY
Finished the Chop
Last night we finished up welding the frame. Well, we finished welding the steering head in place. I'm going to do some additional gusseting under the main tube, more for esthetic reasons than structural. And there will be some additional minor cutting and welding over the coming months. But for now the frame is whole again. It’s right at 4 degrees additional rake, which I’m hoping will look pretty slick with the wide glide front end and the 150x16” front tire…just enough rake to be noticeable but not enough to look too extended. I apologize for the lack of pictures. The battery died as soon as I tried to take a picture last night. This is the way it looks now.


As you can see, the angle of the steering head in relation to the down-tubes is almost unnoticable. When it's all back together I don't think anyone will be able to tell unless I point it out.


That's a major hurdle overcome. Glad we got it done. Now, on to refinishing the engine...
As you can see, the angle of the steering head in relation to the down-tubes is almost unnoticable. When it's all back together I don't think anyone will be able to tell unless I point it out.
That's a major hurdle overcome. Glad we got it done. Now, on to refinishing the engine...
Thread Starter
|
Road Master
Joined: Jul 2011
Posts: 1,166
Likes: 7
From: NY
Cleaning the Engine -- An Odessy
So, as I've mentioned in earlier posts, the finish on my engine was royally screwed. Heavy oxidation under the paint had caused it to bubble and peel in numerous places, with the underside of the motor being the worst. Just looking at it on the road you couldn't notice much of a problem...a few spots below the cylinders where it peeled, a couple of spots on the cases. Doing a cursory inspection you wouldn't think a whole lot of it. Didn't look too bad.

But, when I started really diggin into it I found that there were large areas where the paint appeared fine but there was extensive oxidation underneath it. Other areas the paint was ok. And there was no rhyme or reason to the pattern of good paint vs bad. And you couldn't really tell without actually chipping away at it. This means that if I didn't strip the whole thing I'd never know if I got it all, and one day whatever new paint I put on it might start to peel and chip off again. AND being the **** retentive closet perfectionist that I am...I just couldn't live with that. I had to clean it up. I just had to.
But I've really struggled with how to go about this. One way would be to tear down the whole engine, blast everything, reassemble and paint. But the motor runs great and doesn't leak any oil so I didn't want to mess with splitting the cases. Besides, I am NOT a mechanic and don't need any additional OJT regarding major engine overhauls. I have a day job and I really wanted to avoid this turning into the proverbial "basket case".
I've been scraping away at it, a little bit here and a little bit there, since I pulled the motor in October. The bad paint just sloughs off real easy. But the good paint is hard as a rock and is really difficult to remove. Here's a shot from underneath.

And since it is very hard in many cases to tell which is which, you just can't get rid of the bad paint and leave the good. You never know when what appears to be a good spot has oxidation under it. Couple that with all the little imperfections in the casting, all the little nooks and cranies of cases...it's a nightmare to scrape all that paint off with the motor when it is fully, or mostly assembled. I spent hours chipping away at it in one small section and there was still all kinds of paint left. And finding the right tool to chip with. Geezuz H. A wire brush wouldn't touch it. The little brushes for the dremel tool just disintegrated in five minutes. The wire wheels for my drill were too big and couldn't reach into all the tight spaces. What started as a minor aspect of the makeover - remove some bad paint and spray on some new paint - was rapidly becoming the most difficult , and the most stressful part of the whole project. Here's a picture of the front of the engine after several hours of chipping and cleaning with everything from a screwdriver to a razor blade. Arrgh!

I even tried buying a portable sandblaster (cheap, from Harbor Freight), wrapping the cylinders real tight in a plastic garbage bag and taping it off real good to keep sand out of the exhaust and intake ports. Took it outside and blasted. But that didn't work very well, mostly because I used too fine a media and it wouldn't take off all the paint. AND the motor is friggin heavy, so moving it around by myself and getting underneath it, blocking it from tipping over, worrying about sand getting through a crack in my wrapping job and into an opening and really screwing up the engine ... OMFG.
Early on, a buddy mentioned using paint stripper to take it off but that seemed to me like a bad way to go. That stipper stuff is really corrosive and I thought it might frig up the gasket on the main case and cause a problem down the road, and it's a horrible mess to deal with. That, and there are several rubber and plastic wire leads and hoses still attached to the motor that I didn't want to remove and which the stripper would eat in a heartbeat. Stripper just seemed the wrong way to go. But after weeks of getting nowhere I was desperate. So I gave it a shot. And it is a mess, and a huge pain in the ***. But...it works. Pretty well. That coupled with a couple of exacto knives with different shapped blades for scraping and I've actually got it almost done. Here are some pics I took during the process. I put a piece of plastic under the motor, got a couple of rolls of paper towels, some spray on detergent, taped off all the plastic and rubber stuff on the engine with gorilla tape (that stuff is really useful) and took it one small section at a time.


Spray the stuff on, wait about five minutes and then start wiping and scraping. The stripper causes most of the paint to bubble up and peel off. But some still sticks and the paint that's down in the recesses of the casing, underneath the folds and protrusions...it all has to be scraped off by hand. I found that a high pressure air gun with a small nozzle sharpened a bit on the end works great for getting some areas cleaned up, scrape and blow at the same time.


So the bottom line is it works fairly well. And I've got all but a small portion at the bottom-rear of the engine done. Here's the way I left it late this afternoon.
FRONT

REAR

BOTTOM

Bear in mind that the two side cases are coming off (again) and will be powder coated before the engine goes back in the frame for final assembly. The plan is to spend the next couple of months doing mock ups and modifications before painting the engine and having the frame powder coated. Also, the cylinders are not too bad as far as oxidation goes. I am NOT going through this drill with all of those fins. So when the time comes I'll clean them up real good before painting the whole thing. Also, I'm powder coating the rocker covers.
I am out of town until after Thanksgiving. I hope everyone has a good one, and I will update when I return. Hopefully, the wheels, forks and triple clamps will be back from the powder coater and I can start mocking everything up.
But, when I started really diggin into it I found that there were large areas where the paint appeared fine but there was extensive oxidation underneath it. Other areas the paint was ok. And there was no rhyme or reason to the pattern of good paint vs bad. And you couldn't really tell without actually chipping away at it. This means that if I didn't strip the whole thing I'd never know if I got it all, and one day whatever new paint I put on it might start to peel and chip off again. AND being the **** retentive closet perfectionist that I am...I just couldn't live with that. I had to clean it up. I just had to.
But I've really struggled with how to go about this. One way would be to tear down the whole engine, blast everything, reassemble and paint. But the motor runs great and doesn't leak any oil so I didn't want to mess with splitting the cases. Besides, I am NOT a mechanic and don't need any additional OJT regarding major engine overhauls. I have a day job and I really wanted to avoid this turning into the proverbial "basket case".
I've been scraping away at it, a little bit here and a little bit there, since I pulled the motor in October. The bad paint just sloughs off real easy. But the good paint is hard as a rock and is really difficult to remove. Here's a shot from underneath.
And since it is very hard in many cases to tell which is which, you just can't get rid of the bad paint and leave the good. You never know when what appears to be a good spot has oxidation under it. Couple that with all the little imperfections in the casting, all the little nooks and cranies of cases...it's a nightmare to scrape all that paint off with the motor when it is fully, or mostly assembled. I spent hours chipping away at it in one small section and there was still all kinds of paint left. And finding the right tool to chip with. Geezuz H. A wire brush wouldn't touch it. The little brushes for the dremel tool just disintegrated in five minutes. The wire wheels for my drill were too big and couldn't reach into all the tight spaces. What started as a minor aspect of the makeover - remove some bad paint and spray on some new paint - was rapidly becoming the most difficult , and the most stressful part of the whole project. Here's a picture of the front of the engine after several hours of chipping and cleaning with everything from a screwdriver to a razor blade. Arrgh!
I even tried buying a portable sandblaster (cheap, from Harbor Freight), wrapping the cylinders real tight in a plastic garbage bag and taping it off real good to keep sand out of the exhaust and intake ports. Took it outside and blasted. But that didn't work very well, mostly because I used too fine a media and it wouldn't take off all the paint. AND the motor is friggin heavy, so moving it around by myself and getting underneath it, blocking it from tipping over, worrying about sand getting through a crack in my wrapping job and into an opening and really screwing up the engine ... OMFG.
Early on, a buddy mentioned using paint stripper to take it off but that seemed to me like a bad way to go. That stipper stuff is really corrosive and I thought it might frig up the gasket on the main case and cause a problem down the road, and it's a horrible mess to deal with. That, and there are several rubber and plastic wire leads and hoses still attached to the motor that I didn't want to remove and which the stripper would eat in a heartbeat. Stripper just seemed the wrong way to go. But after weeks of getting nowhere I was desperate. So I gave it a shot. And it is a mess, and a huge pain in the ***. But...it works. Pretty well. That coupled with a couple of exacto knives with different shapped blades for scraping and I've actually got it almost done. Here are some pics I took during the process. I put a piece of plastic under the motor, got a couple of rolls of paper towels, some spray on detergent, taped off all the plastic and rubber stuff on the engine with gorilla tape (that stuff is really useful) and took it one small section at a time.
Spray the stuff on, wait about five minutes and then start wiping and scraping. The stripper causes most of the paint to bubble up and peel off. But some still sticks and the paint that's down in the recesses of the casing, underneath the folds and protrusions...it all has to be scraped off by hand. I found that a high pressure air gun with a small nozzle sharpened a bit on the end works great for getting some areas cleaned up, scrape and blow at the same time.
So the bottom line is it works fairly well. And I've got all but a small portion at the bottom-rear of the engine done. Here's the way I left it late this afternoon.
FRONT
REAR
BOTTOM
Bear in mind that the two side cases are coming off (again) and will be powder coated before the engine goes back in the frame for final assembly. The plan is to spend the next couple of months doing mock ups and modifications before painting the engine and having the frame powder coated. Also, the cylinders are not too bad as far as oxidation goes. I am NOT going through this drill with all of those fins. So when the time comes I'll clean them up real good before painting the whole thing. Also, I'm powder coating the rocker covers.
I am out of town until after Thanksgiving. I hope everyone has a good one, and I will update when I return. Hopefully, the wheels, forks and triple clamps will be back from the powder coater and I can start mocking everything up.
Thread Starter
|
Road Master
Joined: Jul 2011
Posts: 1,166
Likes: 7
From: NY
"Hey hunny, could you come here and clean th...<slap>!!

On second thought...
Thread Starter
|
Road Master
Joined: Jul 2011
Posts: 1,166
Likes: 7
From: NY
 I have all the tools to do anything I need to do - 2 lathes, tig and mig welders, oxy/acetelyne torch, chop saws, hydraulic press, band saw, milling machine, drill presses, belt sander, pipe bender, the works. And between all the guys in the shop, every kind of hand tool known to man, just about. I would not have tackled this project in my garage, by myself. Doing the stuff you've done, you're way braver than me.
 But thanks!
HD Forum Stories
The Best of Harley-Davidson for Lifelong Riders

7 Surprising Harley-Davidson Products that Are Not Motorcycles
Verdad Gallardo
8 Best Harley-Davidson Motorcycles Ever
Pouria Savadkouei
10 Worst Harley-Davidson Motorcycles Ever
Pouria Savadkouei
Killer Custom's Jail Break Is The Breakout That Refused to Blend In
Verdad Gallardo
Crazy Bunderbike Build Looks Amazing, But Is It Impossible to Ride?
Verdad Gallardo
Harley-Davidson Reveals Super Cool Cafe Racer Concept
Verdad Gallardo
Engraved Rebellion: Inside Bundnerbike's Glam Rock II
Verdad Gallardo
10 Motorcycles You Should Never Buy
Joe Kucinski
