My DIY 1250 conversion thread: EFI version
Thread Starter
|
Road Master
Joined: Aug 2011
Posts: 858
Likes: 17
From: victoria bc
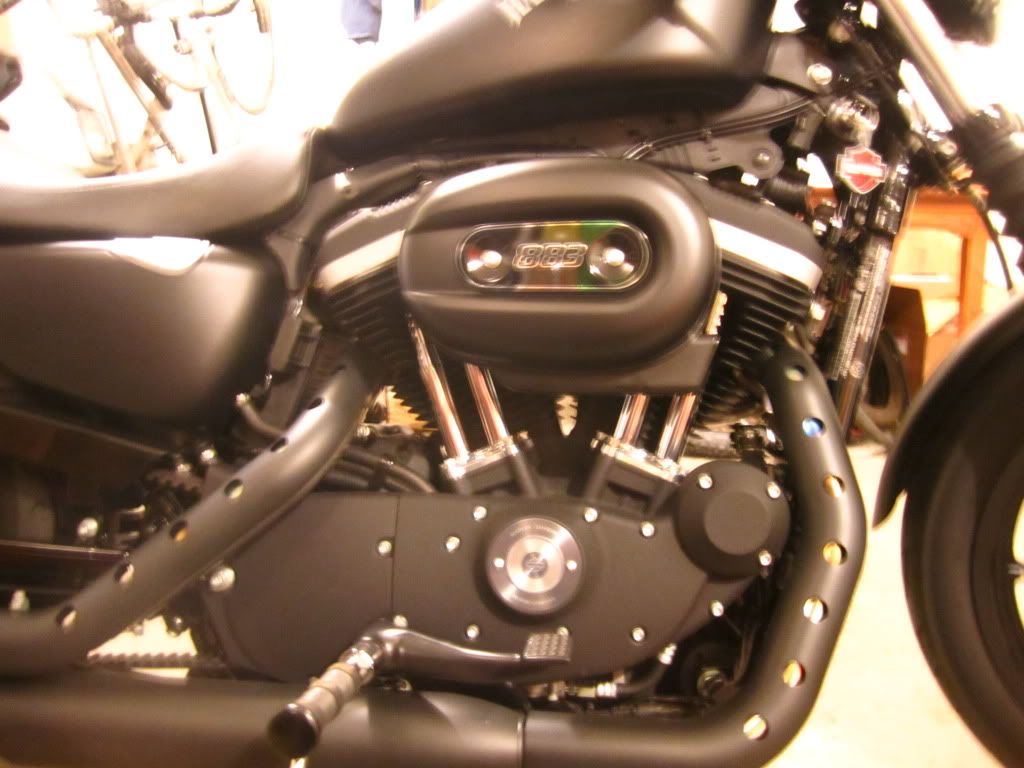
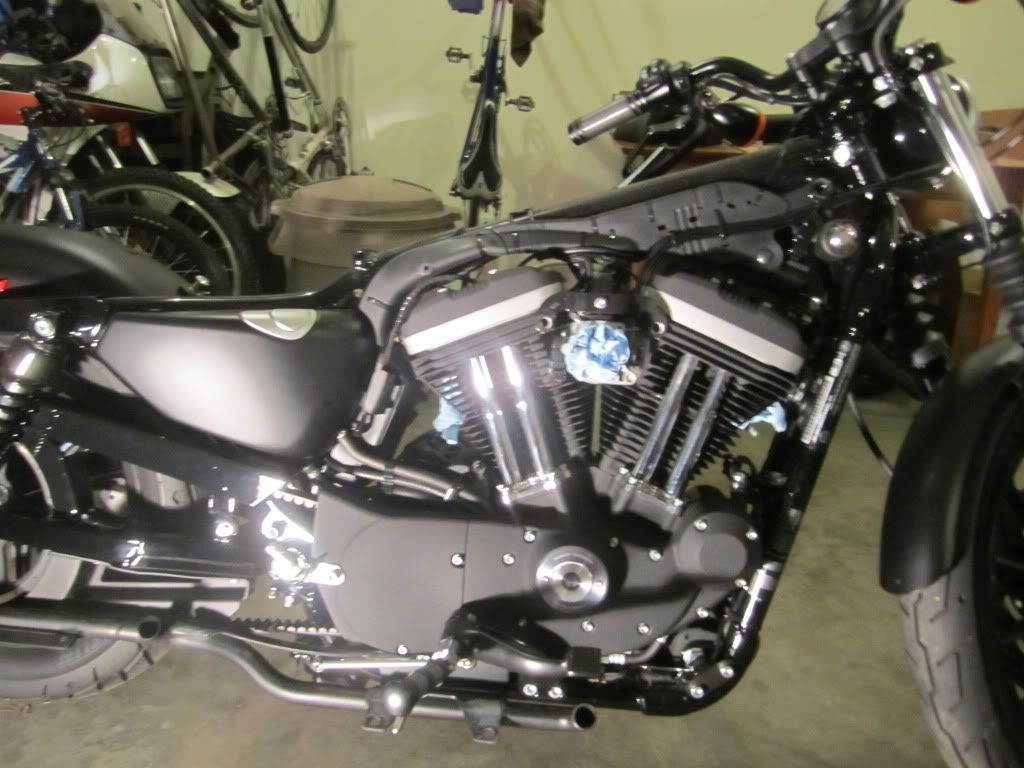
This conversion is on a 2012 883N Iron.
Parts: NRHS 1250 kit, top end gasket kit, SEPST Tuner cables and software , stock 883 heads(for now), SE round stage 1 A/C , 2012 sportster service manual.
Total cost so far is about $1750 Canadian, and that includes 12% hst tax we in BC have to pay, shipping costs of about $150,
I have almost all of the parts I need for my 1250 conversion, just waiting for the HD service manual to arrive, so I decided to start the disassembly.
I have never taken an engine apart, but I have worked on some older bikes in the past, so I have some experience stripping one down.
I am sure during the course of this thread I will do some things wrong and please if you see something wrong do not hesitate to let me know.
Let me also apologize in advance for some of my pics. I obviously am not meant to be a photographer.
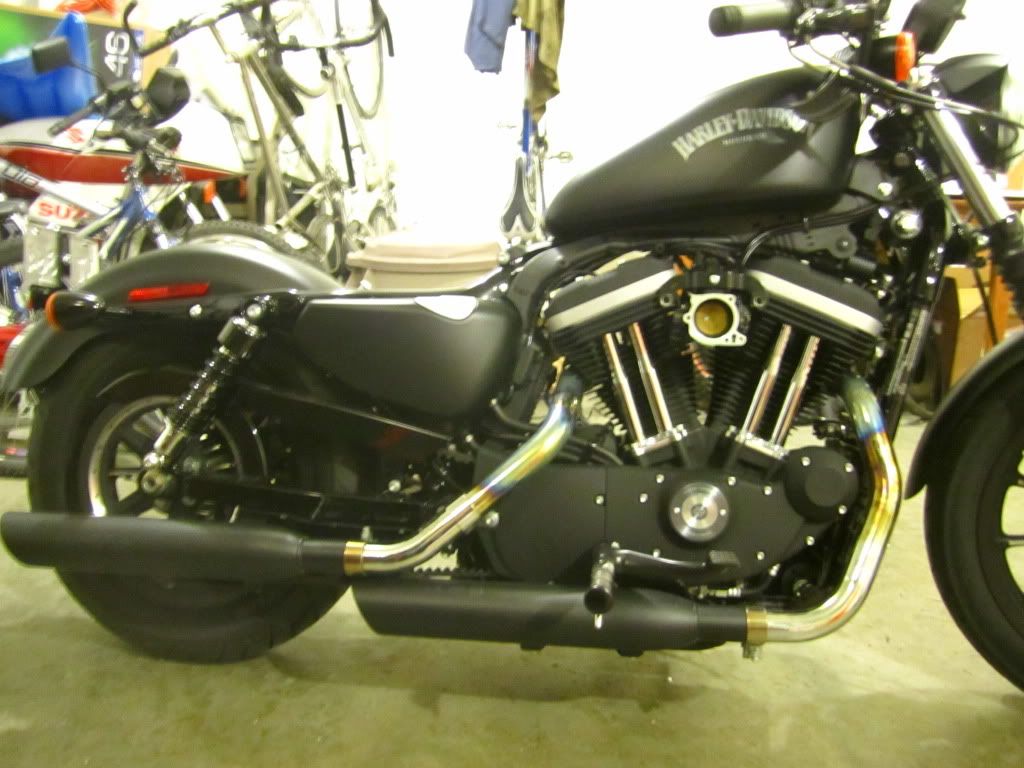
Here is the bike before I start:
Parts: NRHS 1250 kit, top end gasket kit, SEPST Tuner cables and software , stock 883 heads(for now), SE round stage 1 A/C , 2012 sportster service manual.
Total cost so far is about $1750 Canadian, and that includes 12% hst tax we in BC have to pay, shipping costs of about $150,
I have almost all of the parts I need for my 1250 conversion, just waiting for the HD service manual to arrive, so I decided to start the disassembly.
I have never taken an engine apart, but I have worked on some older bikes in the past, so I have some experience stripping one down.
I am sure during the course of this thread I will do some things wrong and please if you see something wrong do not hesitate to let me know.
Let me also apologize in advance for some of my pics. I obviously am not meant to be a photographer.
Here is the bike before I start:
Last edited by Mich; Jan 28, 2012 at 06:47 PM.
Thread Starter
|
Road Master
Joined: Aug 2011
Posts: 858
Likes: 17
From: victoria bc
I believe it is possible to do this disassembly in different order than I did, but this seemed to work.
Tear down:
I started with the seat, remove the one screw behind the seat and it comes right off. Sorry some pics became unavailable (please don't ask...)
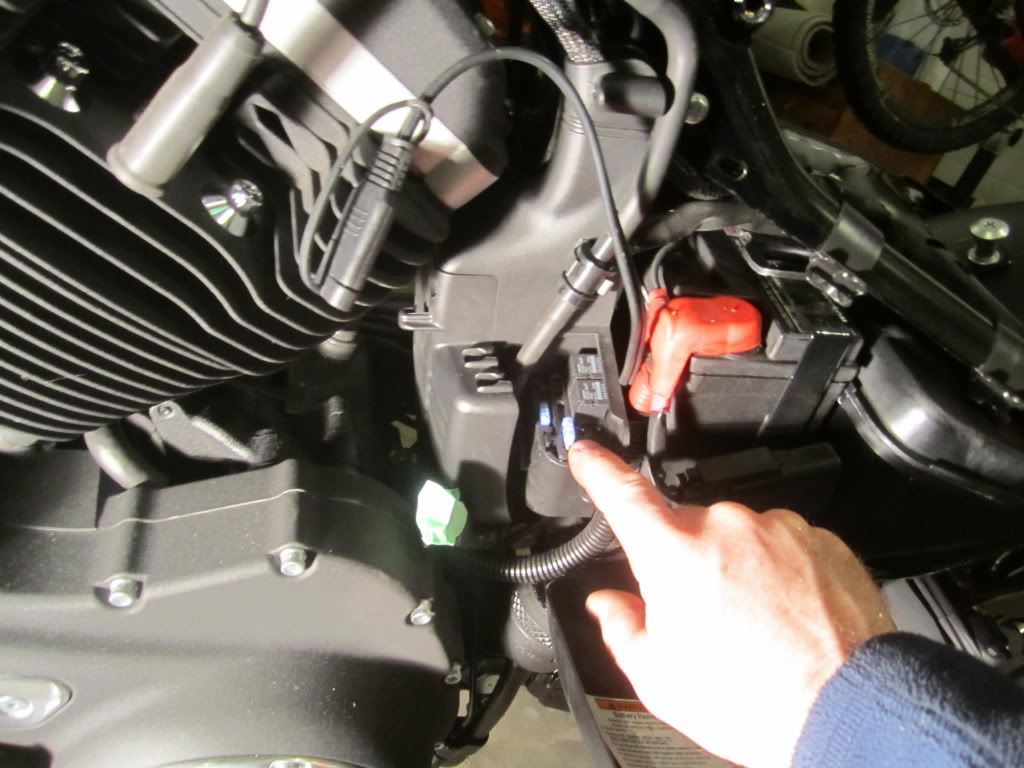
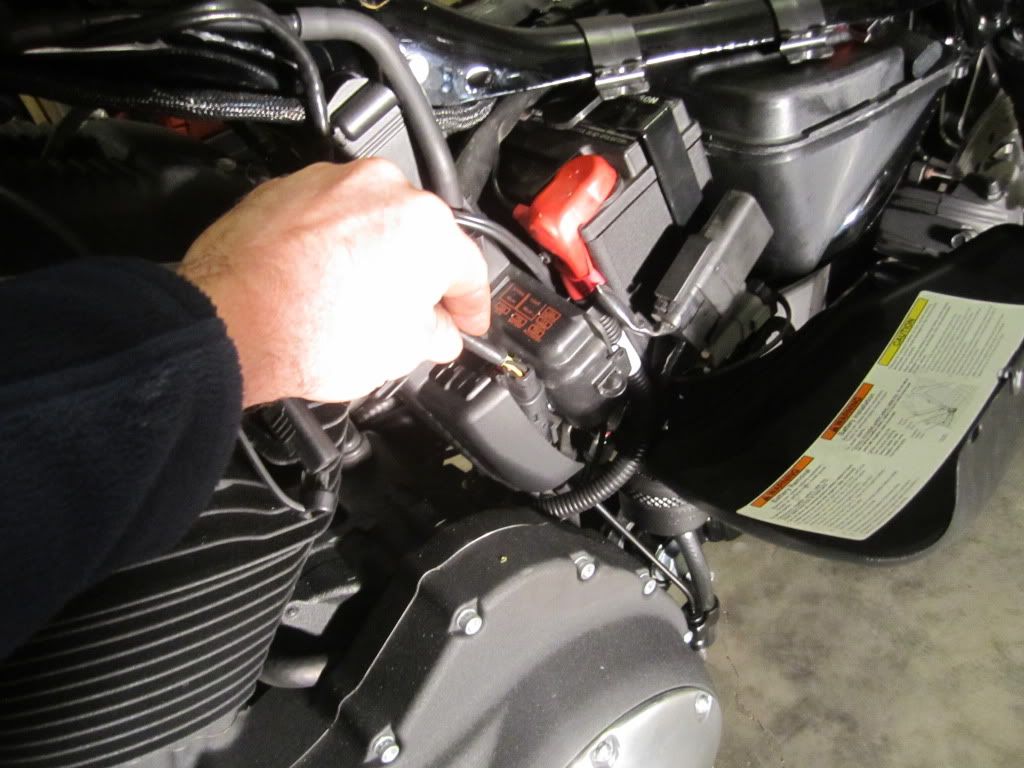
Next I decided to reflash the ECM with the Map I will need to start the bike after this is all finished. First, grab the top of left side cover and pull out, it will come loose and swing down on hinges, let it hang.
Note the grey box, that is the connection:
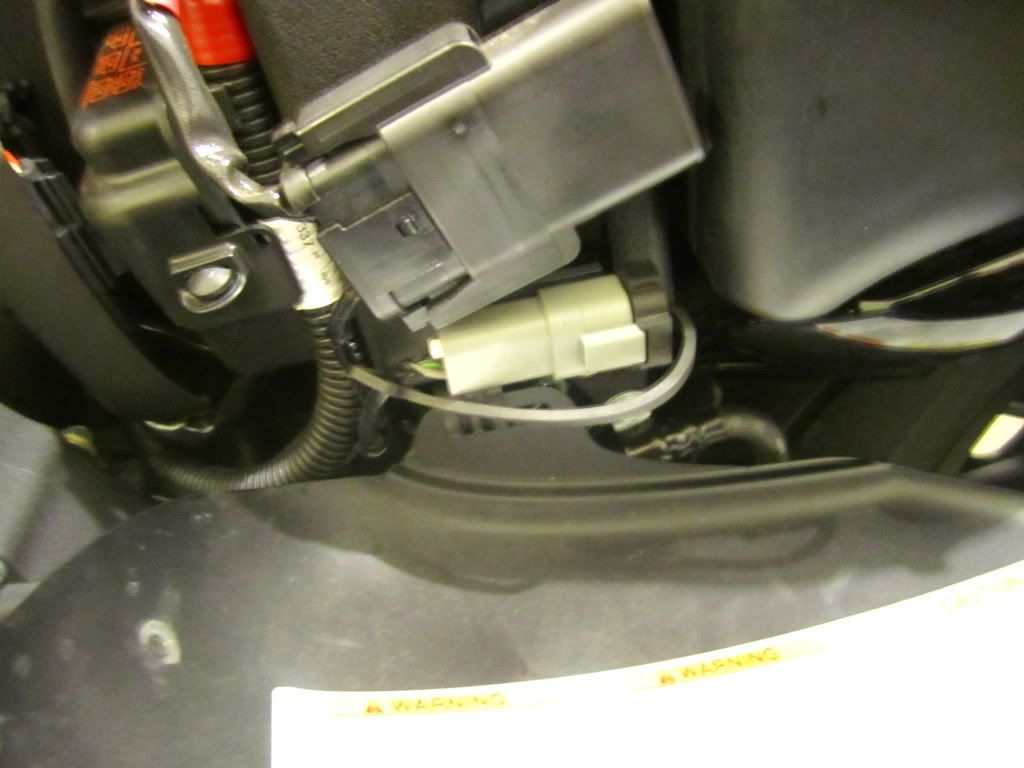
just pull the black plug out of it and plug your SEPST cable in.
Here is a pic of the SEPST connected to the bike:

Before I started this I became familiar with the SEPST and now here is a pic of my pc uploading the new map that will start the bike.
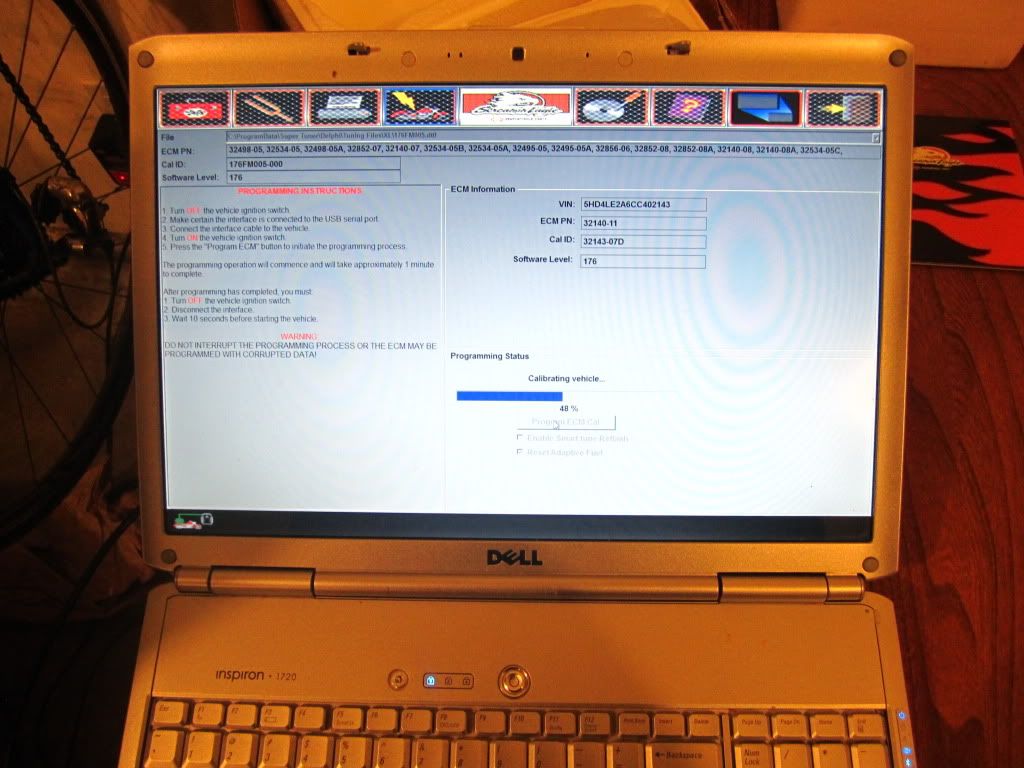
Note that just buying the SEPST tuner will not allow you to tune the bike yourself. You will also need to purchase the cables and software seperately.
Tear down:
I started with the seat, remove the one screw behind the seat and it comes right off. Sorry some pics became unavailable (please don't ask...)
Next I decided to reflash the ECM with the Map I will need to start the bike after this is all finished. First, grab the top of left side cover and pull out, it will come loose and swing down on hinges, let it hang.
Note the grey box, that is the connection:
just pull the black plug out of it and plug your SEPST cable in.
Here is a pic of the SEPST connected to the bike:
Before I started this I became familiar with the SEPST and now here is a pic of my pc uploading the new map that will start the bike.
Note that just buying the SEPST tuner will not allow you to tune the bike yourself. You will also need to purchase the cables and software seperately.
Last edited by Mich; Oct 11, 2013 at 07:26 AM.
Thread Starter
|
Road Master
Joined: Aug 2011
Posts: 858
Likes: 17
From: victoria bc
I have no service manual yet, so I am kinda winging it. I know some people disconnect the battery for this, so this is an option.
Here is the fuse location under the left side cover. **EDIT** JUST UNPLUG THE LARGE BLACK CONNECTION THAT IS RIGHT BELOW THE ORANGE TERMINAL COVER, THAT IS THE MAIN FUSE**
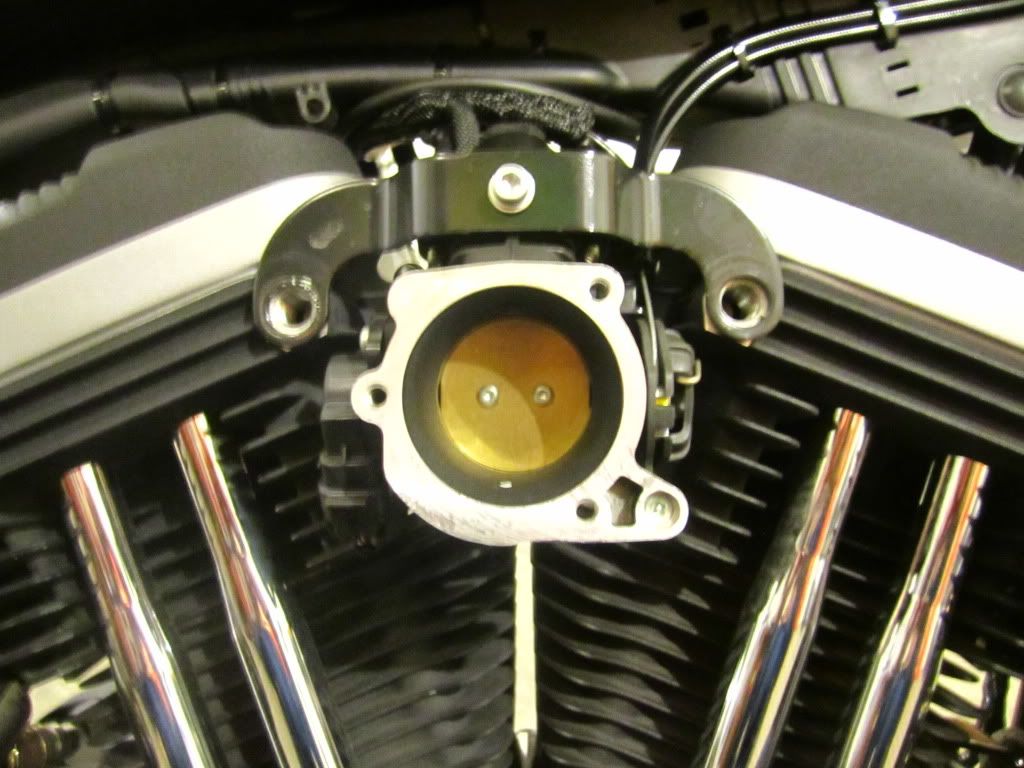
Next I decided to remove the A/C
Again, no pictures unfortunately.... but basically I removed all the bolts holding the AC on in the order that I came across them and then the whole AC just pulled off the Throttle body.
A/C gone, naked throttle body:
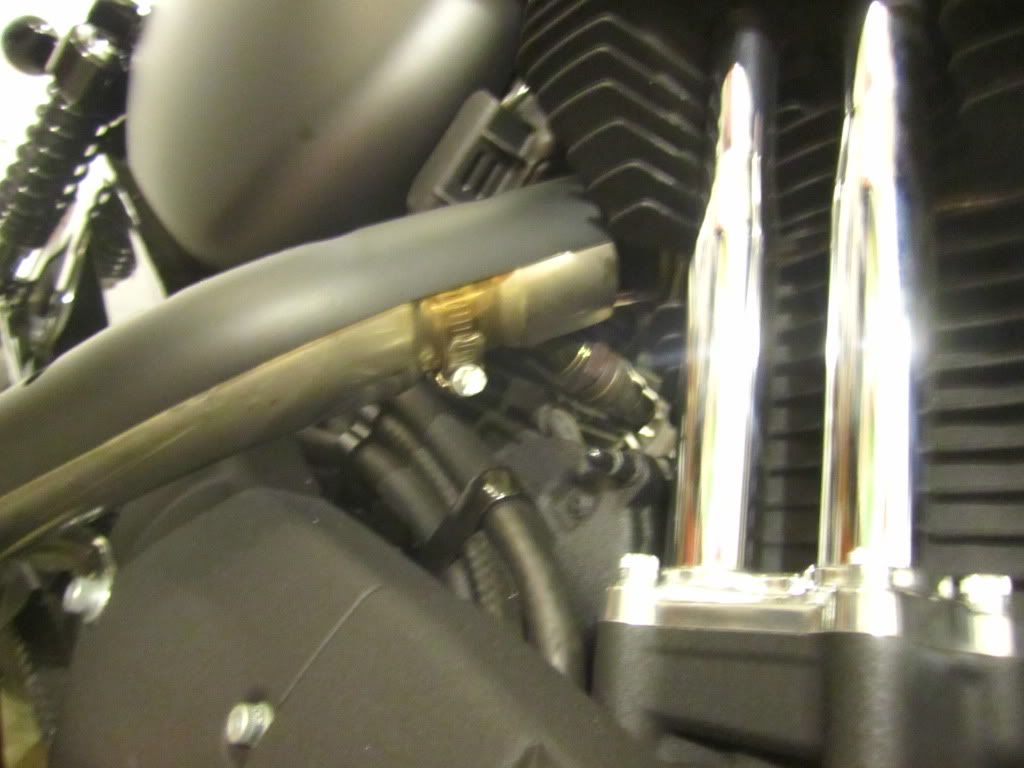
Next, I removed the heat shields. The heat shields are held onto the header pipes by big hose clamps, i just undid all of the hose clamps and pulled gently on the heatshield and they came right off.
Here is one of the clamps:
Here is a pic of the bike with the seat, AC and heat shields removed.
Here is the fuse location under the left side cover. **EDIT** JUST UNPLUG THE LARGE BLACK CONNECTION THAT IS RIGHT BELOW THE ORANGE TERMINAL COVER, THAT IS THE MAIN FUSE**
Next I decided to remove the A/C
Again, no pictures unfortunately.... but basically I removed all the bolts holding the AC on in the order that I came across them and then the whole AC just pulled off the Throttle body.
A/C gone, naked throttle body:
Next, I removed the heat shields. The heat shields are held onto the header pipes by big hose clamps, i just undid all of the hose clamps and pulled gently on the heatshield and they came right off.
Here is one of the clamps:
Here is a pic of the bike with the seat, AC and heat shields removed.
Last edited by Mich; Oct 11, 2013 at 07:27 AM.
Thread Starter
|
Road Master
Joined: Aug 2011
Posts: 858
Likes: 17
From: victoria bc
Now to remove the fuel tank.
There are 2 bolts holding the tank on the bike. One in the front and one in the back. Simply undo these bolts and remove them. Next unhook the fuel line from the tank. This was very simple, no tools. I forget if you lift up or pull down, but you either lift or pull down on the compression fitting under the tank and the hose pulls right out. Only about a teaspoon of gas came out.
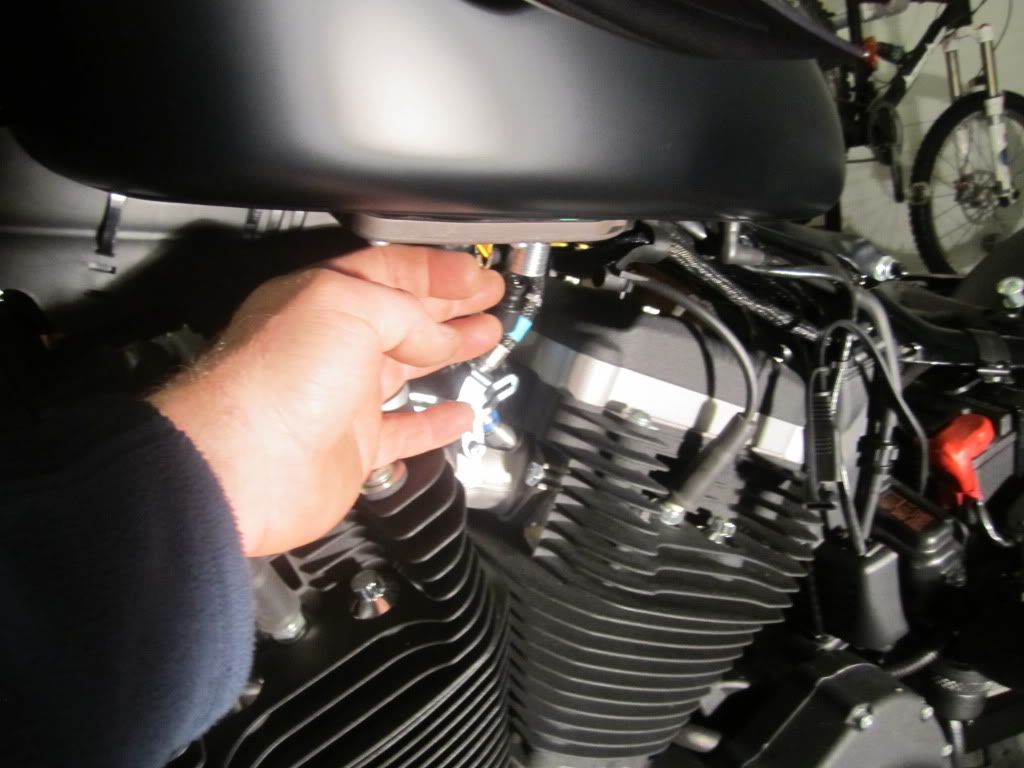
next pull down on the hose located .near the back of the tank on the left side. I just tugged gently with my hands and it came off.
Lastly, follow the wiring harness from the tank to it's connection and undo it.
There are 2 bolts holding the tank on the bike. One in the front and one in the back. Simply undo these bolts and remove them. Next unhook the fuel line from the tank. This was very simple, no tools. I forget if you lift up or pull down, but you either lift or pull down on the compression fitting under the tank and the hose pulls right out. Only about a teaspoon of gas came out.
next pull down on the hose located .near the back of the tank on the left side. I just tugged gently with my hands and it came off.
Lastly, follow the wiring harness from the tank to it's connection and undo it.
Last edited by Mich; Oct 11, 2013 at 07:23 AM.
Thread Starter
|
Road Master
Joined: Aug 2011
Posts: 858
Likes: 17
From: victoria bc
The heat shields are gone so time to get the rest of the pipes out of the way. Note the O2 sensors on your pipes, there is one on the front and rear pipe. this is what they look like:
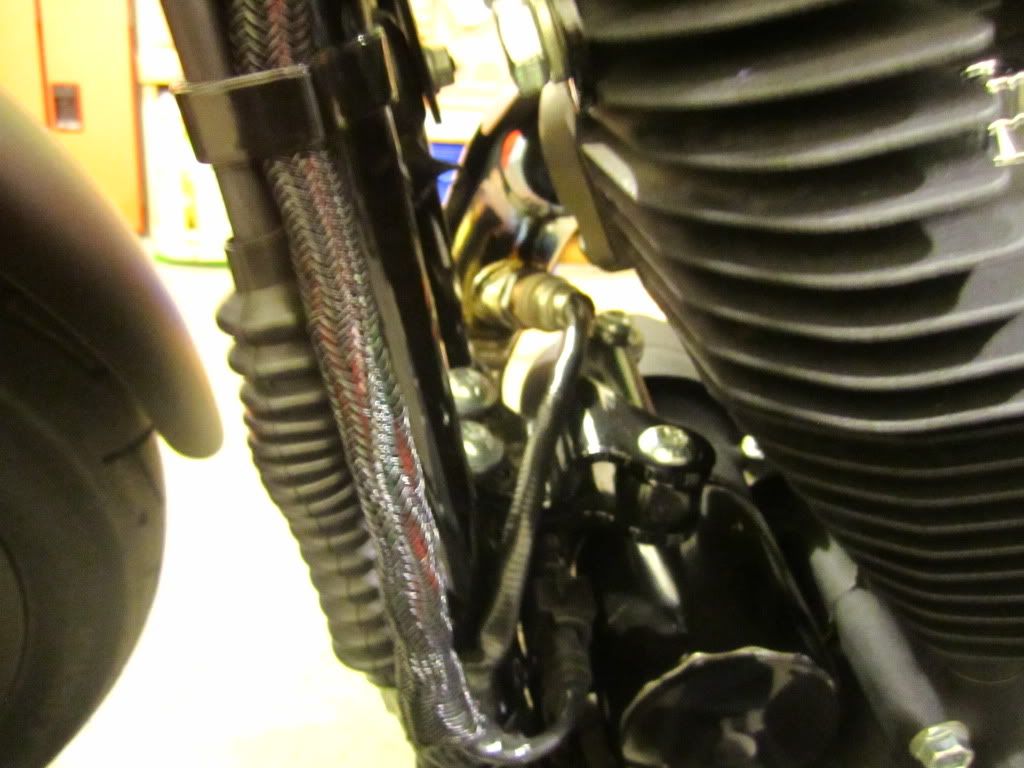
I followed the wiring from each O2 sensor to their connection and disconnected them. This requires removing a wire harness clip on the front sensor.
note the big black clip on the front down tube, just pull on it and it will come off:
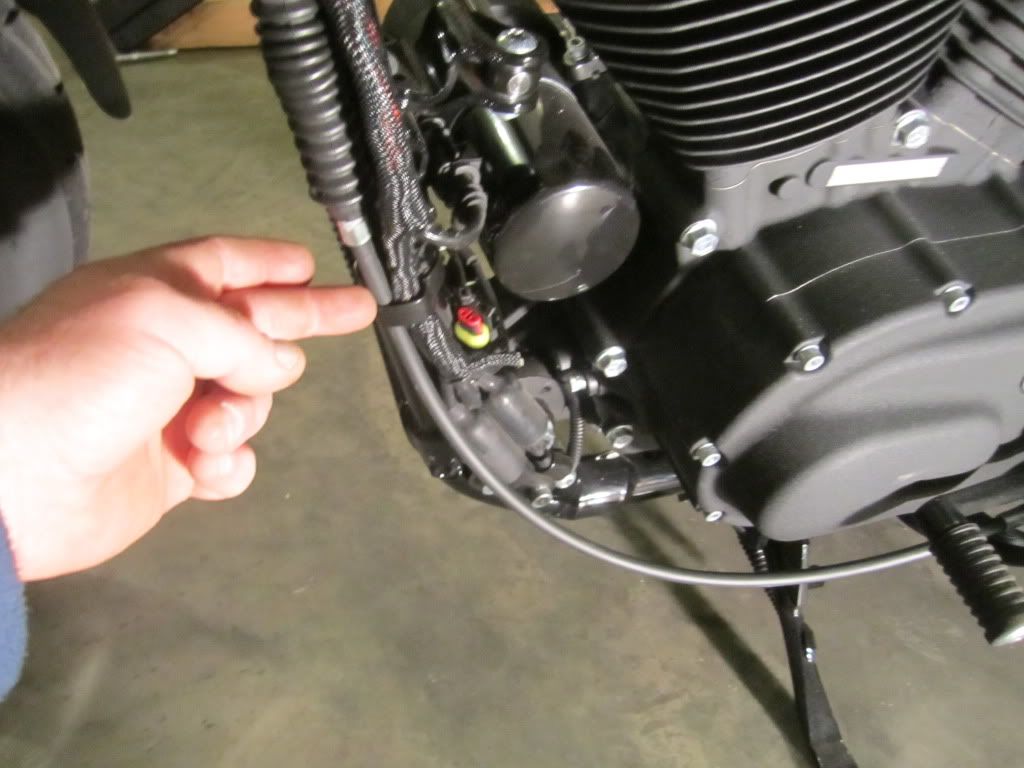
Here is the front sensor connection, note the connectors are red and yellow:
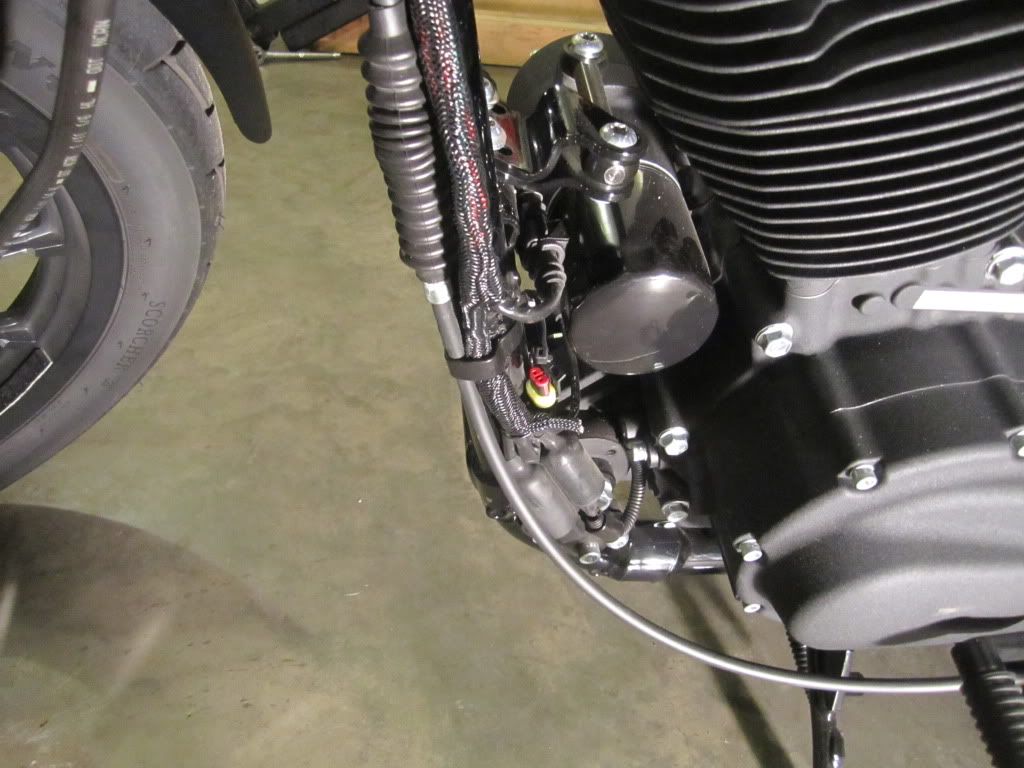
The rear connection:

Next I went under the mufflers and removed the 2 each 1/2" bolts that hold each muffler to the crossover tube. there is a third bolt on the forward pipe, remove it as well. I then removed the exhaust manifold bolts with a regular socket and gently remove the complete pipes.
Here is the bike with the pipes gone;
this bike only has 3800 kms on it and has never been in the rain. It is a pleasure to pull apart as everything is coming off easy.
I followed the wiring from each O2 sensor to their connection and disconnected them. This requires removing a wire harness clip on the front sensor.
note the big black clip on the front down tube, just pull on it and it will come off:
Here is the front sensor connection, note the connectors are red and yellow:
The rear connection:
Next I went under the mufflers and removed the 2 each 1/2" bolts that hold each muffler to the crossover tube. there is a third bolt on the forward pipe, remove it as well. I then removed the exhaust manifold bolts with a regular socket and gently remove the complete pipes.
Here is the bike with the pipes gone;
this bike only has 3800 kms on it and has never been in the rain. It is a pleasure to pull apart as everything is coming off easy.
Thread Starter
|
Road Master
Joined: Aug 2011
Posts: 858
Likes: 17
From: victoria bc
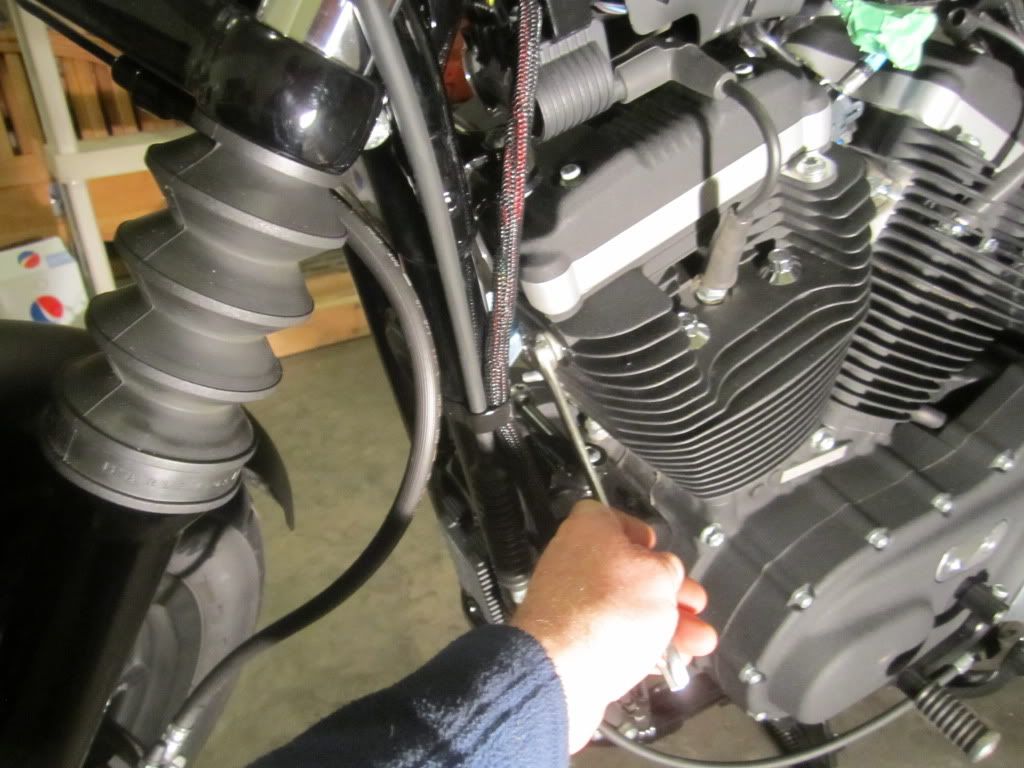
Time to remove the throttle body and manifold. I have read alot about people needing a special manifold wrench but this was not necessary for me. a regular wrench did the job just fine.
I started by loosening the throttle cables at the handlebar:
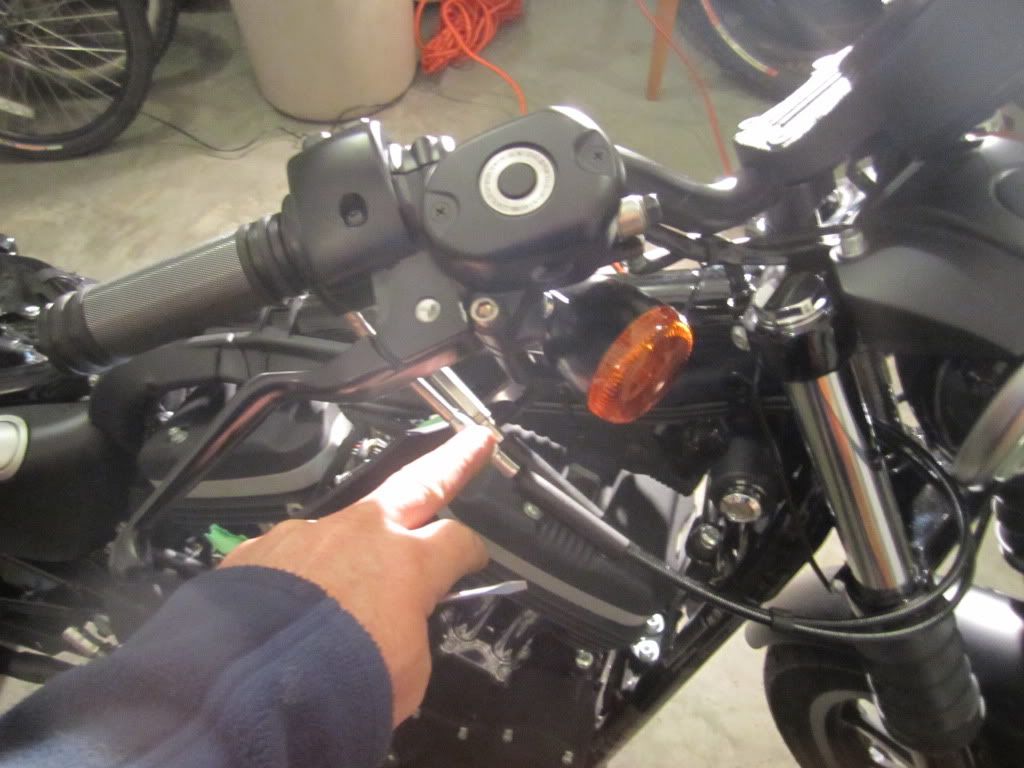
I then followed the cables to the throttle body and used the slack in the cable to easily remove the cables:

Disconnect all wiring from the throttle body and intake manifold. You will find wires for the 2 injectors going into the manifold, also 3 other wire connections I think ( I am too lazy to go down stairs and count them). Without the manual I am not sure what all the connections are but I am guessing the map sensor, throttle position sensor and air temp? Anyways make sure they are all disconnected.
Removing the wires:
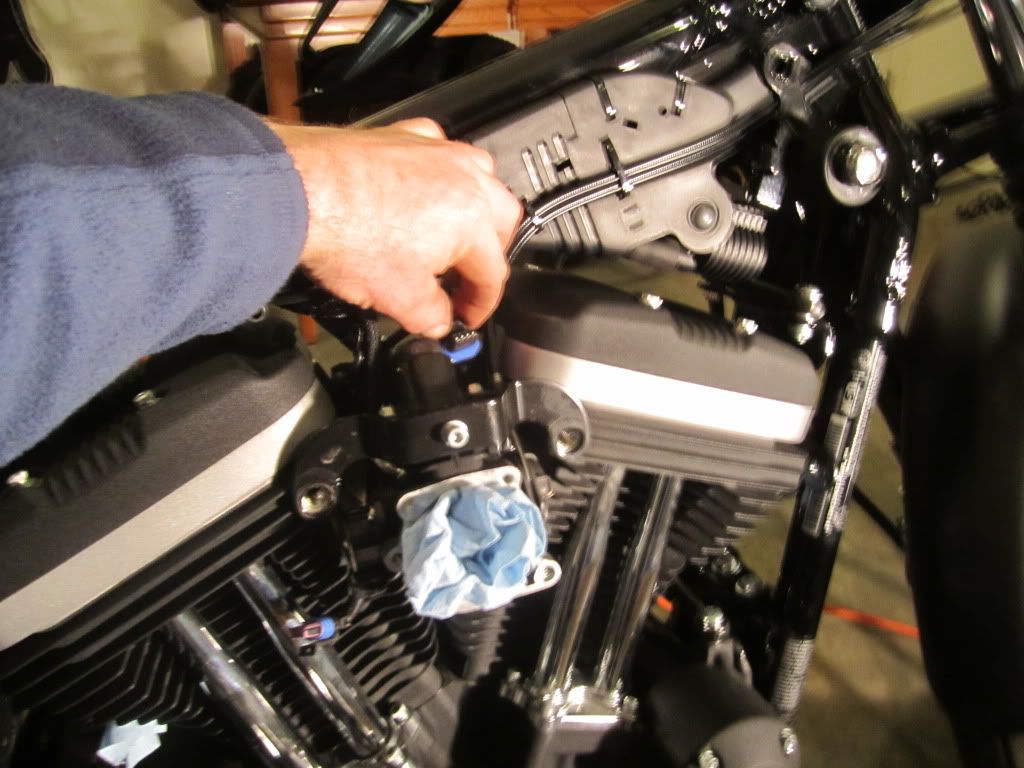
It may be unnecessary but as a newb, I would rather be safe than sorry. I have been putting tape on my connections for a few reasons, one: to keep crap out of them and, 2: it reminds me to reconnect them. I have also been stuffing shop towels into most holes to keep them clean.
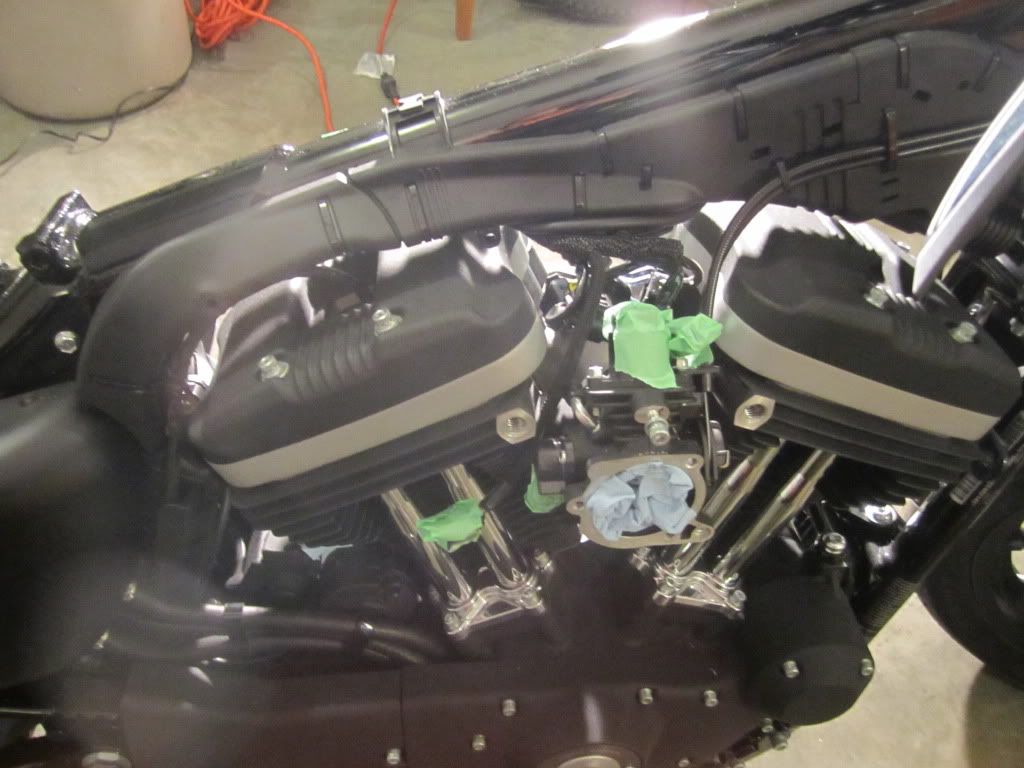
Now I turn my attention to the manifold bolts. They came loose easily with a regular wrench. I removed all 4 of the bolts and then wiggled the Throttle body/manifold gently until it started to move freely.
As it loosened up I pulled it outwards on the right side of the bike. it was a little snug but I took my time and the manifold flanges eventually passed by the heads and the whole unit came out.
TB and Intake manifold gone:
I started by loosening the throttle cables at the handlebar:
I then followed the cables to the throttle body and used the slack in the cable to easily remove the cables:
Disconnect all wiring from the throttle body and intake manifold. You will find wires for the 2 injectors going into the manifold, also 3 other wire connections I think ( I am too lazy to go down stairs and count them). Without the manual I am not sure what all the connections are but I am guessing the map sensor, throttle position sensor and air temp? Anyways make sure they are all disconnected.
Removing the wires:
It may be unnecessary but as a newb, I would rather be safe than sorry. I have been putting tape on my connections for a few reasons, one: to keep crap out of them and, 2: it reminds me to reconnect them. I have also been stuffing shop towels into most holes to keep them clean.
Now I turn my attention to the manifold bolts. They came loose easily with a regular wrench. I removed all 4 of the bolts and then wiggled the Throttle body/manifold gently until it started to move freely.
As it loosened up I pulled it outwards on the right side of the bike. it was a little snug but I took my time and the manifold flanges eventually passed by the heads and the whole unit came out.
TB and Intake manifold gone:
Thread Starter
|
Road Master
Joined: Aug 2011
Posts: 858
Likes: 17
From: victoria bc
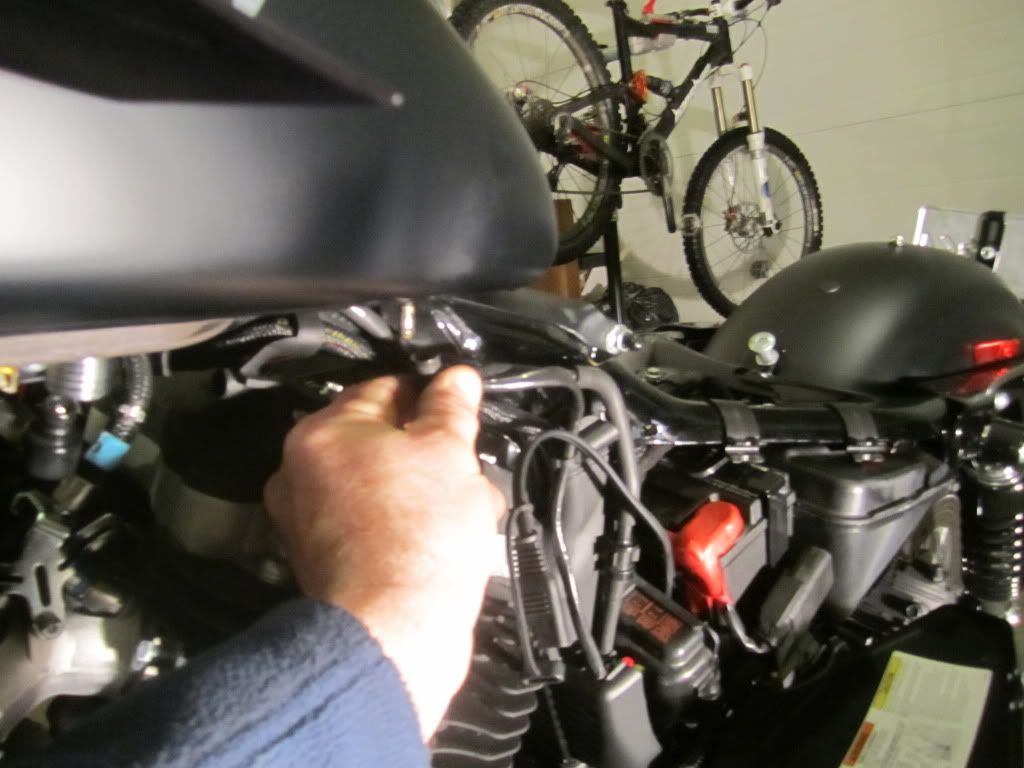
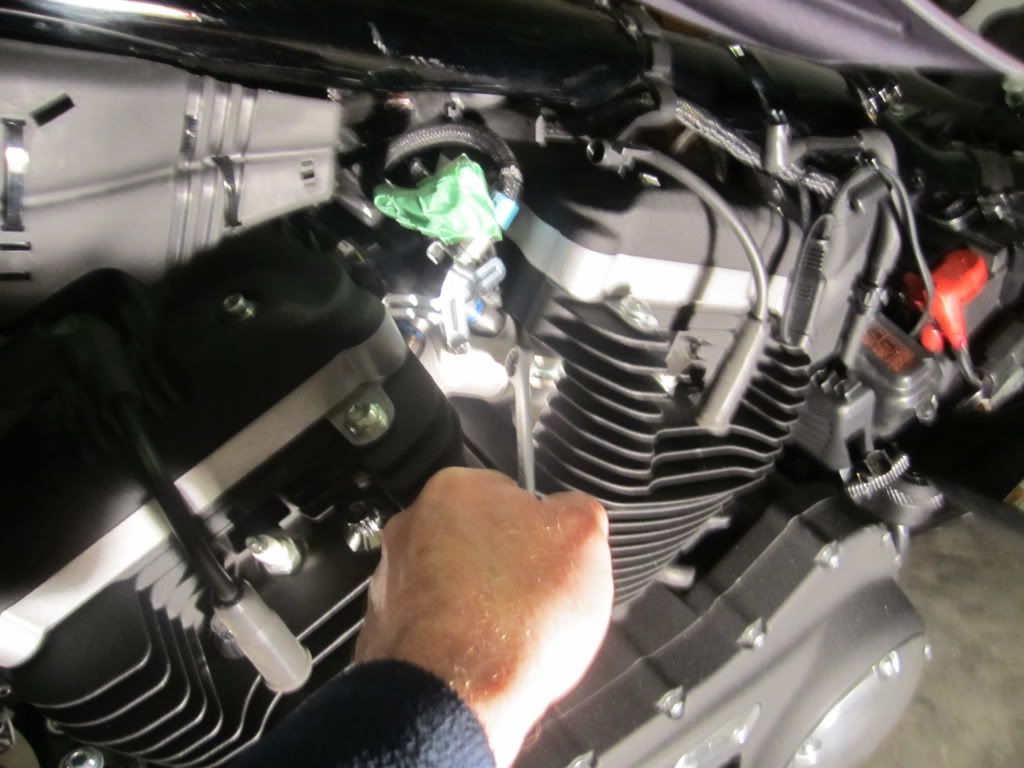
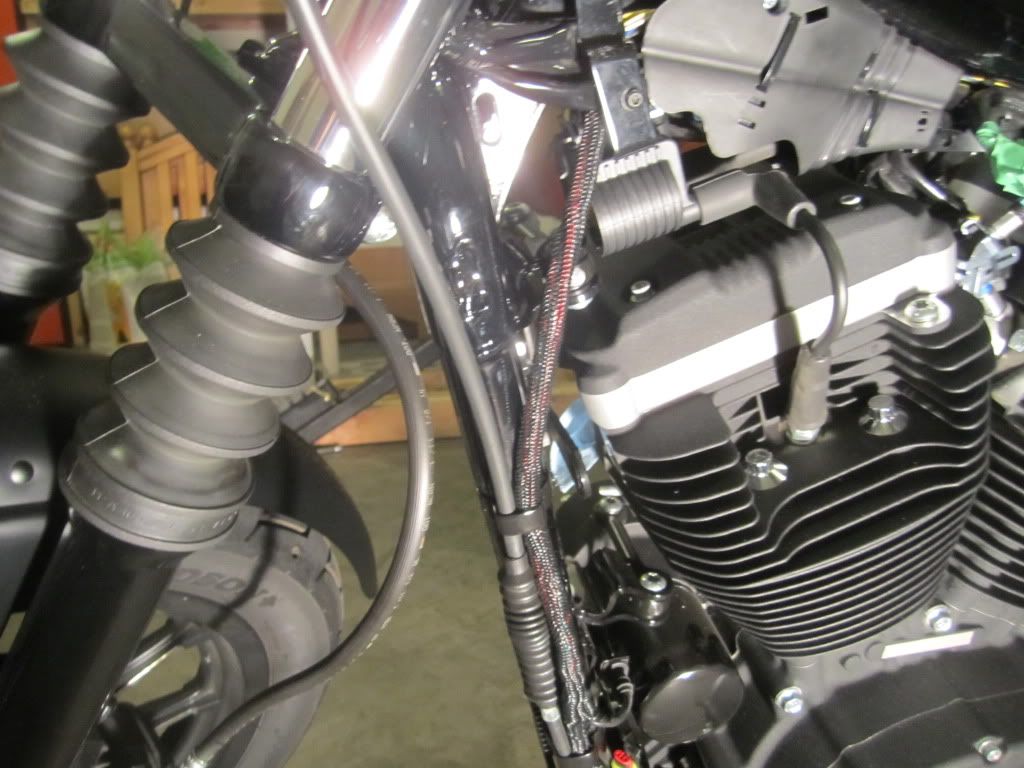
the upper forward engine mount needs to be disconnected. Note the mount and the two bolts. I just put a wrench on the bolts and removed them.
You can see in this pic that the mount swings back away from the engine with the bolts gone.
You can see in this pic that the mount swings back away from the engine with the bolts gone.
Trending Topics
Thread Starter
|
Road Master
Joined: Aug 2011
Posts: 858
Likes: 17
From: victoria bc
Here are the removed parts waiting to be reinstalled.
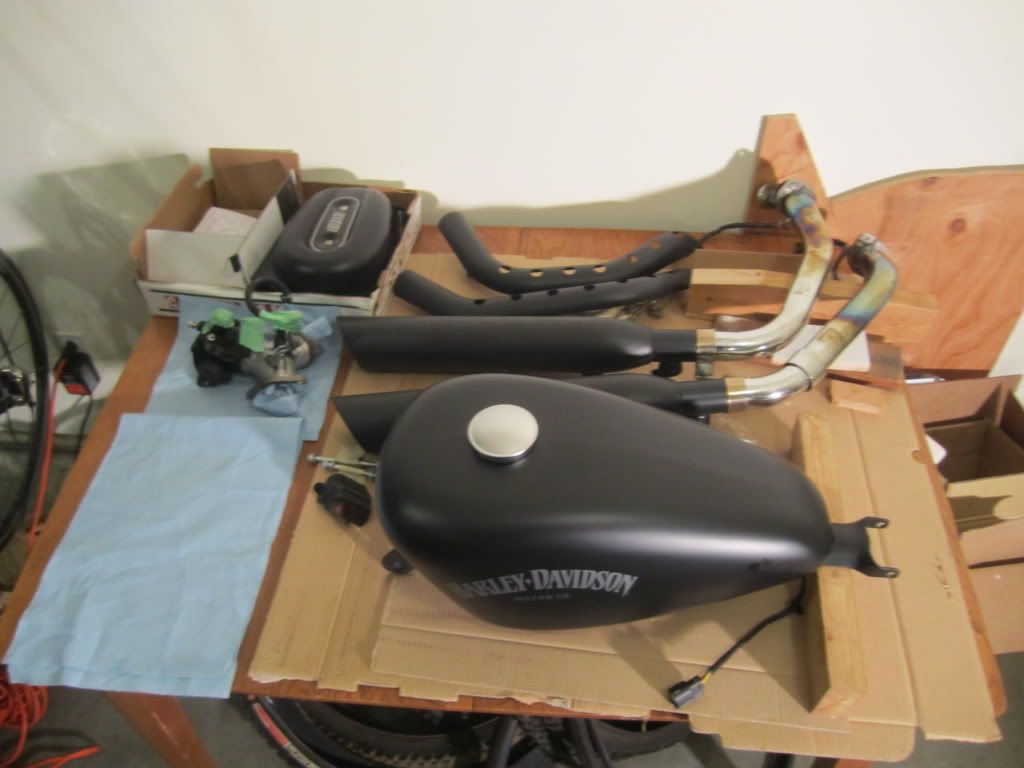
To get to this point was about 2.5 hours. I am now stopping and will not start the rockers, heads and cylinders until I have the manual. If the manual arrives this week, I will be doing the reinstall next Saturday and I am hoping to have it reassembled and started that day (knock on wood).
So far I have only needed basic wrenches, sockets and allen keys. I am not anticipating needing any special tools other than a good torque wrench and a micrometer for measuring my squish. Fortunately I am able to borrow these two tools from friends.
Last edited by Mich; Jan 28, 2012 at 05:55 PM.
HD Forum Stories
The Best of Harley-Davidson for Lifelong Riders

7 Surprising Harley-Davidson Products that Are Not Motorcycles
Verdad Gallardo
8 Best Harley-Davidson Motorcycles Ever
Pouria Savadkouei
10 Worst Harley-Davidson Motorcycles Ever
Pouria Savadkouei
Killer Custom's Jail Break Is The Breakout That Refused to Blend In
Verdad Gallardo
Crazy Bunderbike Build Looks Amazing, But Is It Impossible to Ride?
Verdad Gallardo
Harley-Davidson Reveals Super Cool Cafe Racer Concept
Verdad Gallardo
Engraved Rebellion: Inside Bundnerbike's Glam Rock II
Verdad Gallardo
10 Motorcycles You Should Never Buy
Joe Kucinski
10 Things Harley-Davidson Needs to Fix in 2026
Verdad GallardoThread Starter
|
Road Master
Joined: Aug 2011
Posts: 858
Likes: 17
From: victoria bc
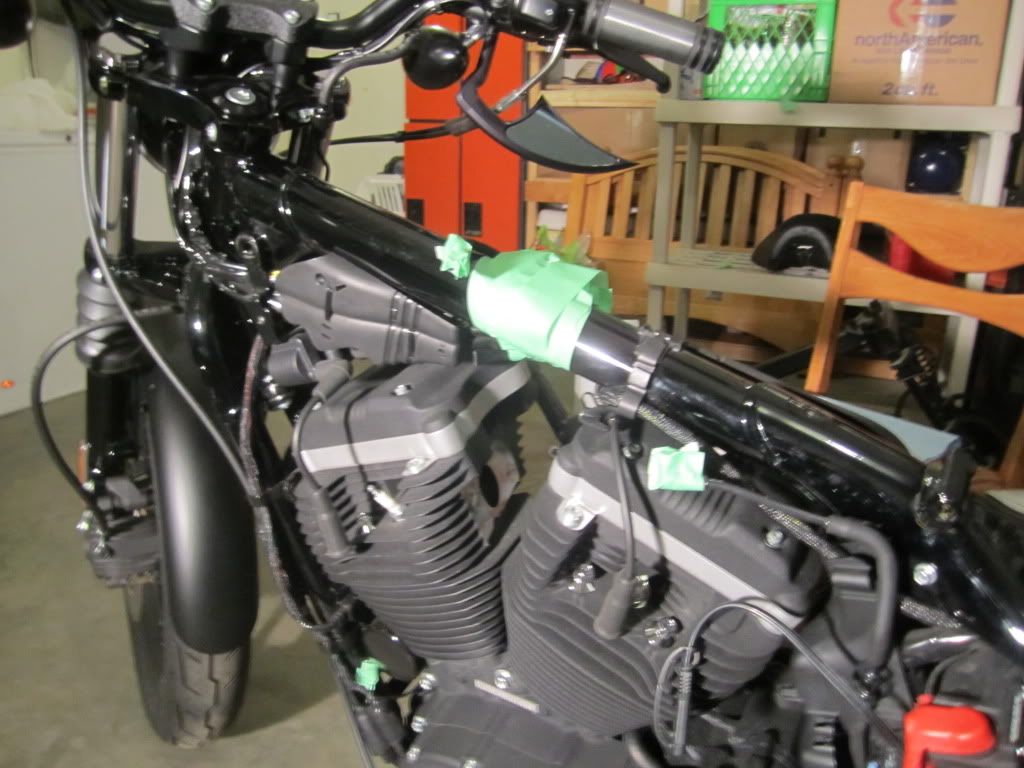
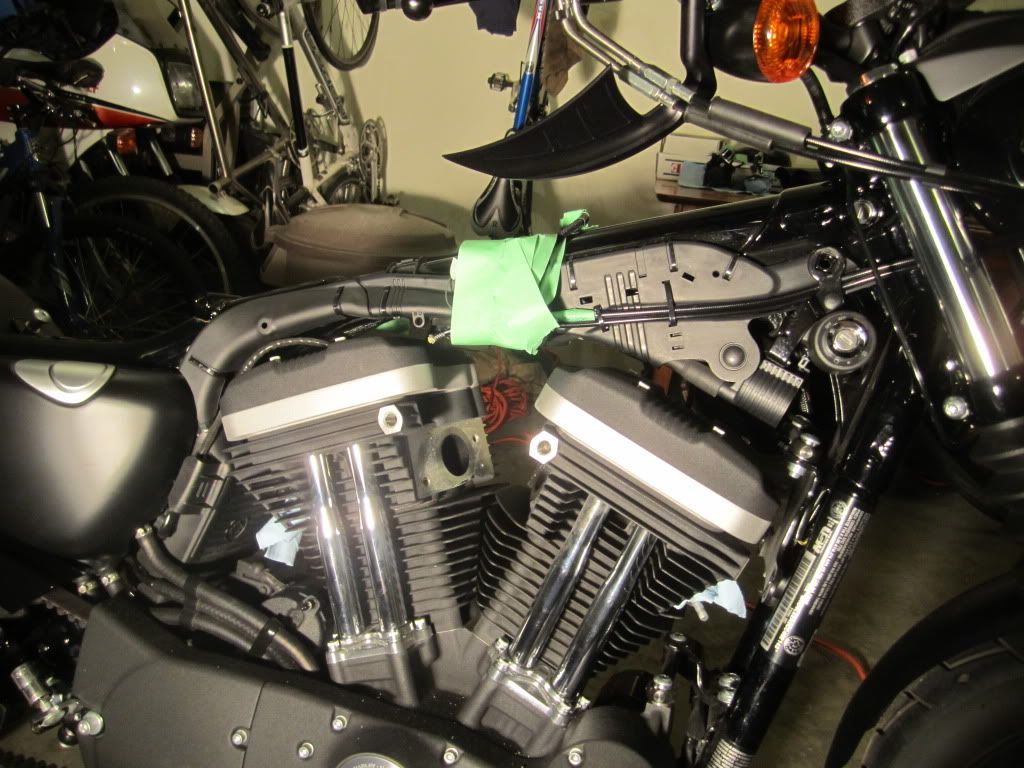
I almost forgot. I gathered up the wiring near the top tube of the frame as well as the throttle cables and used some masking tape to wrap them out of the way. Now hopefully they will not get in my way when I am working on the engine.