


Battery and Fork seal 2005 Sporty

Thread Starter
|
Intermediate

Joined: Jul 2012
Posts: 49
Likes: 10
From: Idaho
New Owner - Factory service manual on order.
2005 Sportster Custom
Can I get a basic how to for battery removal and install. Looks straight forward but I want to be sure.
Secondly, how difficult is a fork seal job? Or how much should I pay to have it done?
Did not notice the fork leak before I bought it. Slight but it is there.
Thanks in advance...

Road Captain
Joined: Jun 2012
Posts: 533
Likes: 2
From: Virginia
Fork seal's not a bad job - it is helpful to have an impact wrench to spin the dampener rod bolt loose.
One hint for the battery: Get a 10MM wrench, and wrap it in electrical tape or dip it in the "liquid tape" so that when it slips off the nut and touches the frame, it doesn't arc and weld the wrench to your bike. :-)
One hint for the battery: Get a 10MM wrench, and wrap it in electrical tape or dip it in the "liquid tape" so that when it slips off the nut and touches the frame, it doesn't arc and weld the wrench to your bike. :-)
Road Captain
Joined: Jun 2012
Posts: 533
Likes: 2
From: Virginia
W/out an impact - it will be difficult to spin the bolt that's in the bottom of the fork tube w/out the damper it's bolted to spinning inside the fork tube. Borrow/rent one - you'll be glad you did.

Road Warrior
Joined: Jul 2006
Posts: 1,768
Likes: 4
From: eastern Pa
your gone need a impact gun for shure.
the battery you unbolt the ground cable at engine and then pull out battery and then remove ground bolt at battery,
not bad but a pain in azz,harley drop the ball on that one.
the battery you unbolt the ground cable at engine and then pull out battery and then remove ground bolt at battery,
not bad but a pain in azz,harley drop the ball on that one.

Grand HDF Member
Joined: Jul 2007
Posts: 4,007
Likes: 126
From: Manassas, VA
I've never needed an impact gun for the damper bolts, but I have had the screw heads strip.
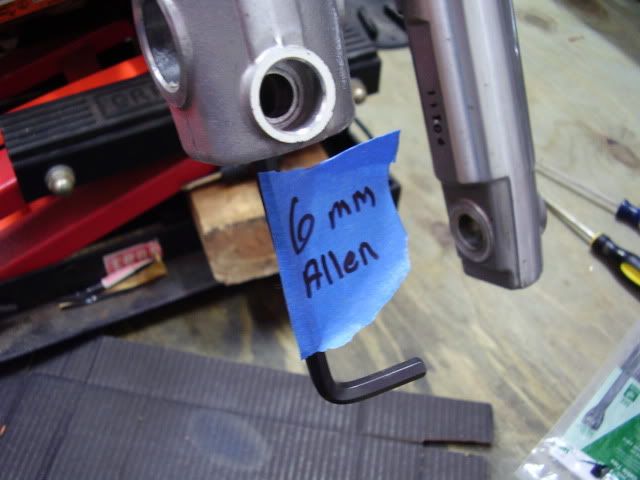
Not too bad of a project, unless you strip the heads on the 6mm socket-head bolts that go up from the bottom into the damper tube. This wasn't the first set of lowers I've swapped out, but for some reason all four (2 sets of legs) got boogered up.
Tie your caliper up with zip ties. Don't let it hang by the hose.
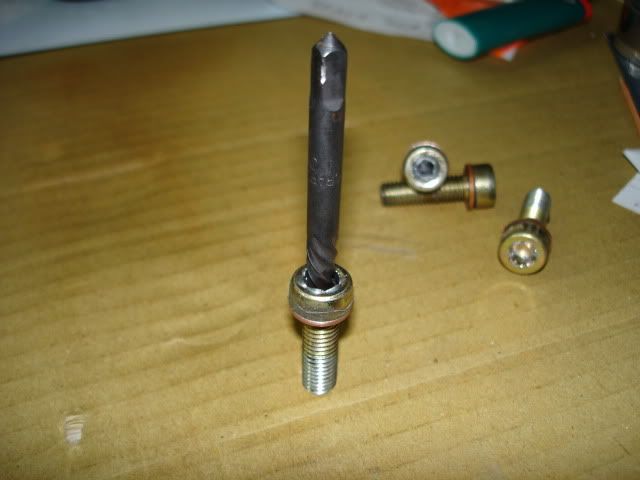
Here's the ez-out I used on the stripped damper rod bolts:
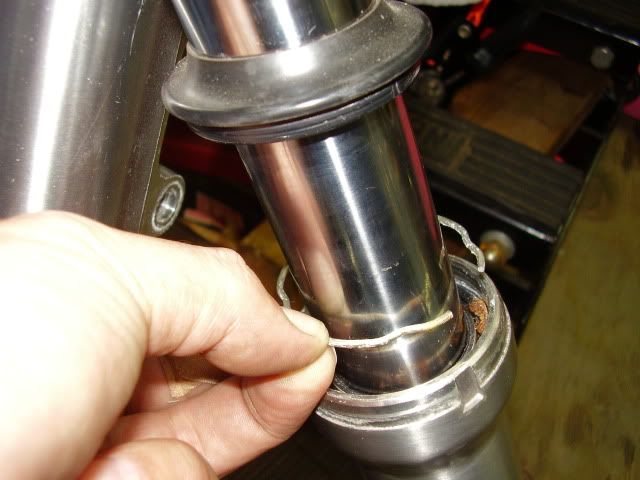
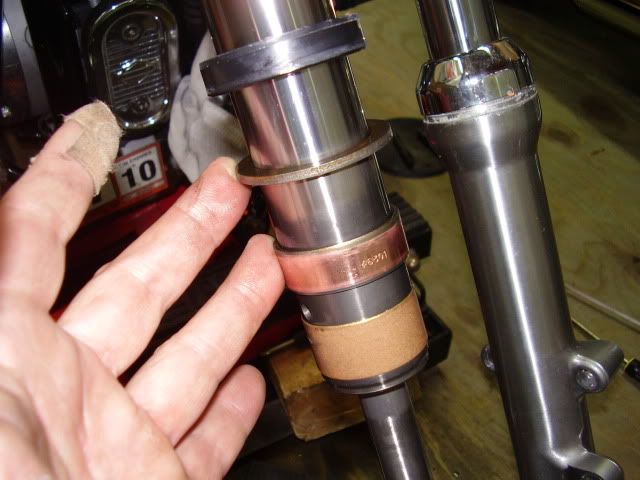
The rubber dust shield (located under the shiney metal cap mentioned below) and c-clip. A lot of times those c-clips are pretty oxidized. Wire brush them clean or get new ones. The oil seal is directly under the c-clip (you can see a brown rust stain from the oxidized c-clip on the seal)
The innerds. That top, black ring is the oil seal (not to be confused with the rubber dust shield that is directly under the shiney metal cap seen here on the right leg)
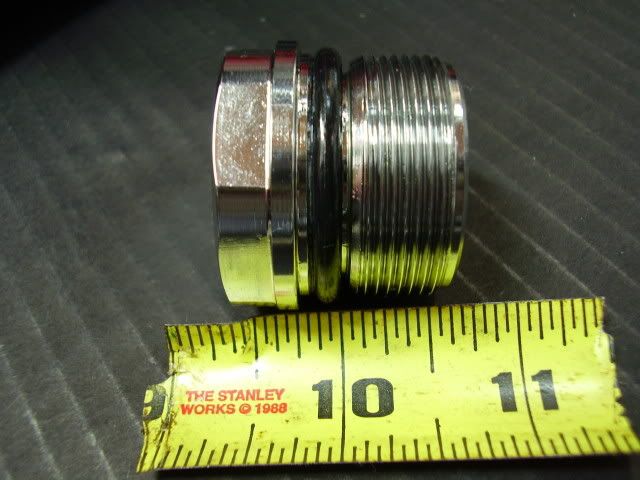
These sockets work great for the tube cap. Notice the o-ring to prevent scratches and the rounded corners to help prevent cracking the chrome. It's a 1 3/8" socket that's shallow to allow working under your mounted handlebars. I think mine is from Motion Pro ("MP 08-0139" stamped on side) available through Dennis Kirk, Drag Specialties, etc.

How much thread you got before that top nut takes your eye out. It's not terrible, but it is under tension:
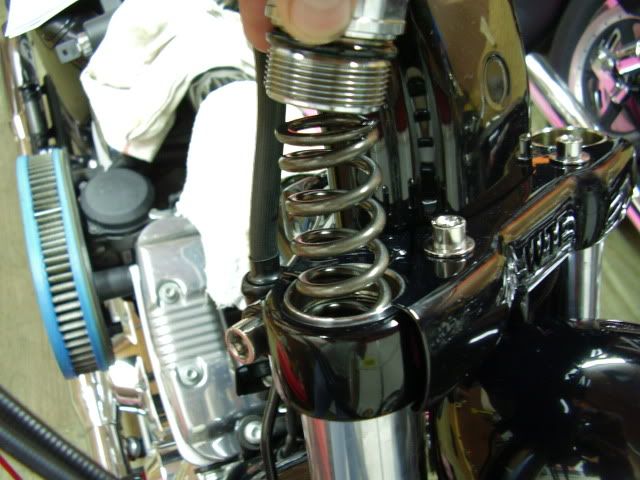
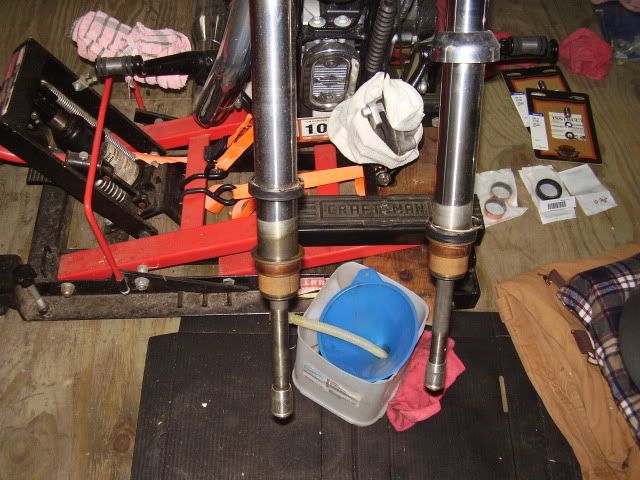
Put down card board or newspaper. When you drain the oil, it'll go everywhere unless you pump the leg s-l-o-w. Hold a bucket under it, moving it in motion with the leg, while you pump (assuming your bike has drain screws in the lower legs).
When you're ready to seperate the lower leg from the fork tube, use a slide-hammer type action and they'll pop apart. Start out easy before you get Medieval on it.
After removing the damper rod bolt out of the bottom, I take the fork tubes out of the triple clamps. It's easier (good time for a turn signal relocation). I bought a fork seal driver because I knew I'd be doing more than one set. Years ago, on my old Honda, I used an appropriately sized PVC pipe to set the seals. In addition to new seals, you'll want new upper and lower bushings while you're in there (they last for about 15k-20k miles but I didn't want to do it twice). Get new drain screw crush washers, too. I always get new damper tube screws and their crush washers, even if I don't destroy them getting them out.
Enjoy.
Not too bad of a project, unless you strip the heads on the 6mm socket-head bolts that go up from the bottom into the damper tube. This wasn't the first set of lowers I've swapped out, but for some reason all four (2 sets of legs) got boogered up.
Tie your caliper up with zip ties. Don't let it hang by the hose.
Here's the ez-out I used on the stripped damper rod bolts:
The rubber dust shield (located under the shiney metal cap mentioned below) and c-clip. A lot of times those c-clips are pretty oxidized. Wire brush them clean or get new ones. The oil seal is directly under the c-clip (you can see a brown rust stain from the oxidized c-clip on the seal)
The innerds. That top, black ring is the oil seal (not to be confused with the rubber dust shield that is directly under the shiney metal cap seen here on the right leg)
These sockets work great for the tube cap. Notice the o-ring to prevent scratches and the rounded corners to help prevent cracking the chrome. It's a 1 3/8" socket that's shallow to allow working under your mounted handlebars. I think mine is from Motion Pro ("MP 08-0139" stamped on side) available through Dennis Kirk, Drag Specialties, etc.
How much thread you got before that top nut takes your eye out. It's not terrible, but it is under tension:
Put down card board or newspaper. When you drain the oil, it'll go everywhere unless you pump the leg s-l-o-w. Hold a bucket under it, moving it in motion with the leg, while you pump (assuming your bike has drain screws in the lower legs).
When you're ready to seperate the lower leg from the fork tube, use a slide-hammer type action and they'll pop apart. Start out easy before you get Medieval on it.
After removing the damper rod bolt out of the bottom, I take the fork tubes out of the triple clamps. It's easier (good time for a turn signal relocation). I bought a fork seal driver because I knew I'd be doing more than one set. Years ago, on my old Honda, I used an appropriately sized PVC pipe to set the seals. In addition to new seals, you'll want new upper and lower bushings while you're in there (they last for about 15k-20k miles but I didn't want to do it twice). Get new drain screw crush washers, too. I always get new damper tube screws and their crush washers, even if I don't destroy them getting them out.
Enjoy.
Last edited by HarleyScuba; Oct 24, 2012 at 07:04 PM. Reason: nunya

Stellar HDF Member
Joined: Aug 2009
Posts: 3,212
Likes: 212
I'm with HarleyScuba on this. You do not need an impact to get it out. I've done more than a couple sets and you can use the spring tension itself to hold the damper and loosen the bolt first, or you can shove something down there on a long rod and use a partner to hold the damper while you turn the bolt.
I charge $100 per leg plus parts if I do seals/bushings. If you bring it to me off the bike I'll knock off $25/leg, and if you bring it to me separated to just drive the seals back on I'll charge you $15 bucks.
I charge $100 per leg plus parts if I do seals/bushings. If you bring it to me off the bike I'll knock off $25/leg, and if you bring it to me separated to just drive the seals back on I'll charge you $15 bucks.
Trending Topics
Thread Starter
|
Intermediate
Joined: Jul 2012
Posts: 49
Likes: 10
From: Idaho
Thanks guys. I can do it now with the pics and text.
Service manual is ordered.
Never knew about that socket. NICE!!!
Service manual is ordered.
Never knew about that socket. NICE!!!
HD Forum Stories
The Best of Harley-Davidson for Lifelong Riders

8 Best Harley-Davidson Motorcycles Ever
Pouria Savadkouei
10 Worst Harley-Davidson Motorcycles Ever
Pouria Savadkouei
Killer Custom's Jail Break Is The Breakout That Refused to Blend In
Verdad Gallardo
Crazy Bunderbike Build Looks Amazing, But Is It Impossible to Ride?
Verdad Gallardo
Harley-Davidson Reveals Super Cool Cafe Racer Concept
Verdad Gallardo
Engraved Rebellion: Inside Bundnerbike's Glam Rock II
Verdad Gallardo
10 Motorcycles You Should Never Buy
Joe Kucinski
10 Things Harley-Davidson Needs to Fix in 2026
Verdad Gallardo
Southpaw Super Glide: A Left-Hand-Drive 1979 Harley FXE Built to Fit the Rider
Verdad Gallardo
Road Warrior
Joined: Jul 2006
Posts: 1,768
Likes: 4
From: eastern Pa
its Jack in a box time and he aint nice.
Grand HDF Member
Joined: Jul 2007
Posts: 4,007
Likes: 126
From: Manassas, VA
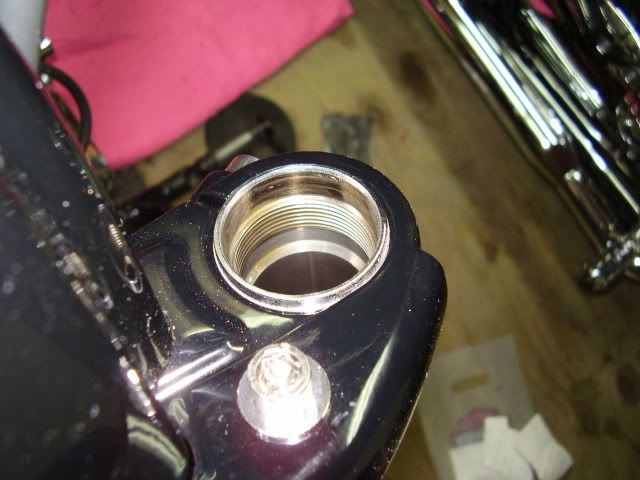
One more thing about the fork seal driver; there's an optional, plastic coned-shaped piece (that's used in conjuction with the seal driver) which allows you to seat the shiney metal caps at the top of the lowers without boogerin' 'em up. A nice rag might do the same thing, but I opted for the plastic driver adapter. When removing those metal dust caps, I always seem to put dings in them while driving them up with a screwdriver or punch. Small dings, but they bother me, so I get new metal caps, too.
While those legs are off, you could polish or power coat 'em:


While those legs are off, you could polish or power coat 'em: